Final Project
Week 12
Final Project Progress Update
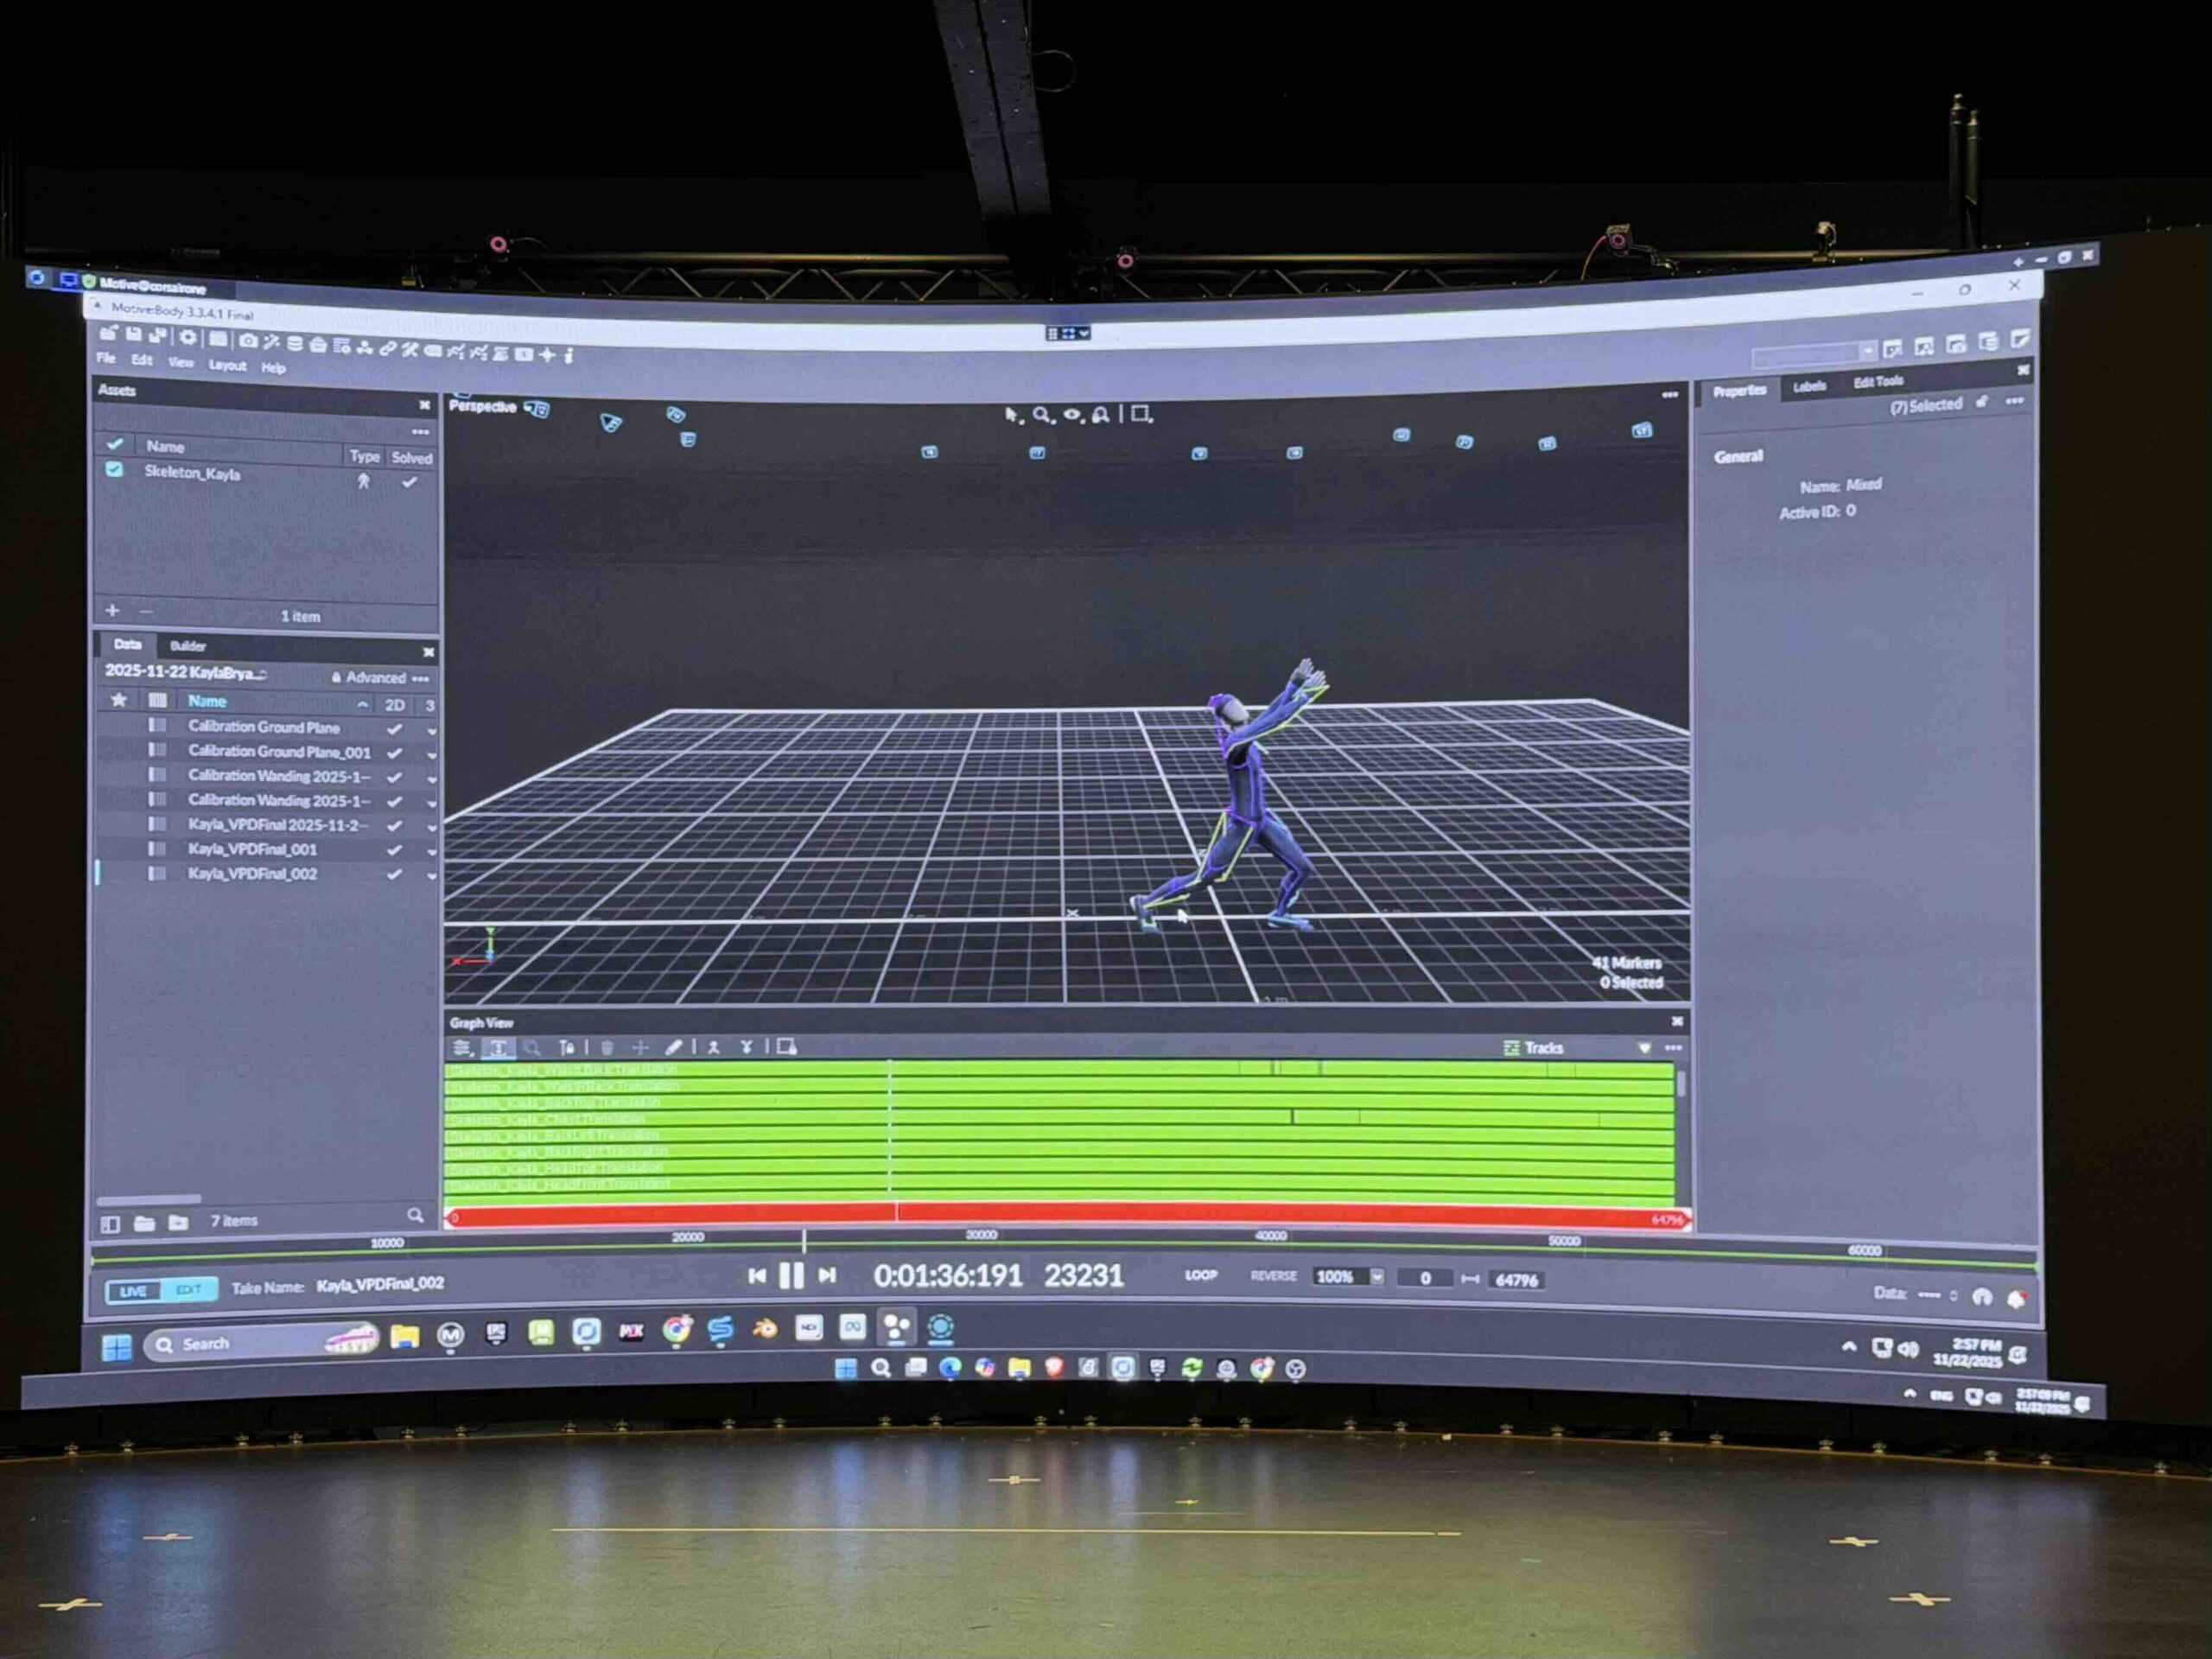
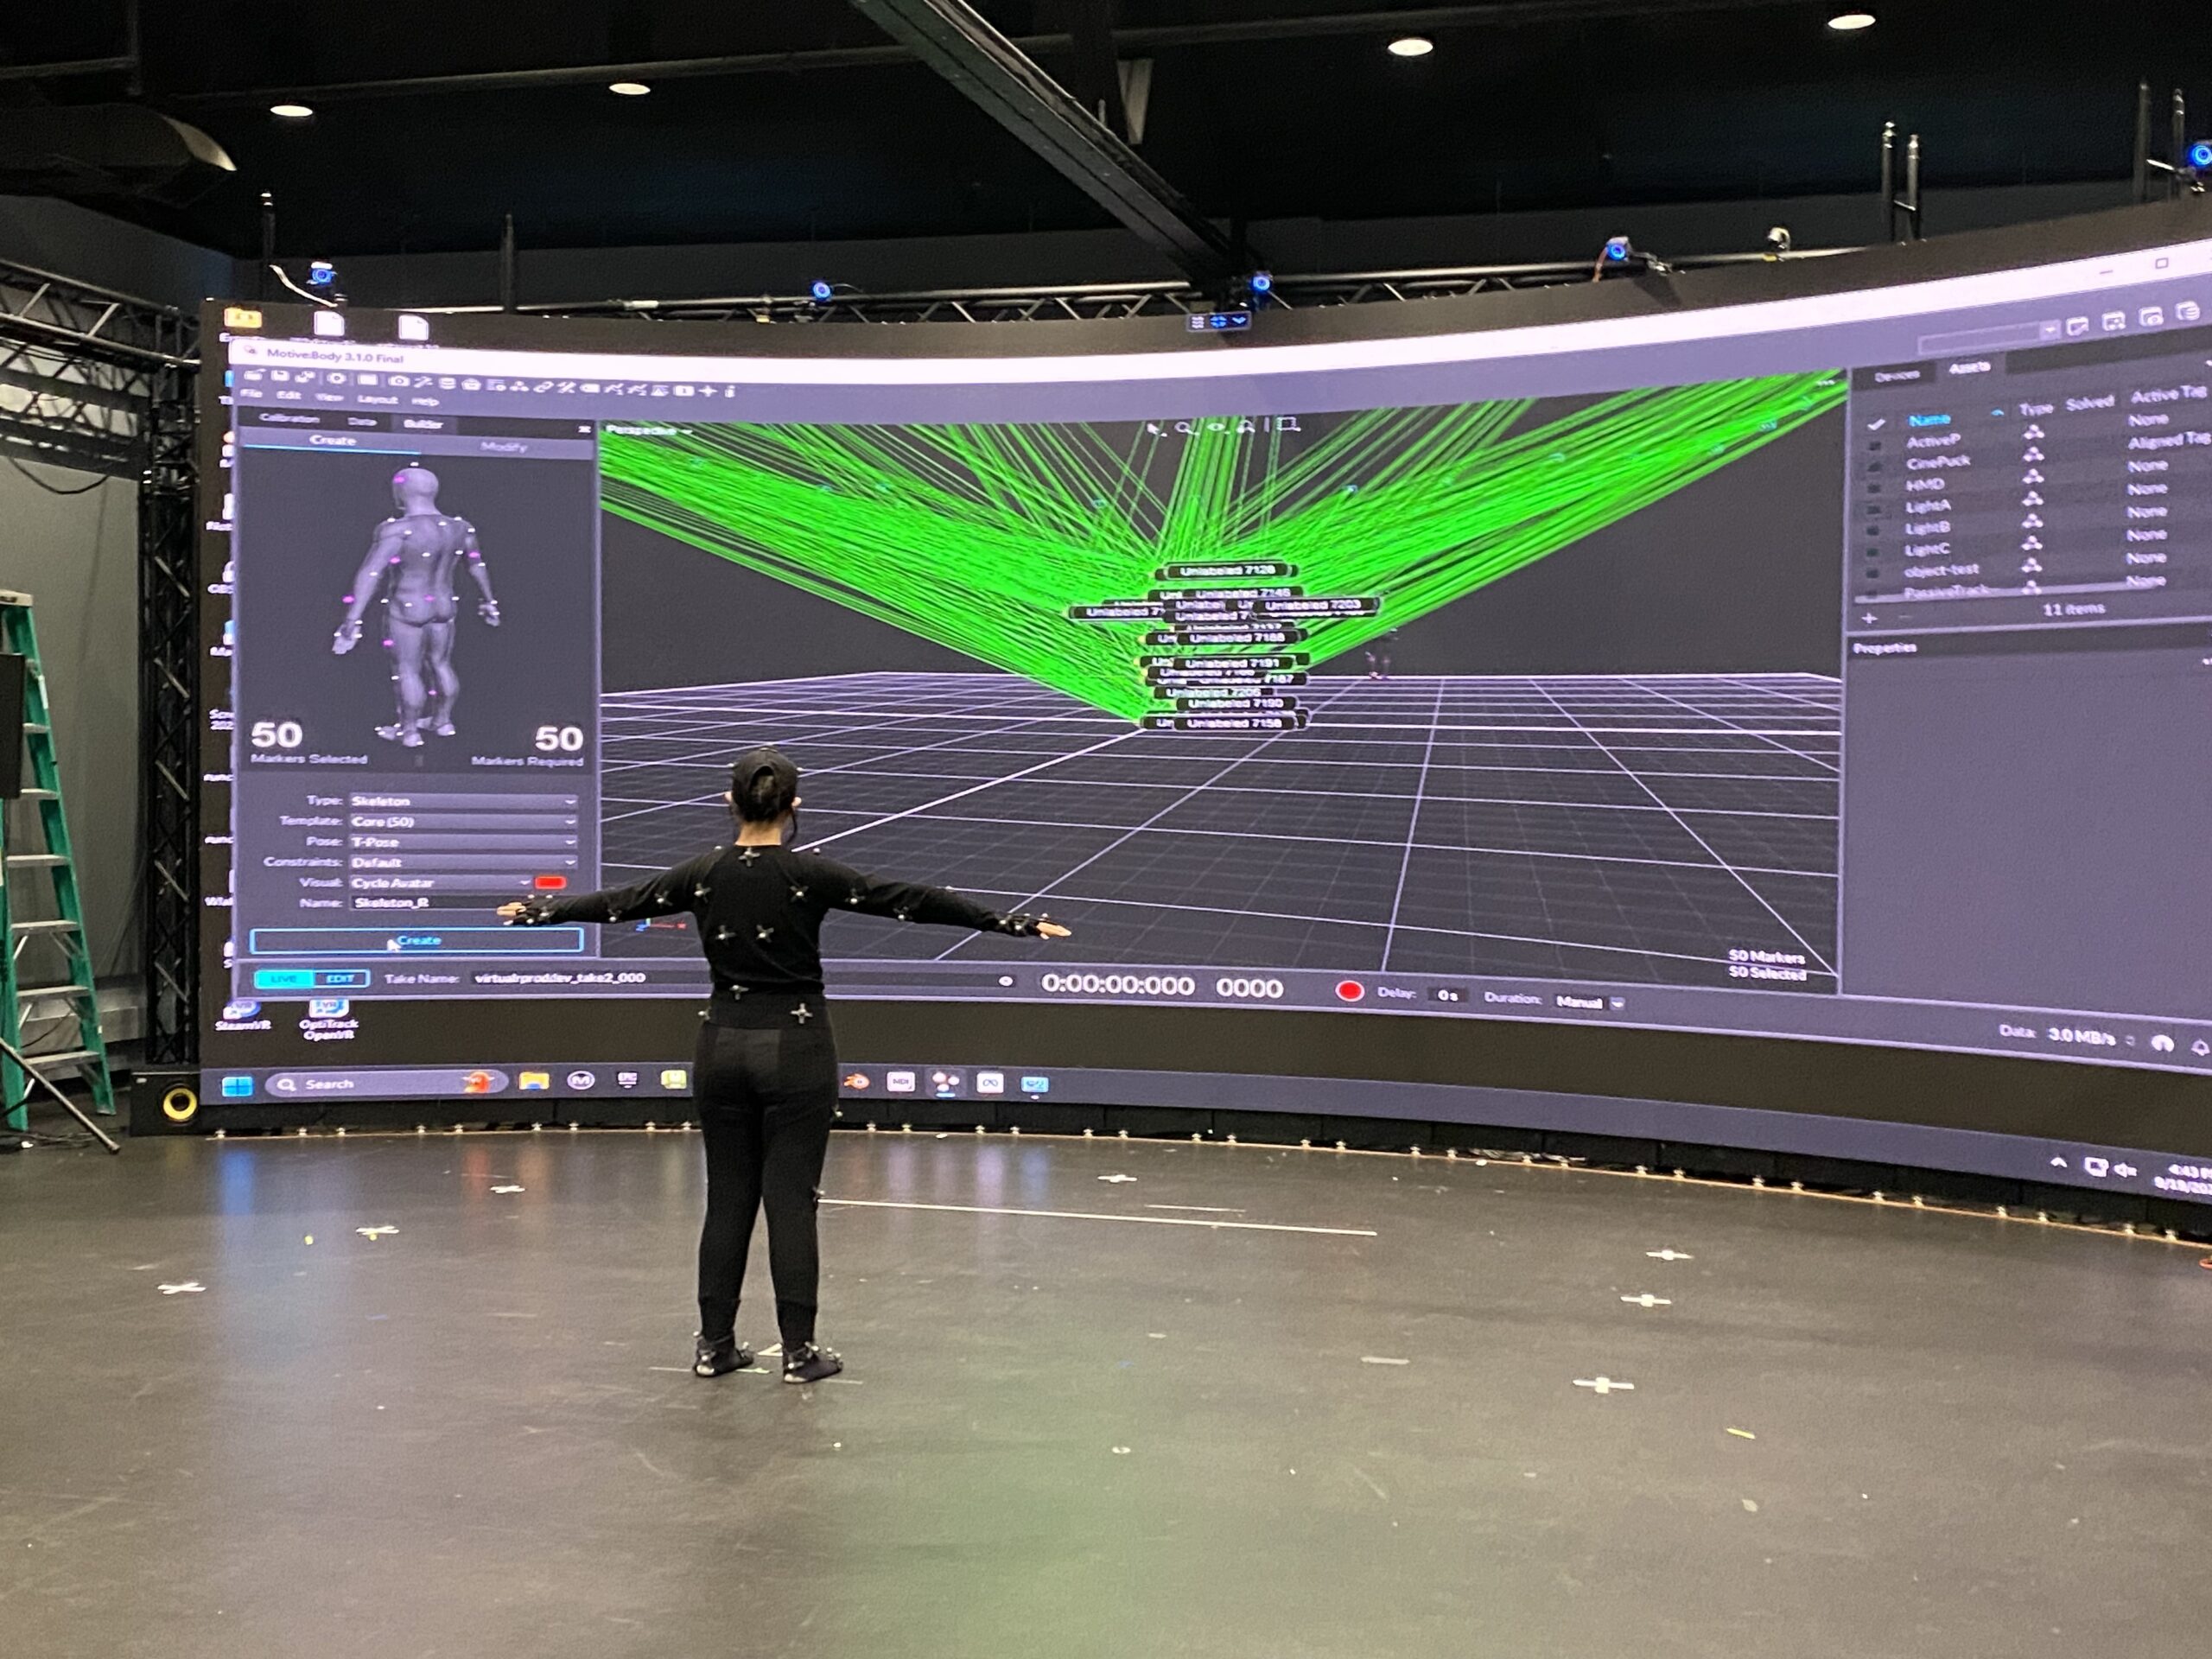
This week was full of adventures and failures with learning lots of lesson and gaining wisdom. These were my goals:
1. Mocap session
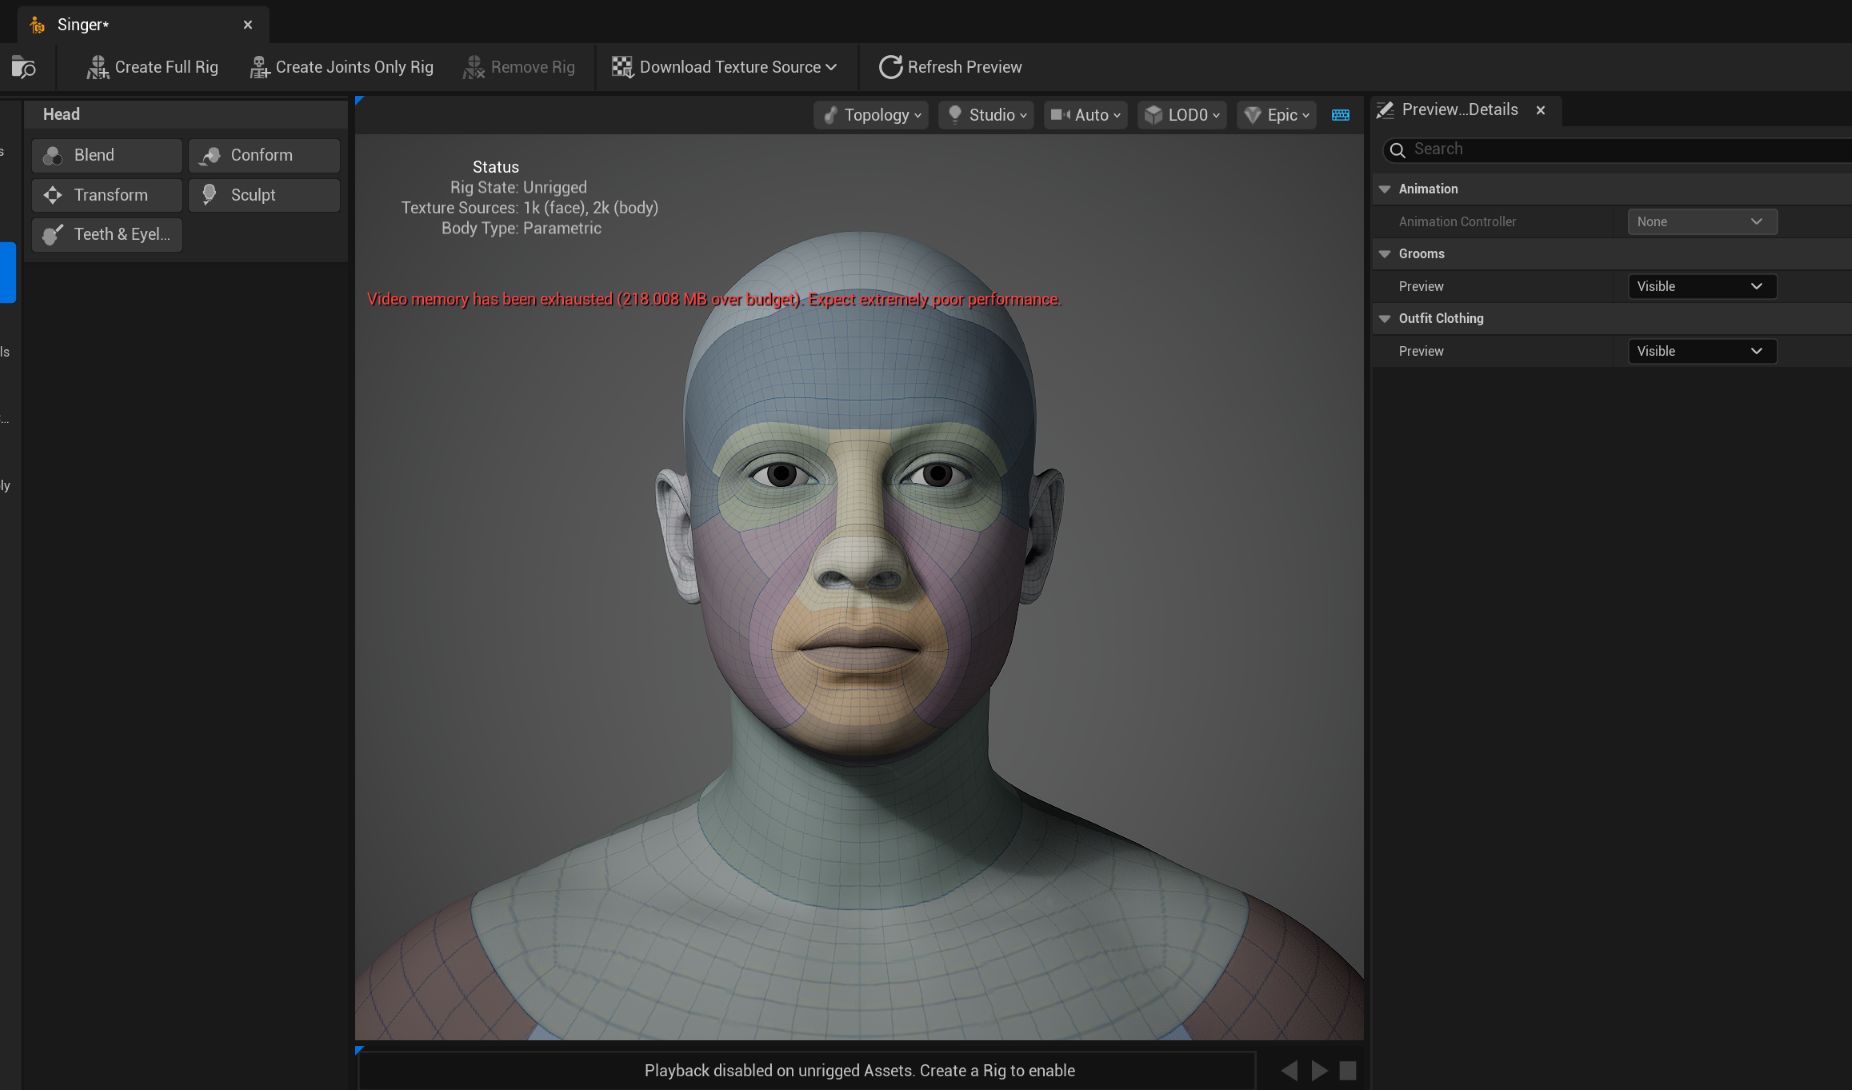
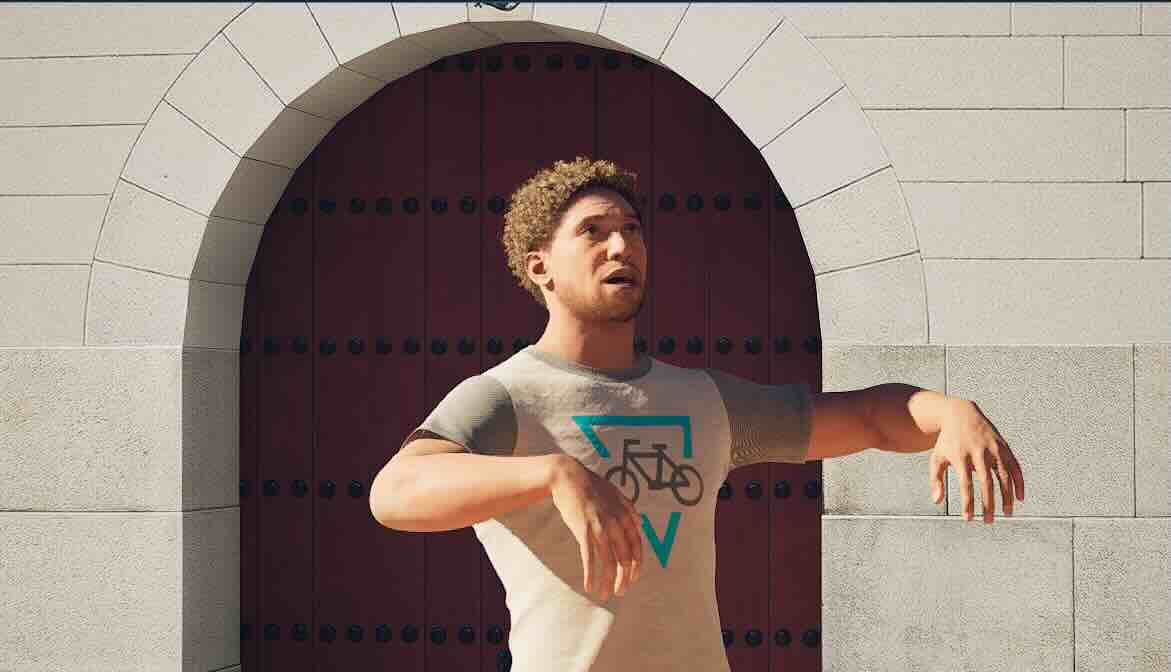
2. Adding marble skin to the metahuman face character
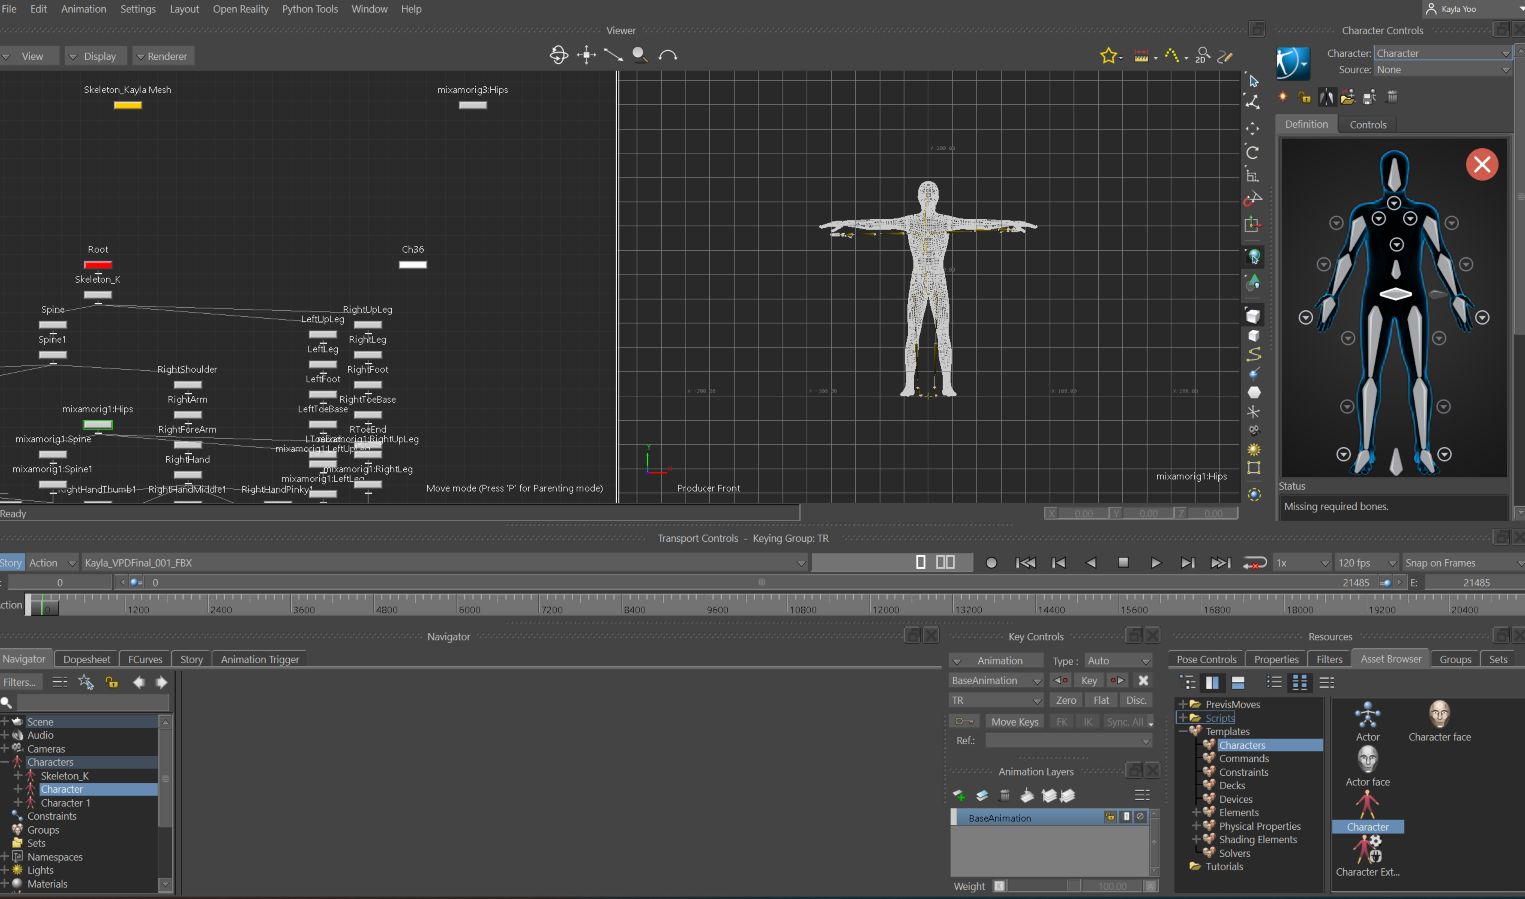
3. Retargeting Optitrack Animation Sequence
4. Level Sequence editing
5. Live Link Facemotion
6. Adding Mixamo Character
7. Adding bird flocking & falling leaves
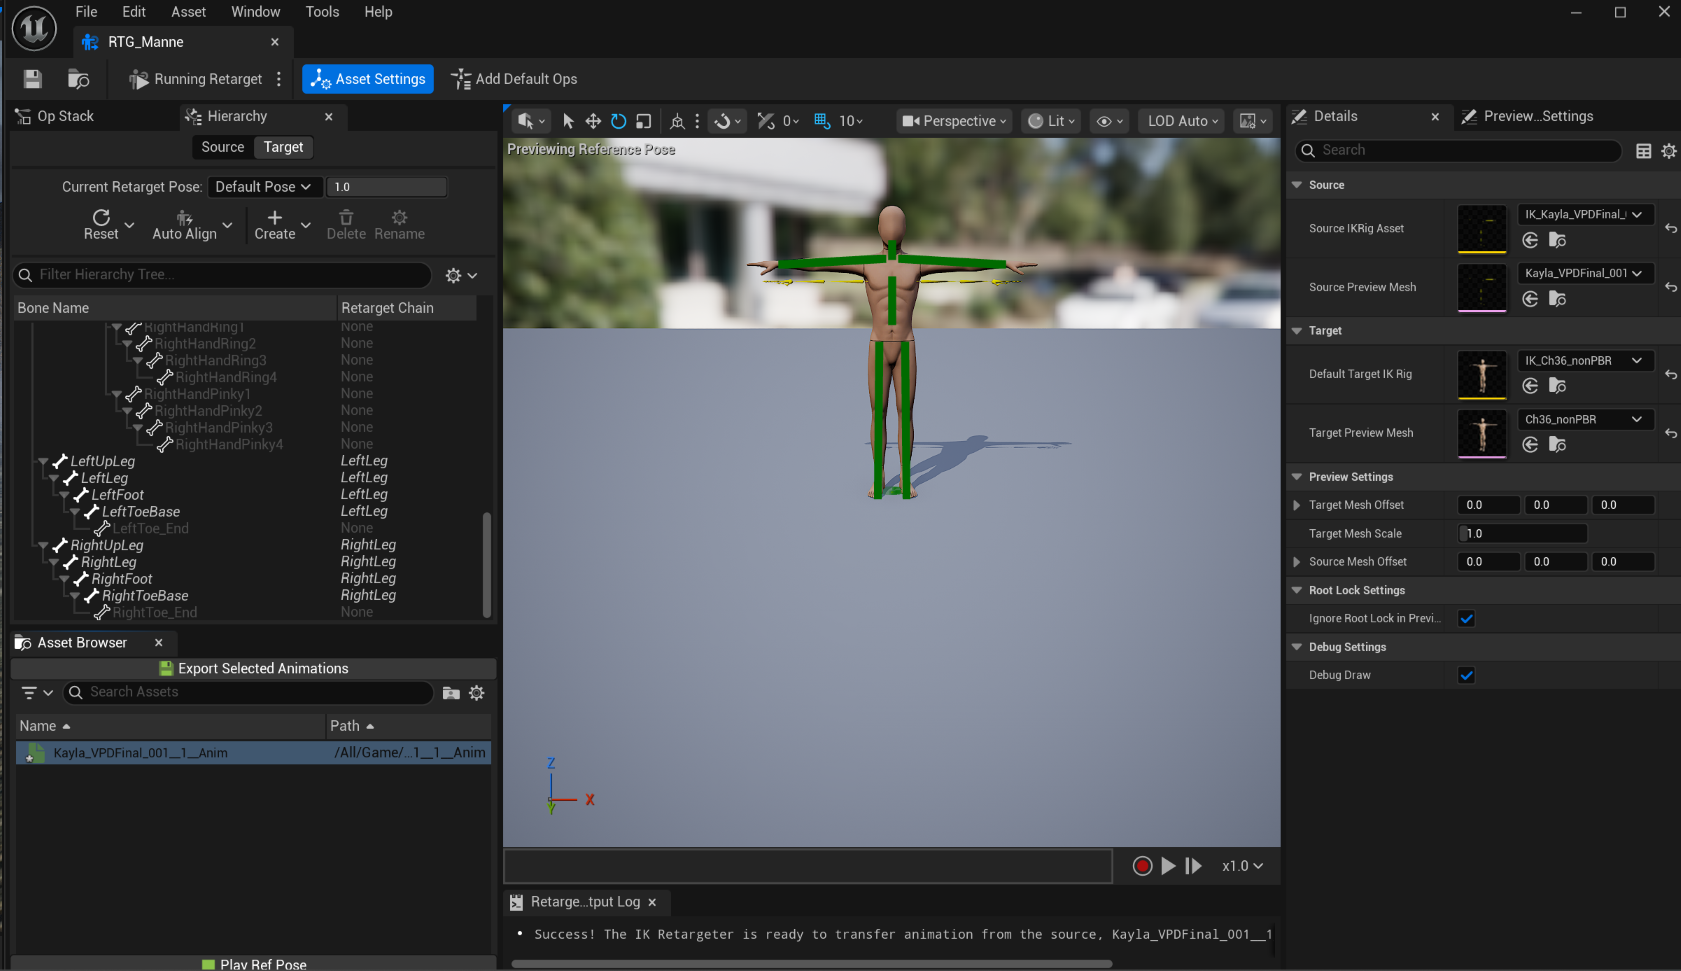


Even though I was beautifully failed the goal 2 and 3 and still working on the goal 7, I am having fun creating the level and giving the life to the design. For the final week, I will be connecting dots between individual viewpoints and focusing on finalizing the video.
Tutorials:
https://www.youtube.com/watch?v=8_X7vKps554
https://www.youtube.com/watch?v=PEObW2odtXI
https://www.youtube.com/watch?v=gekQTr74y3E
https://www.youtube.com/watch?v=9IvDqZOD0V8
https://www.youtube.com/watch?v=MaZP6SZlJus
Week 11
Articles
While working on the final project and I wanted to learn 2 things- creating custom skin for the metahuman character, and trying to Mocap with phone at home without purchase extra gear. I was able to find a few ways to make it work and many of them already integrated with AI.
MetaHuman + AI
This Tutorial is for using https://www.hitem3d.ai/ to generate clothes in 3D and import into Metahuman character
MetaHuman + Adobe Substance 3D Painter
It seems like many UE users uses Adobe Substance 3D +Metahuman
Tutorial: https://www.youtube.com/watch?v=uaYNgMcEYEE
Product: https://www.adobe.com/products/substance3d/apps/painter.html
Adobe Substance 3D Stager + AI
Substance seems versatile due to the compatibility with other Adobe products and AI integration (Adobe Firefly).
https://www.youtube.com/watch?v=5oKzeHdJPvA
Blender + AI
While learning about Adobe 3D softwares, I was wondering if there's an AI option for Blender, and found this blog :
https://gachoki.com/ai-addons-for-blender/
Free AI MoCap
While planning on capturing Mocap at the Navy Yard studio for the final project, I would like to try Rokoko for Home Mocaping
https://www.rokoko.com/products/vision
https://vision.rokoko.com/dashboard
https://www.youtube.com/watch?v=45xakdr_KtY
Updates on the final project
Level Design Draft
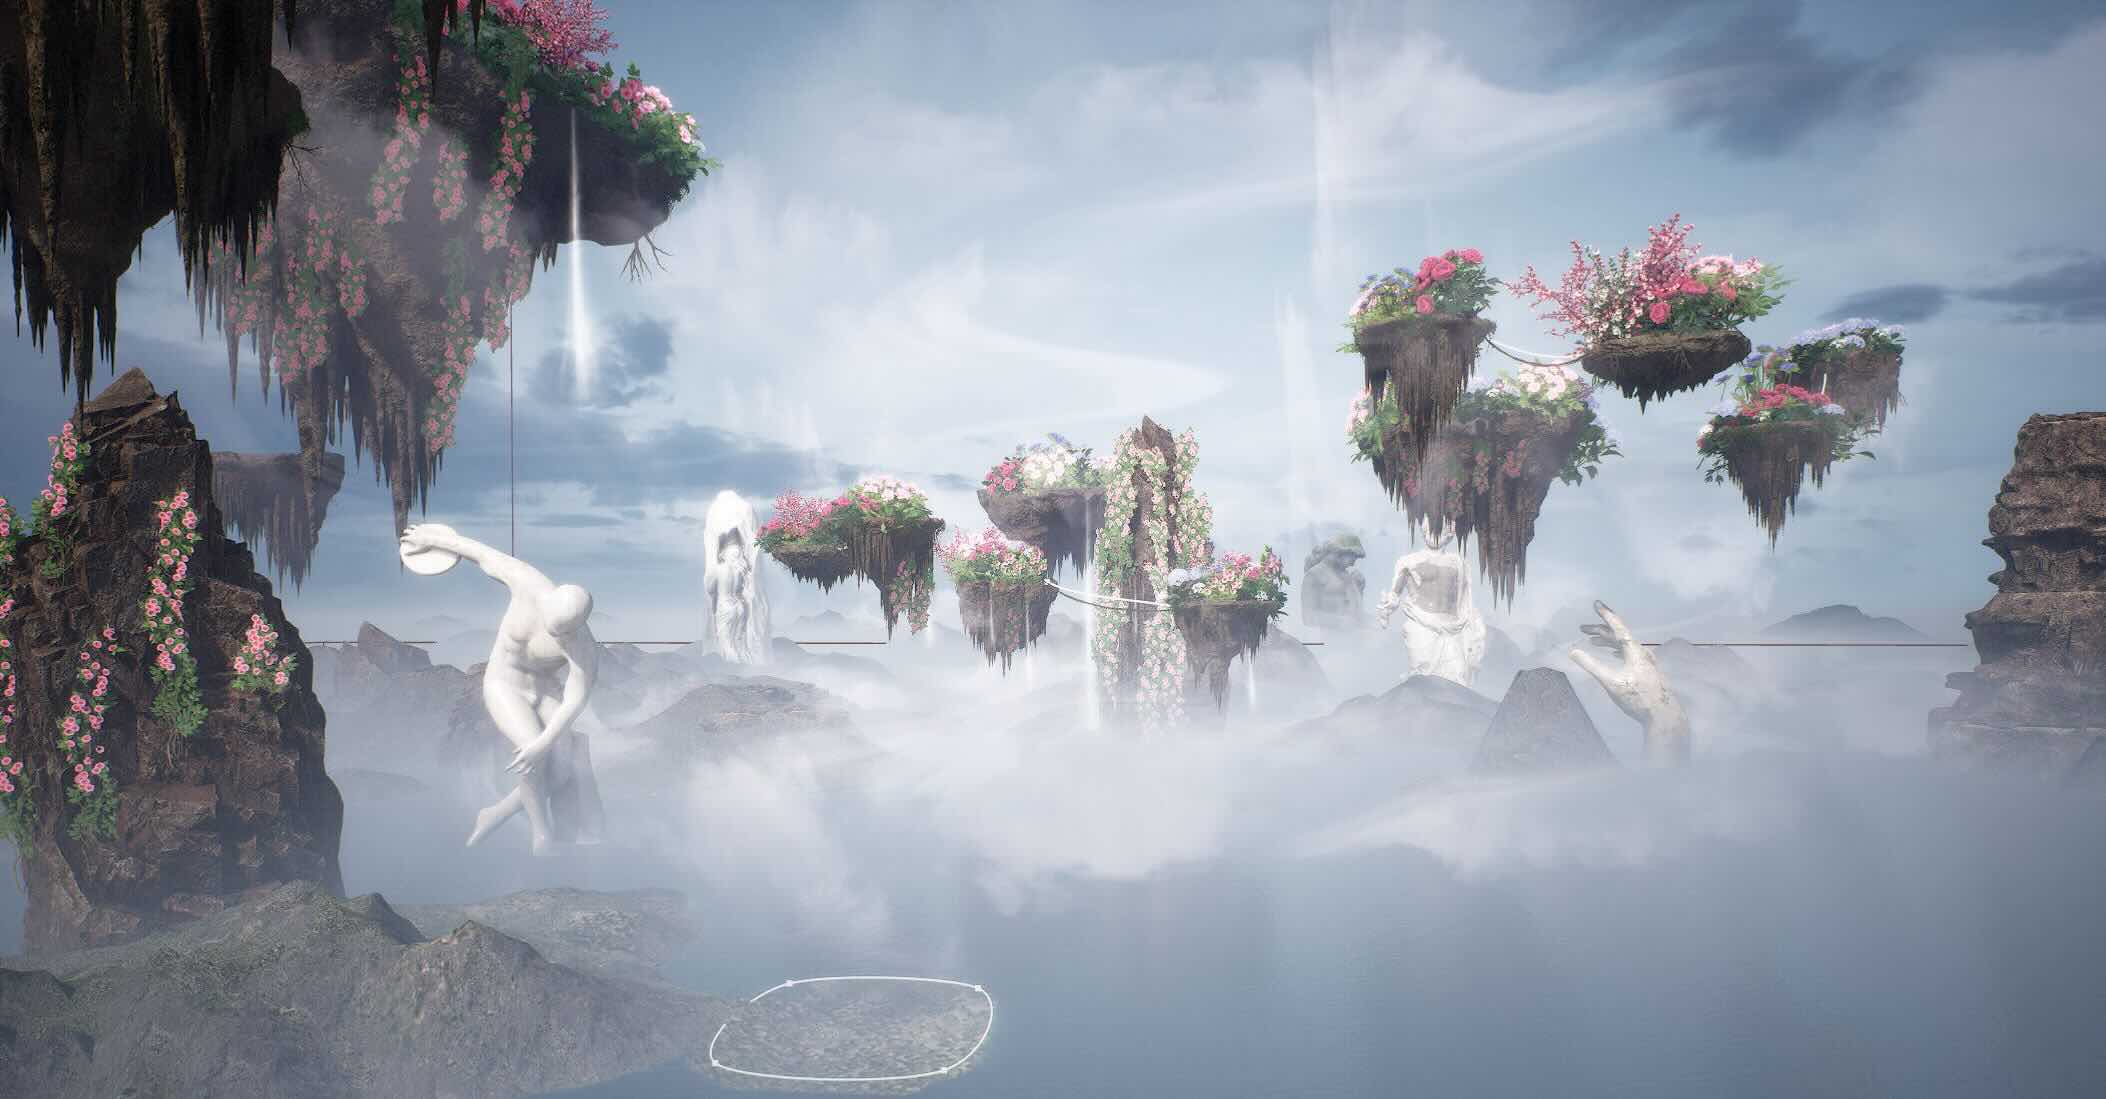
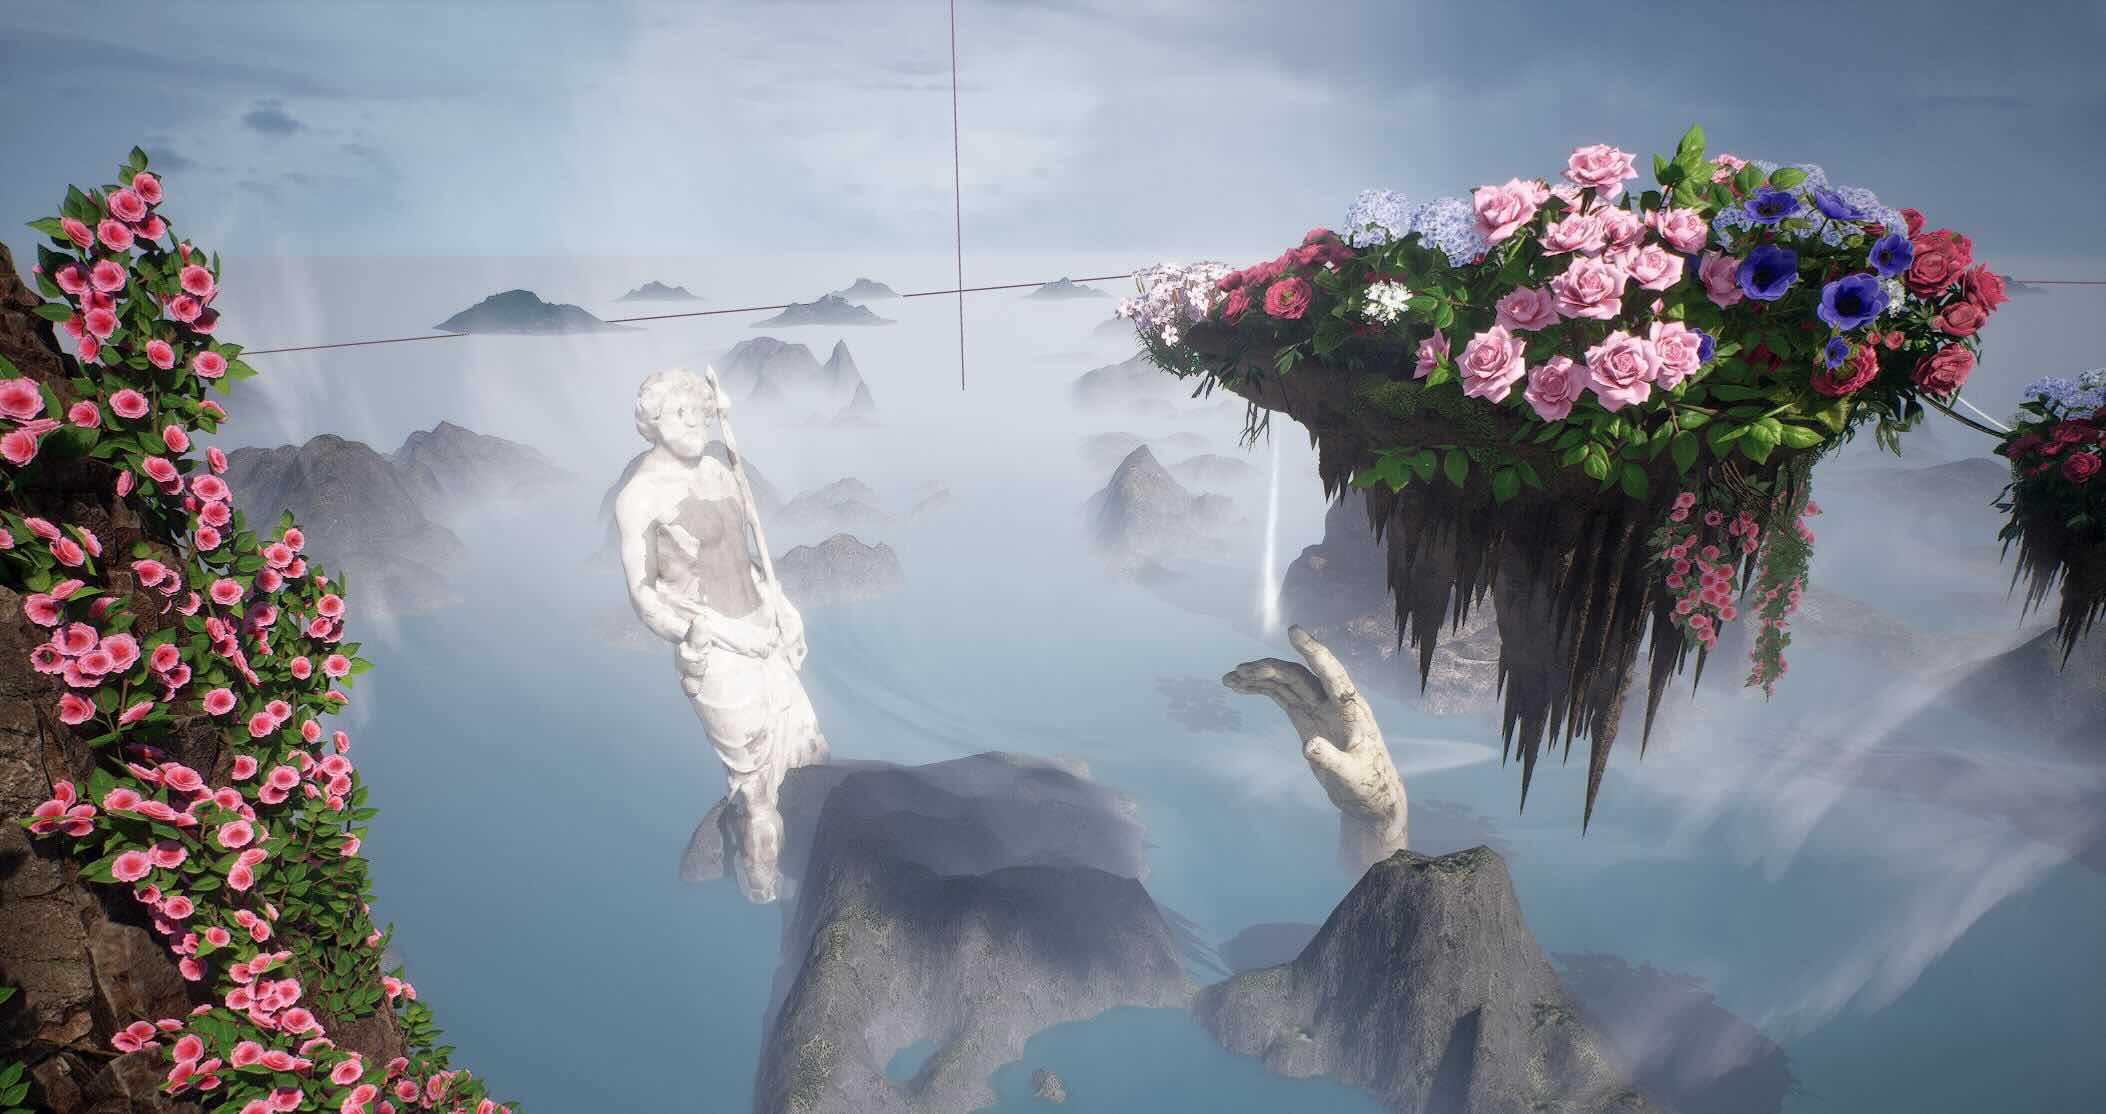
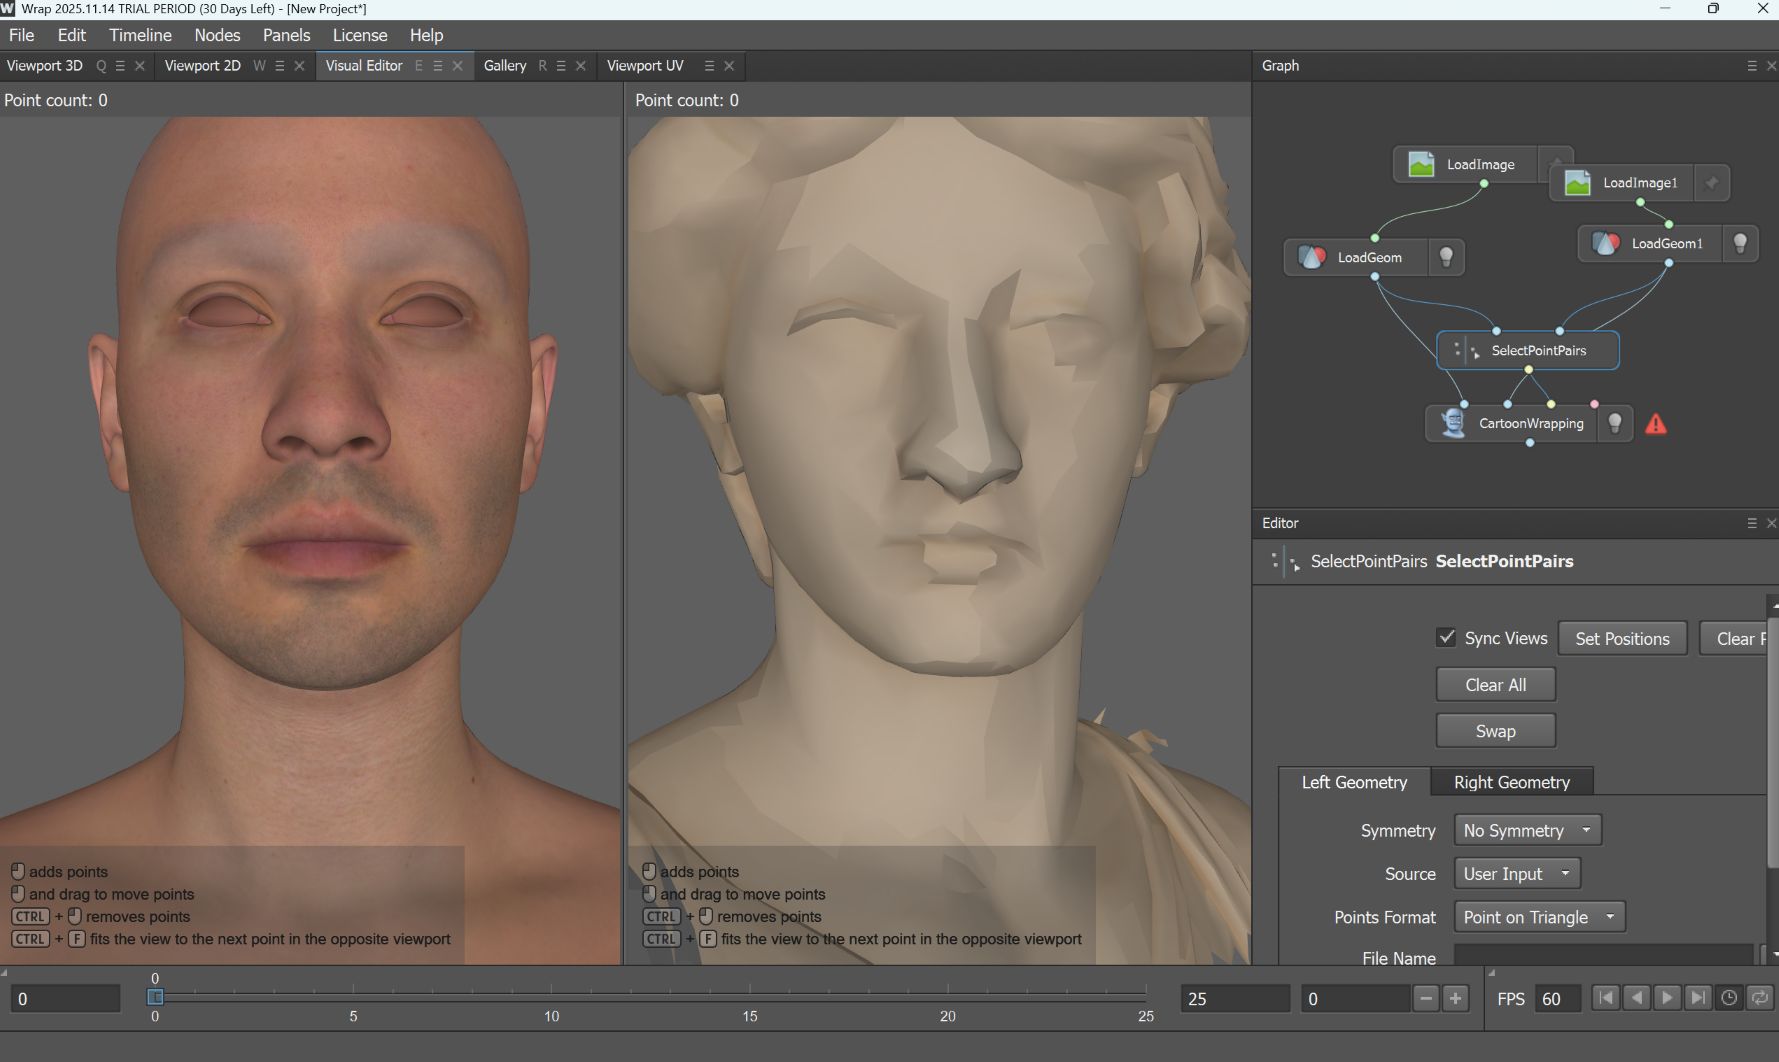
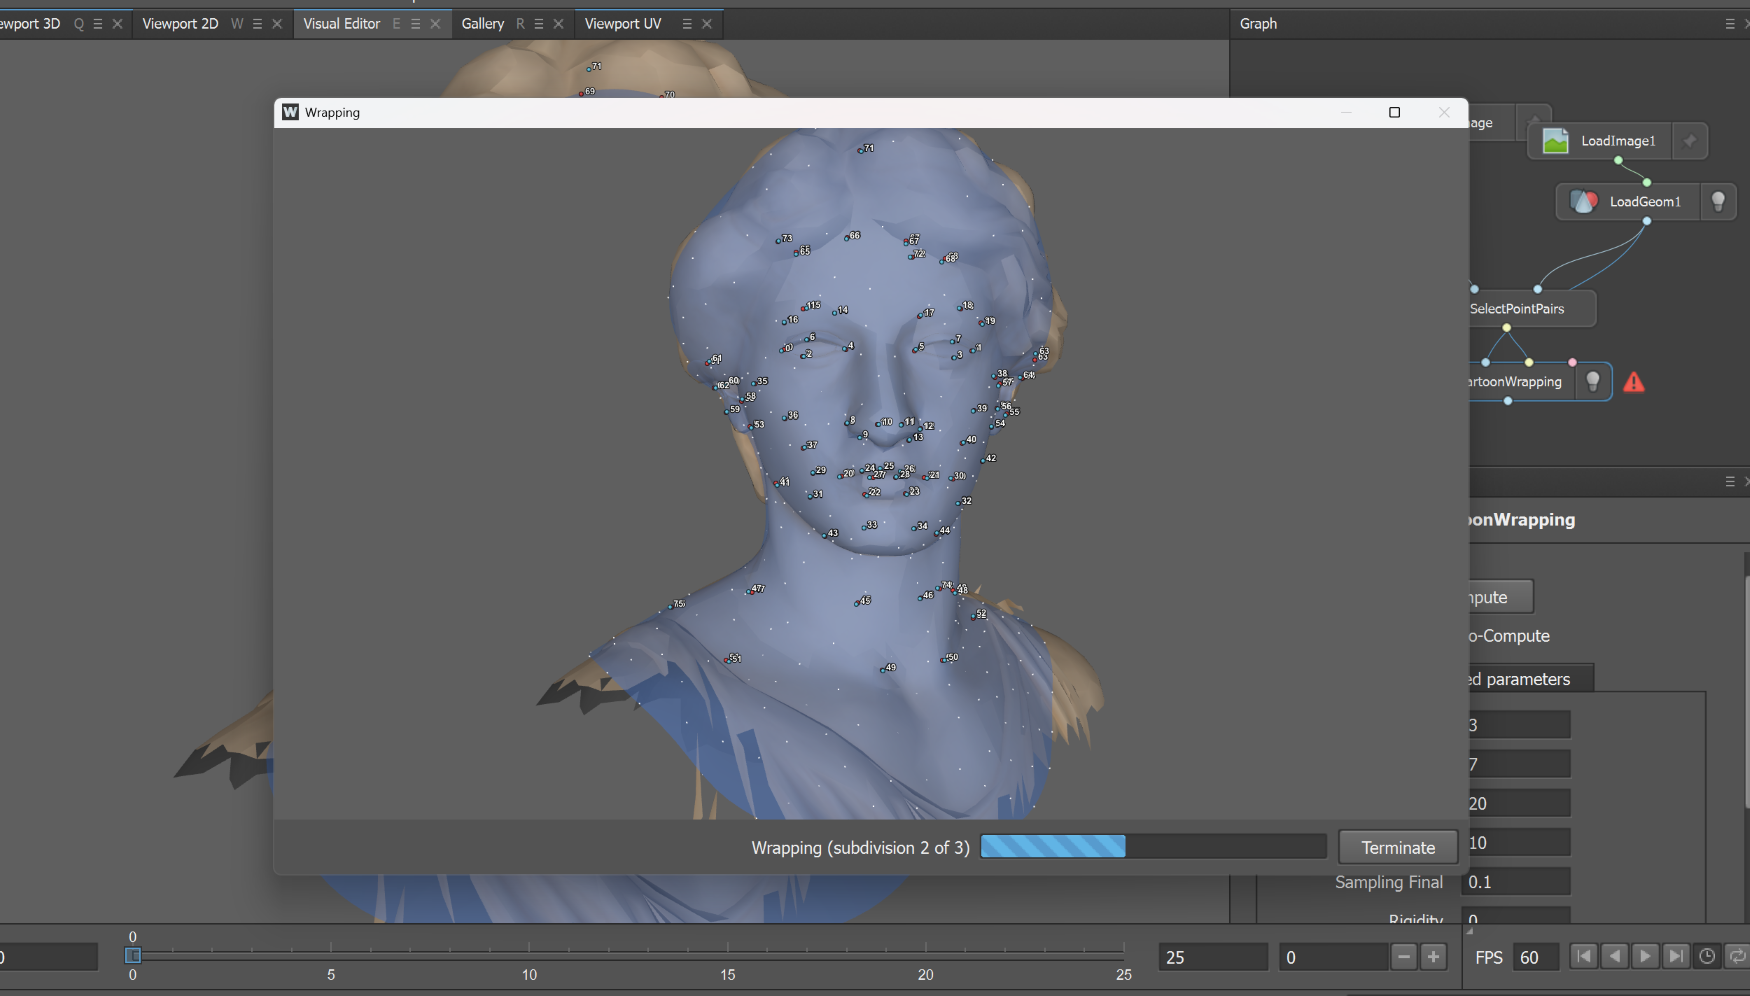
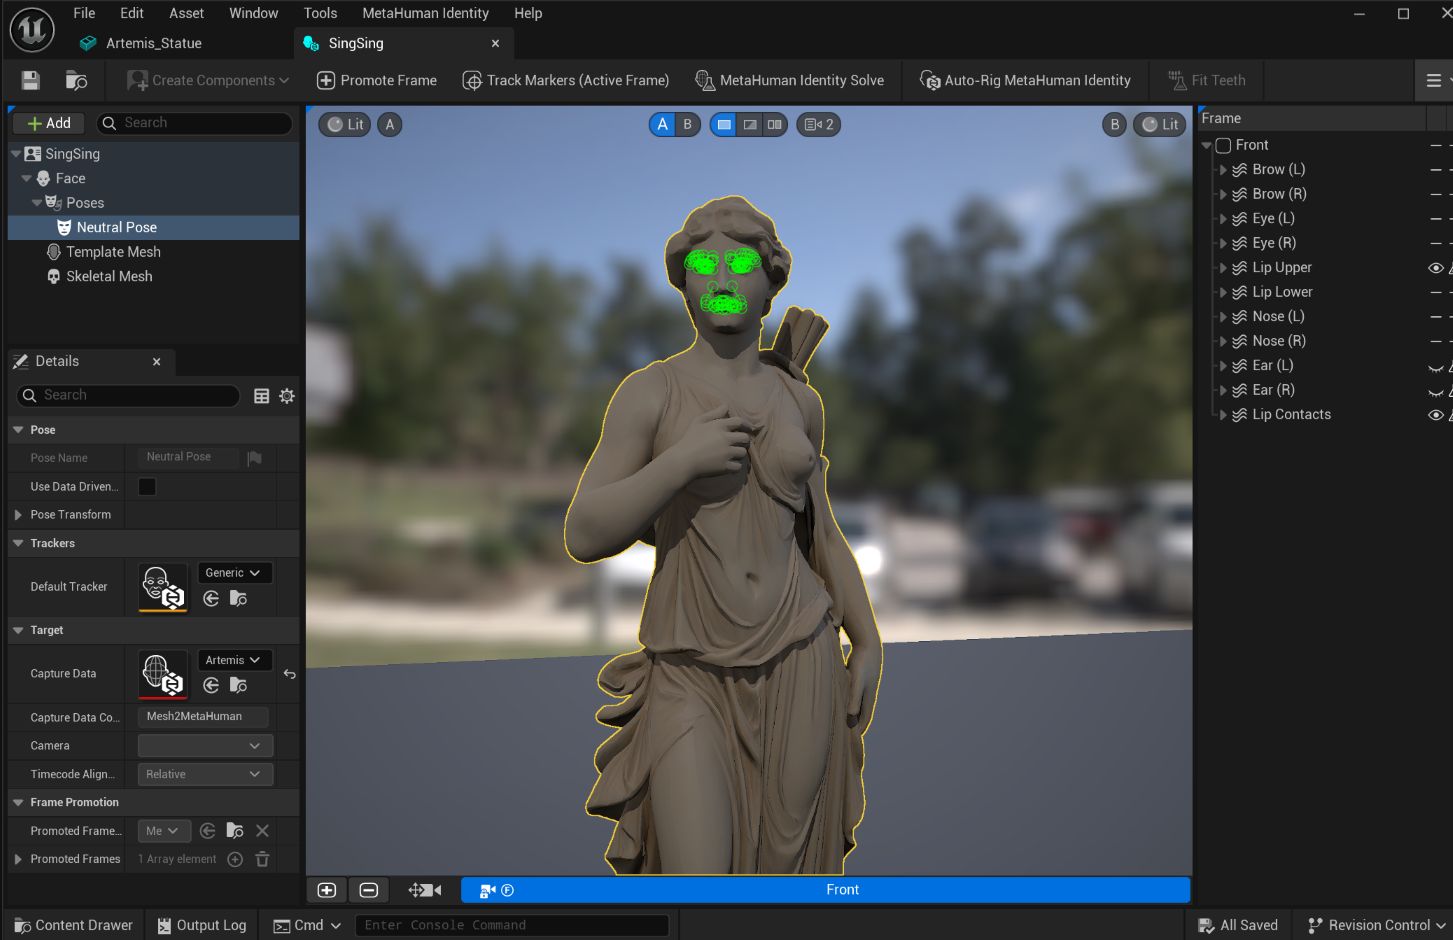
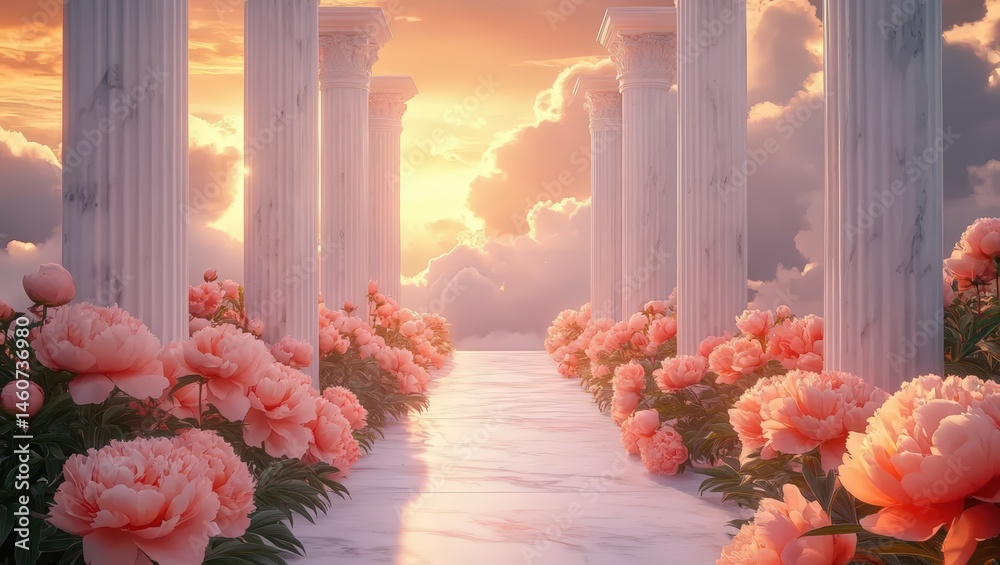
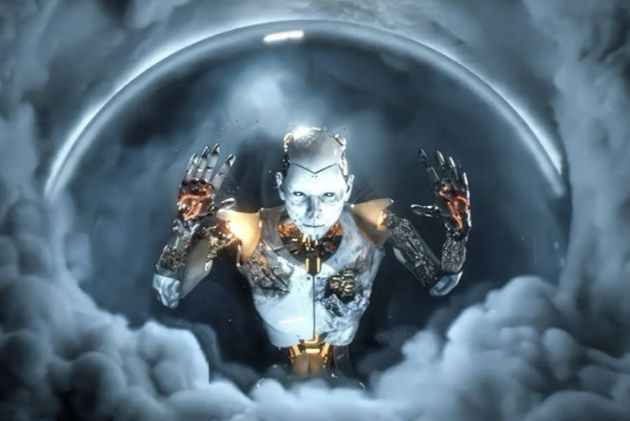
I am also working on creating custom Metahuman character - Greek God sculpture & skin texture with my facial structure.
Creating custom Metahuman character:
https://www.youtube.com/watch?v=xOVyme4TFZw
Week 10
I am currently working on my final project and there is not that much of animation to clean up yet, so I decided to write the process instead.
Final Project Process
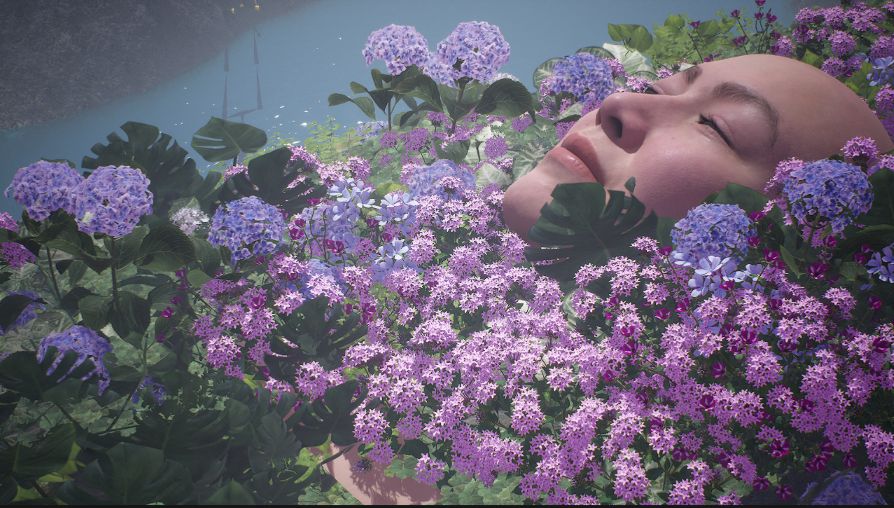
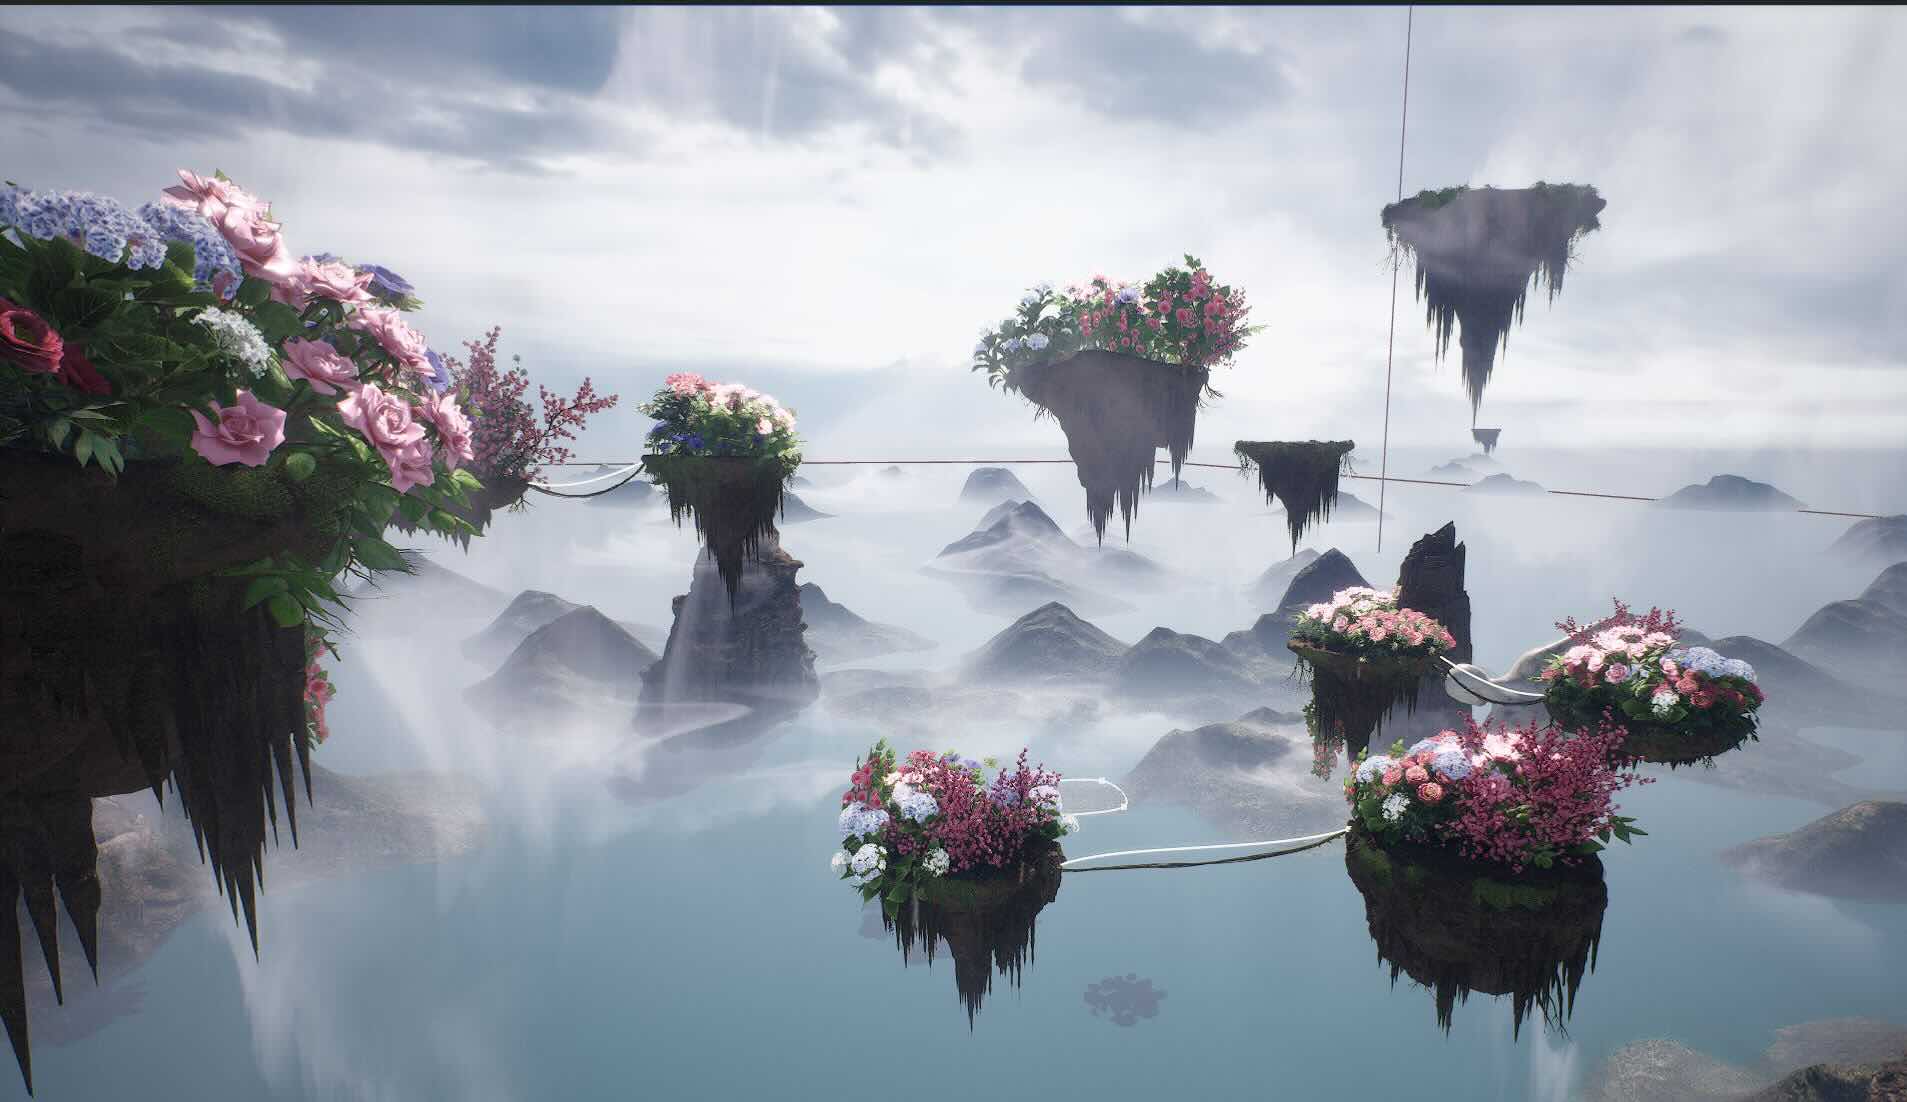
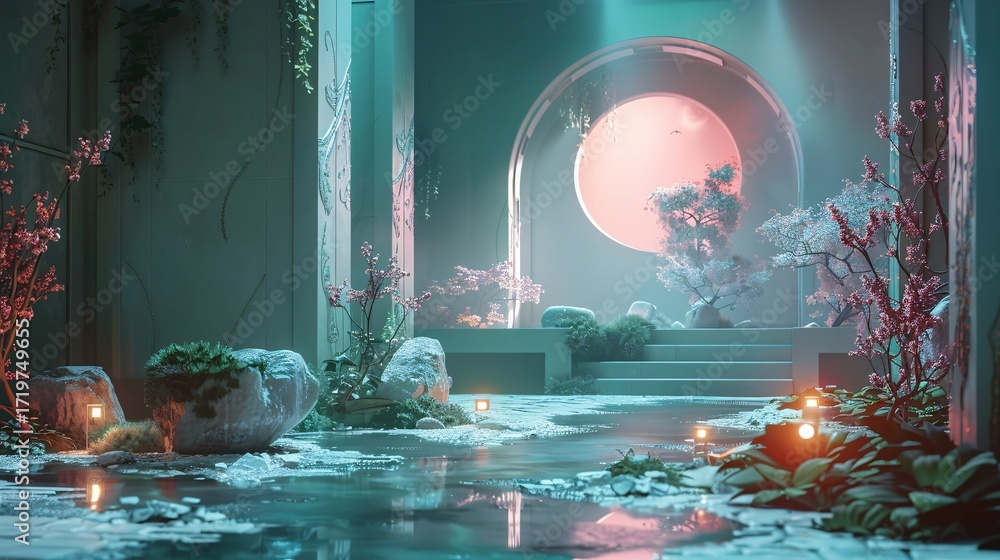
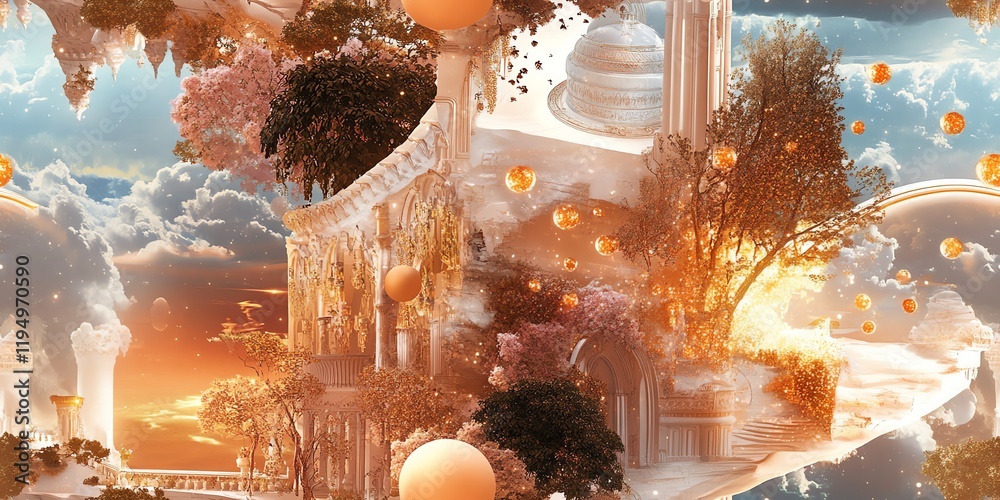
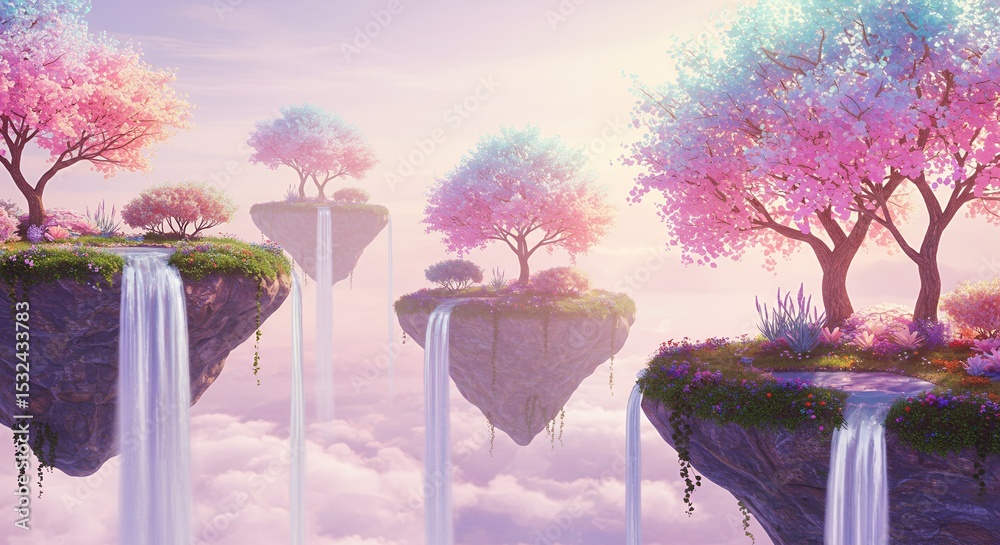
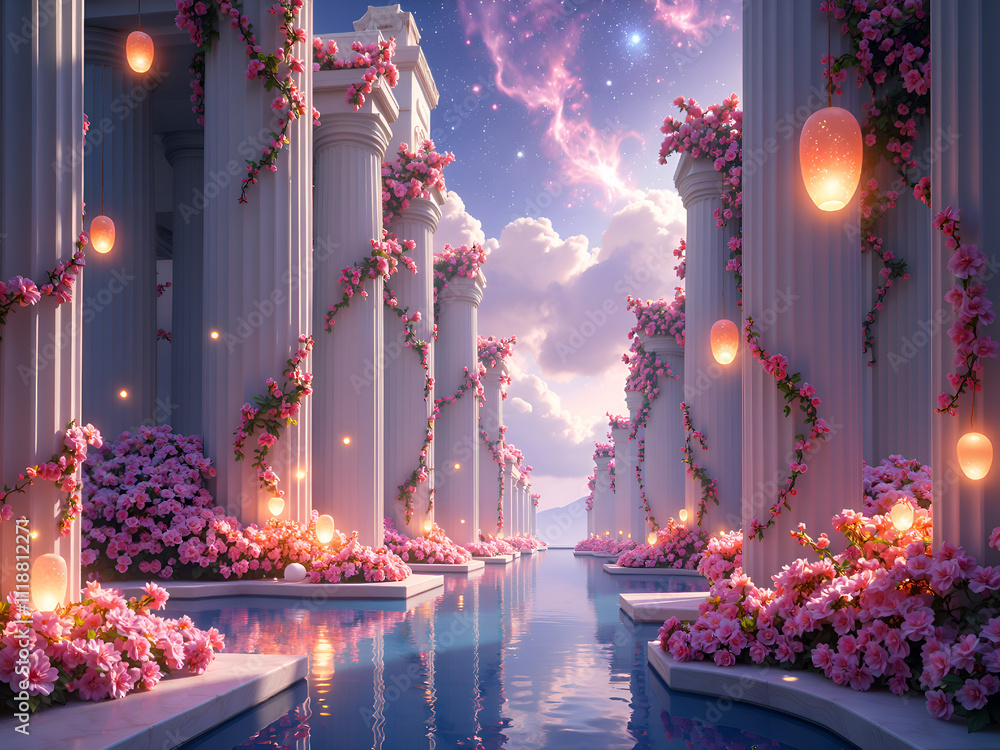
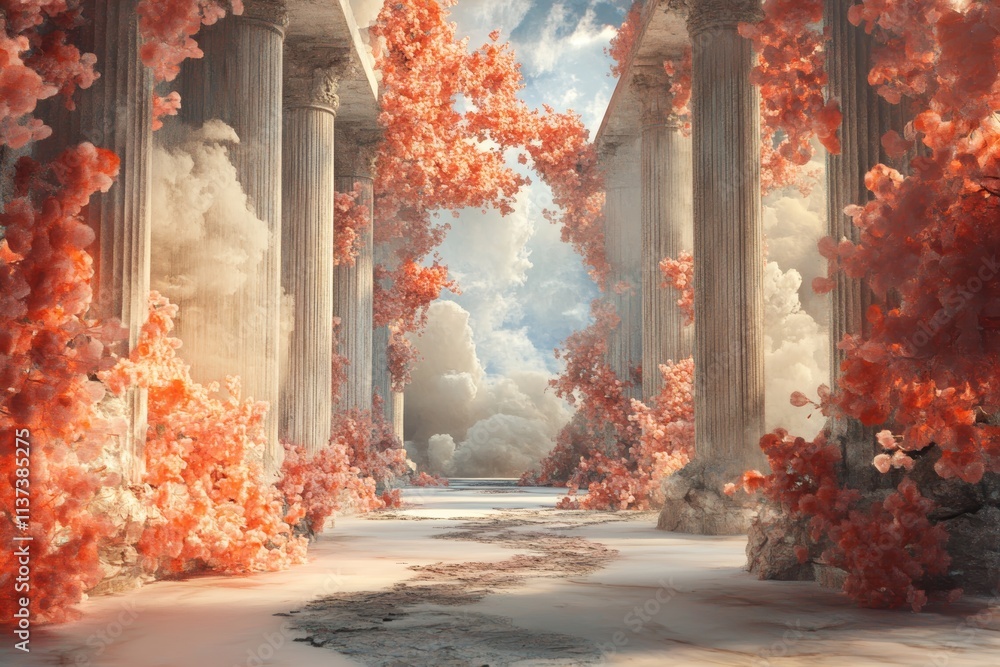
My goal for the final project is to create a music visualization with UE environment with dreamscape/surrealism aesthetic. A metahuman character will be singing a song while wandering around. This week, I started collecting references and creating moodboards for the final project. The background music is "Caribbean Blue" by Enya.
Moodboard
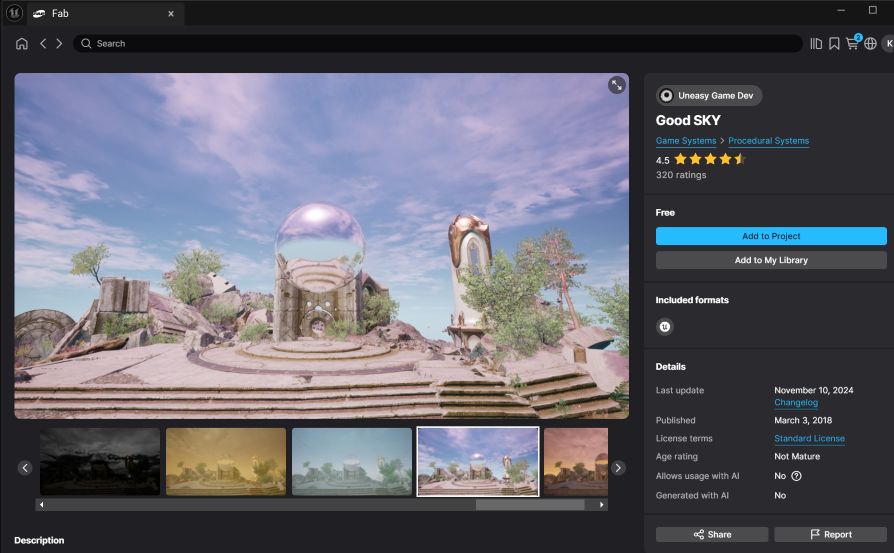
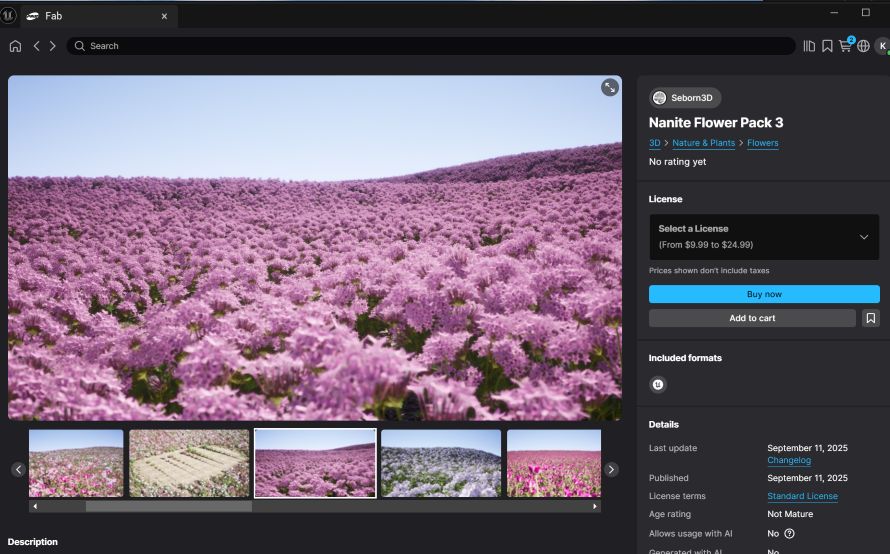
Environment:
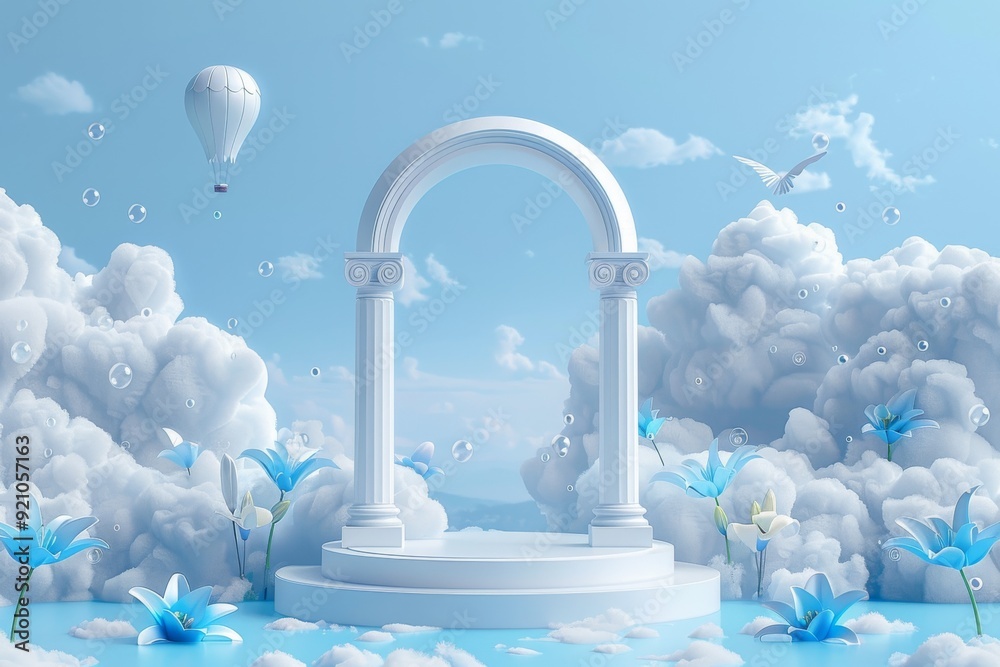
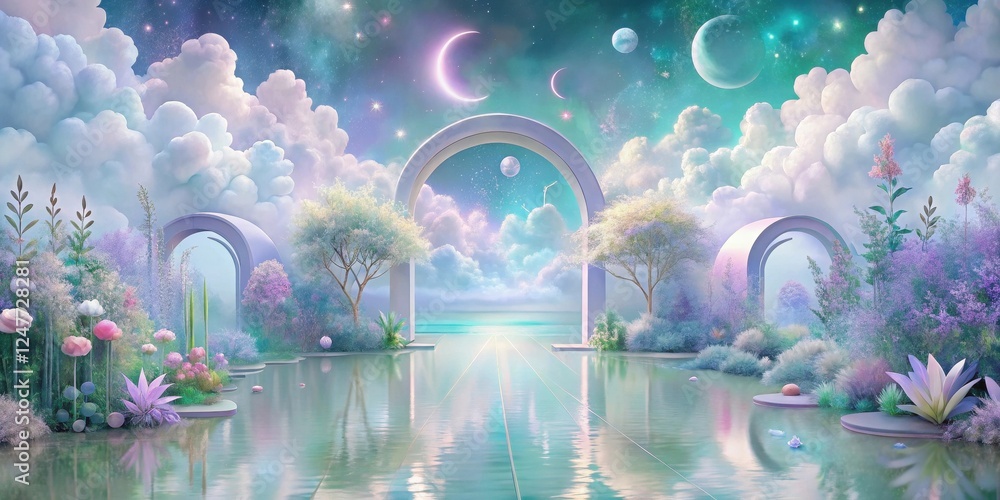
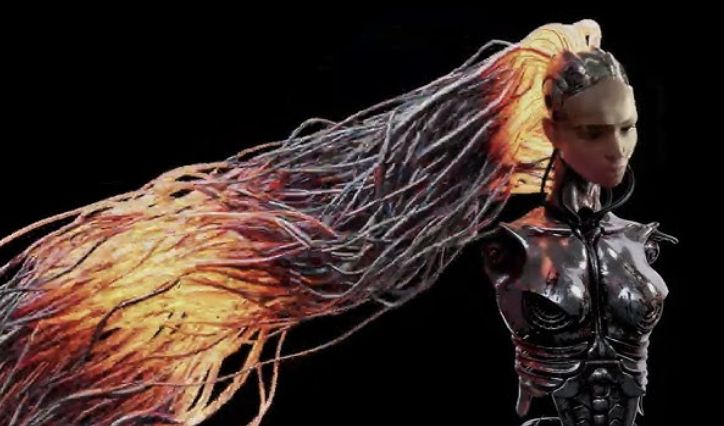
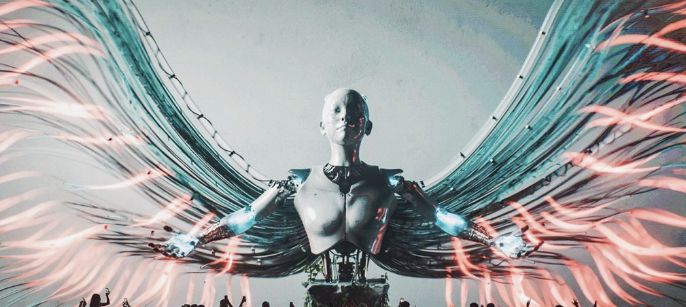
Character - hopefully less electronic aesthetic, more like oceanic creature look & feel

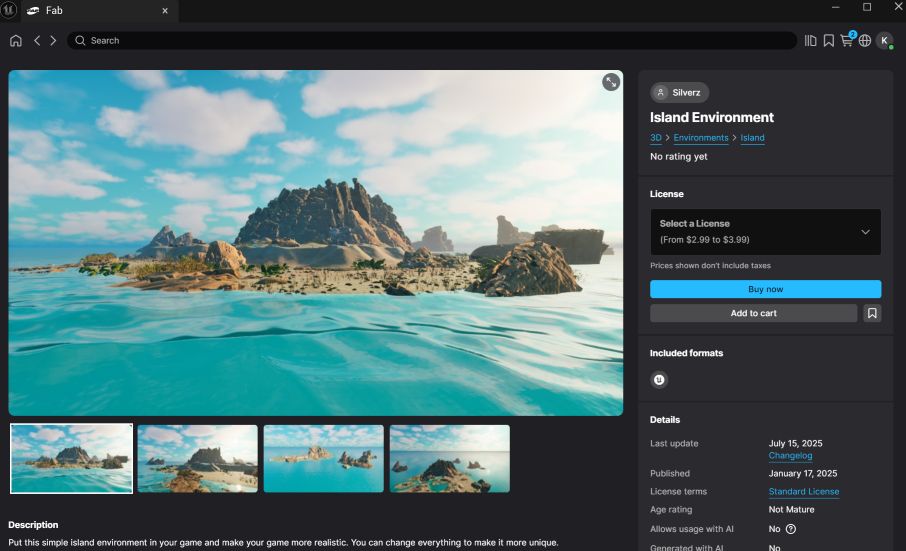
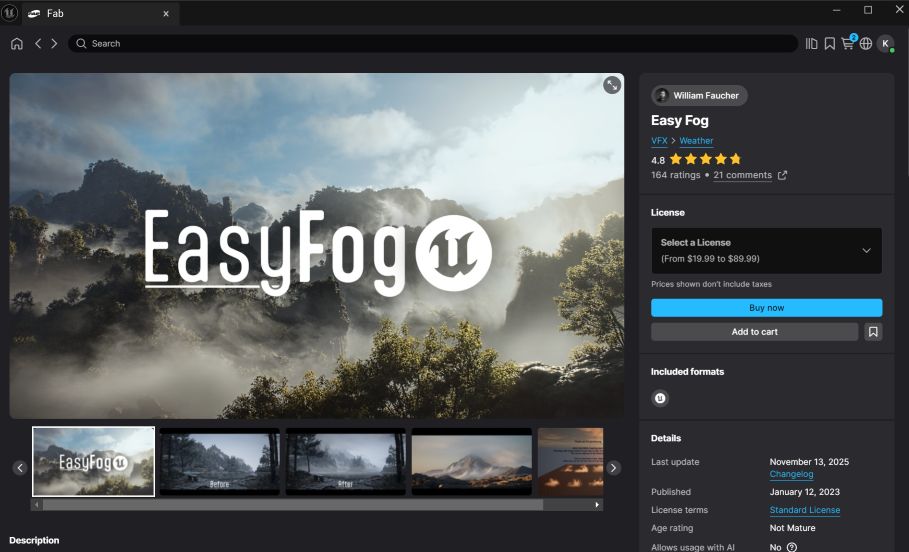
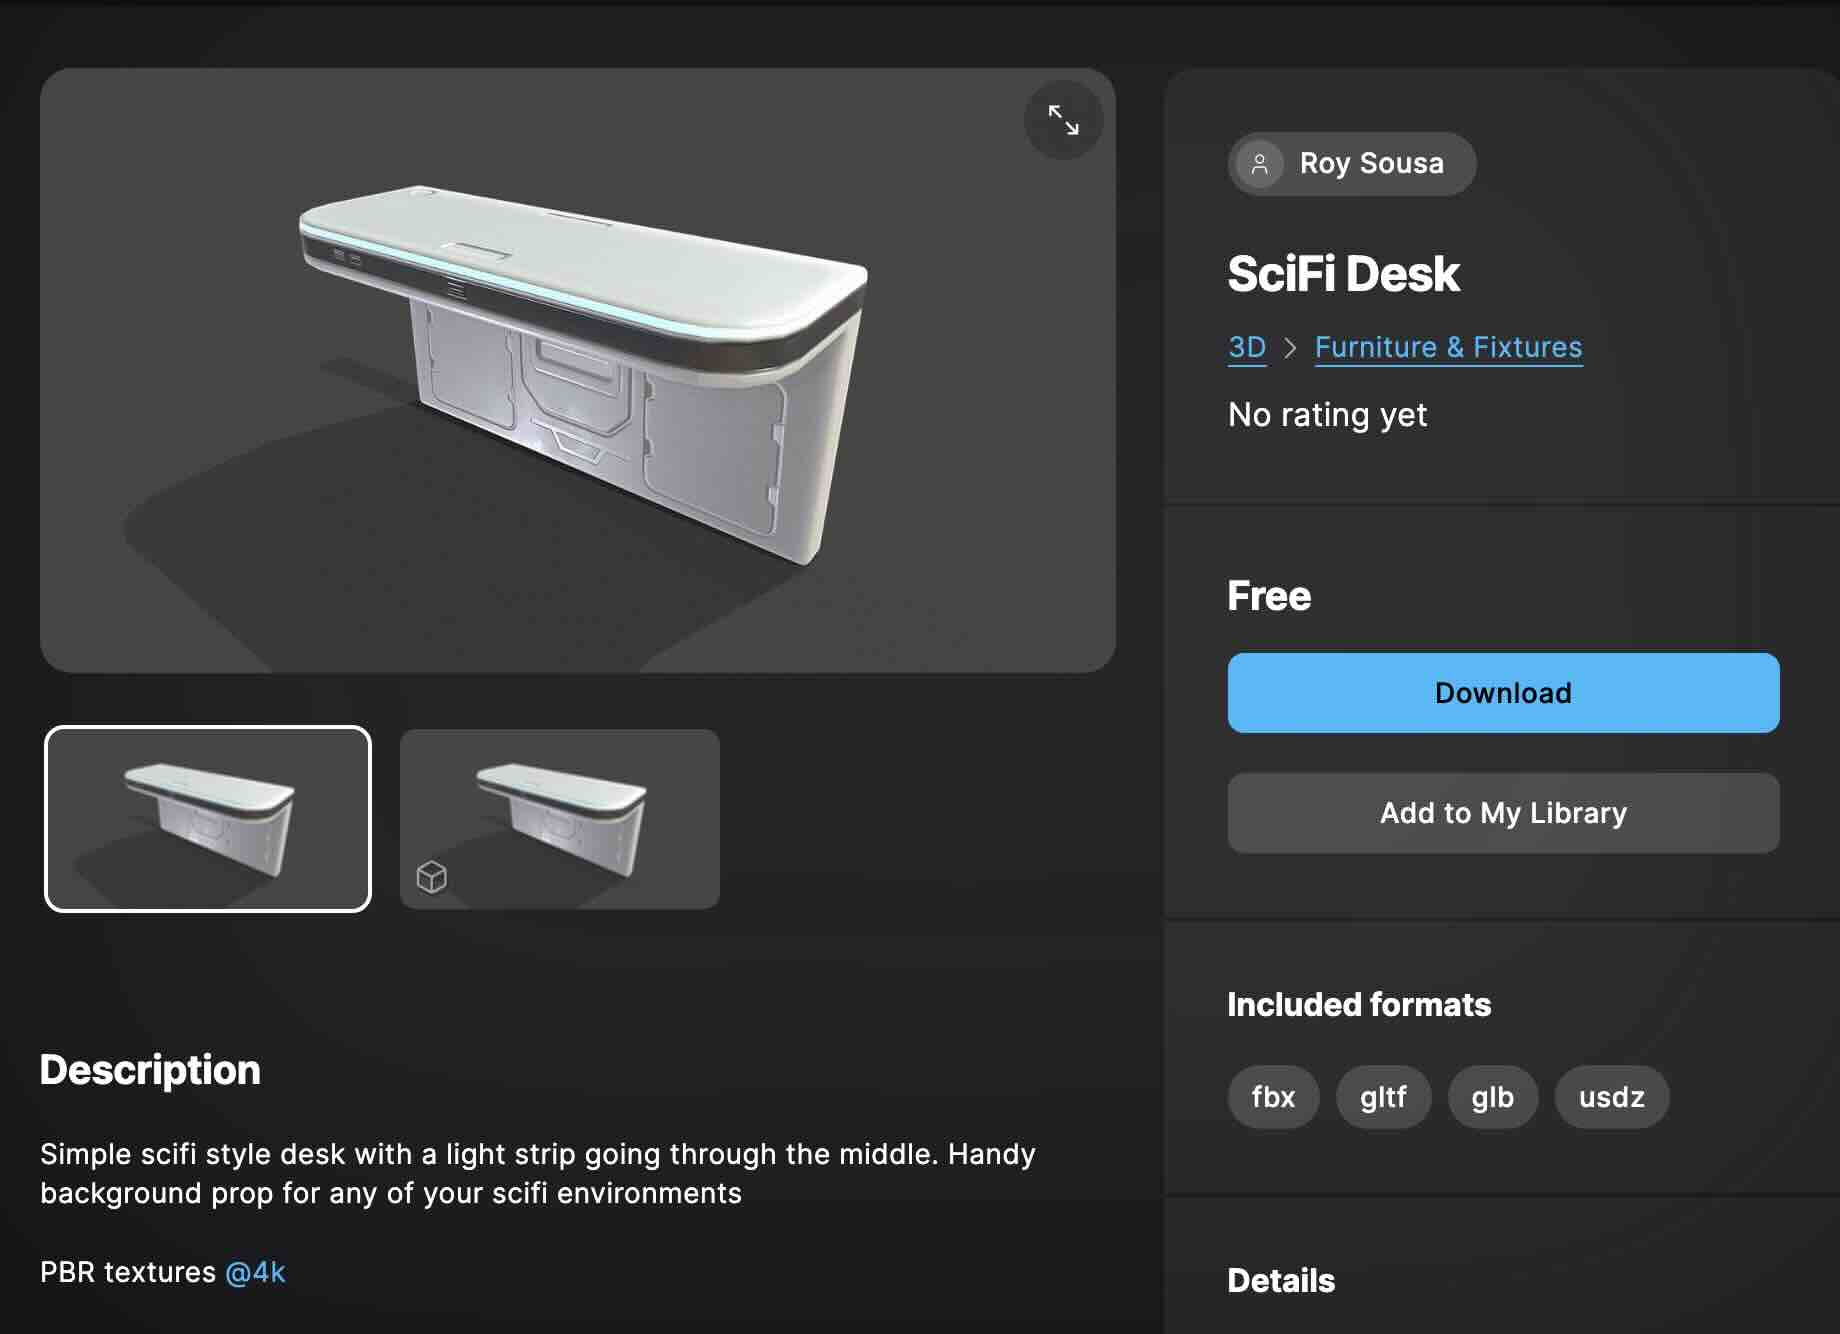
Assets:
Tutorials for Metahuman face texture change :
https://yelzkizi.org/alter-ego-with-metahuman/
https://www.youtube.com/watch?v=vjhzMfxxb18
https://www.youtube.com/watch?v=7iCMspltj24
https://www.youtube.com/watch?v=uaYNgMcEYEE
https://www.youtube.com/watch?v=iYeV0OOQPE0
https://www.youtube.com/watch?v=piPSnOeZNyY
https://www.youtube.com/watch?v=PEObW2odtXI
Detailed storyboard will be followed.
Week 9
This week, our team worked on merging assets we individually worked on and finalized the video.
Creating the level design
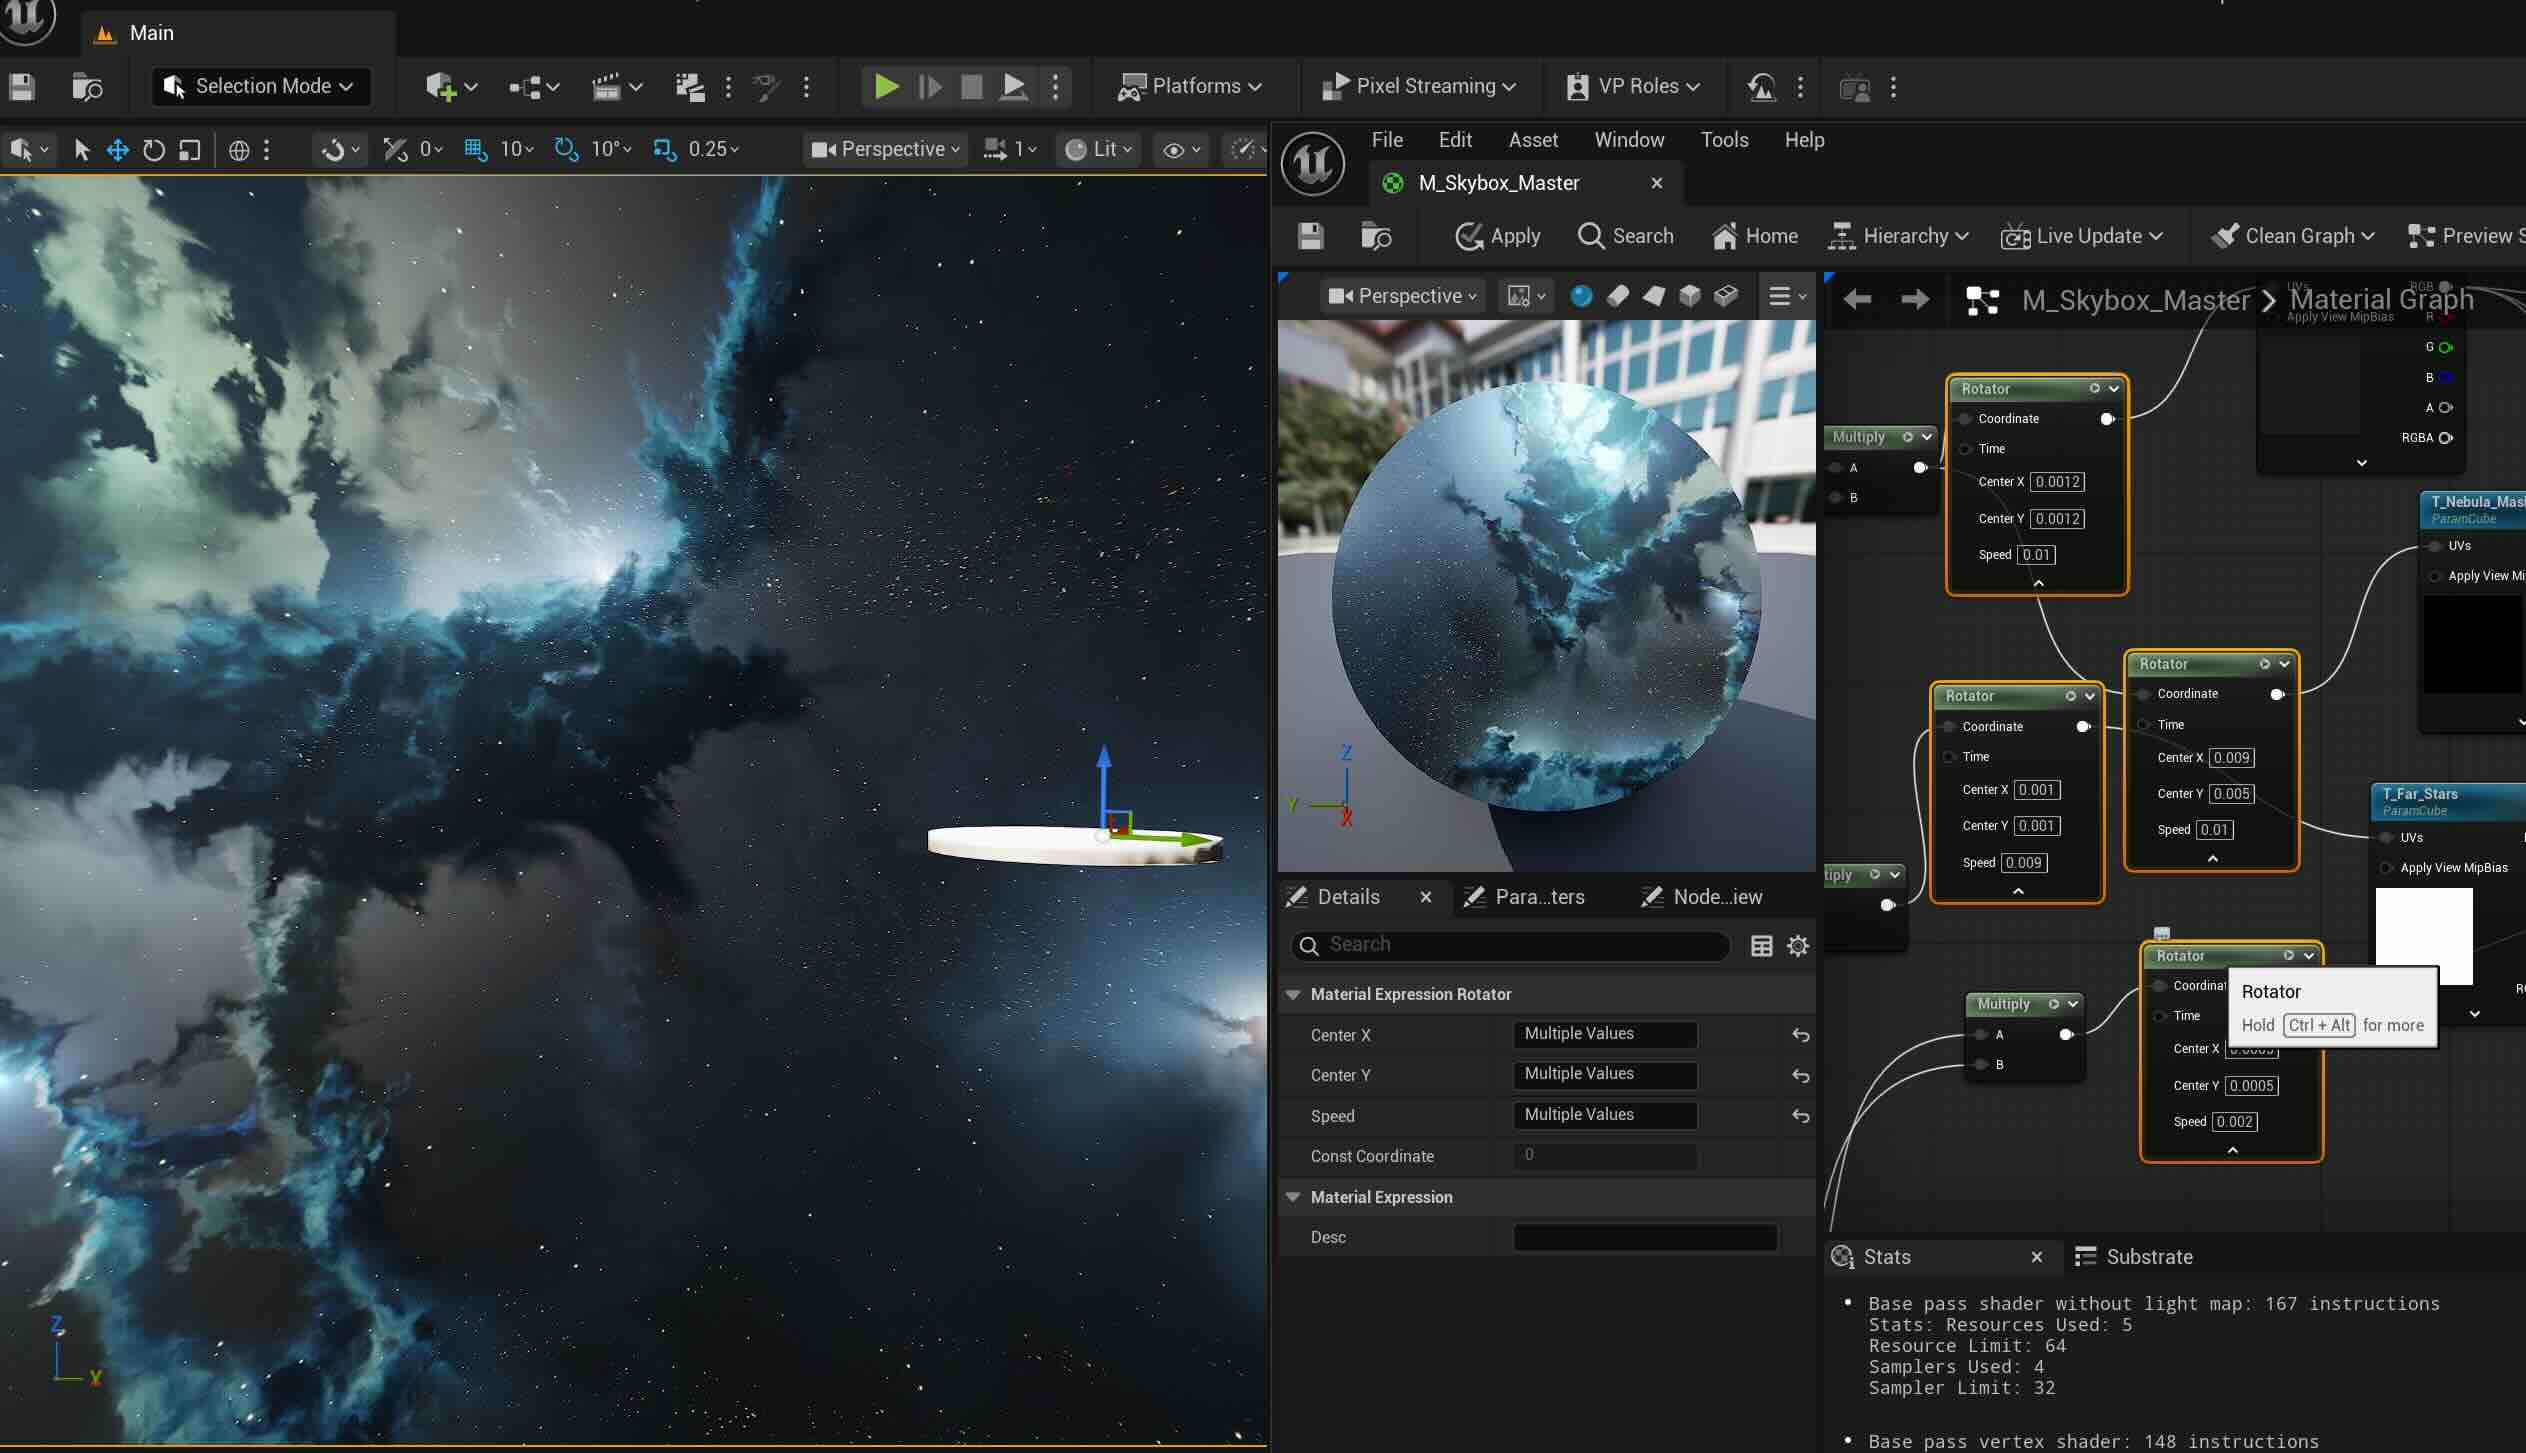
As a VAD team, I created the rotating galaxy background to the setup. Instead of staying the regular movie set, we thought it would be more interesting and funny to try out different background for the final video. This time, I troubleshooted the issue with the skybox (I tried this for the first project and it didn't work) and added the rotators nodes in the blueprint, adjusted the speed of the nebulas and the stars.
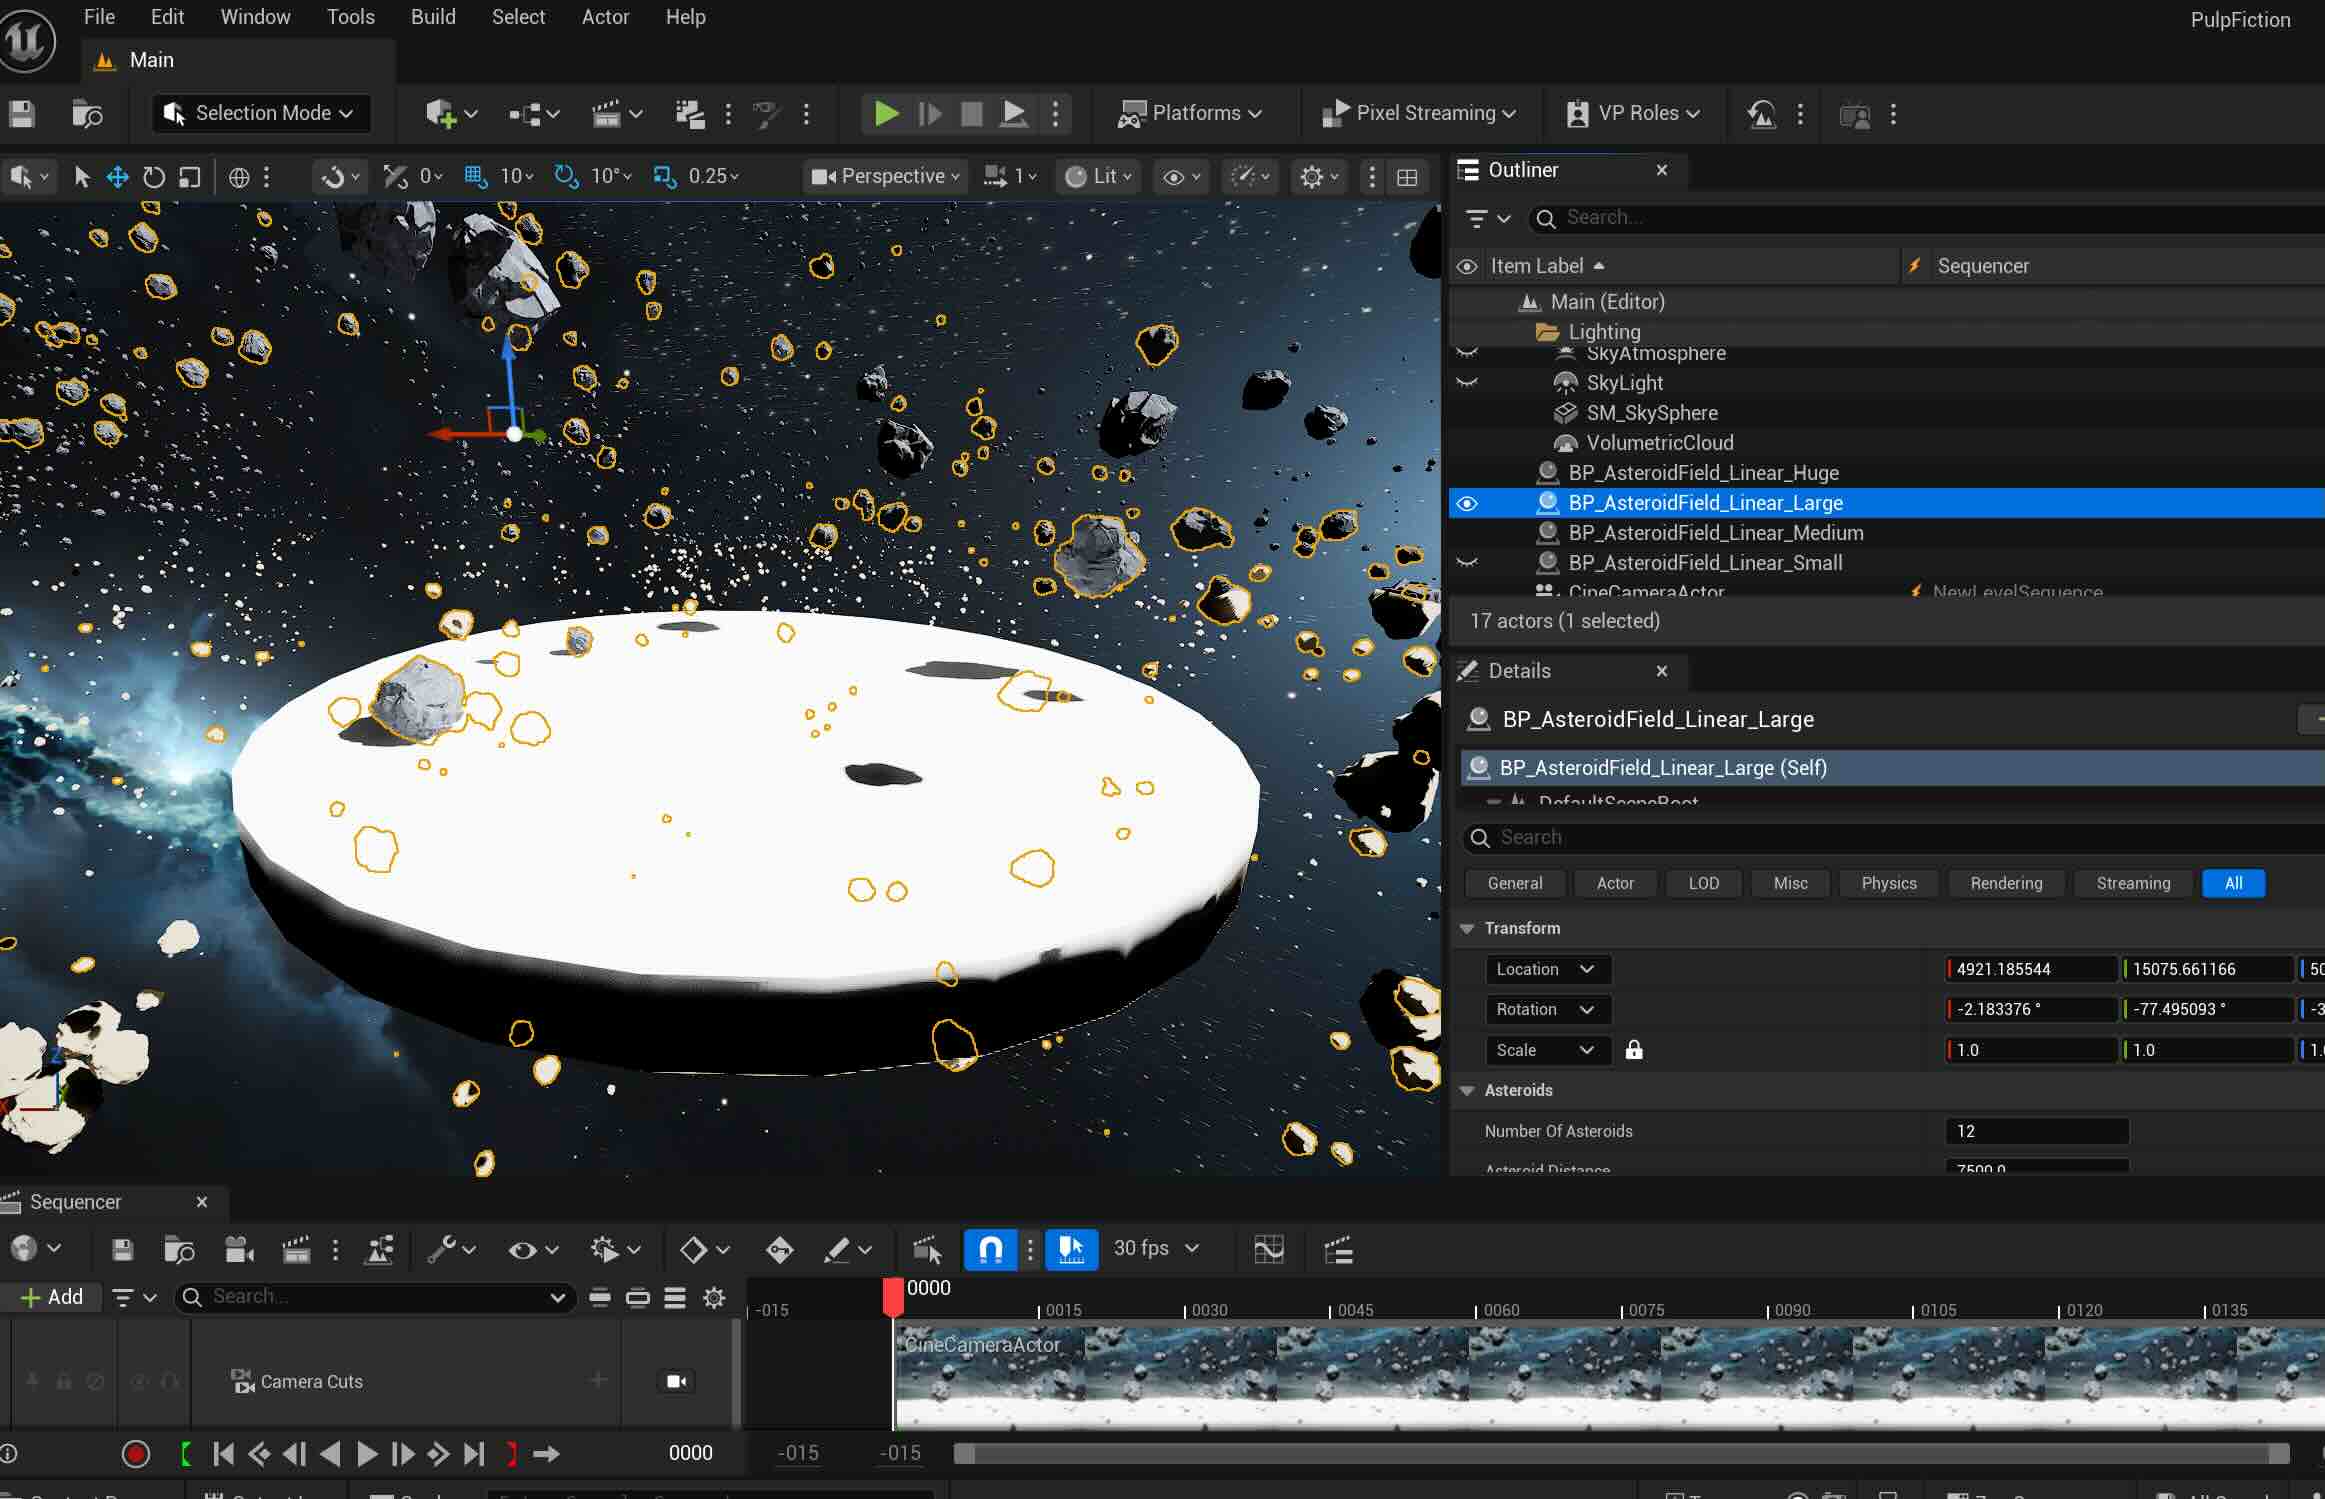
Adding various sizes of the Asteroids
Adding light beams through Niagara Particle Systems to create hyperspace look- we decided to nix it later as it makes the scene busier with the star rotation.

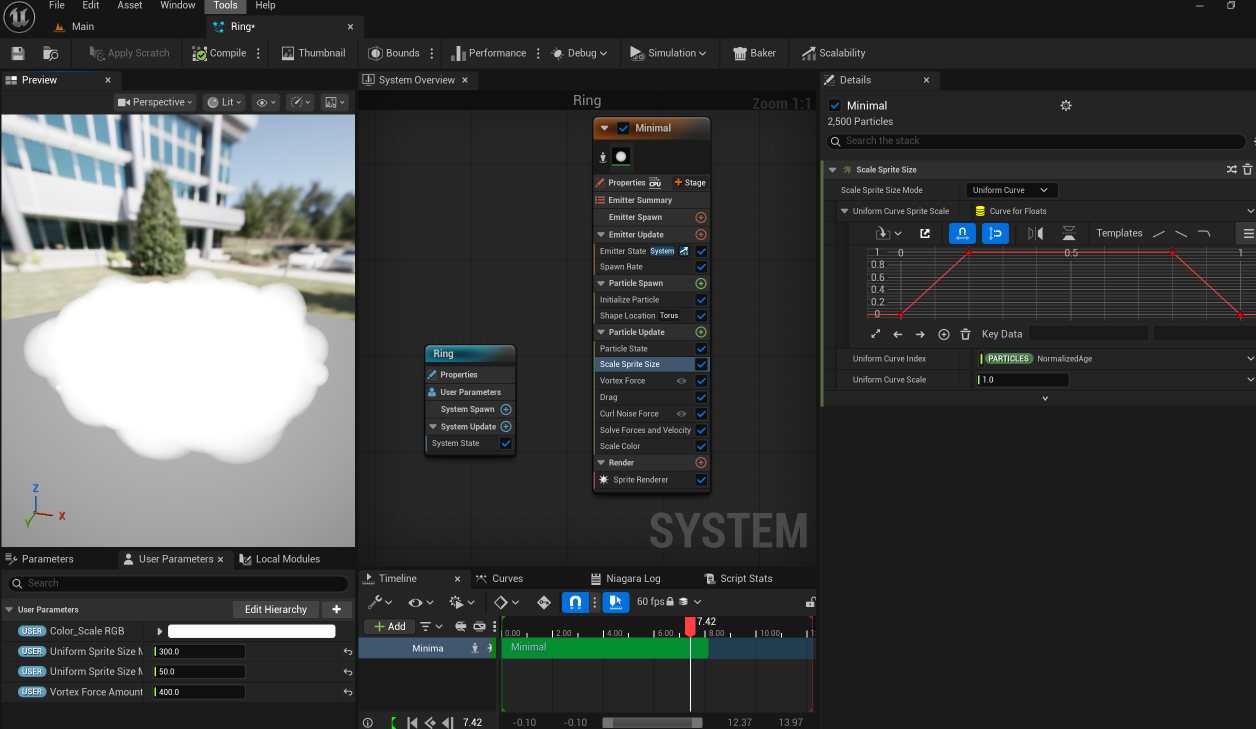
More FX - Moving rings around the stage after following this tutorial
I added the smoke texture like the tutorial, reverted it back as it looks too dark and serious.
The ring:
Asset Migration
4 of us worked via Zoom, merging the world and the Mocap characters

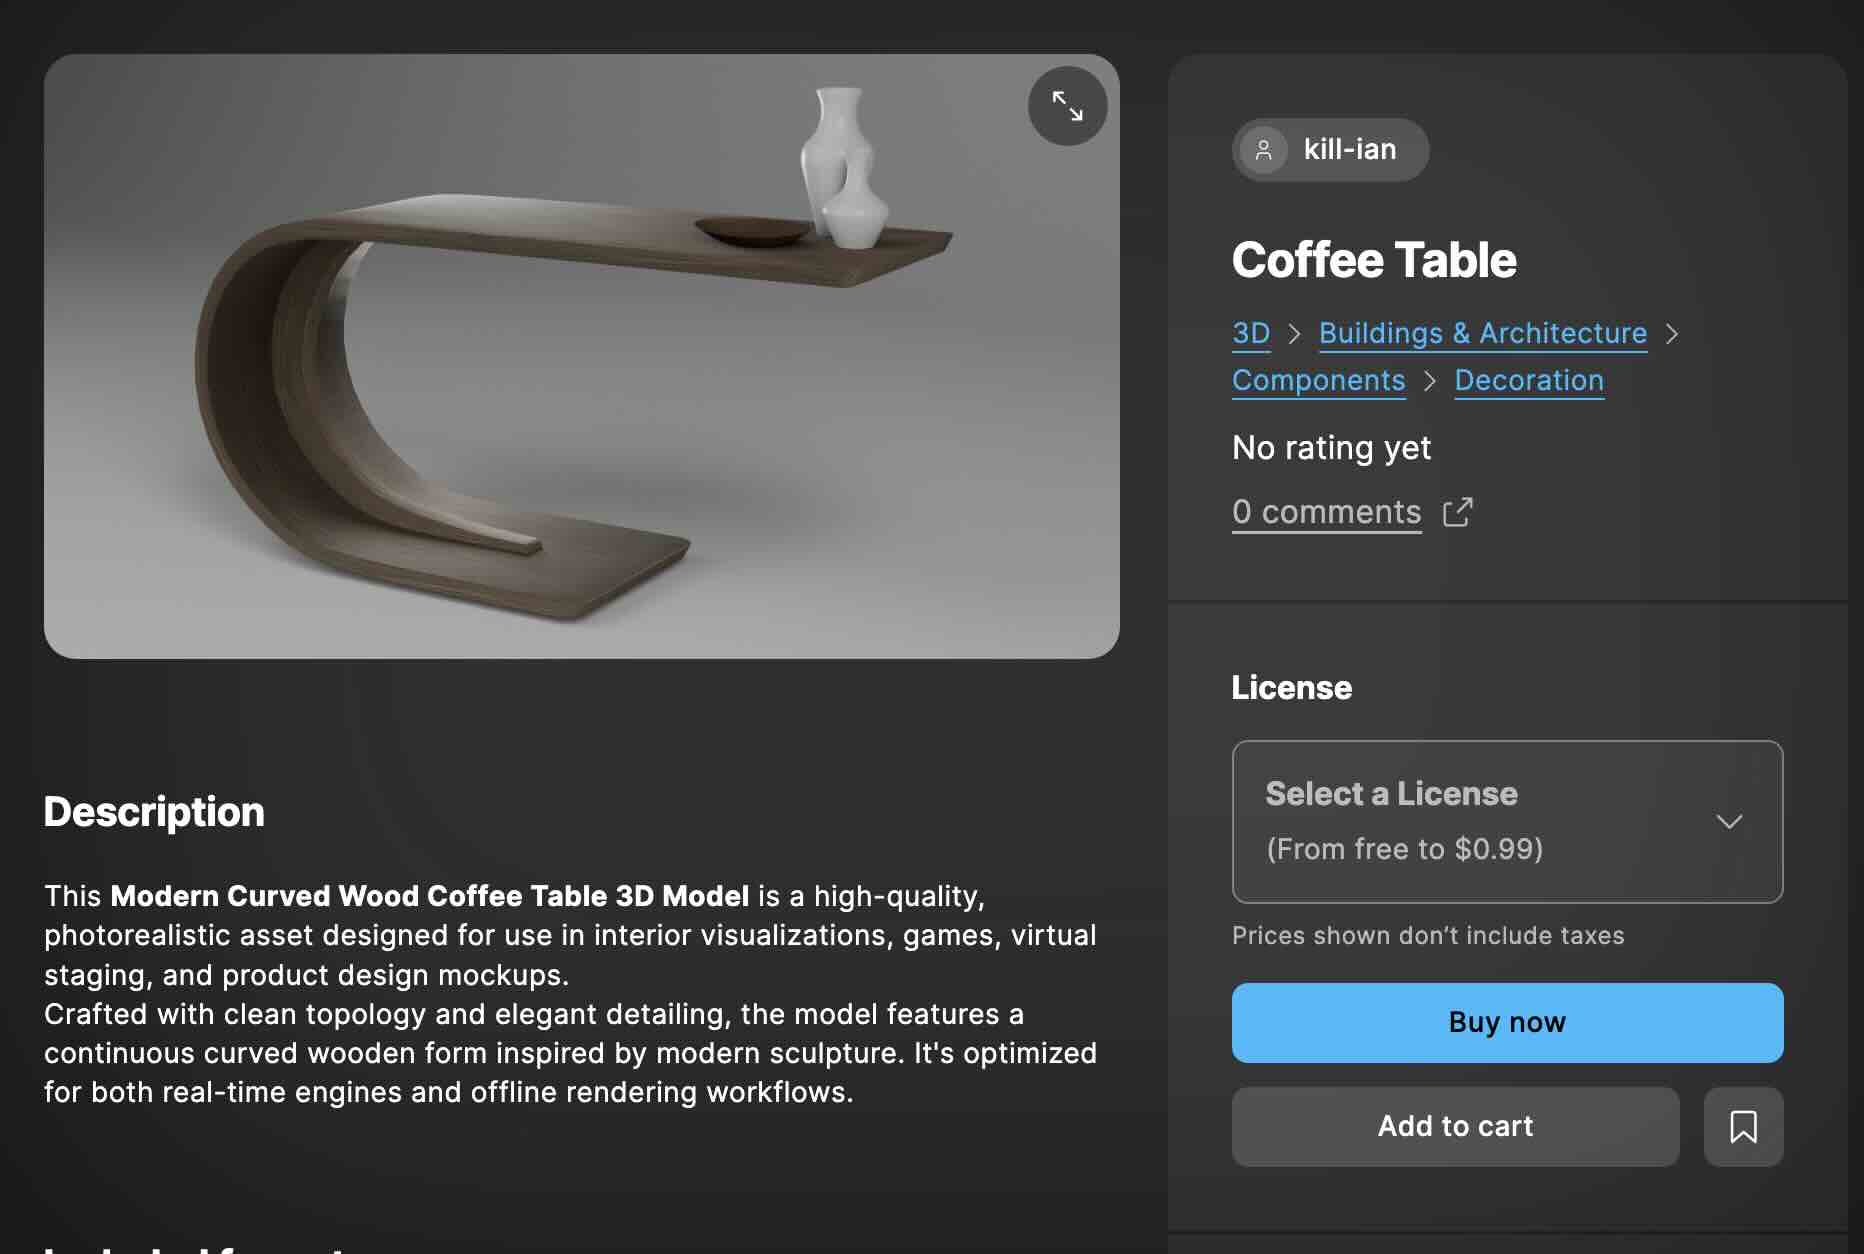
Hunting more assets per Rosalyn's request:

Final Video
Week 8
This week, our team started working on the midterm project. We briefly brainstormed the idea and came up with a list:
1. Alan Walker 'Darkside'
2. Soulja Boy 'Crank Dat'
3. Sickick - 'Faded'
4. Napoleno Dynamite - Solo Dance scene
5. Pulp Fiction - Duo Dance scene
We picked the legendary dance scene from the movie 'Pulp Fiction' starring Uma Thurman and John Travolta.
Roles:
3D Vad- Kayla & Vasudha
MoCap Operator- Rosalyn, Vasudha, Bryan (motion retargeting)
Unreal Operator- Kayla, Rosalyn
Mocap Actors- Bryan, Vasudha
Mocap Recording Director- Rosalyn
Choreography Director- Kayla
Shot list:
Shot size | Actors | Shot angle | Movement | Action
VLS | JT & UT | | Stationery | UT, JT Shoes off, walking to the stage
LS | JT & UT | | Zoom in | UT& JT starts dancing
MCU | JT | OTS | Stationery | UT hammering dance & JT dancing
MCU | UT | OTS | Pan left | UT dancing- shaking head and walking out
MS | JT & UT | OTS | Pan R, ZO | UT& JT dancing, swimming dance
MCU | UT | hip-level | Tilt down | UT& JT dancing, UT almost sitting down
MCU | JT | eye-level | Stationery, PL | JT dancing
MCU | UT | eye-level | Pan left | UT hammering dancing
MS | UT& JT | eye-level | Zoom out | UT& JT dancing
MCU | UT& JT | ground | Tilt down | both feet twisting on the floor
MS | UT & JT | eye-level | Pan L-R-Middle | UT& JT dancing
As this is a group project, I thought a professional shot list was needed to be on the same page. I referenced this example for the final shot list.
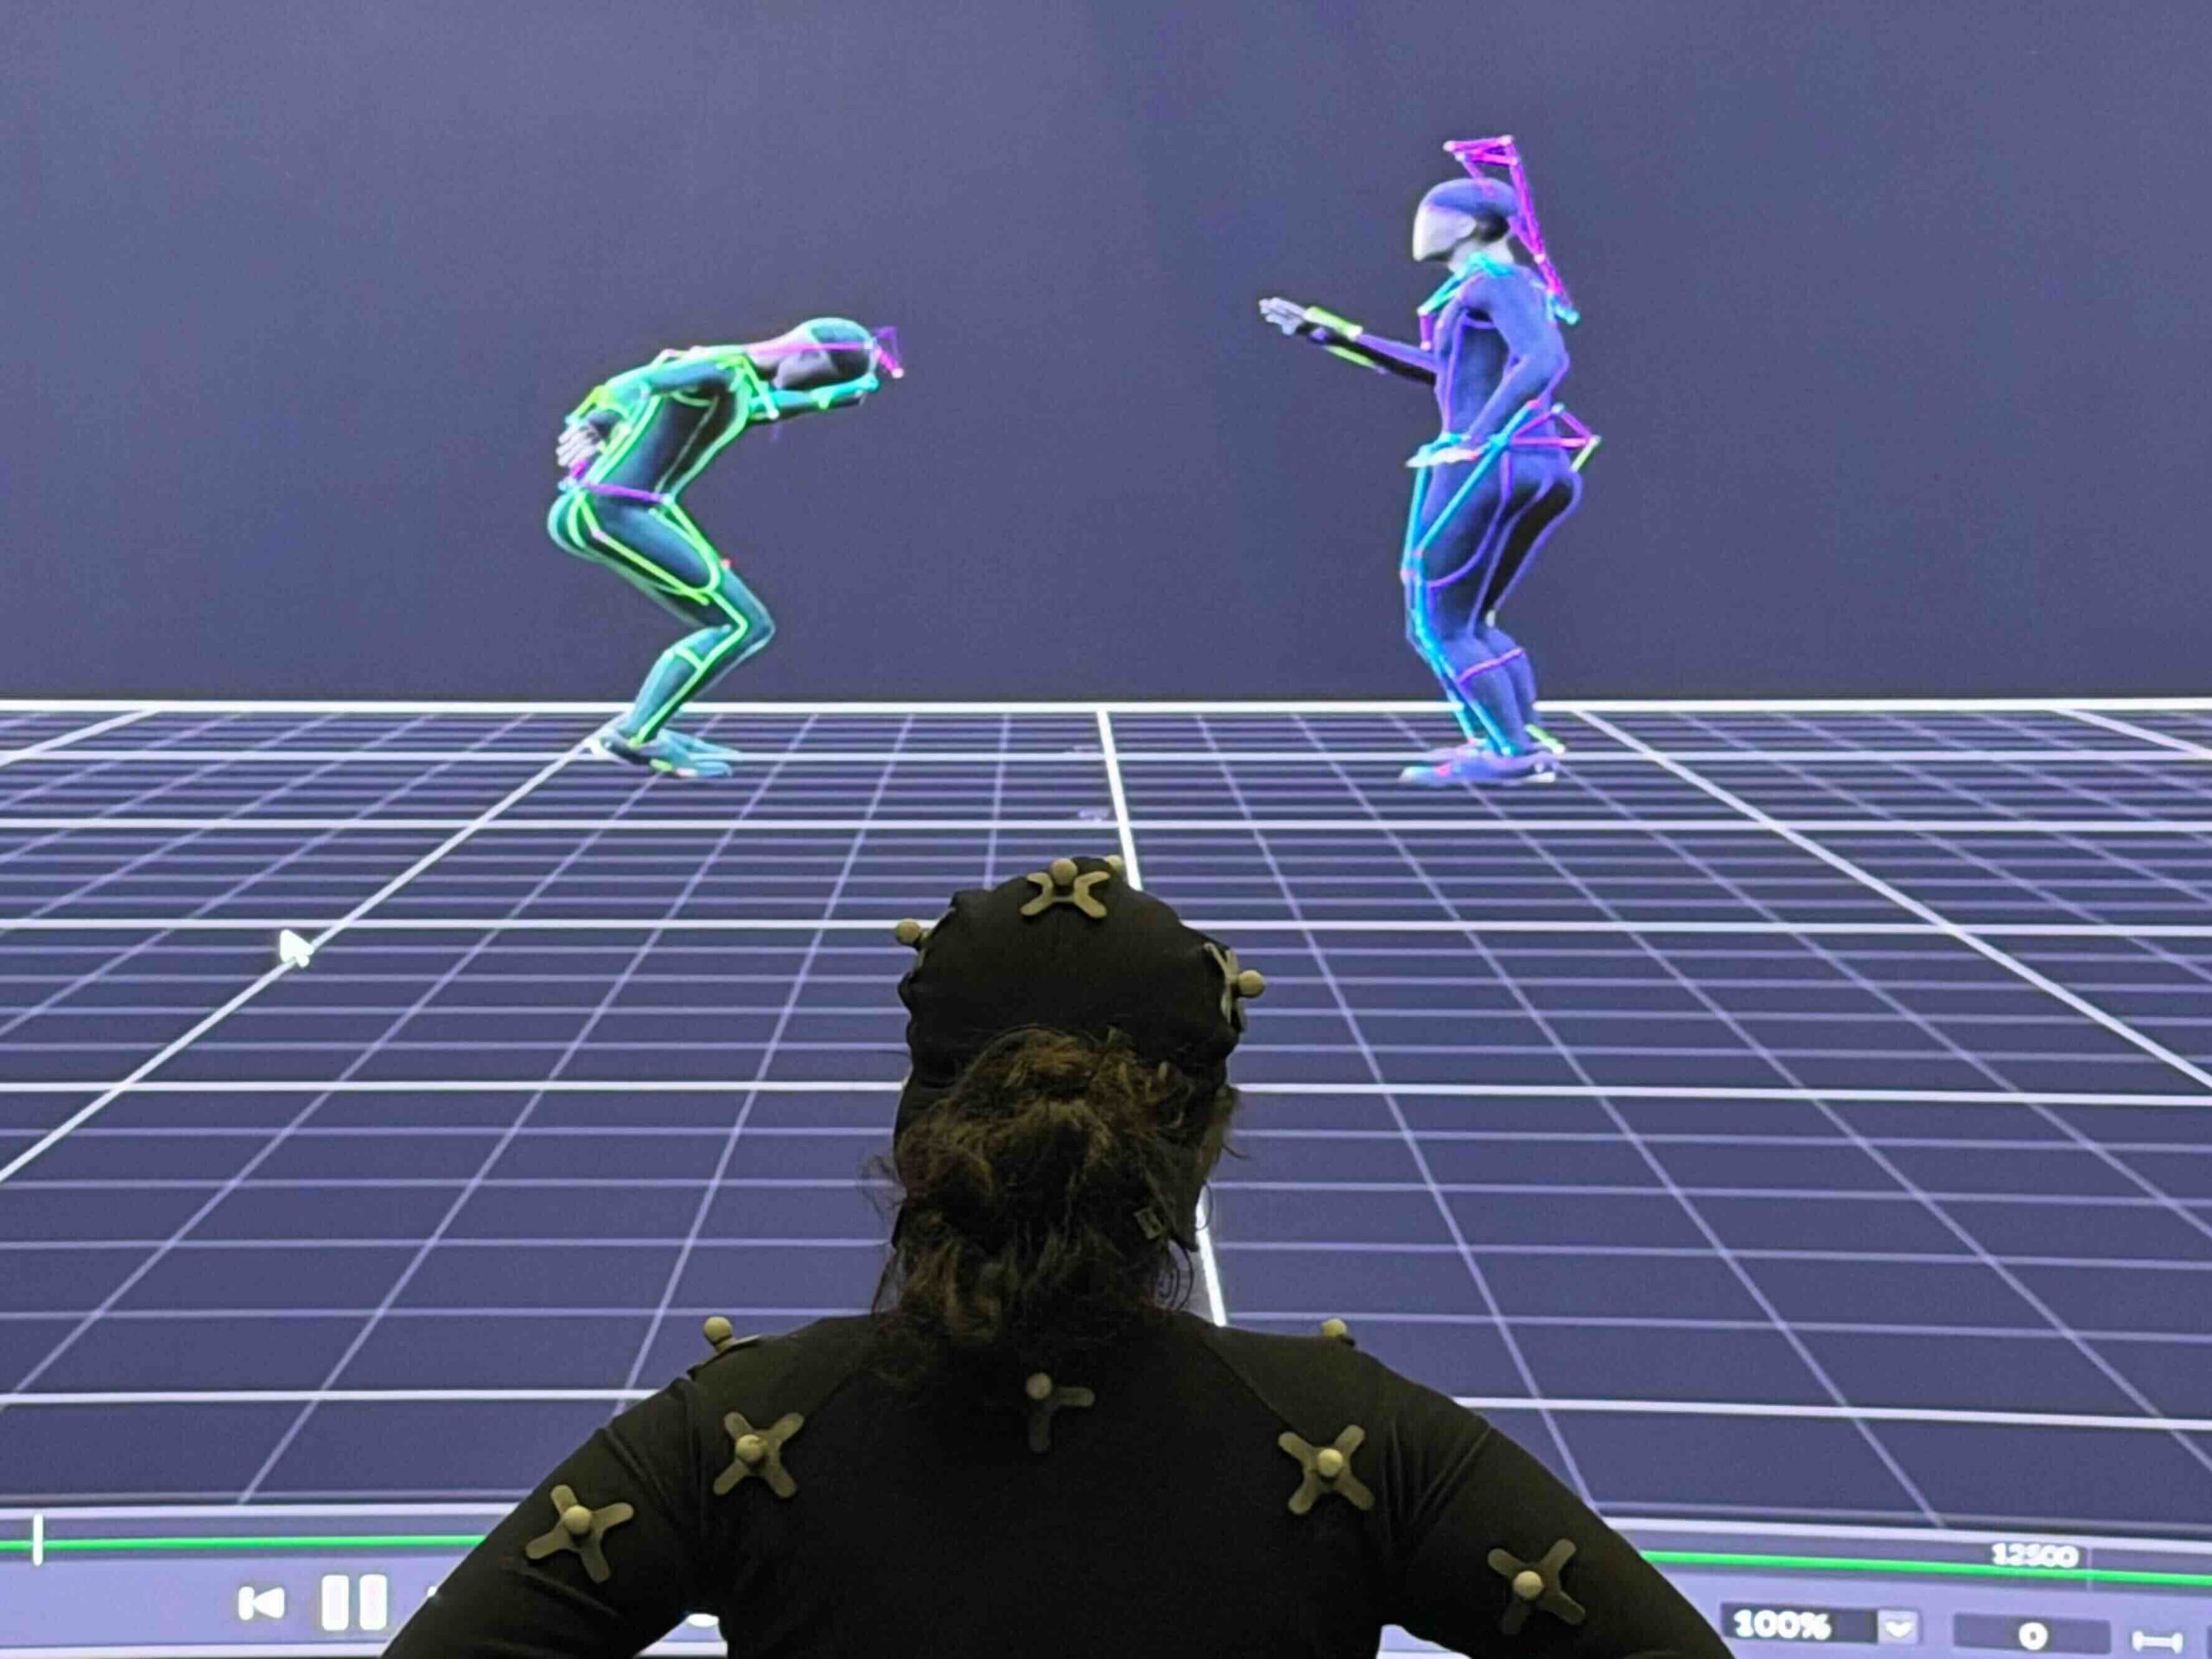
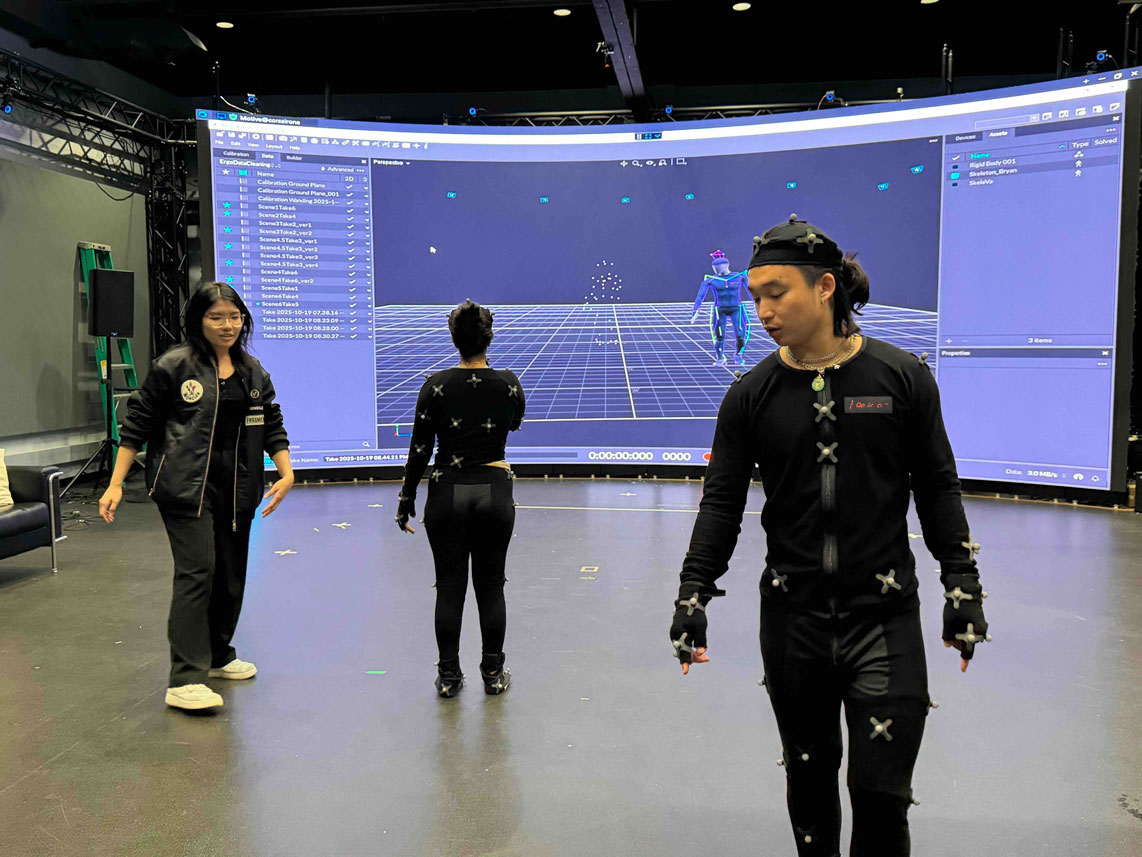
At the Mocap session, I worked on the shot list, helped the actors with the suits, and directed the choreography. Since I came up with the Pulp Fiction idea, I researched the scene further and watched the video of Quentin Tarantino discussing how he directed the dance style for the scene. He wanted Uma to dance like the Zsa Zsa Gabor cat from The Aristocats, showing the back of the hands, and John to twist in a bigger, richer way. As the scenes are cut in between MS and CO, we don't know how one actor is doing when the camera is showing the other. I coached them to keep moving as Quentin described the style.
We shot both individual and group scenes a couple of times to get extra data to match the best movement for each scene. Rosalyn operated the Motive and directed the movement path of the actors from taking off the shoe to walking onto the stage, facing the audience etc.
At the end of the scene, I saw both movie characters enjoying the dance more freely, and I thought having the Mocap actors dance to come up with their own moves would be more fun than following the exact movements. The actors were amazingly talented (Vasudha is a great dancer, Bryan even pulled the perfect Tai Chi moves when I asked), and it worked out great. We were happy with the outcome.
I also photo-documented the session :

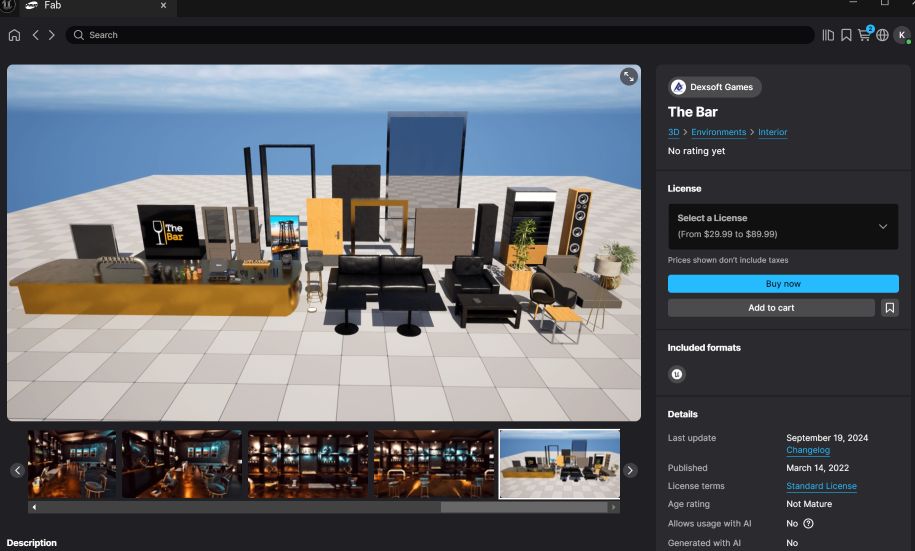

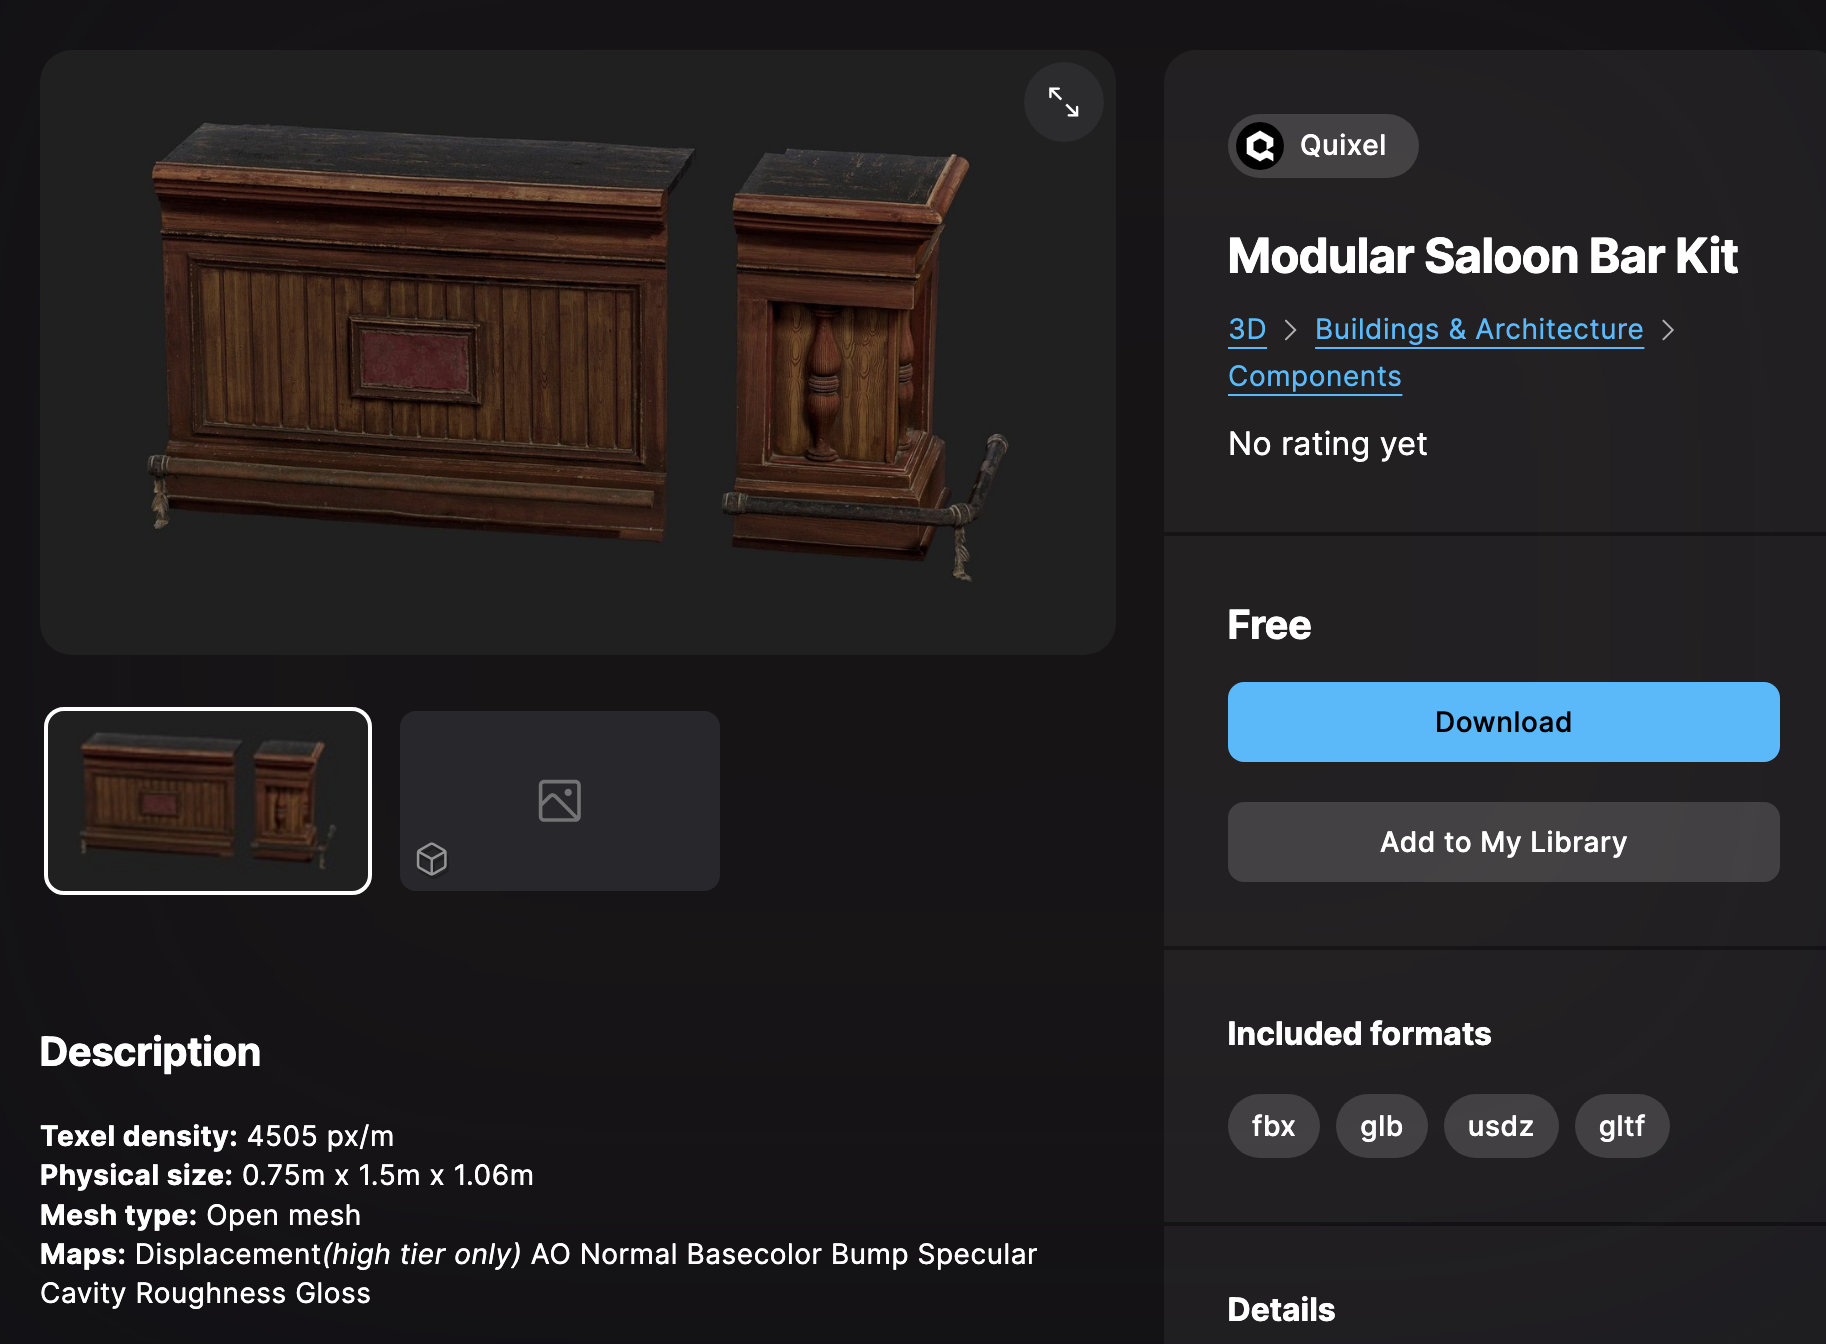
The original scene, Fab Research (bar setting) & the level design base (considering the background to be something different except the neon lights- tutorial)
Deadlines (TBD except Oct 29) :
Oct 19 - Brainstorming, Mocap Recording
Oct 22 - Motion and Design Draft, Migrate and Merge
Oct 24 - Motion and Design 2nd draft, Migrate and Merge
Oct 27 - Final touch-up, finalize the file
Oct 29 - Midterm Presentation
Week 7
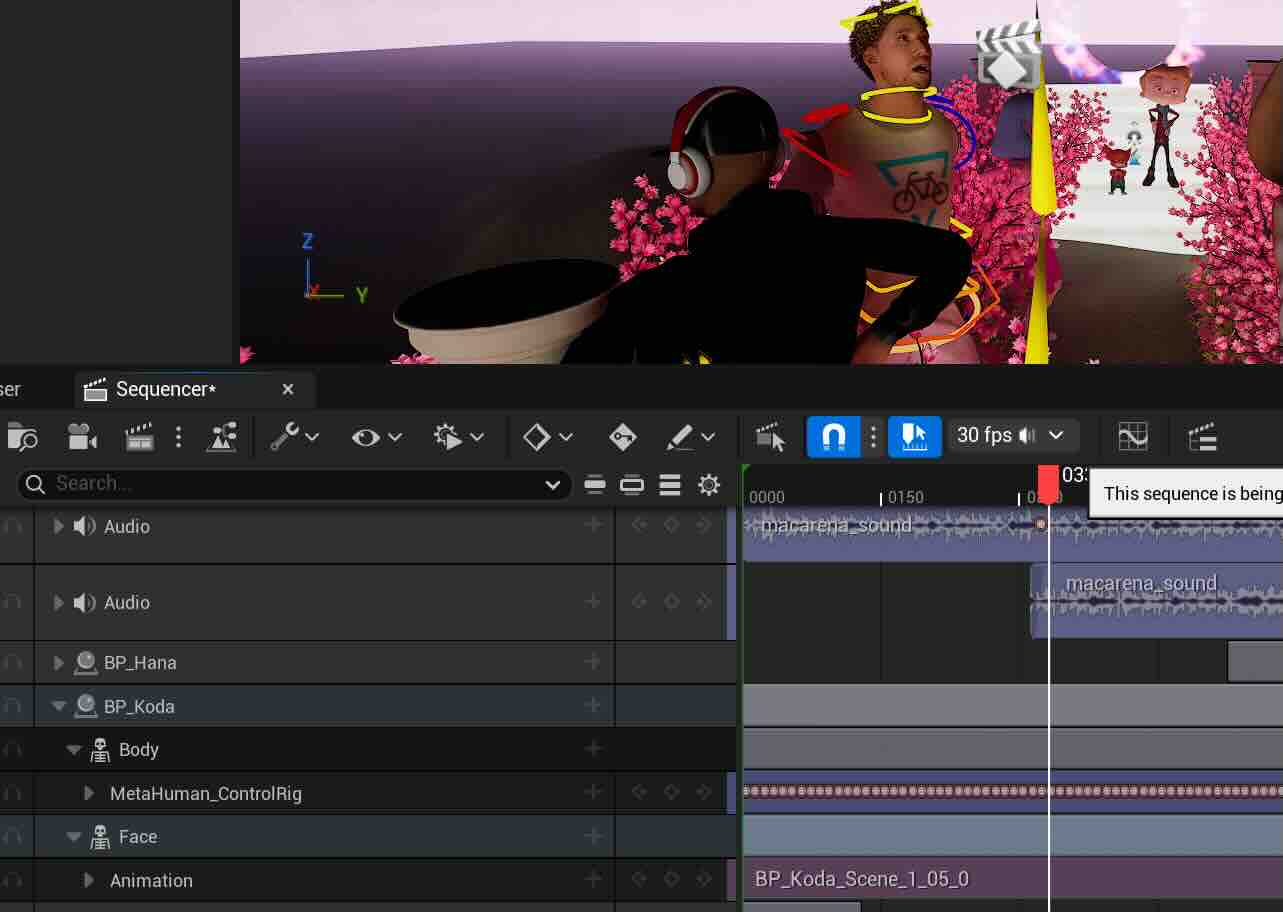
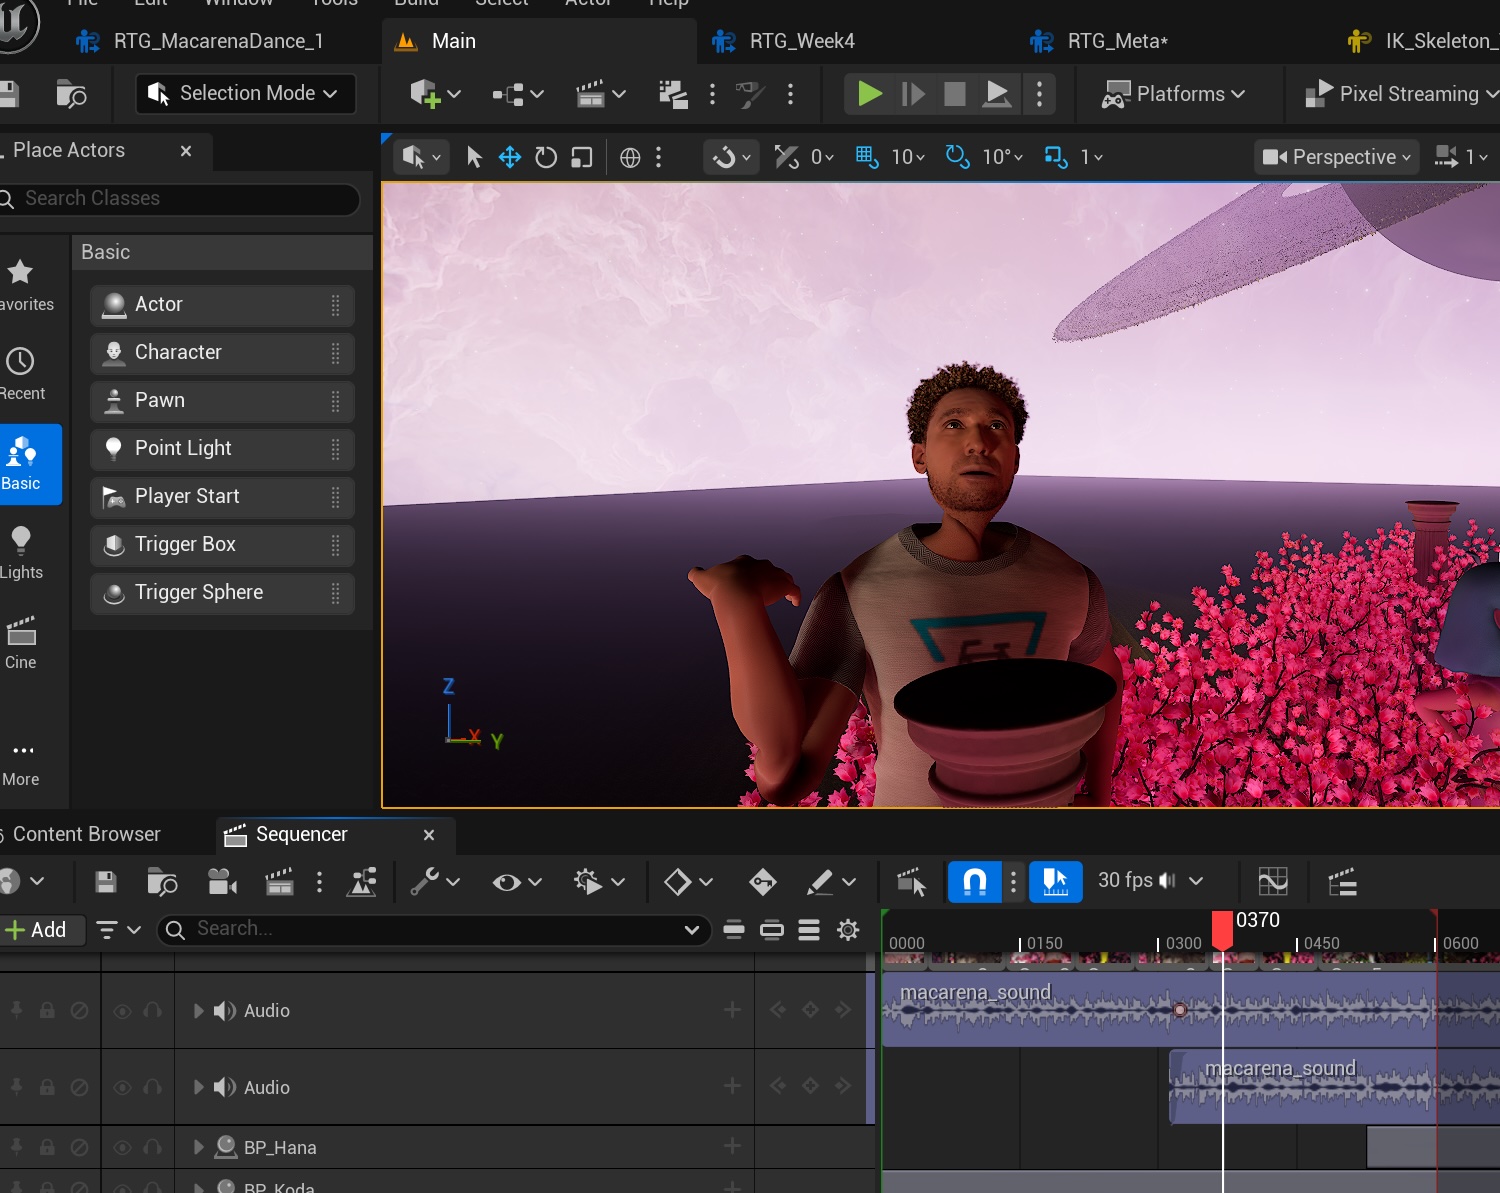
This week, I worked on the sequence camera cuts, and rendering of the video. The inspiration and the soundbite are from the "Macarena" featuring Bad Bunny, created by Vogue. There was a sound playback issue (I later found out that the PC's sound doesn't work with the extended monitor connected). I worked through the entire sequence and the render process without the proper sound bite, and this is a revised version.
In this version, I also wanted to make the character "Koda" have the Mocap motion and the face motion together. I initially assigned the face motion and Mocap motion and assigned them separately, as my computer kept shutting down when I worked around the Metahuman skeleton mesh. After watching a few tutorials and the in-class videos again, I was able to assign both motion to Koda (still fixing a few retargeting errors).
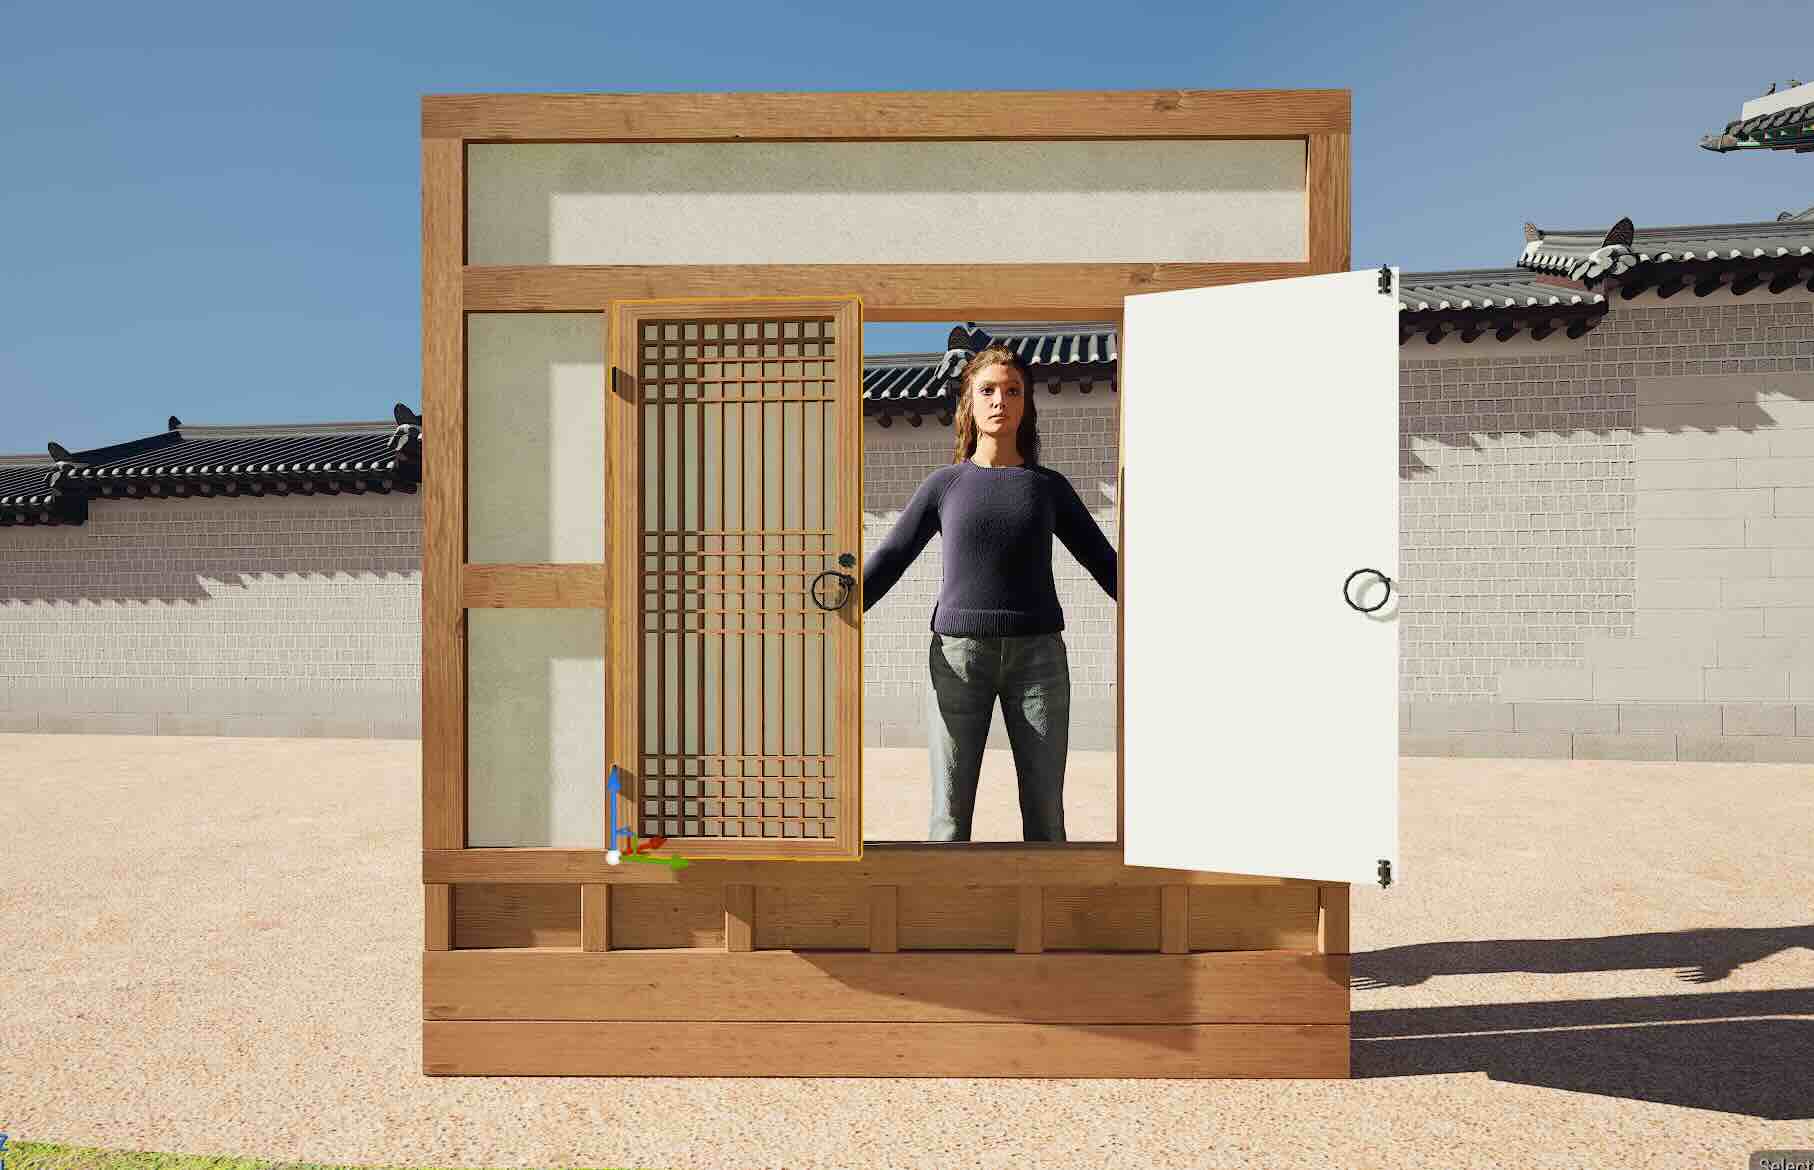
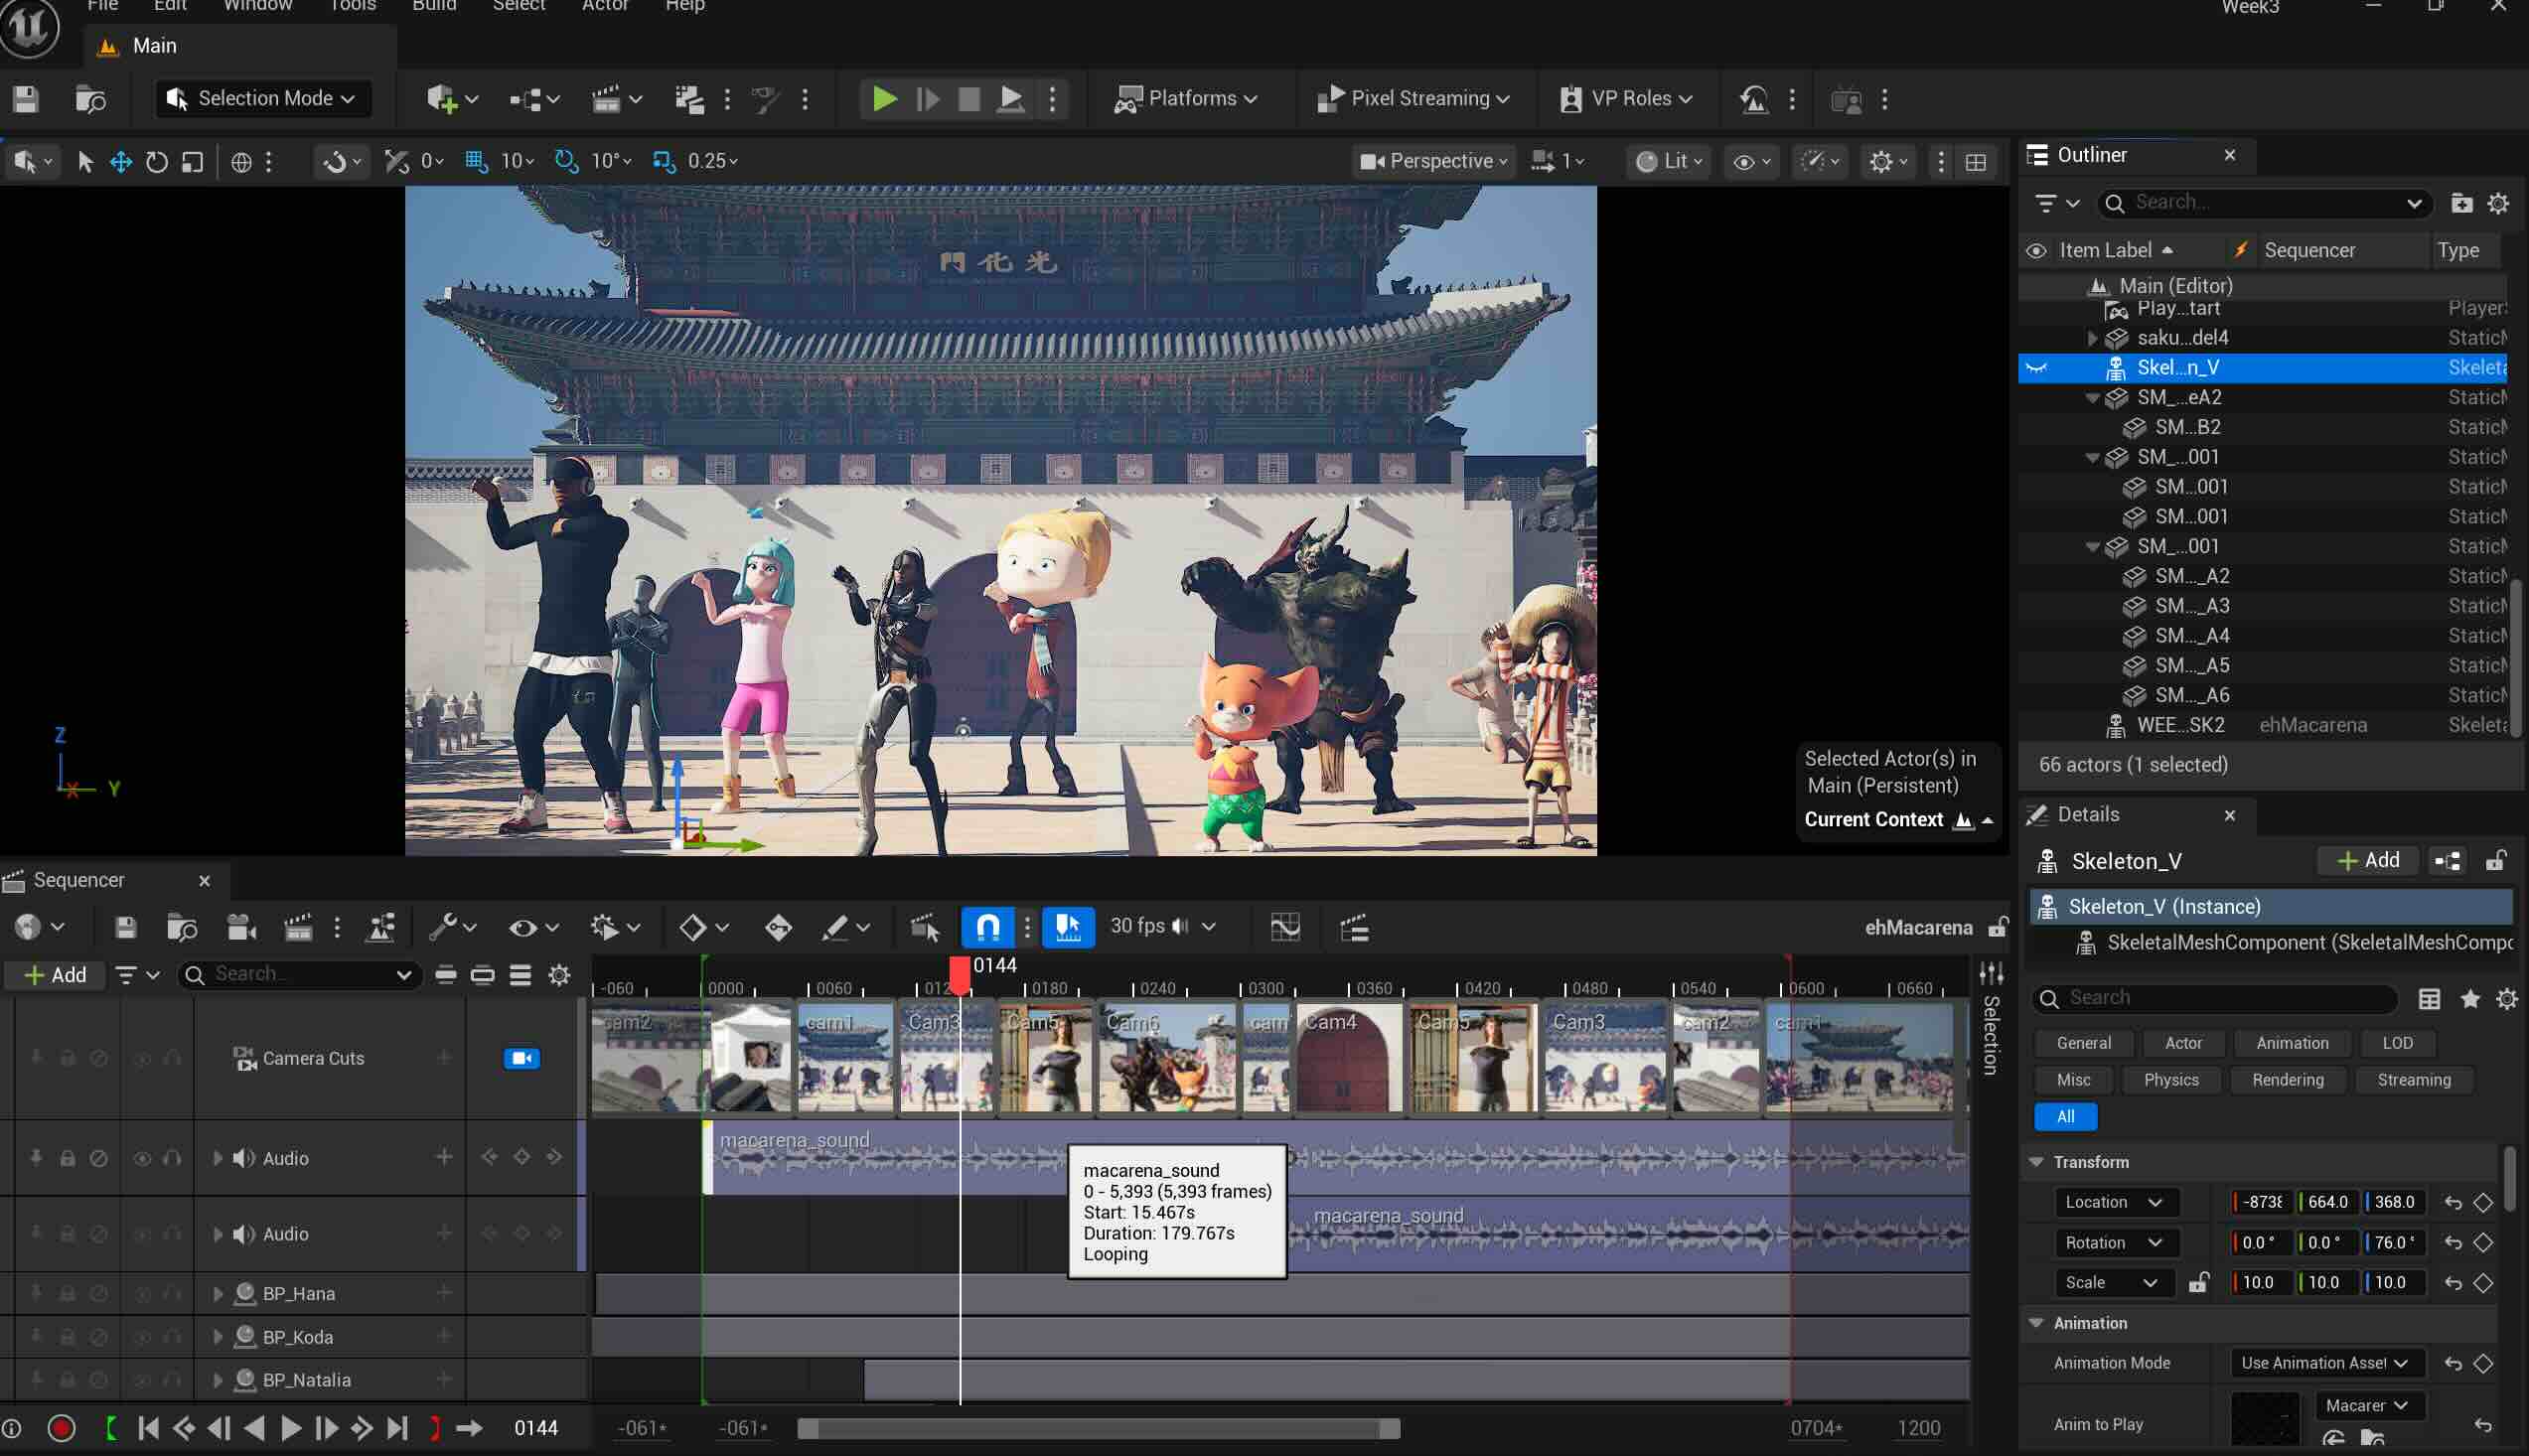
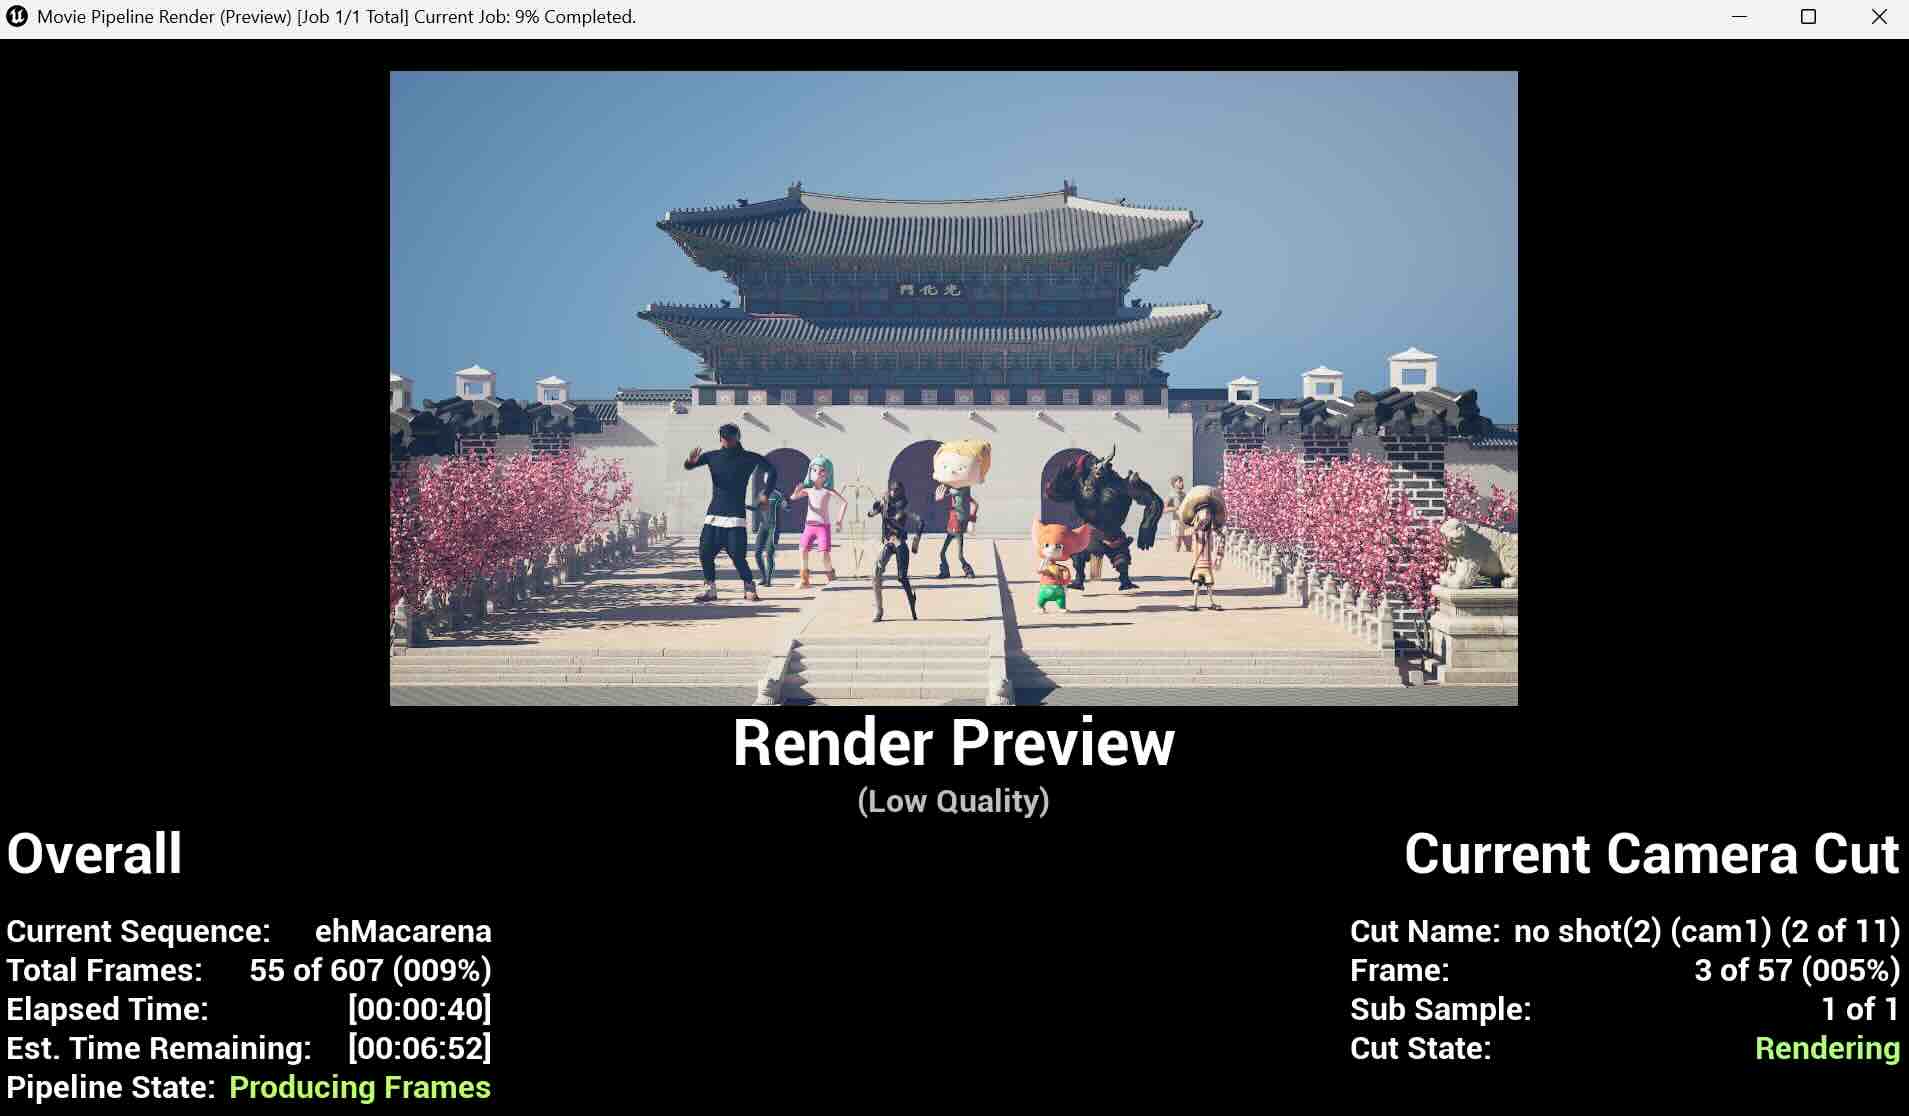
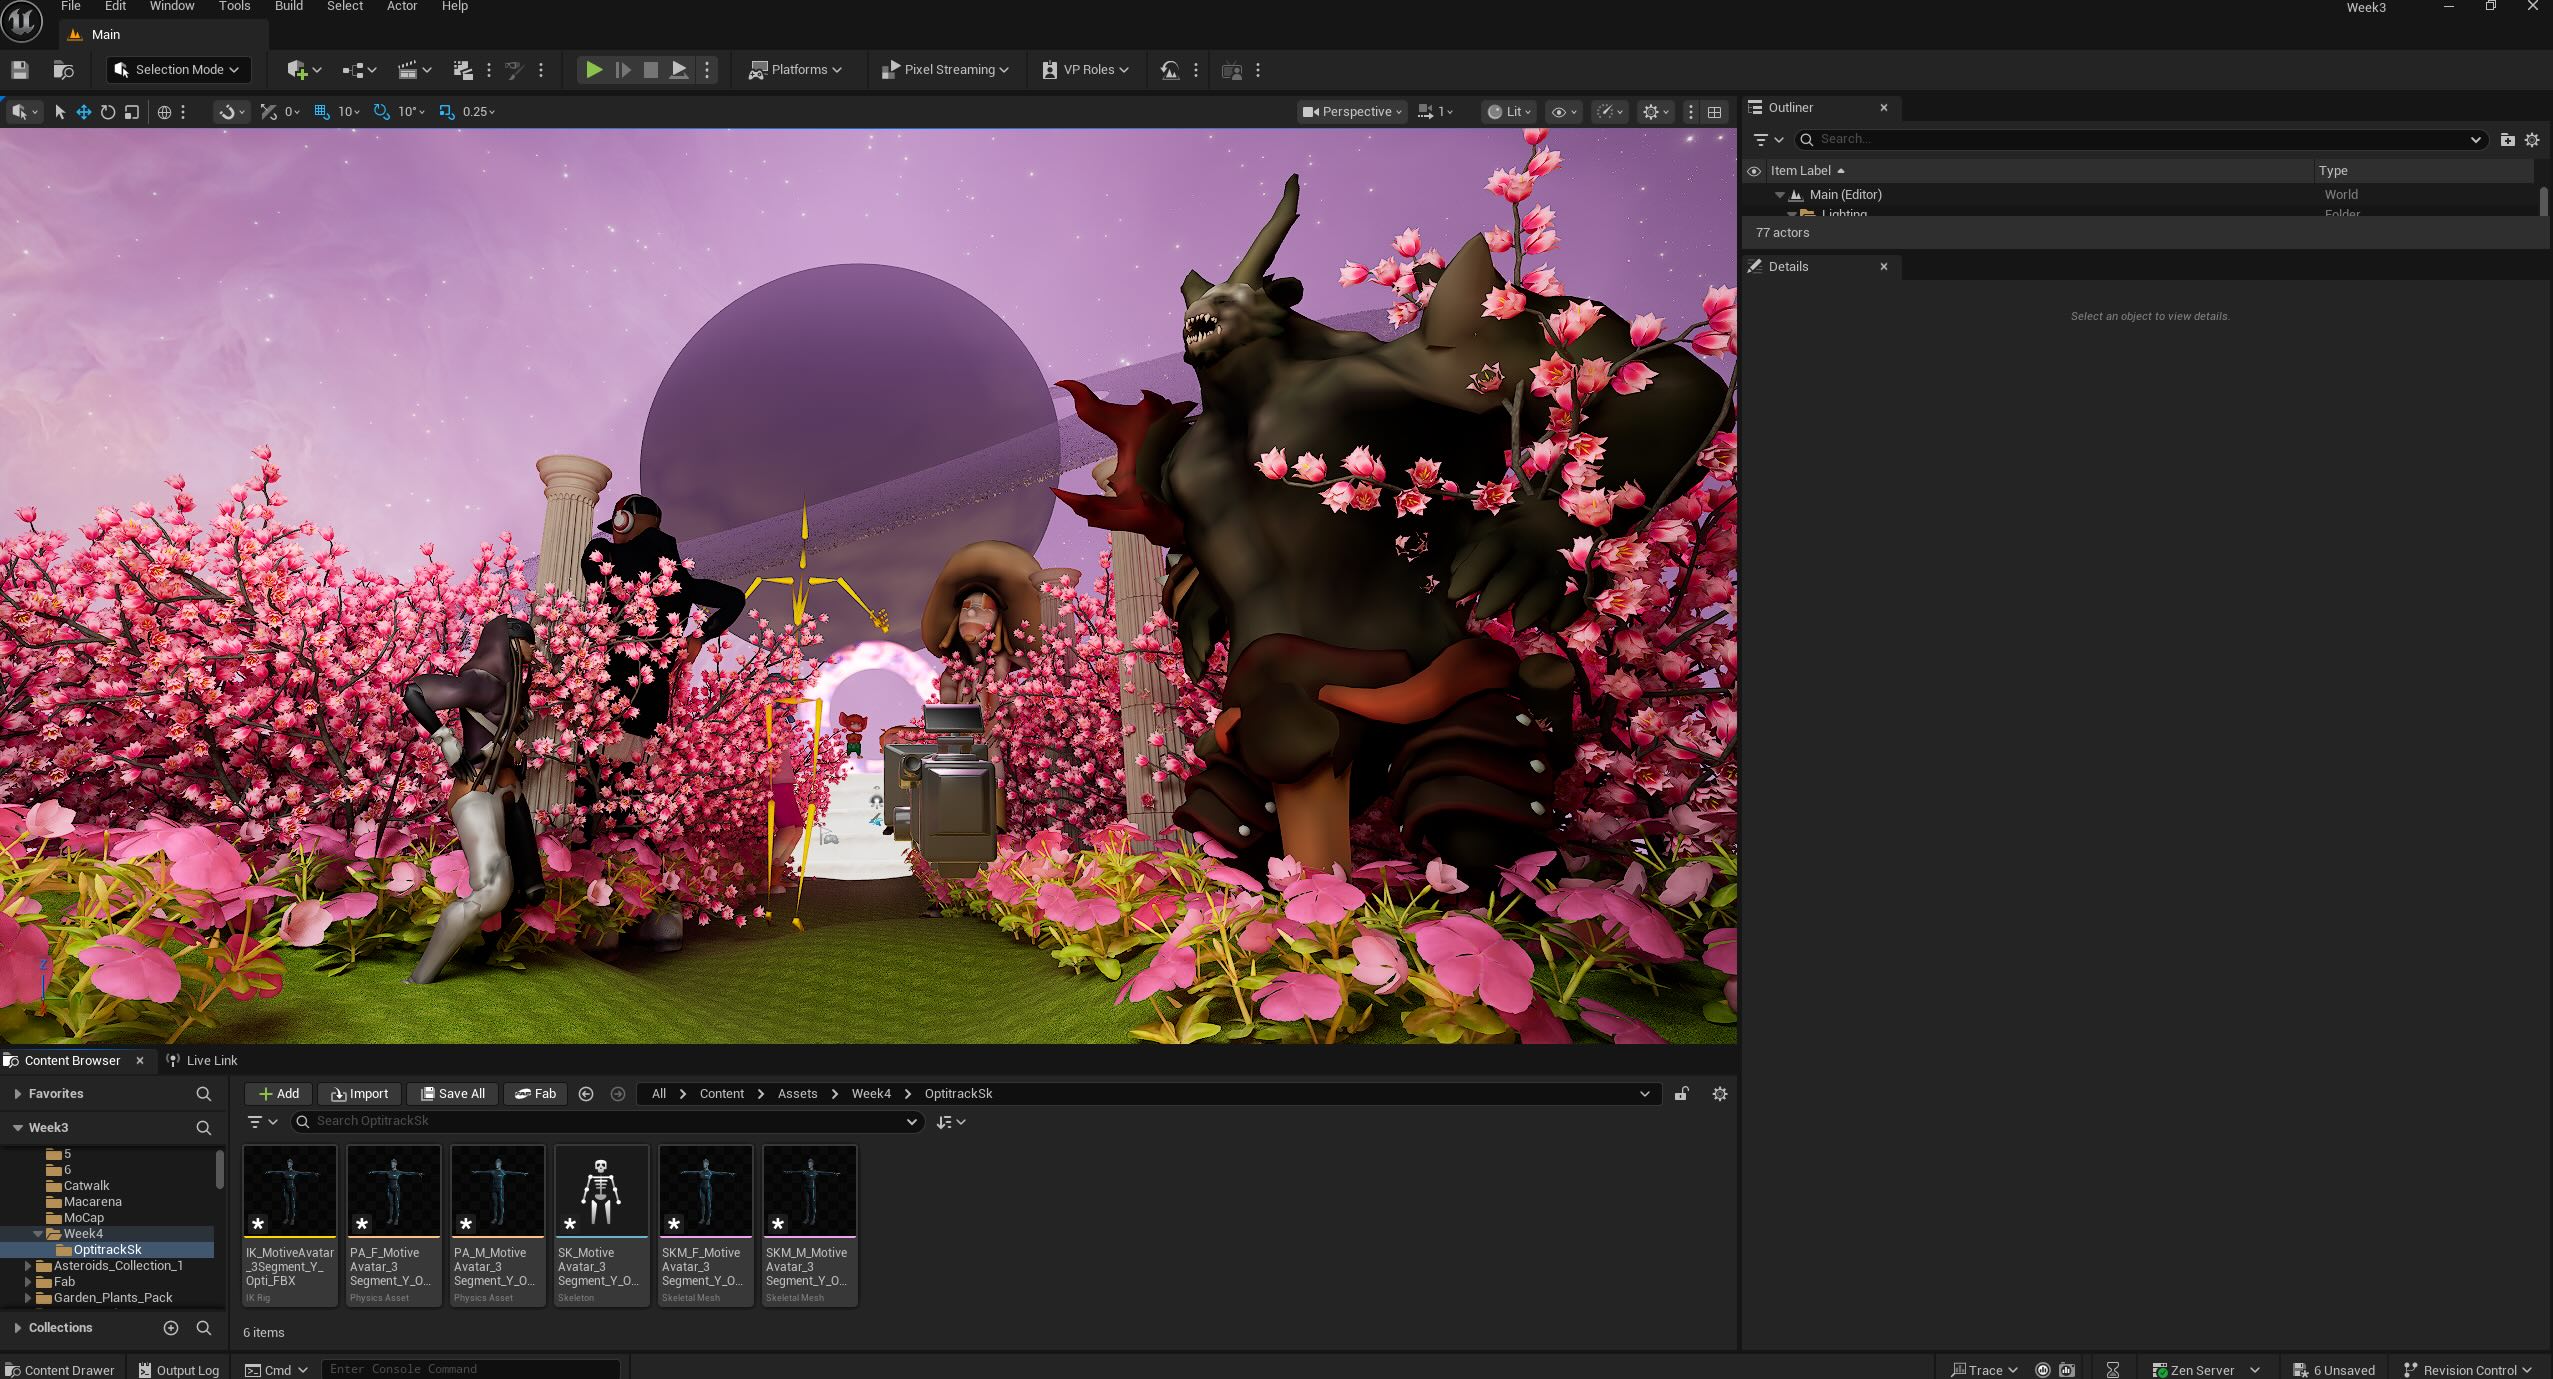
In this version, I upgraded the level design, added more characters to create a flash mob dance scene at Gwanghwamun in Seoul, Korea. The map was designed by the Korea Heritage Service, the government agency established to oversee affairs such as the management, protection, designation, and restoration of national heritage.
I started with this order:
Picking the soundbite-> Planning shot list -> Adding & arranging elements -> Assigning cameras -> Rendering
Soundbite
Intro 4 bar - Chorus 4 bar (approx. 20 secs)
Edited in the Sequence
Initial Shot list
1. CO - Movie slate & Lyric board
2. FS- Characters dancing
3. MS- Characters dancing
4. CO- Character dancing
5. CO- Metahuman character singing
6. OHS- Characters dancing
Adding & Arranging Elements
1) Added the map, 6 chimney-alike pillars, plum blossom trees, and the Haetae Statues (Mythical guardian beast statue in the front) and the characters.

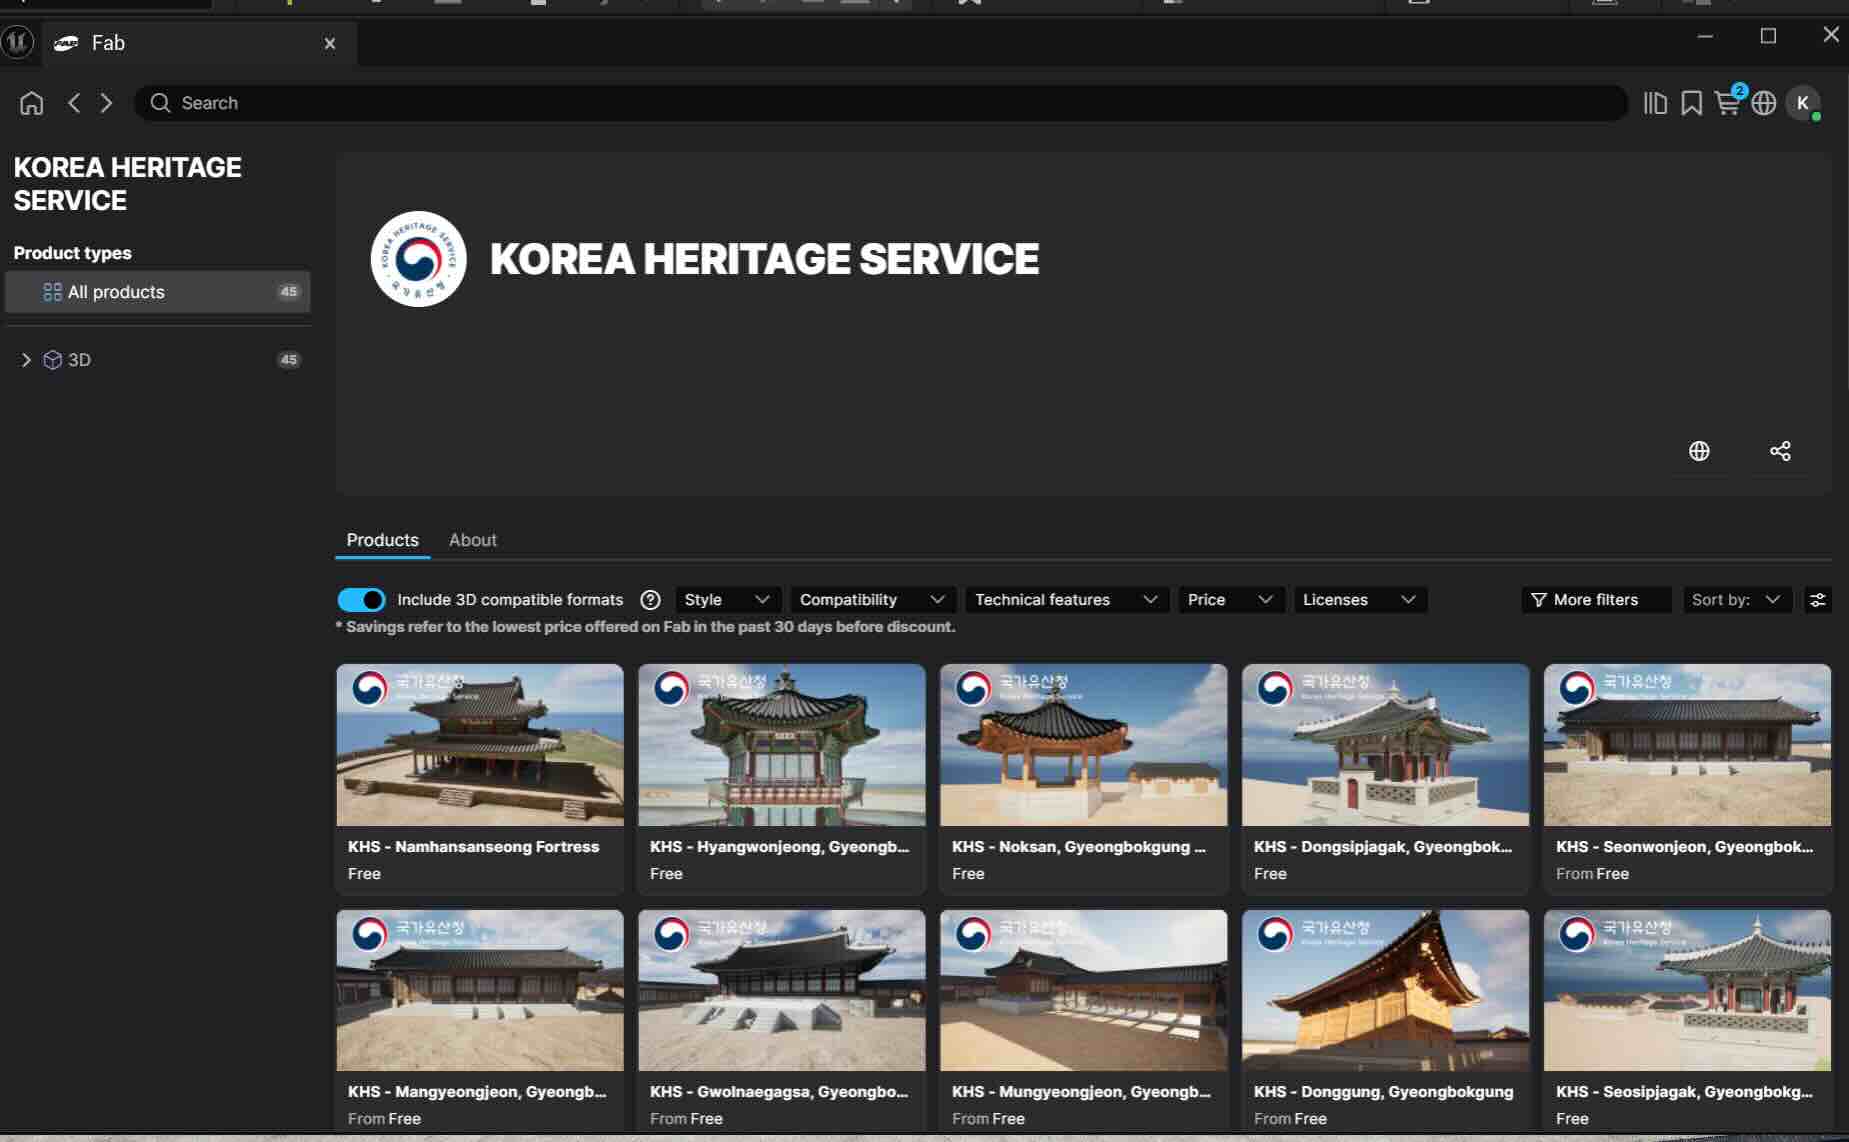
KHS products on Fab
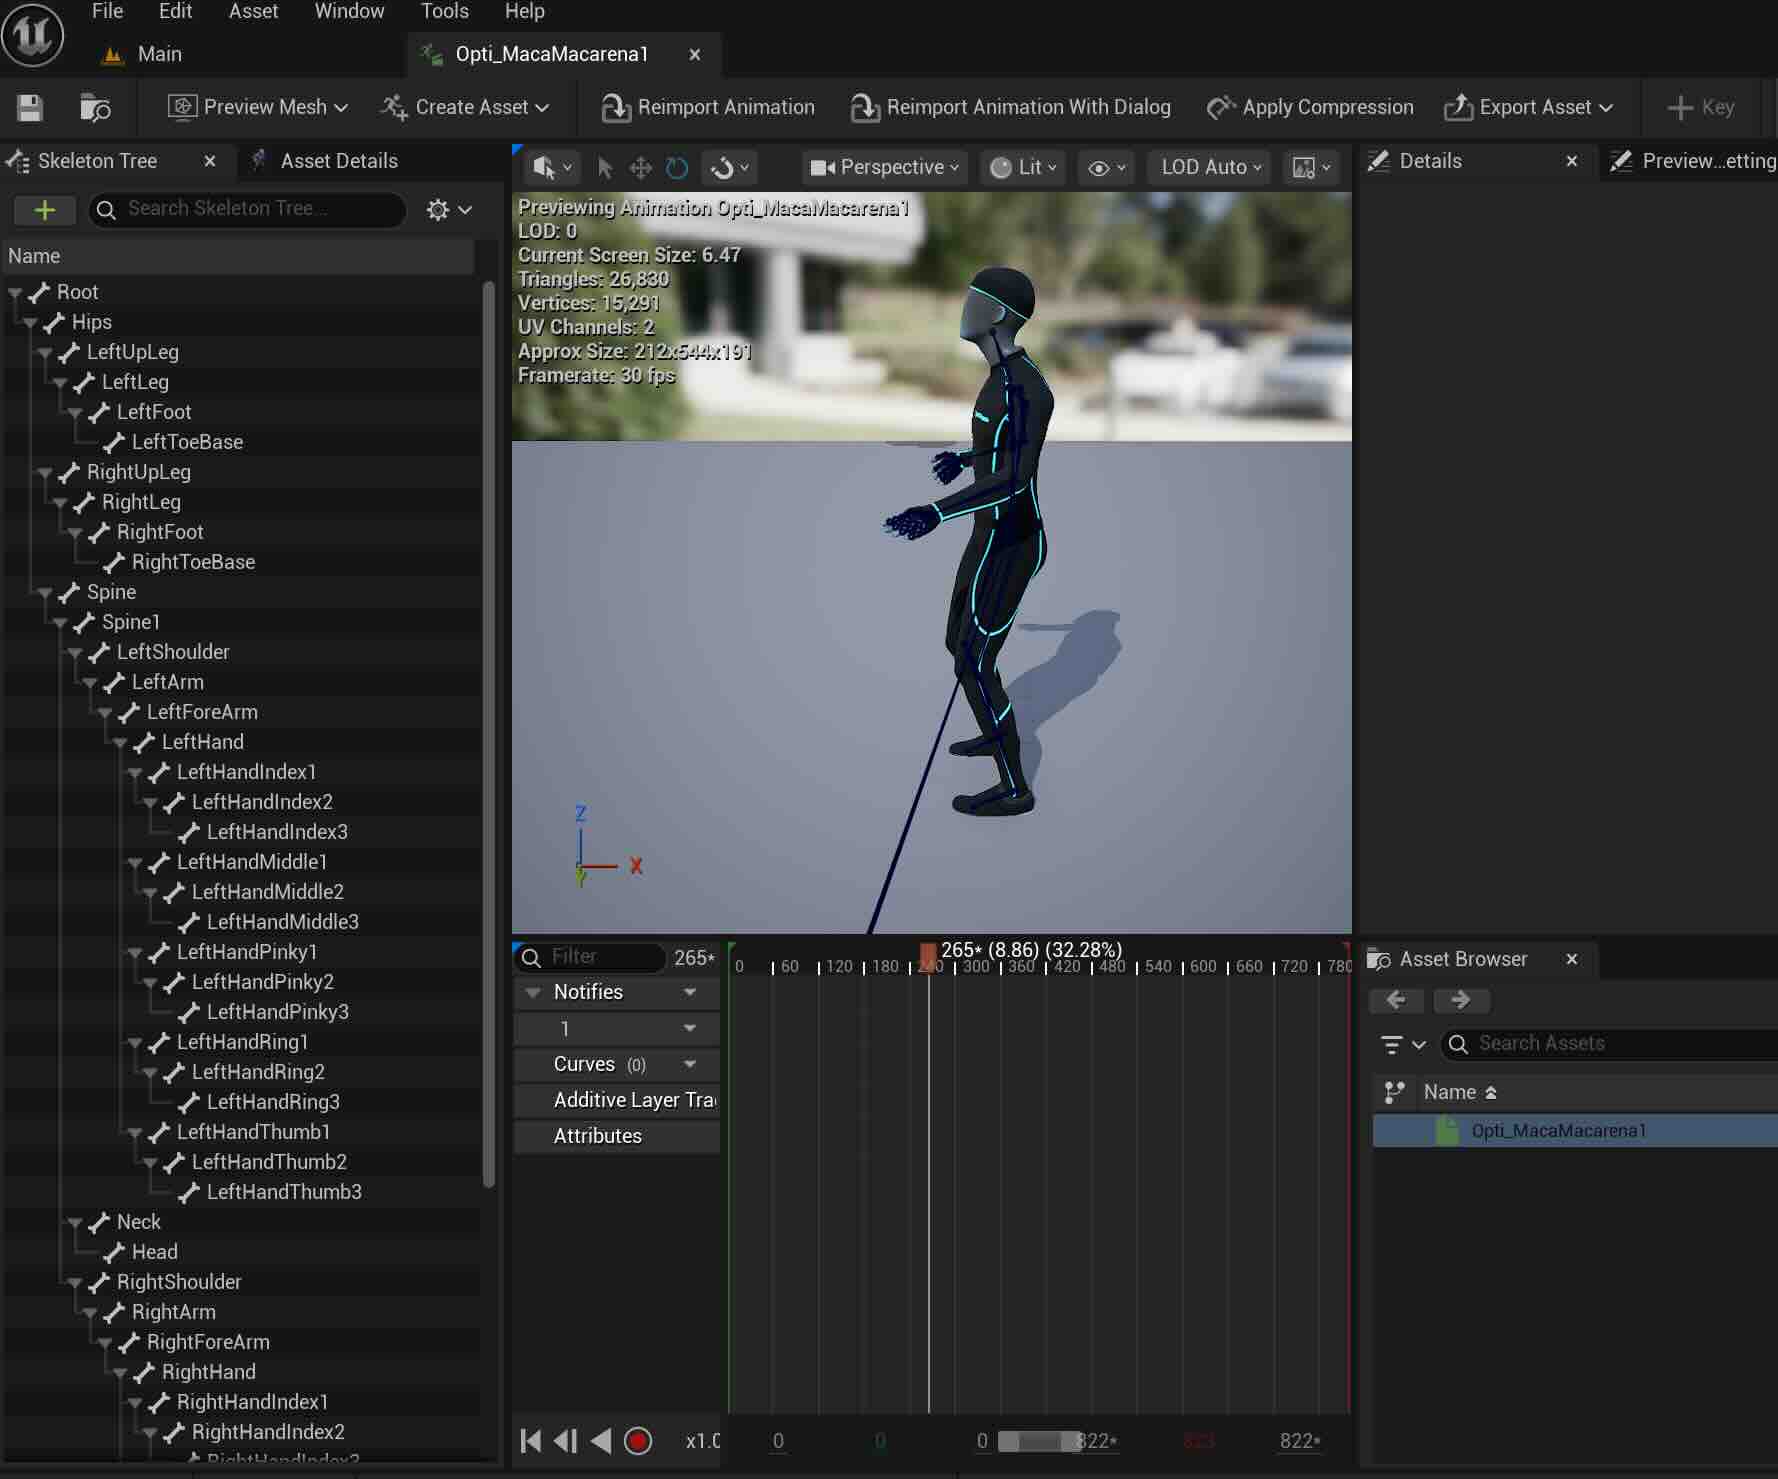
2) Assigning Body motion to Koda
Matched the skeleton and chained them by sections. It seems that the Mocap dots on the lower arms and the shoulder were too close, almost overlapping or intertwined. A-Pose > T-Pose transition and skeleton angle adjustment didn't help as expected. I decided to show a small portion of it in the sequence and mixed it with other characters.


I created another Metahuman character Natalie, with face motion via Live Link and retargeted it to Mixamo Motion. and kept Metahuman Hana with face motion. This setup allows the camera to smoothly cut between the three MetaHumans and the central Mixamo character, enhancing the sequence flow and completing the flash mob concept.
Adding Optitrack Skin Retargeted Motion character, and Mixamo skin+ Optitrack motion retargeted character.

3) Assigning facemotion to Koda via Live Link, same for Natalie and Hana.
Baked the body motion and added the face motion- this tutorial then matched it with the soundbite.


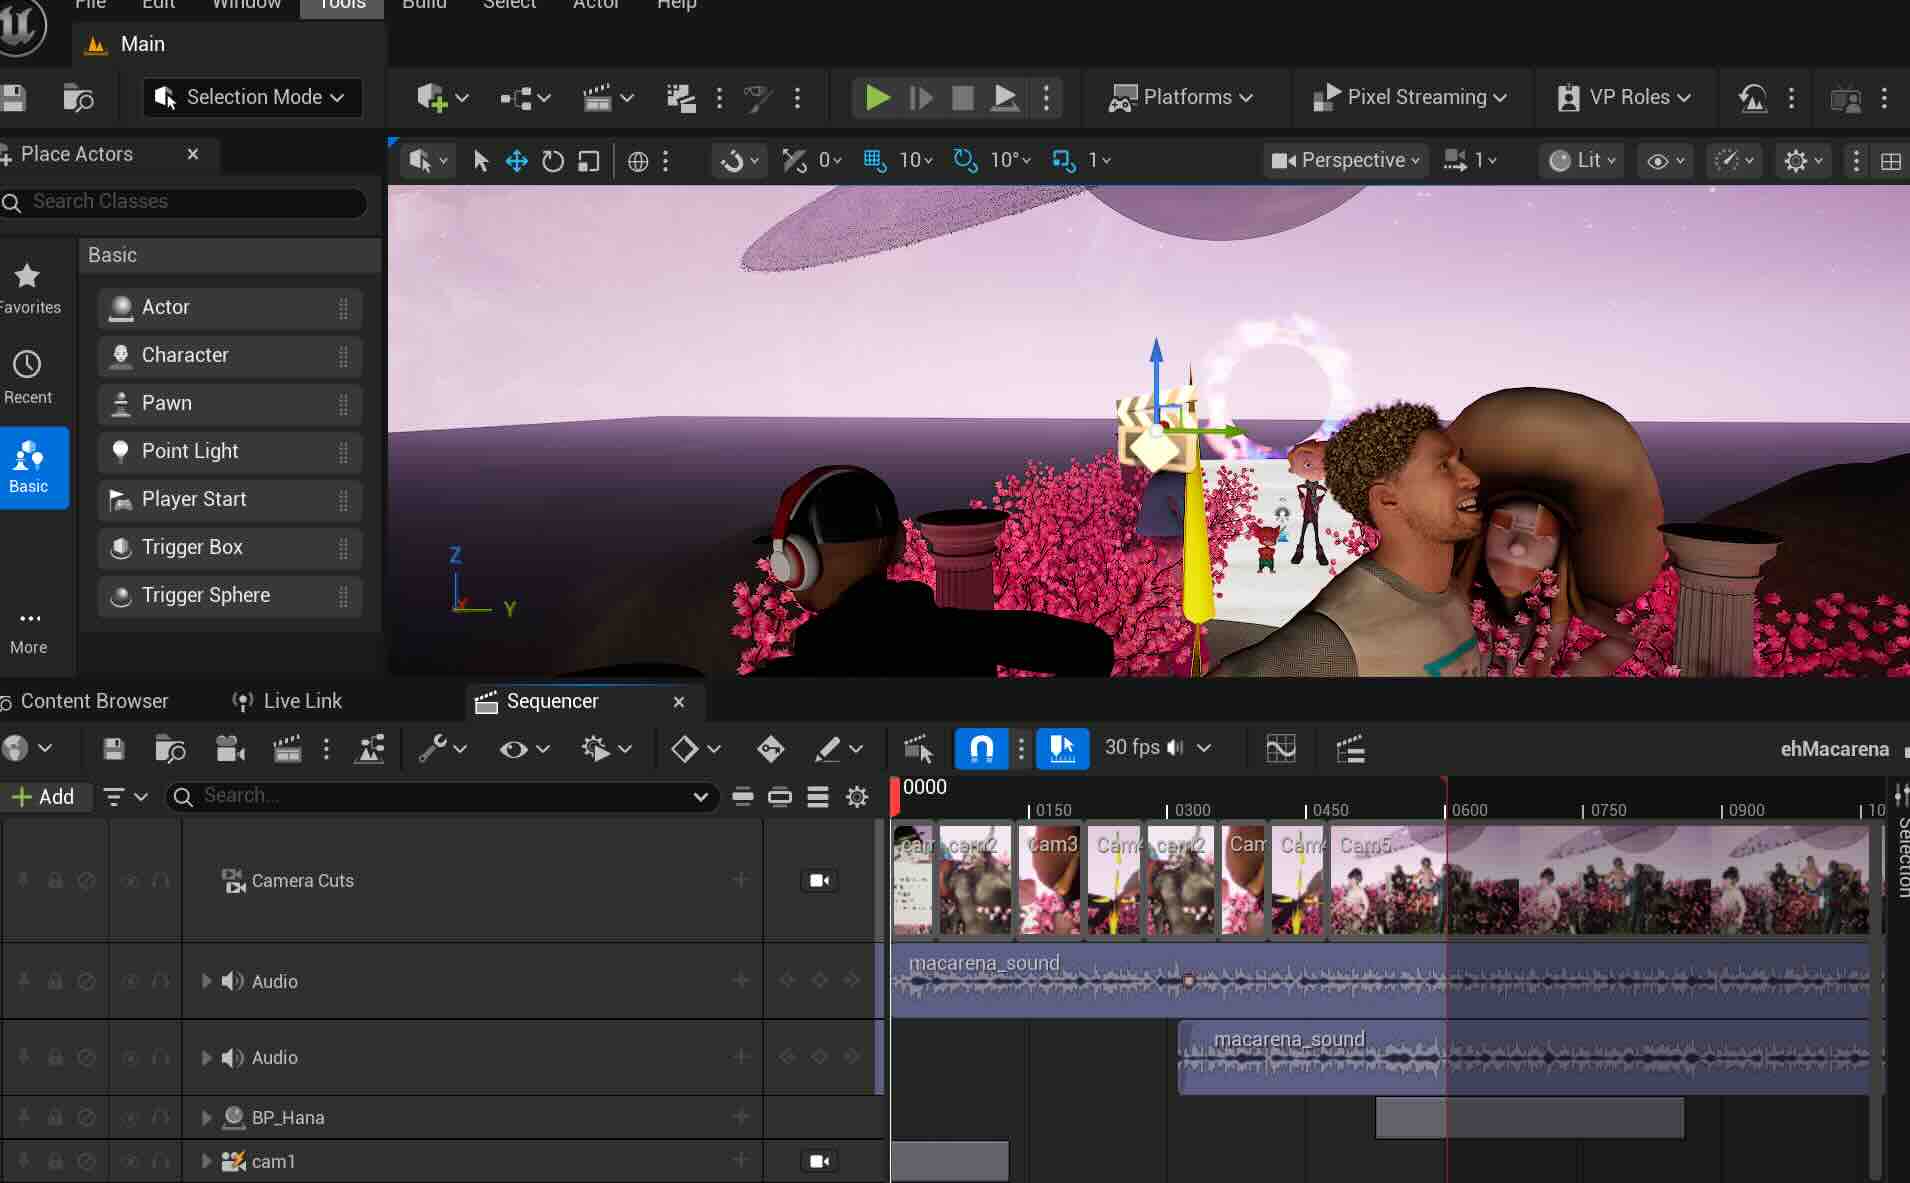
Assigning Camera
(Camera 2) CO - Hana - Face motion "let's go riiiight "
(Camera 1) VLS- Front- Characters dancing - 1 bar
(Camera 3) LS- Mixamo group dancing - 1 bar
(Camera 5) CO- Natalie dancing - 1 bar
(Camera 6) MS - L to R (no panning) Mixamo group dancing - 1 bar
(Camera 1) LS- Front- Characters dancing - 1 bar
(Camera 4) MS- Koda singing - 1 bars
(Camera 5) MS- Natalie singing - 1 bars
(Camera 3) LS -Mixamo group dancing - 1 bar
(Camera 2) -CO- Hana- Face motion " ehhh Macarena"
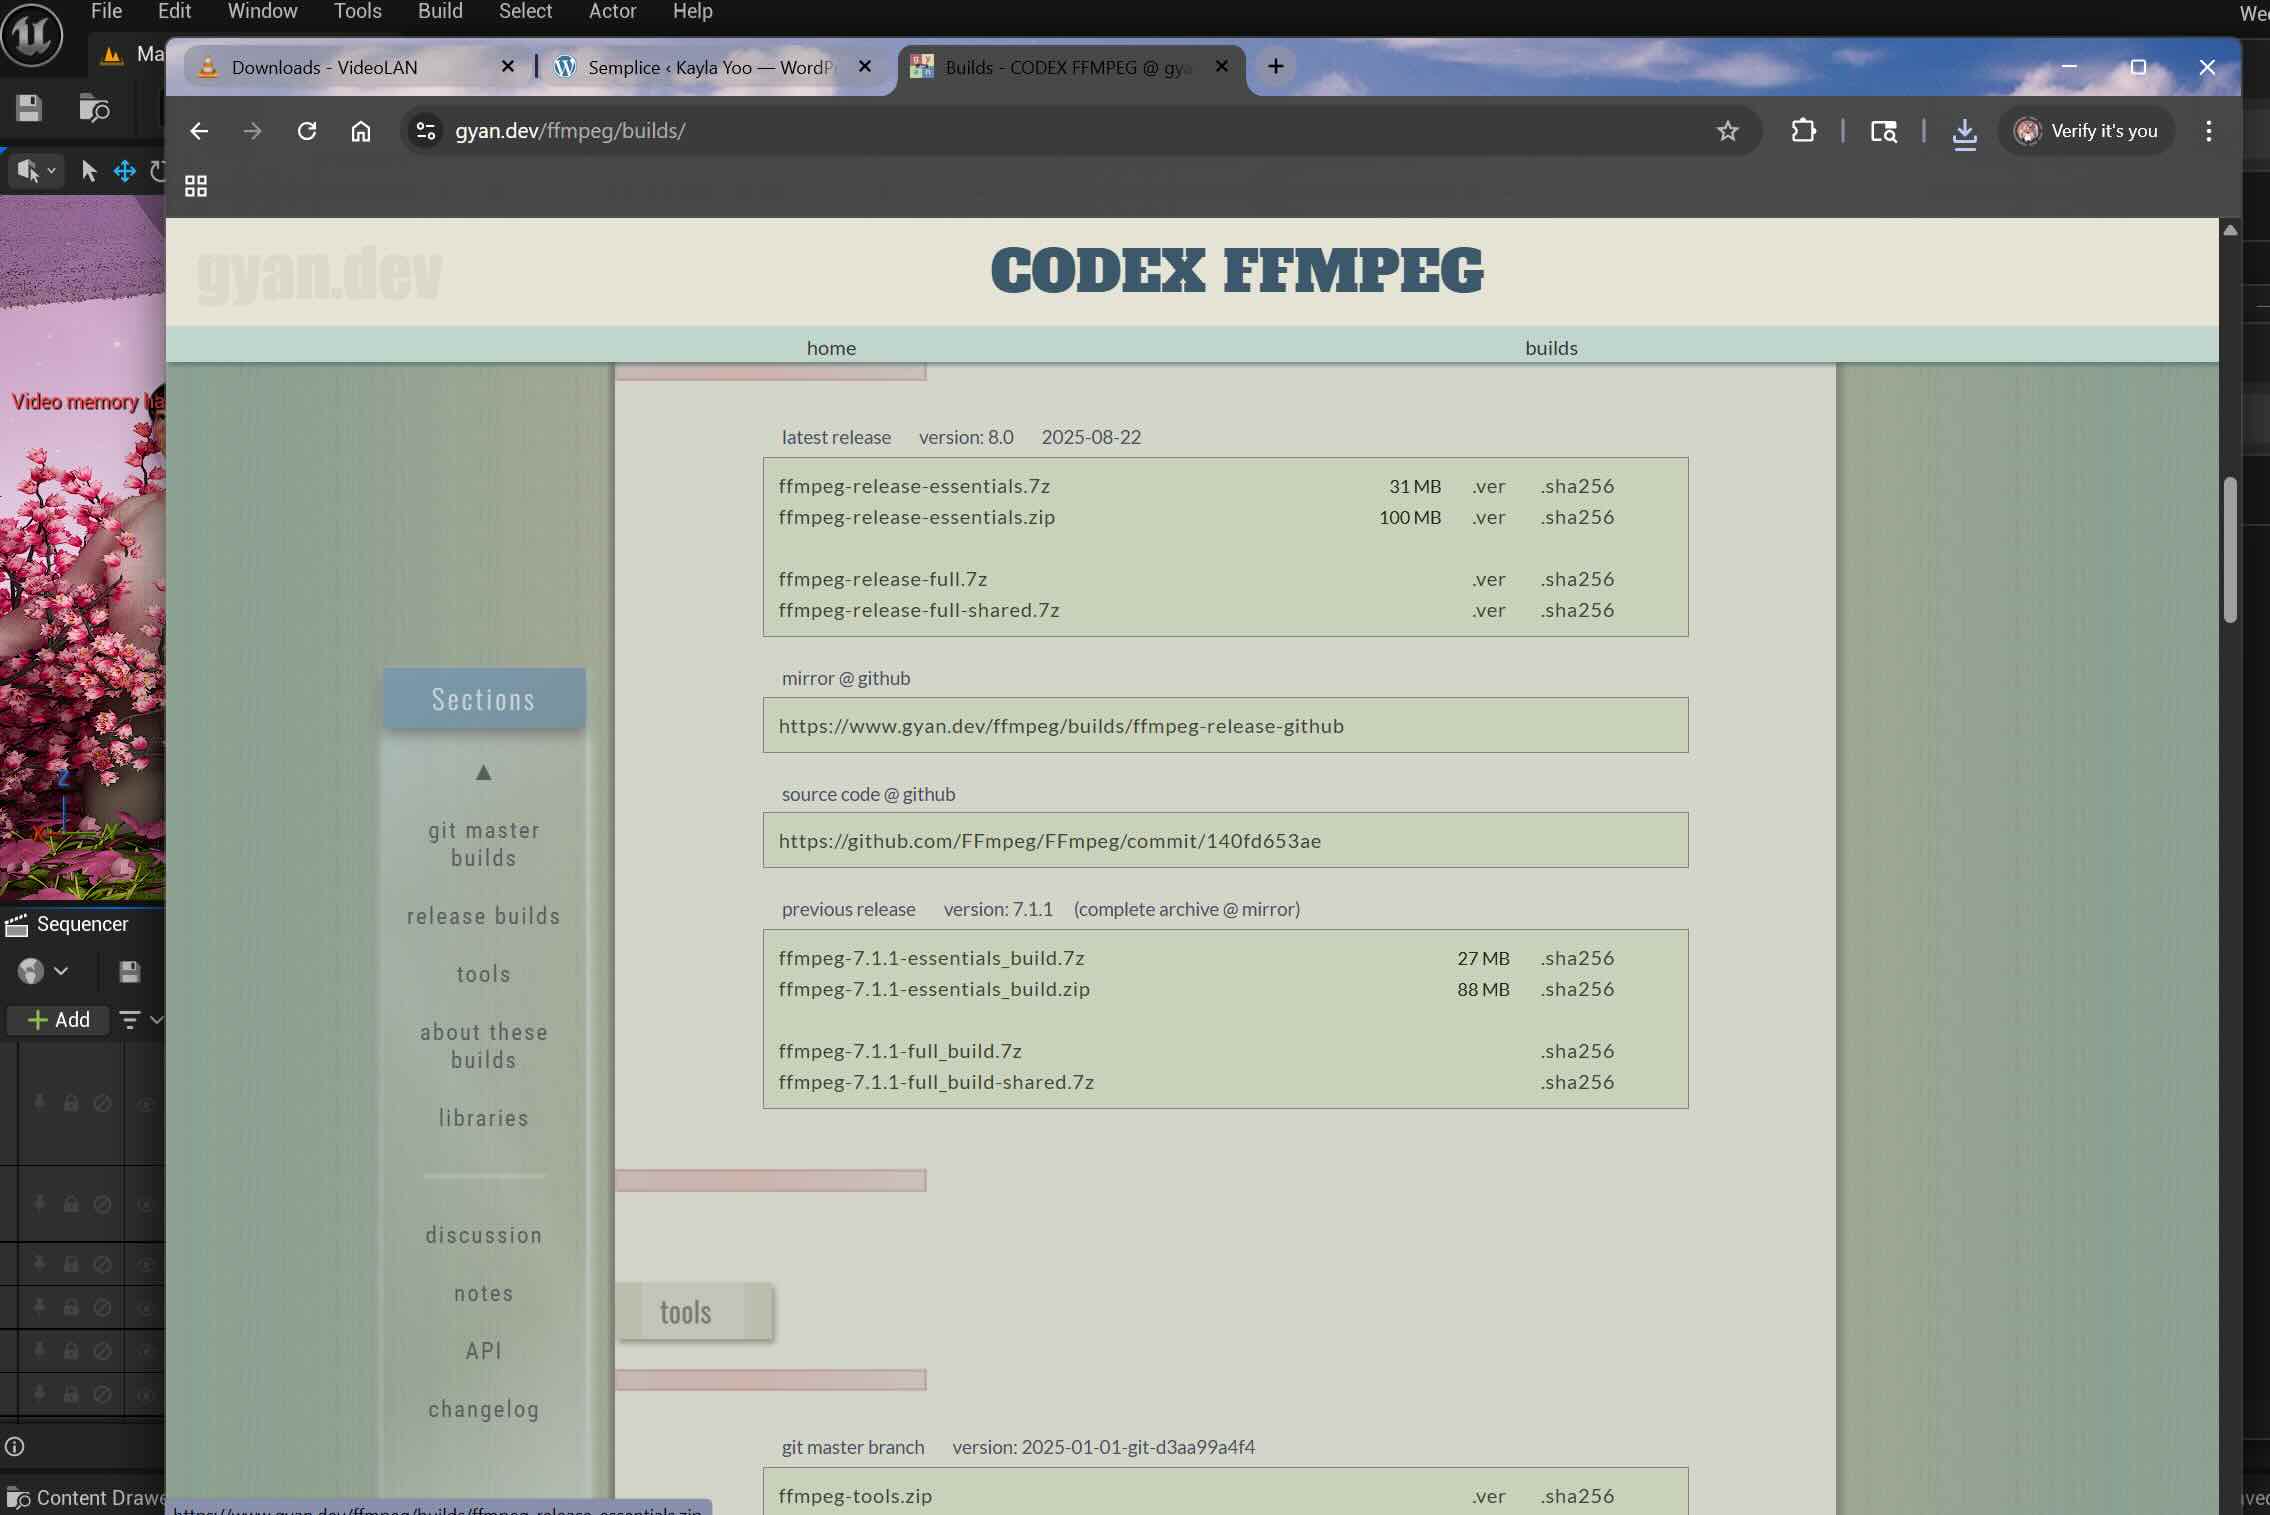
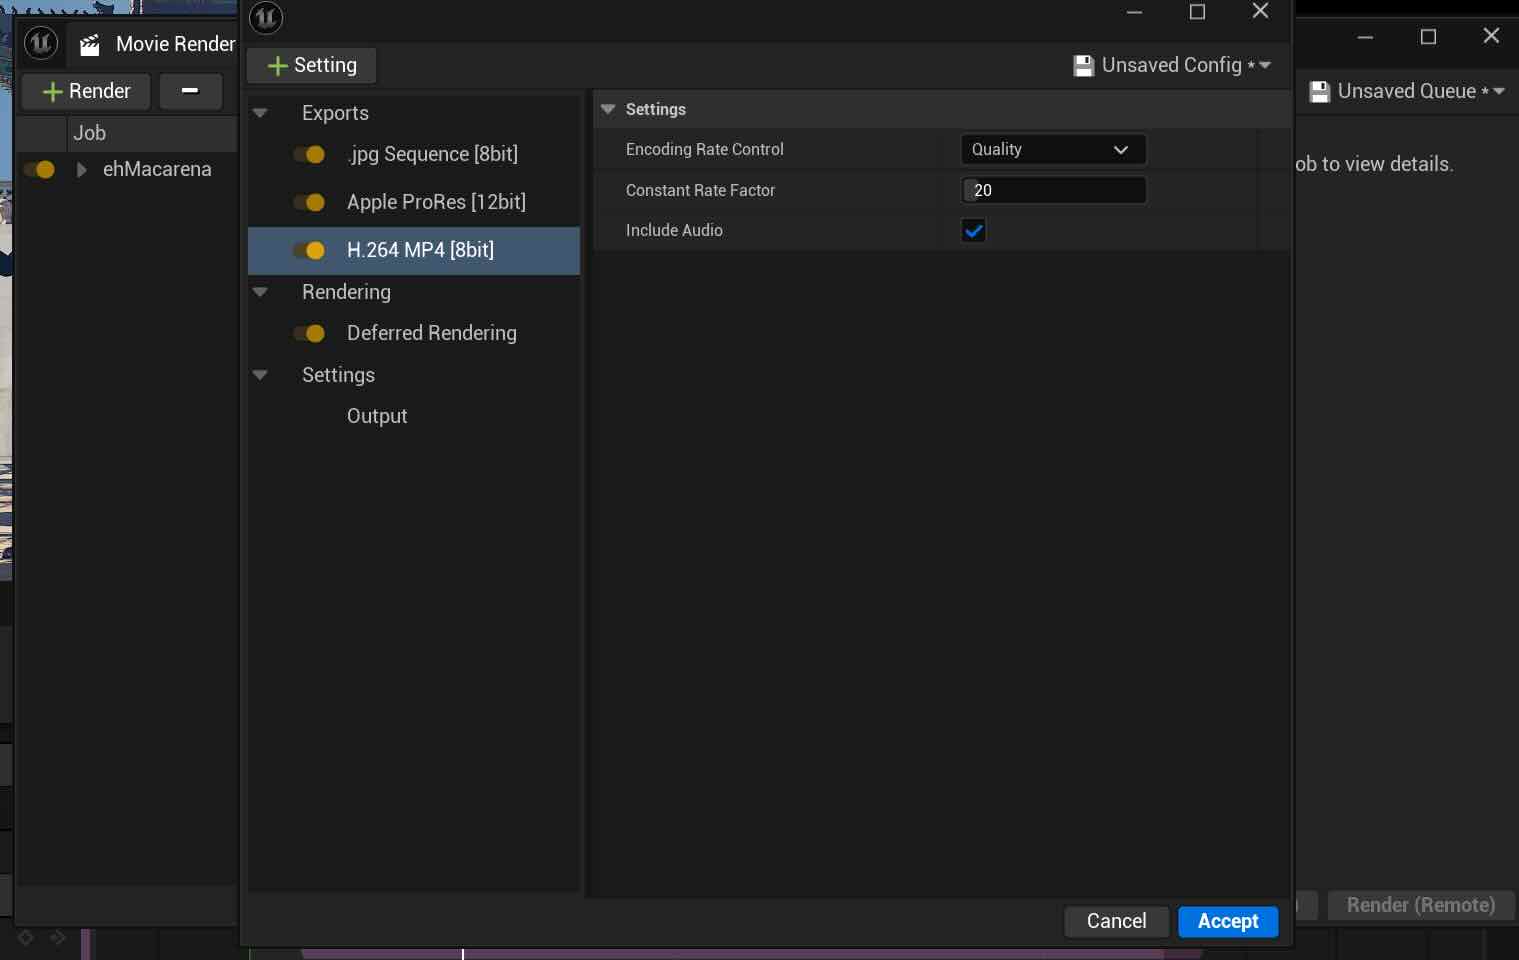
Rendering
I followed this tutorial for the render, installed the FFmpeg and rendered the video in MP4 and MOV, using H264 & Apple 422 HQ.
Final Video
Week 6
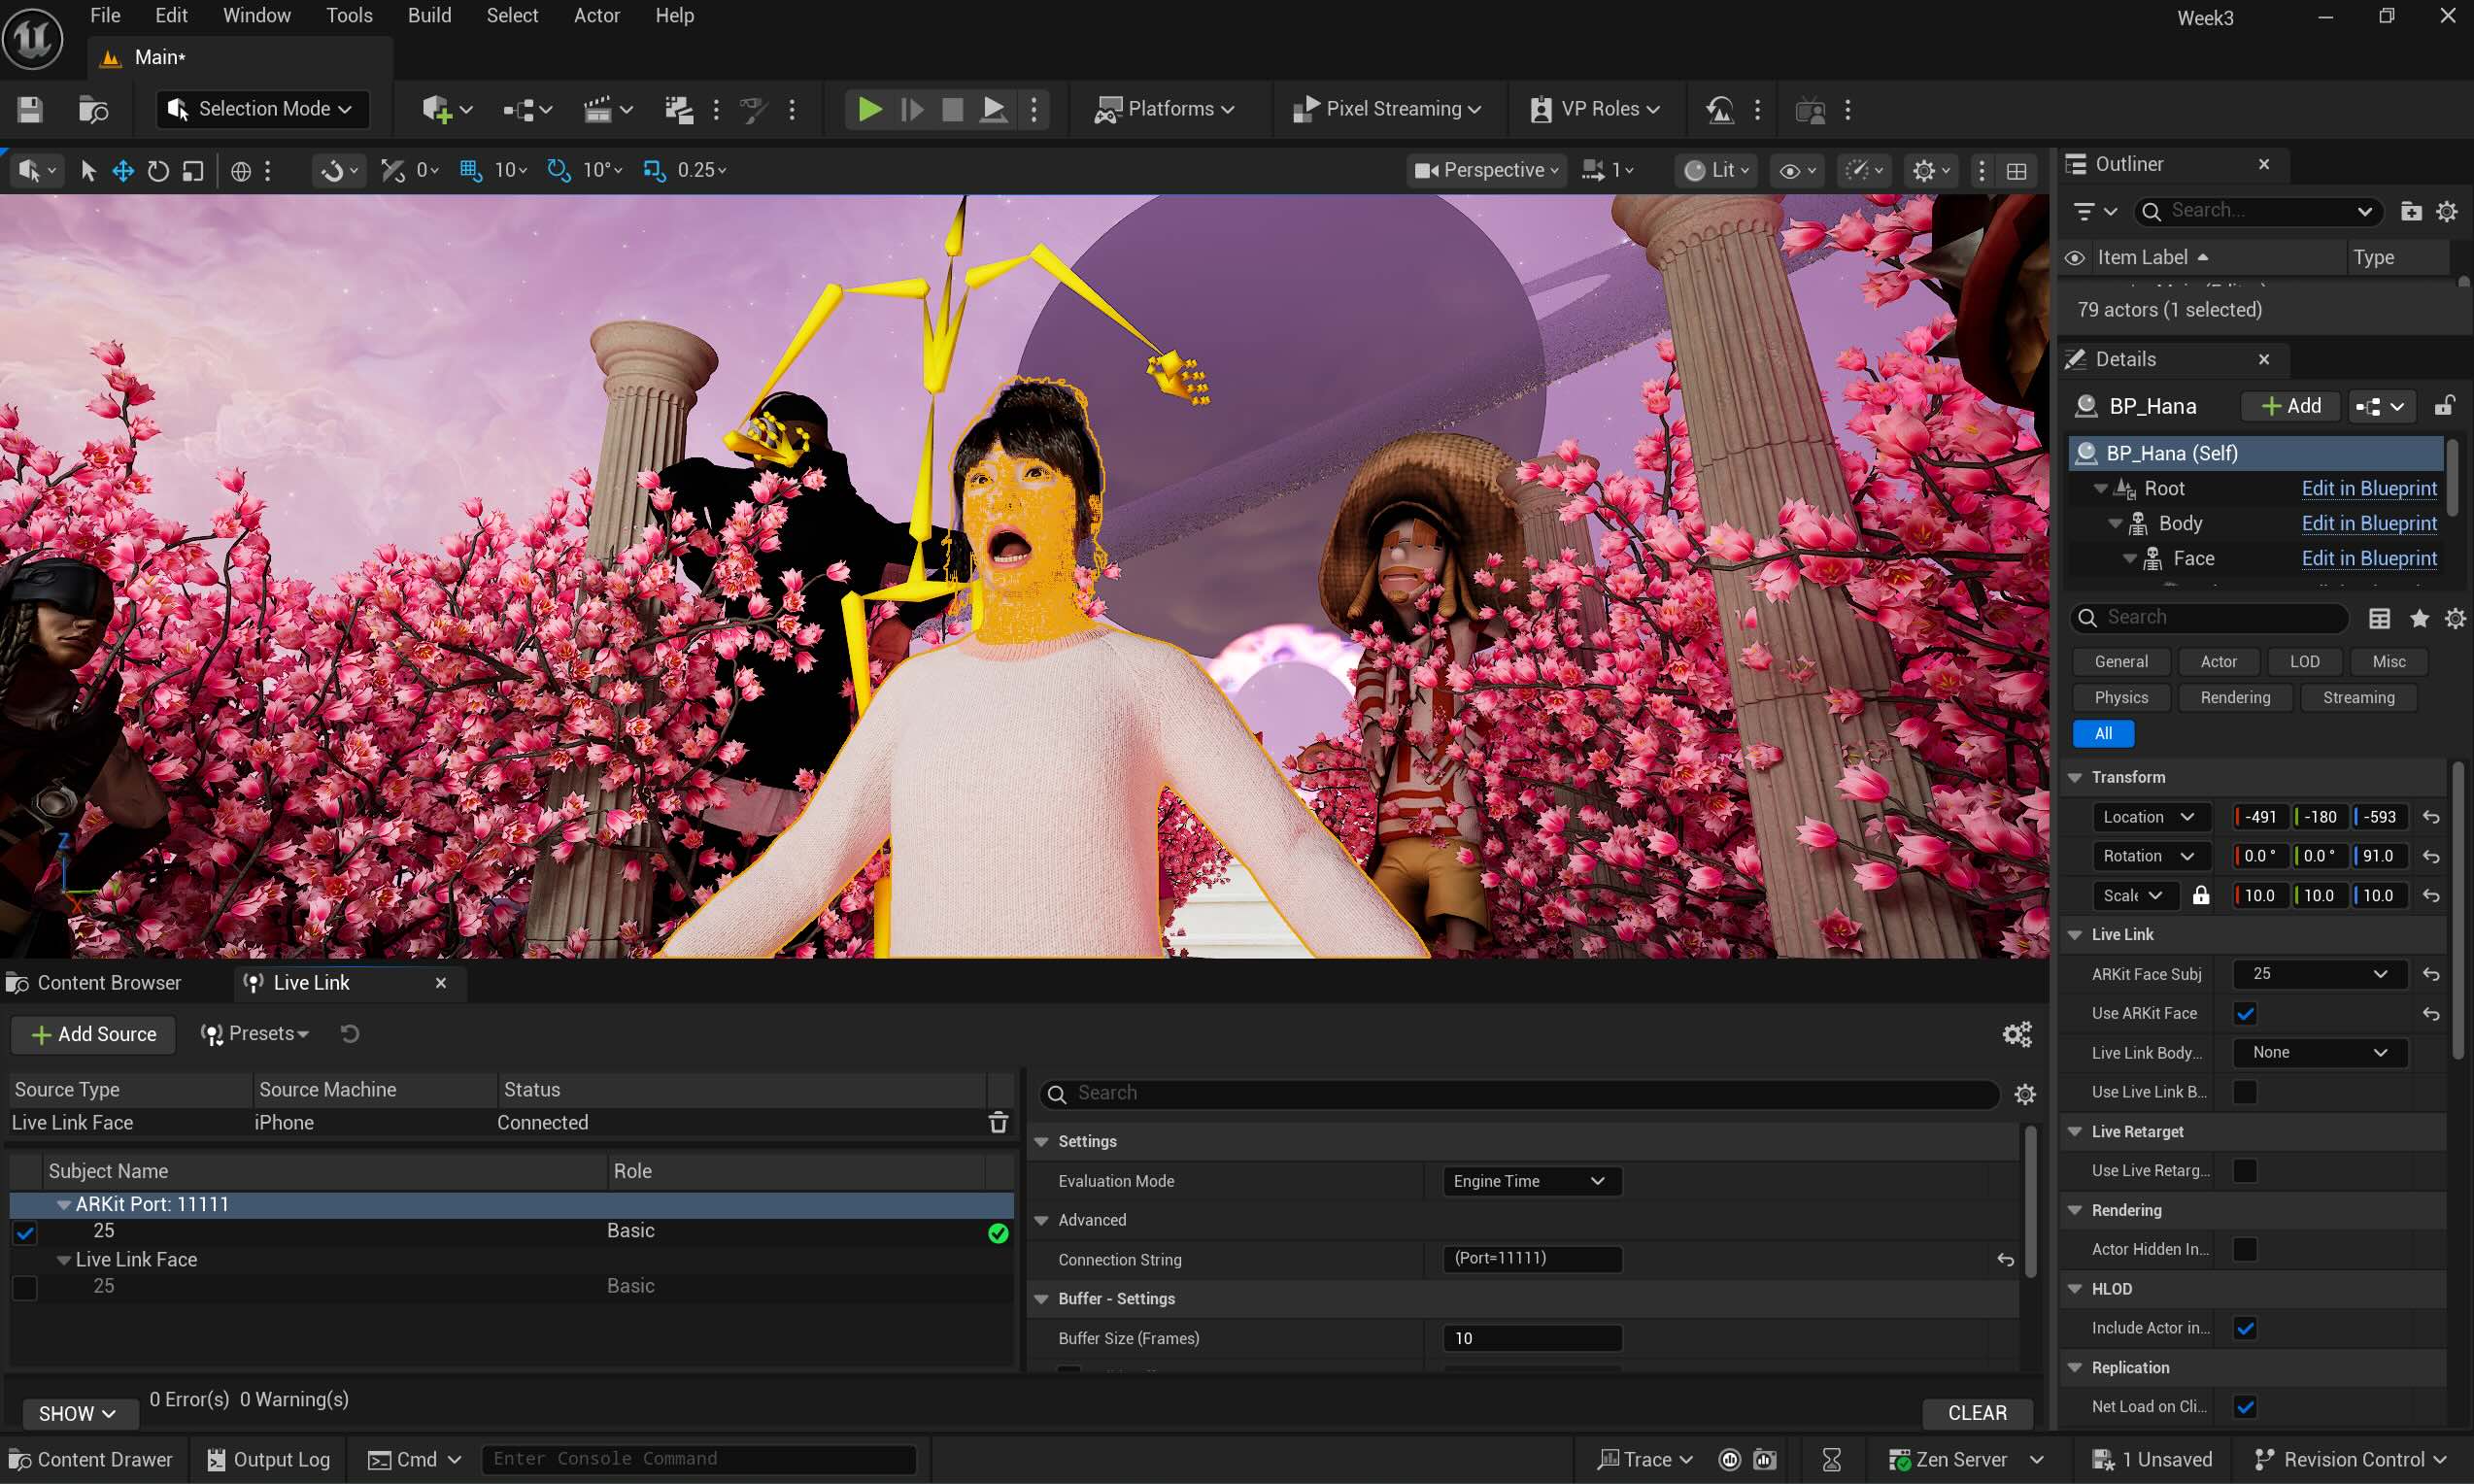
This week, I worked on connecting Metahuman with Live Link Face App and Unreal Engine 5. My goal was to record the Metahuman character Hana to sing "ehh Macarena".

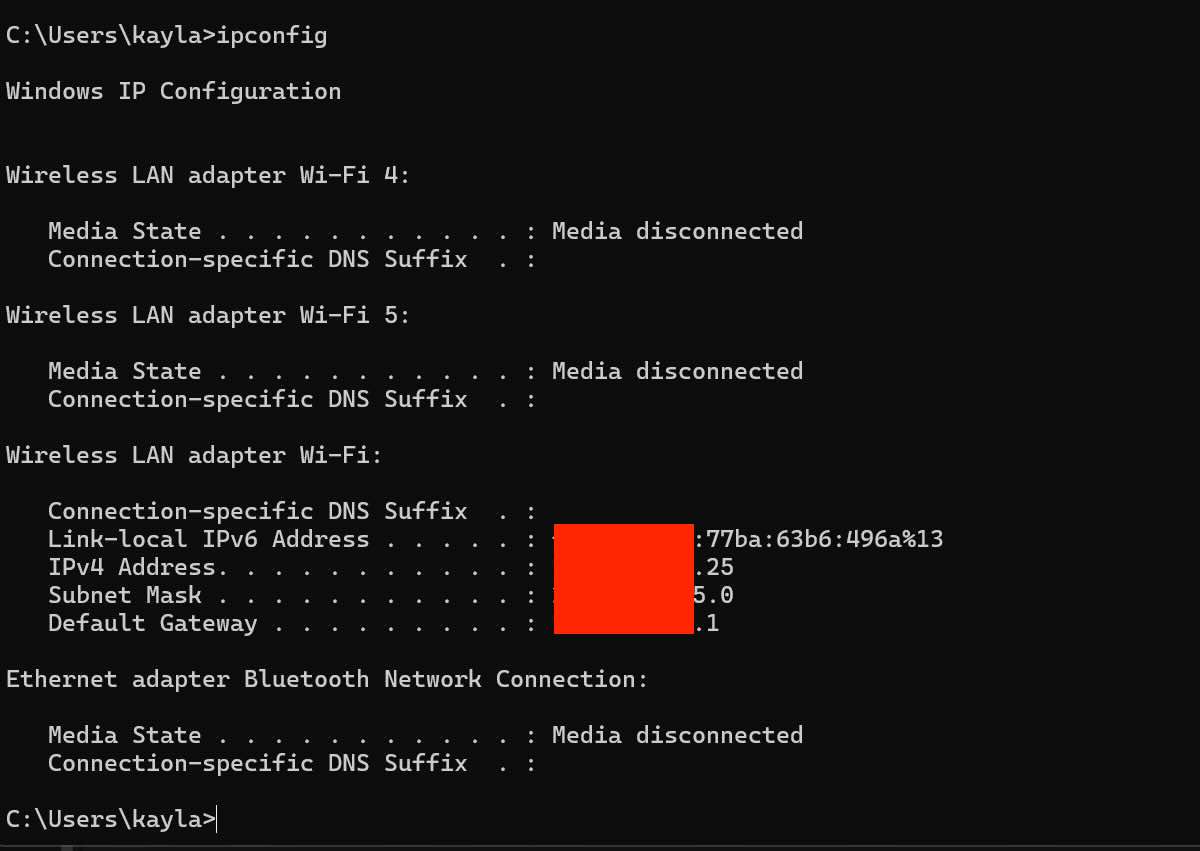
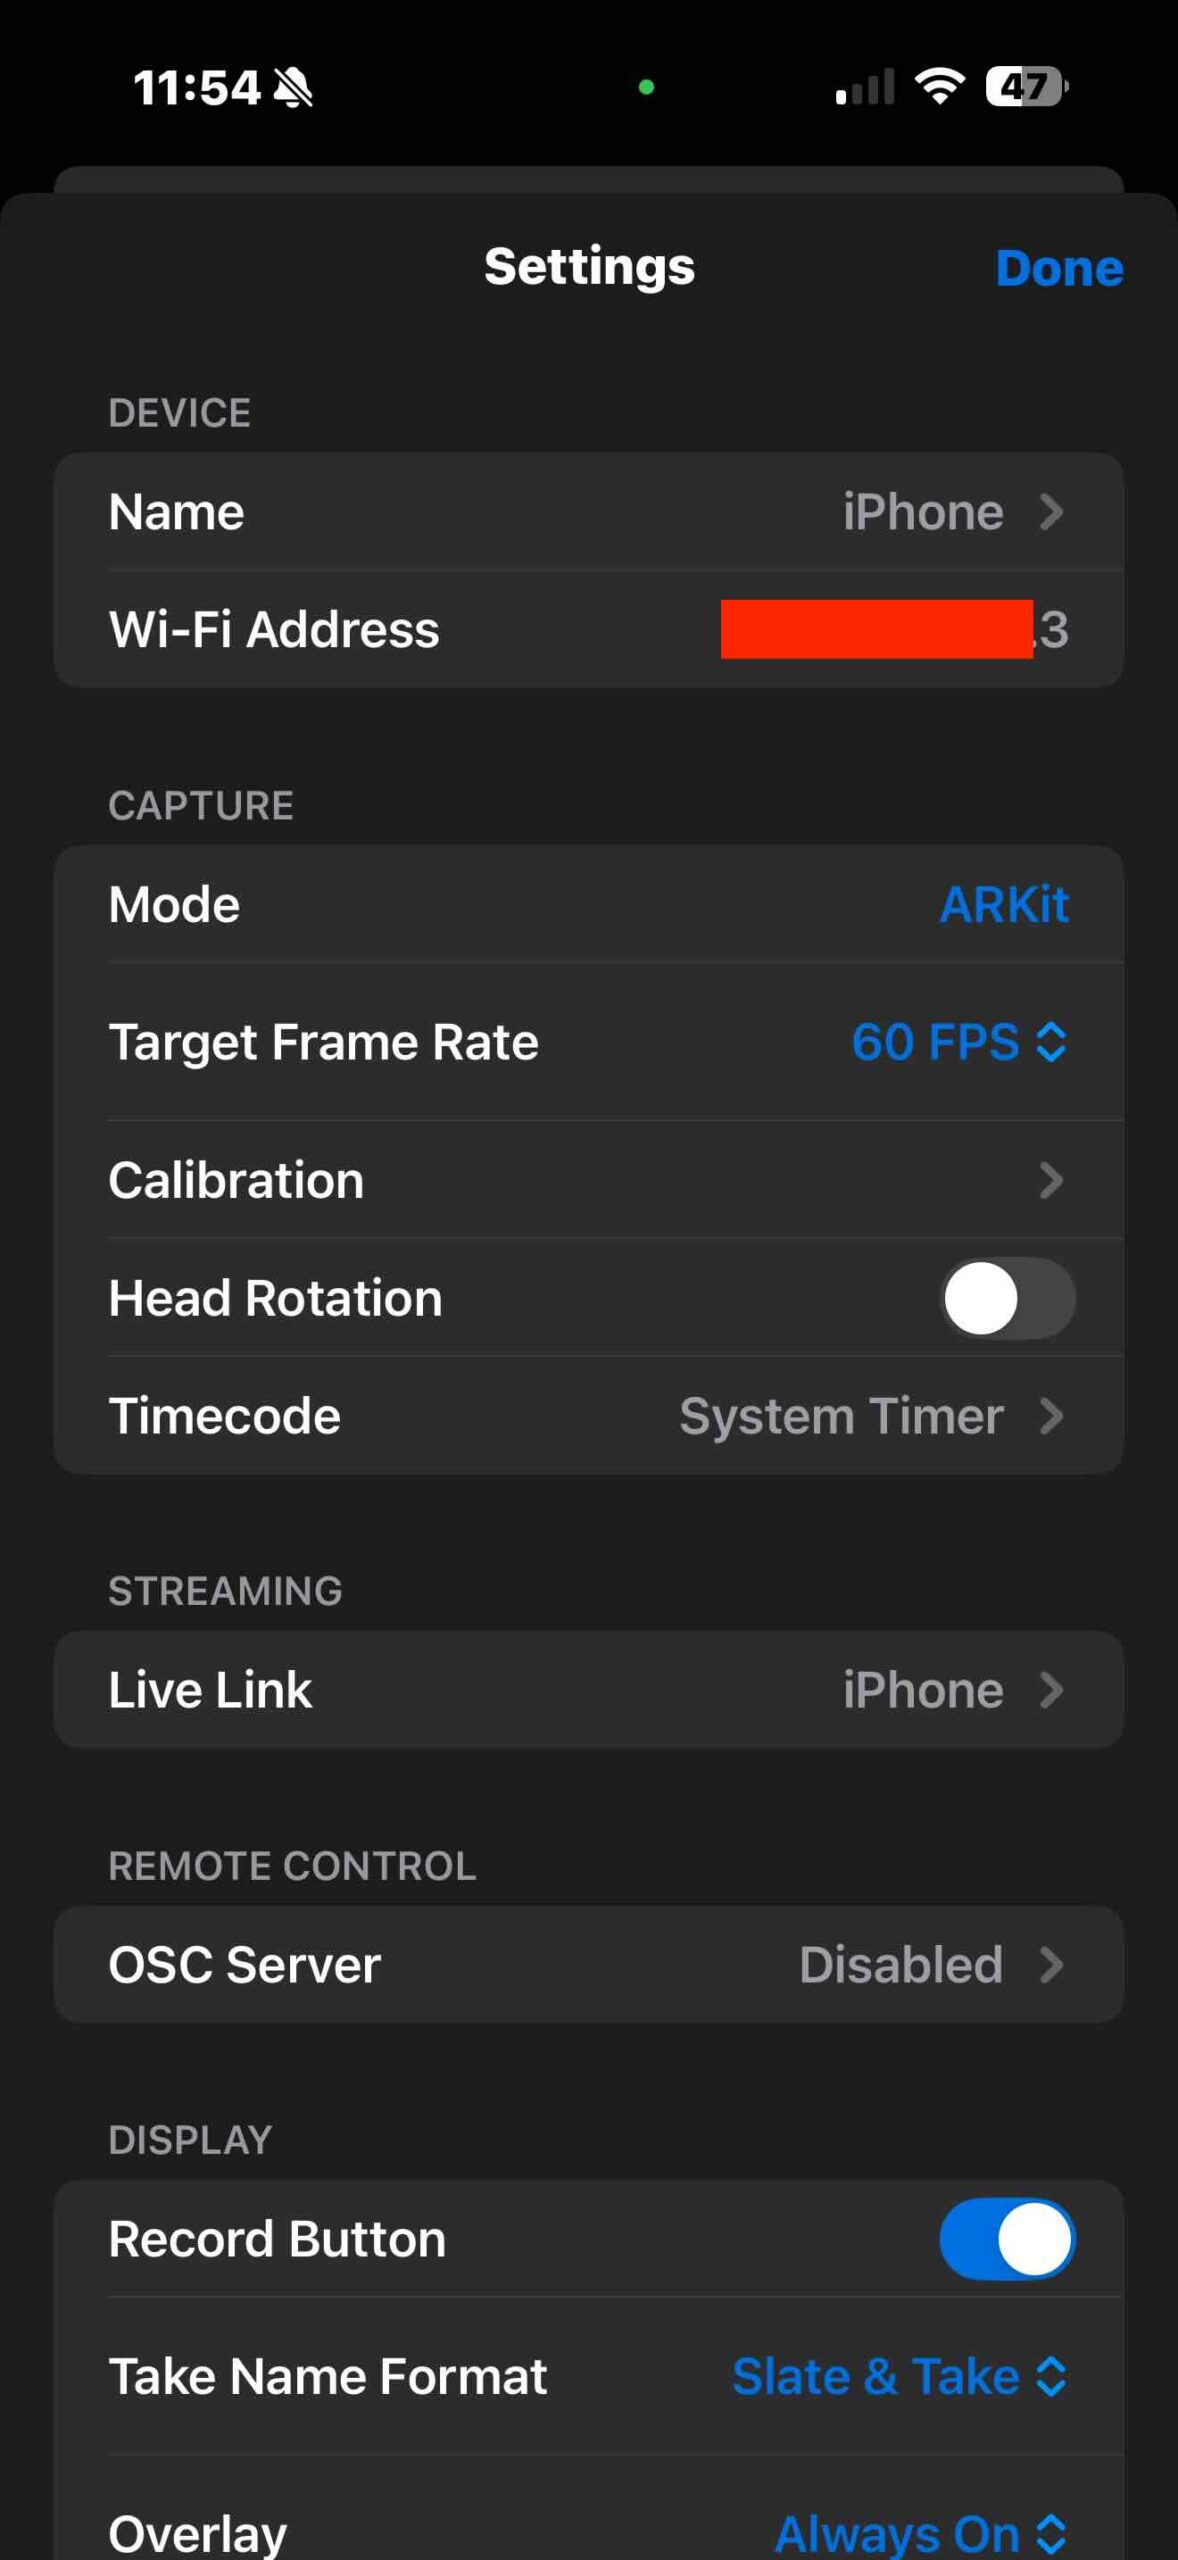
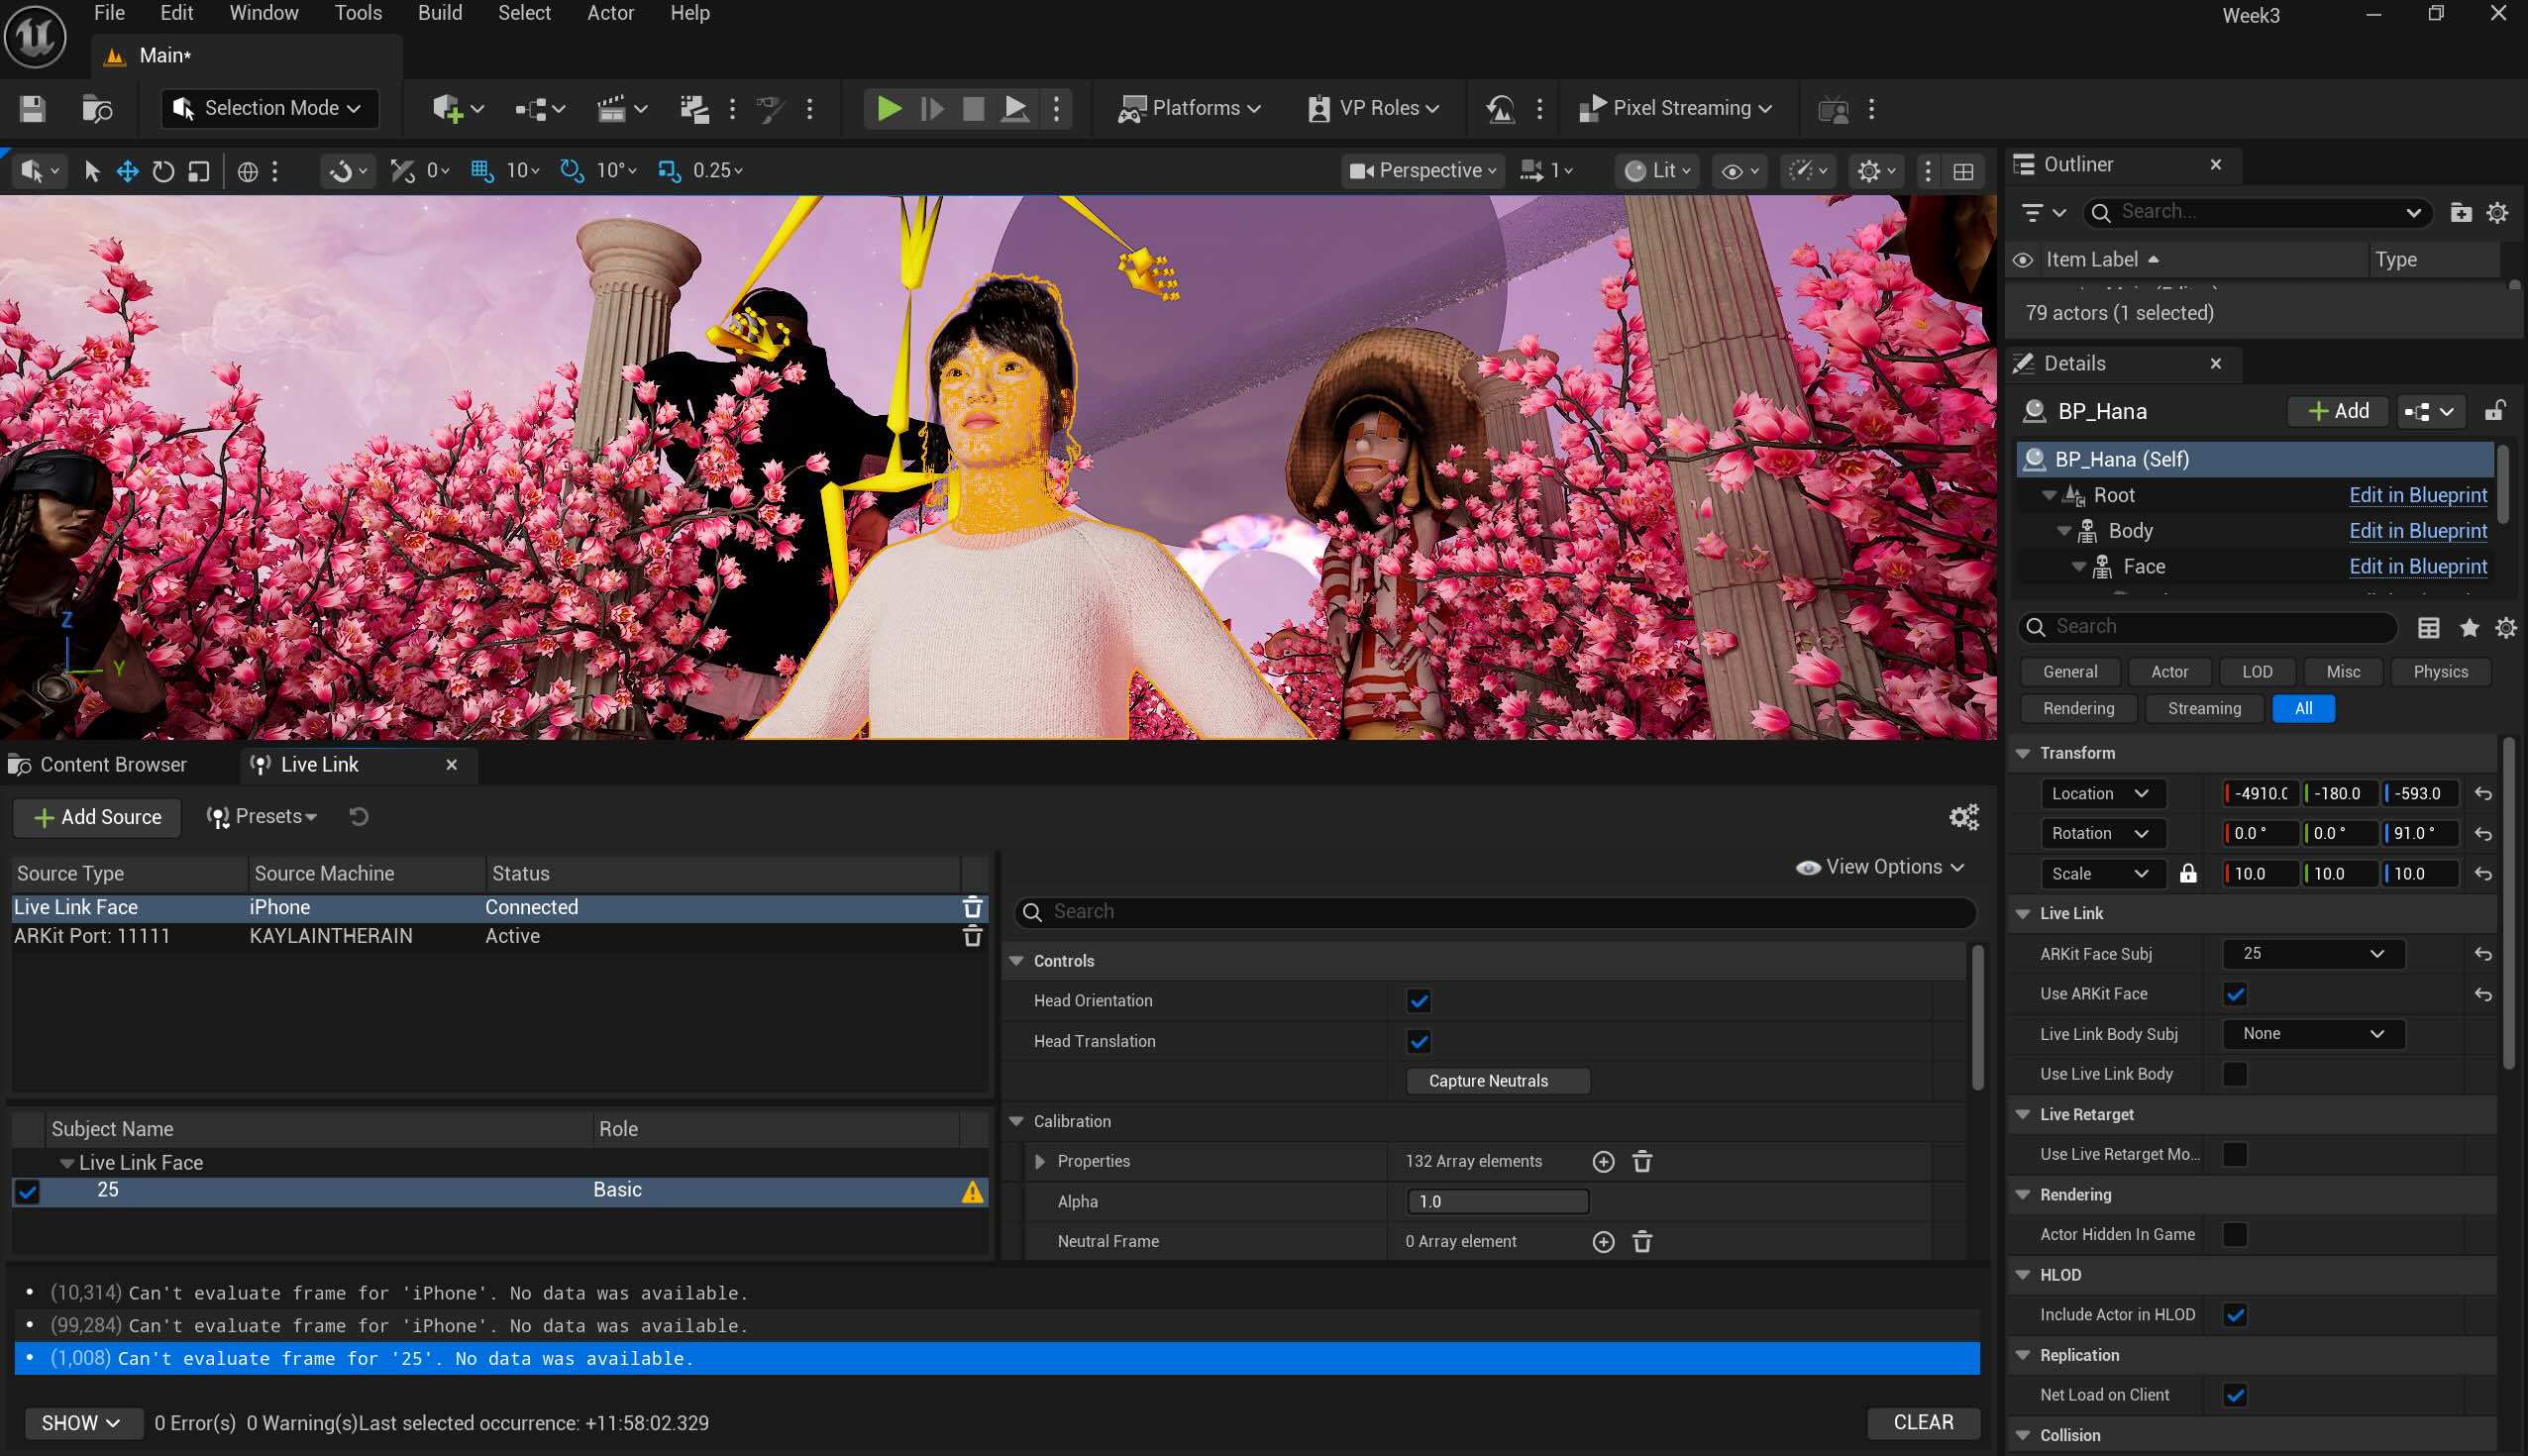
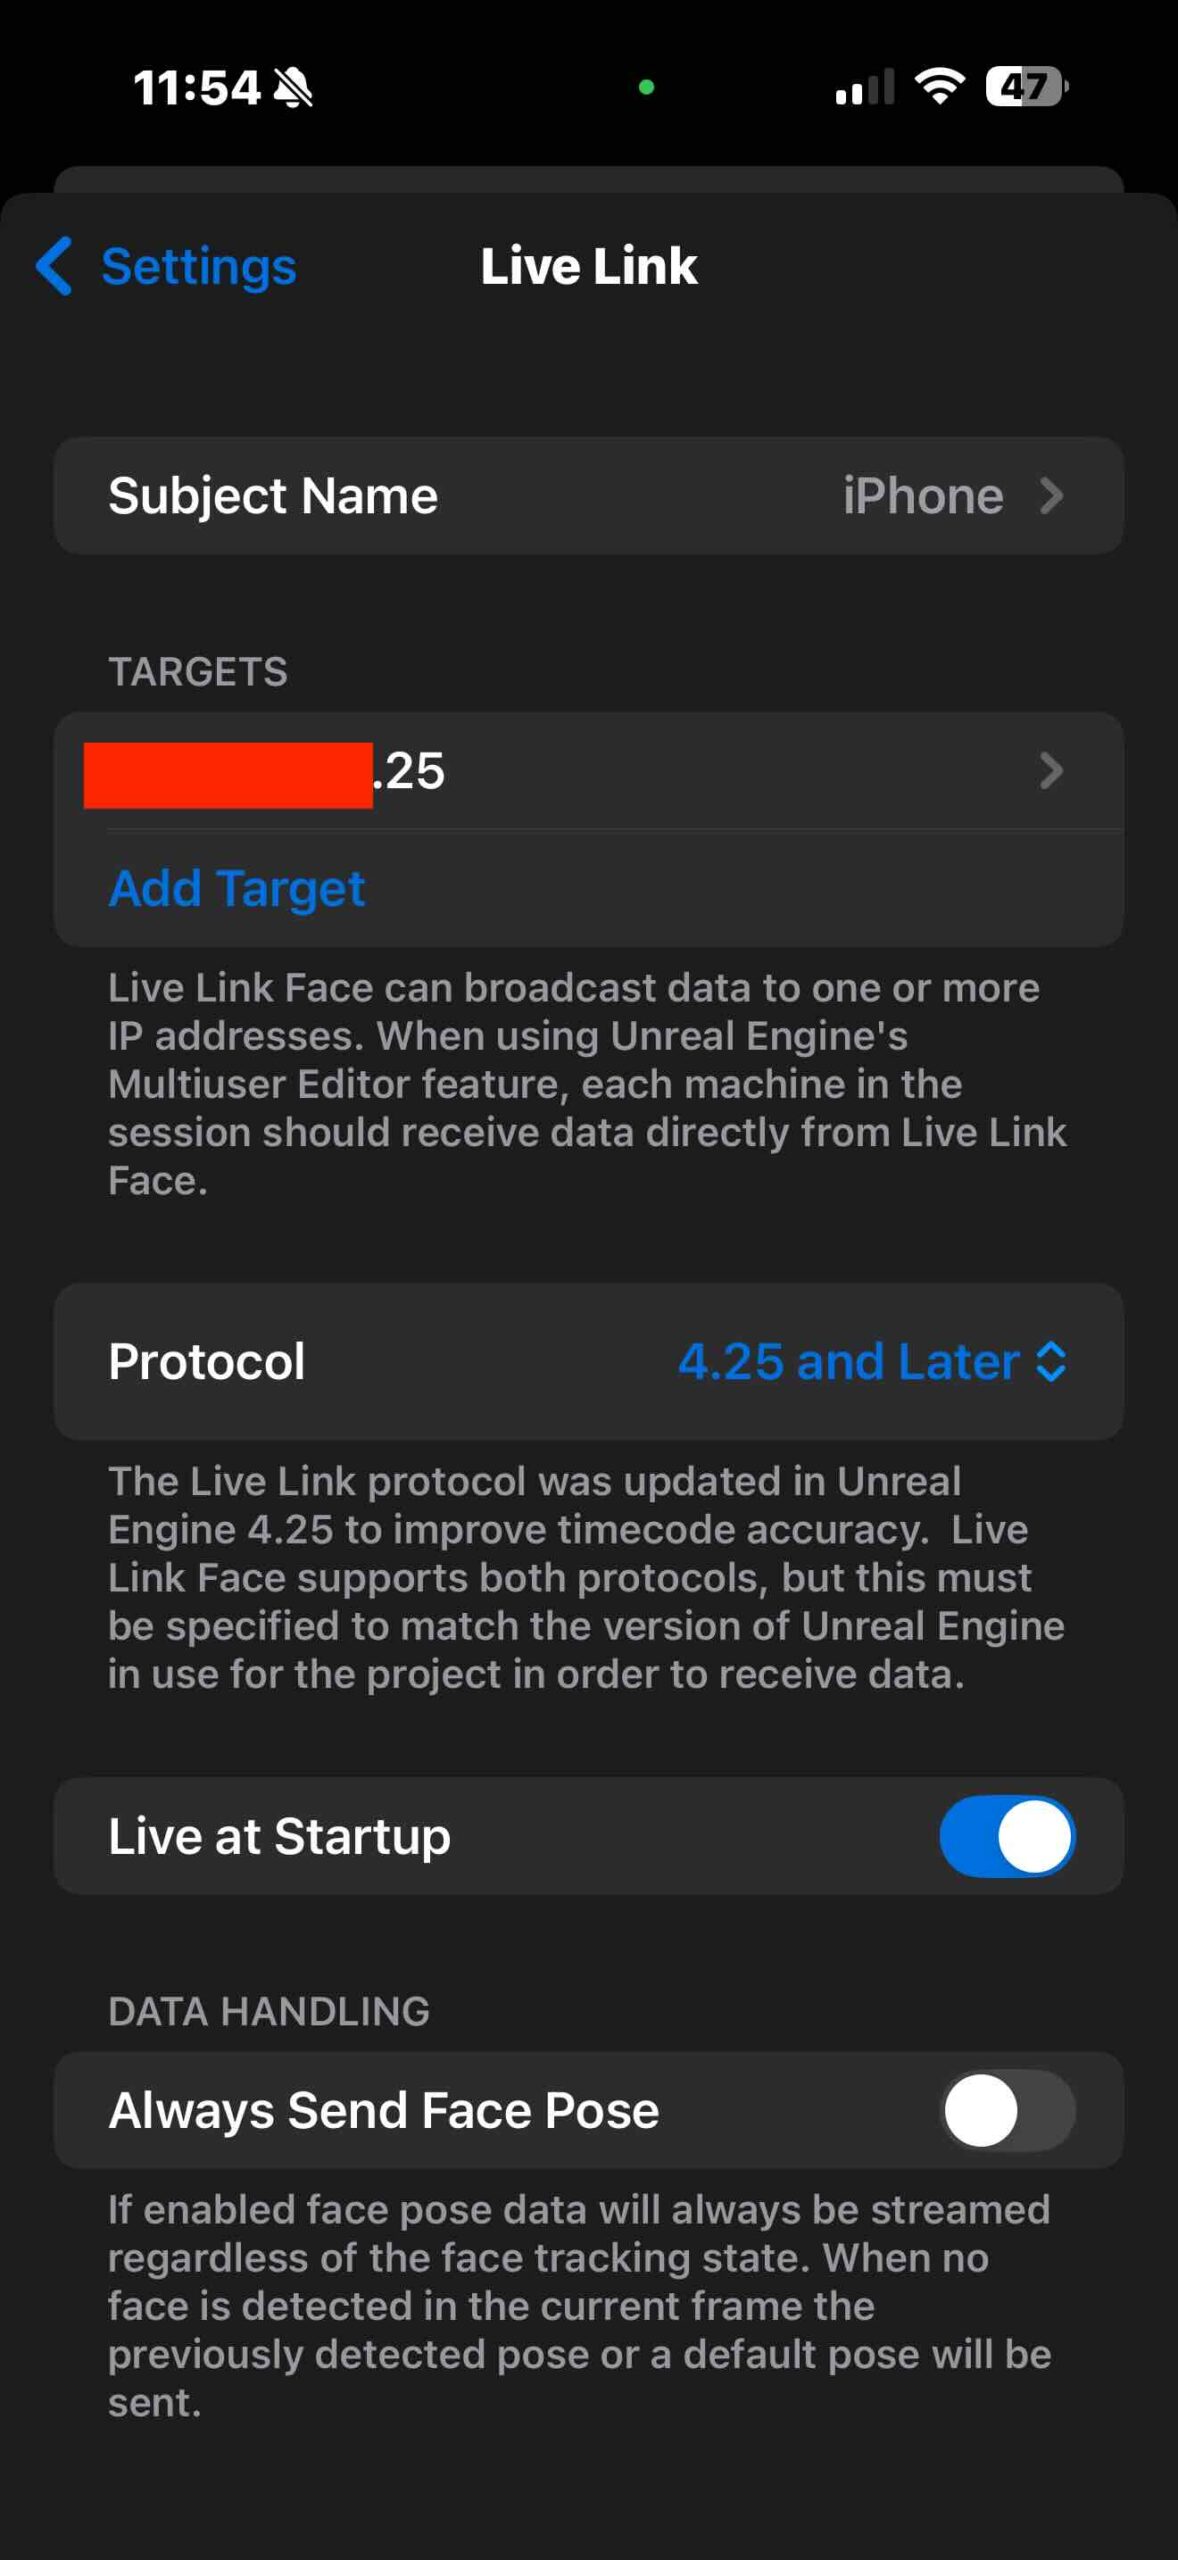
There was a connection issue between the LiveLink App and UE 5 due to IP address mismatch.
My computer: xxx.xxx.xxx.25
My phone detects: xxx.xxx.xxx.30 (or 3)
Both "xxx.xxx.xxx" numbers are identical as they share the same Wi-Fi. I made the app targeted to xxx.xxx.xxx.25, it still didn't recognize. I added "Live Link Face" in the Live Link window after deleting the ARKit port and it still didn't work. The solution was to restart the computer, delete the LinkLink Face app, and reinstall it. The Link Link on the UE5 suddenly detected the iPhone ARKit Port, which is separate from the Live Link Face I manually added and the signal turned green.
For setting the sequence and recording, I followed the instructions in this YouTube tutorial.

1. Adding Sequence
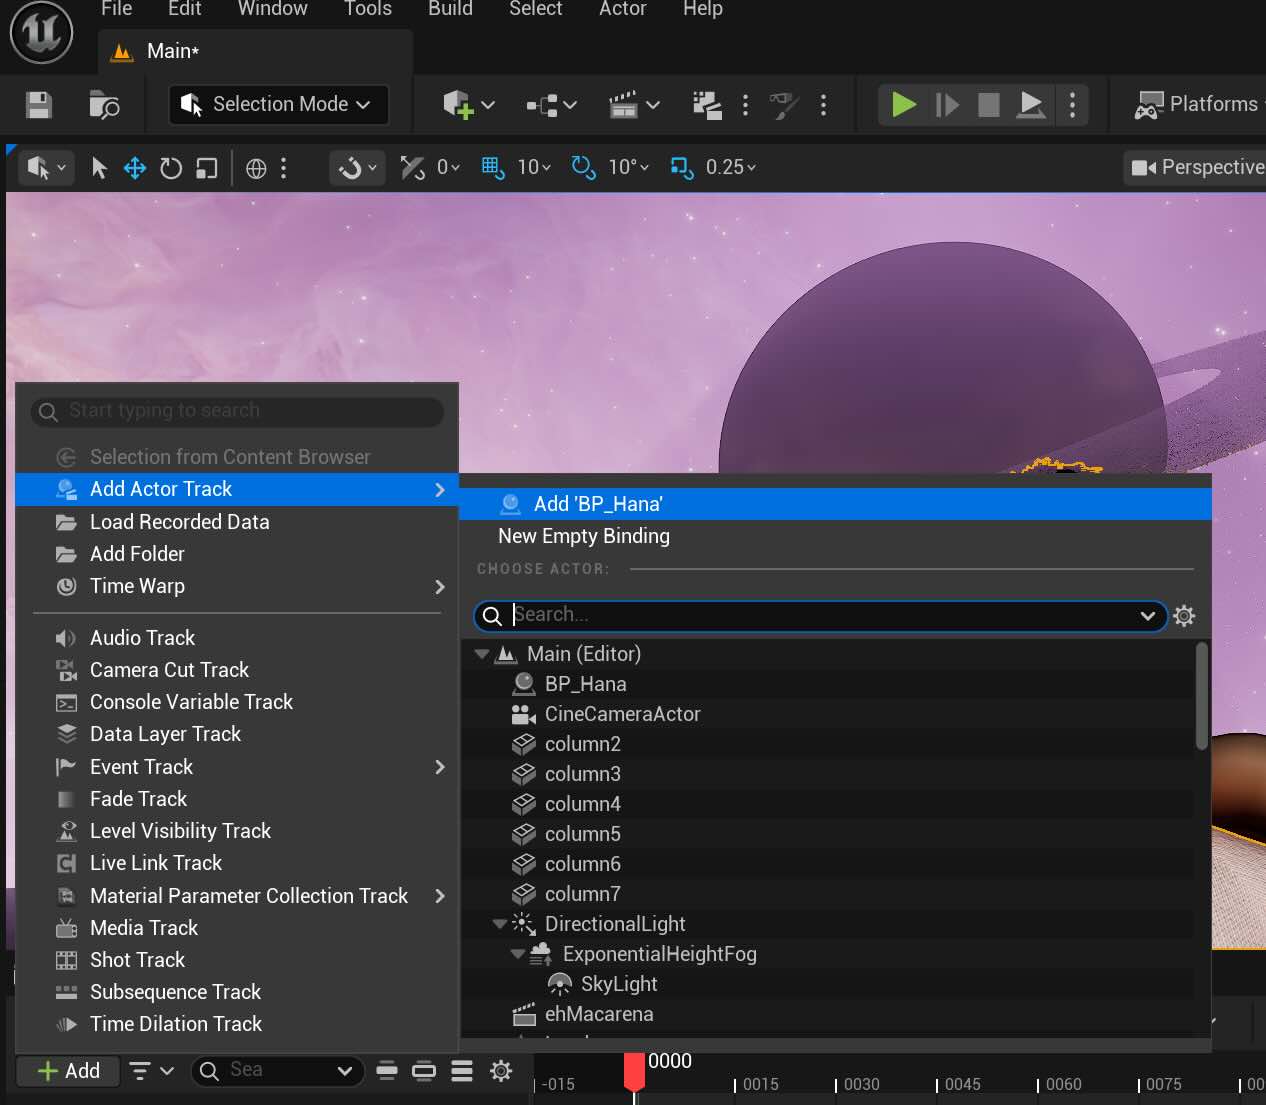
2. Add the actor- BP_Hana, the Metahuman character
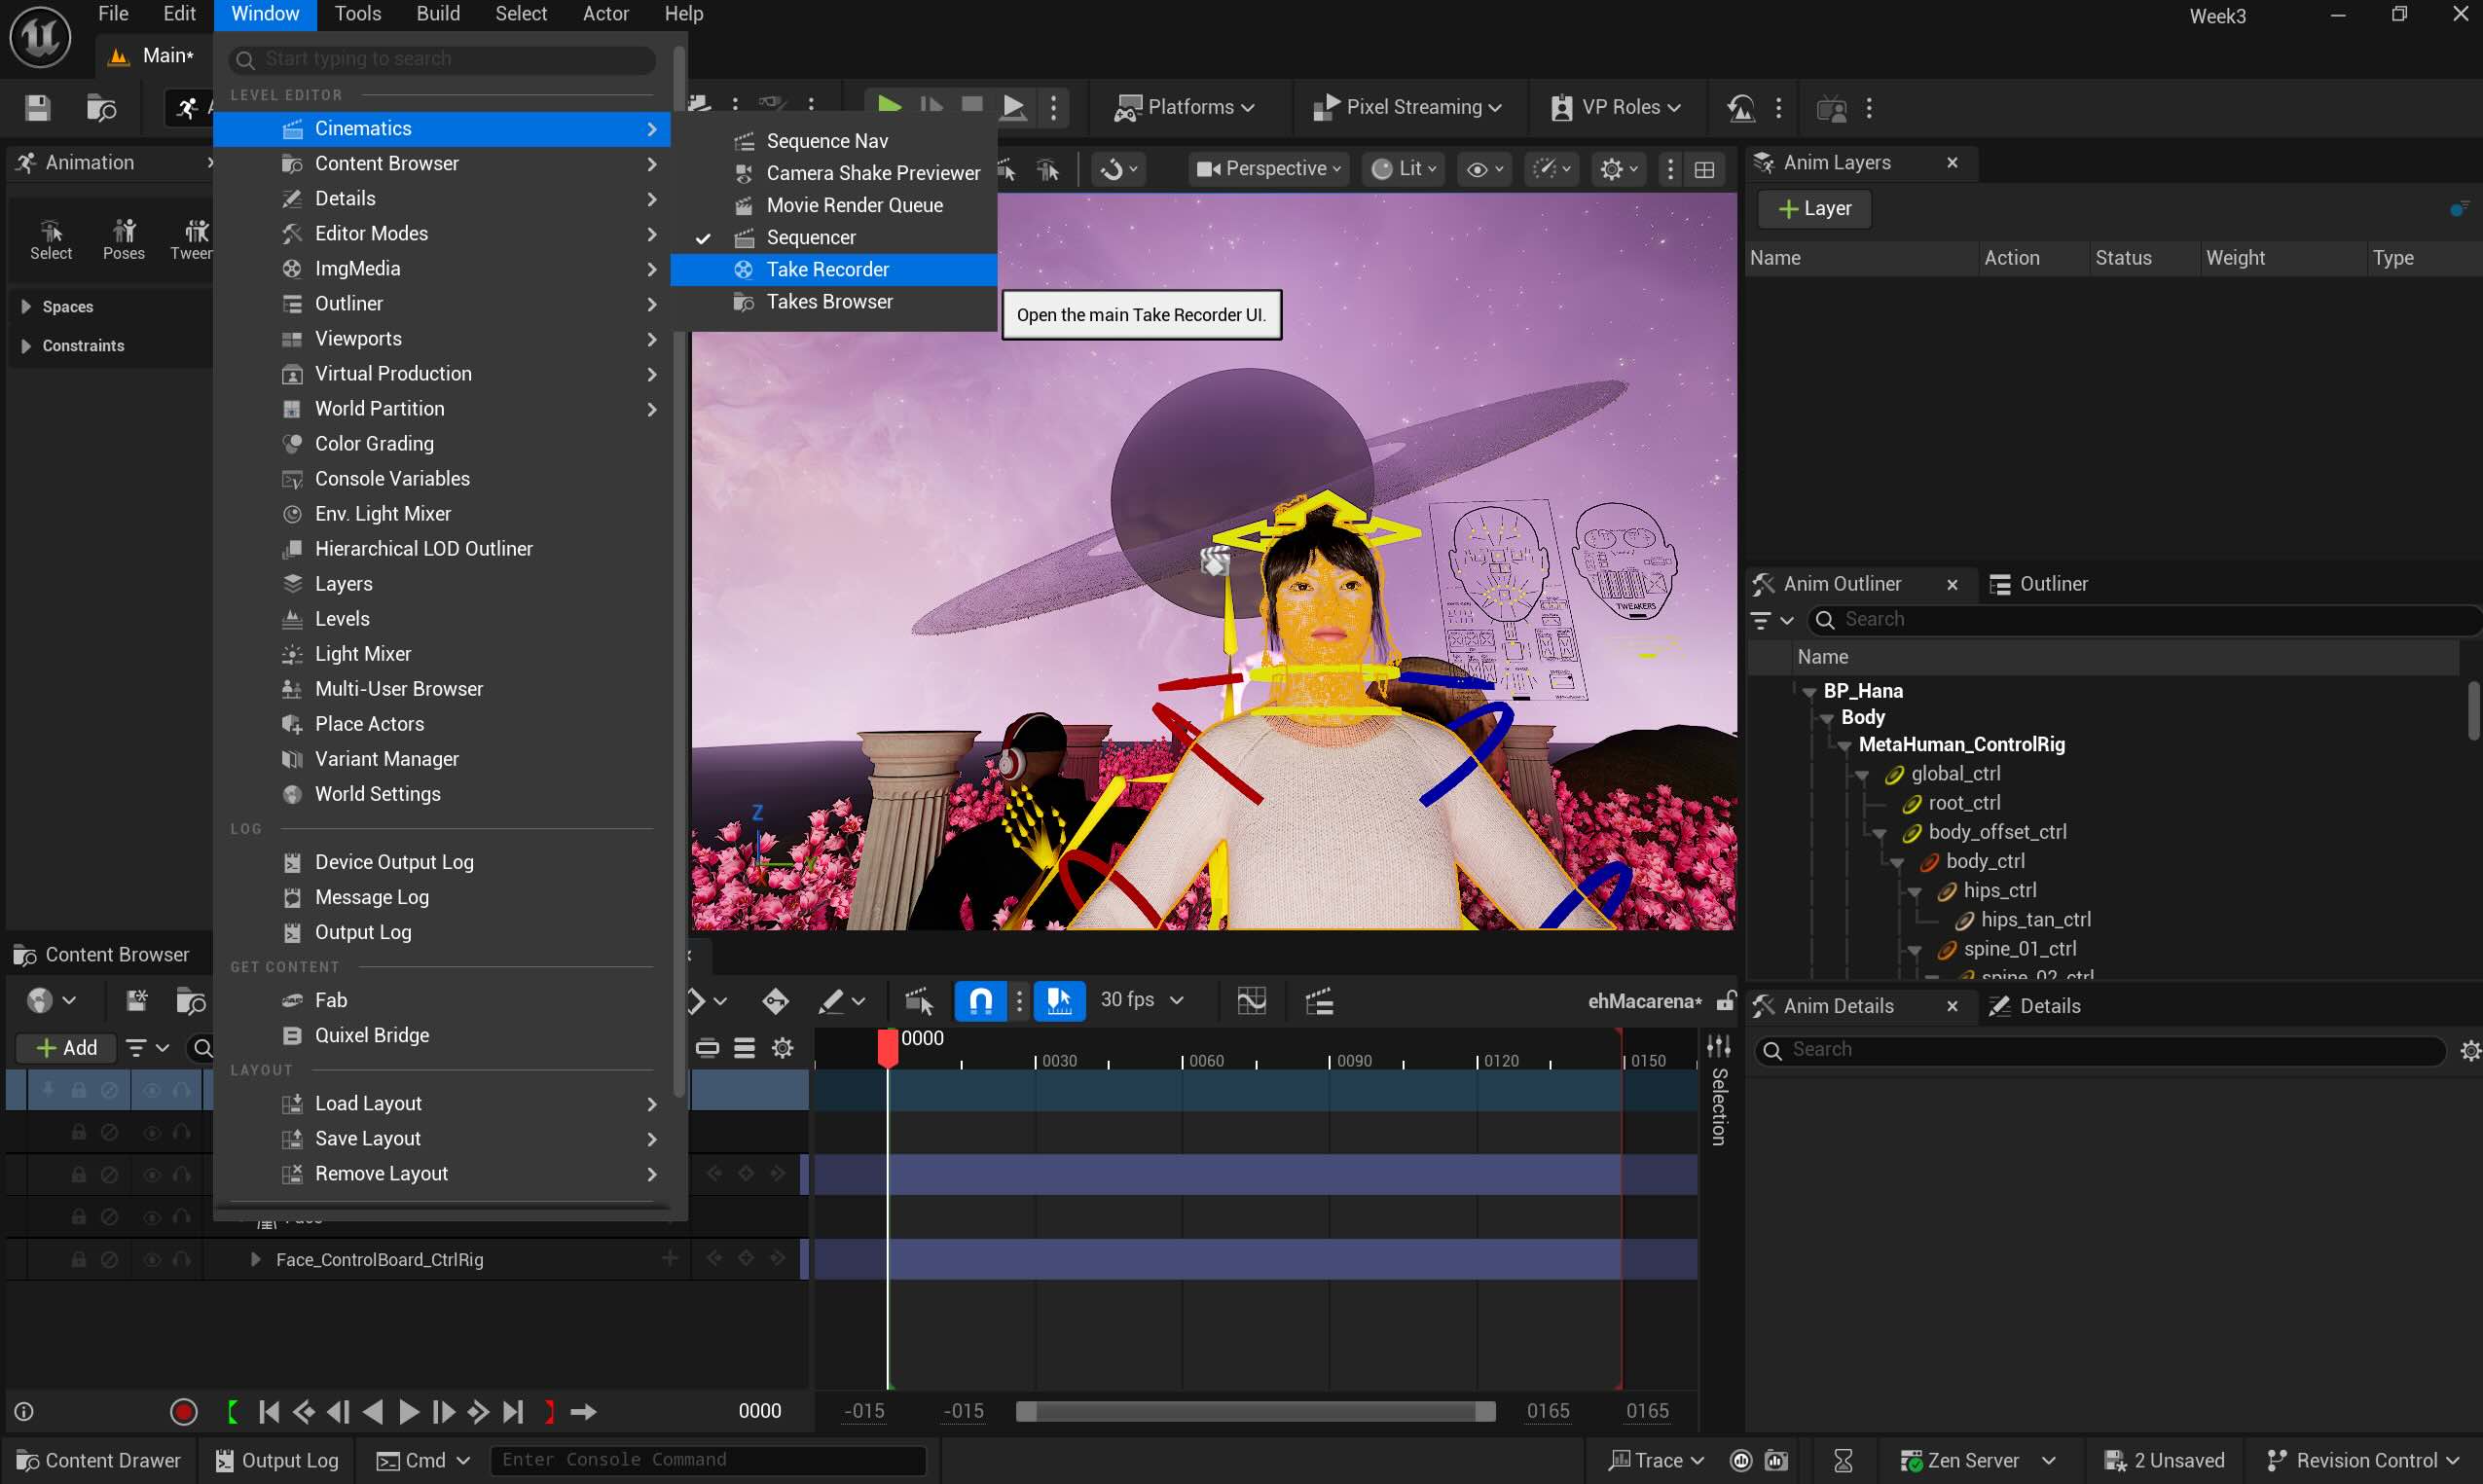
3. Open "Take The Recorder"

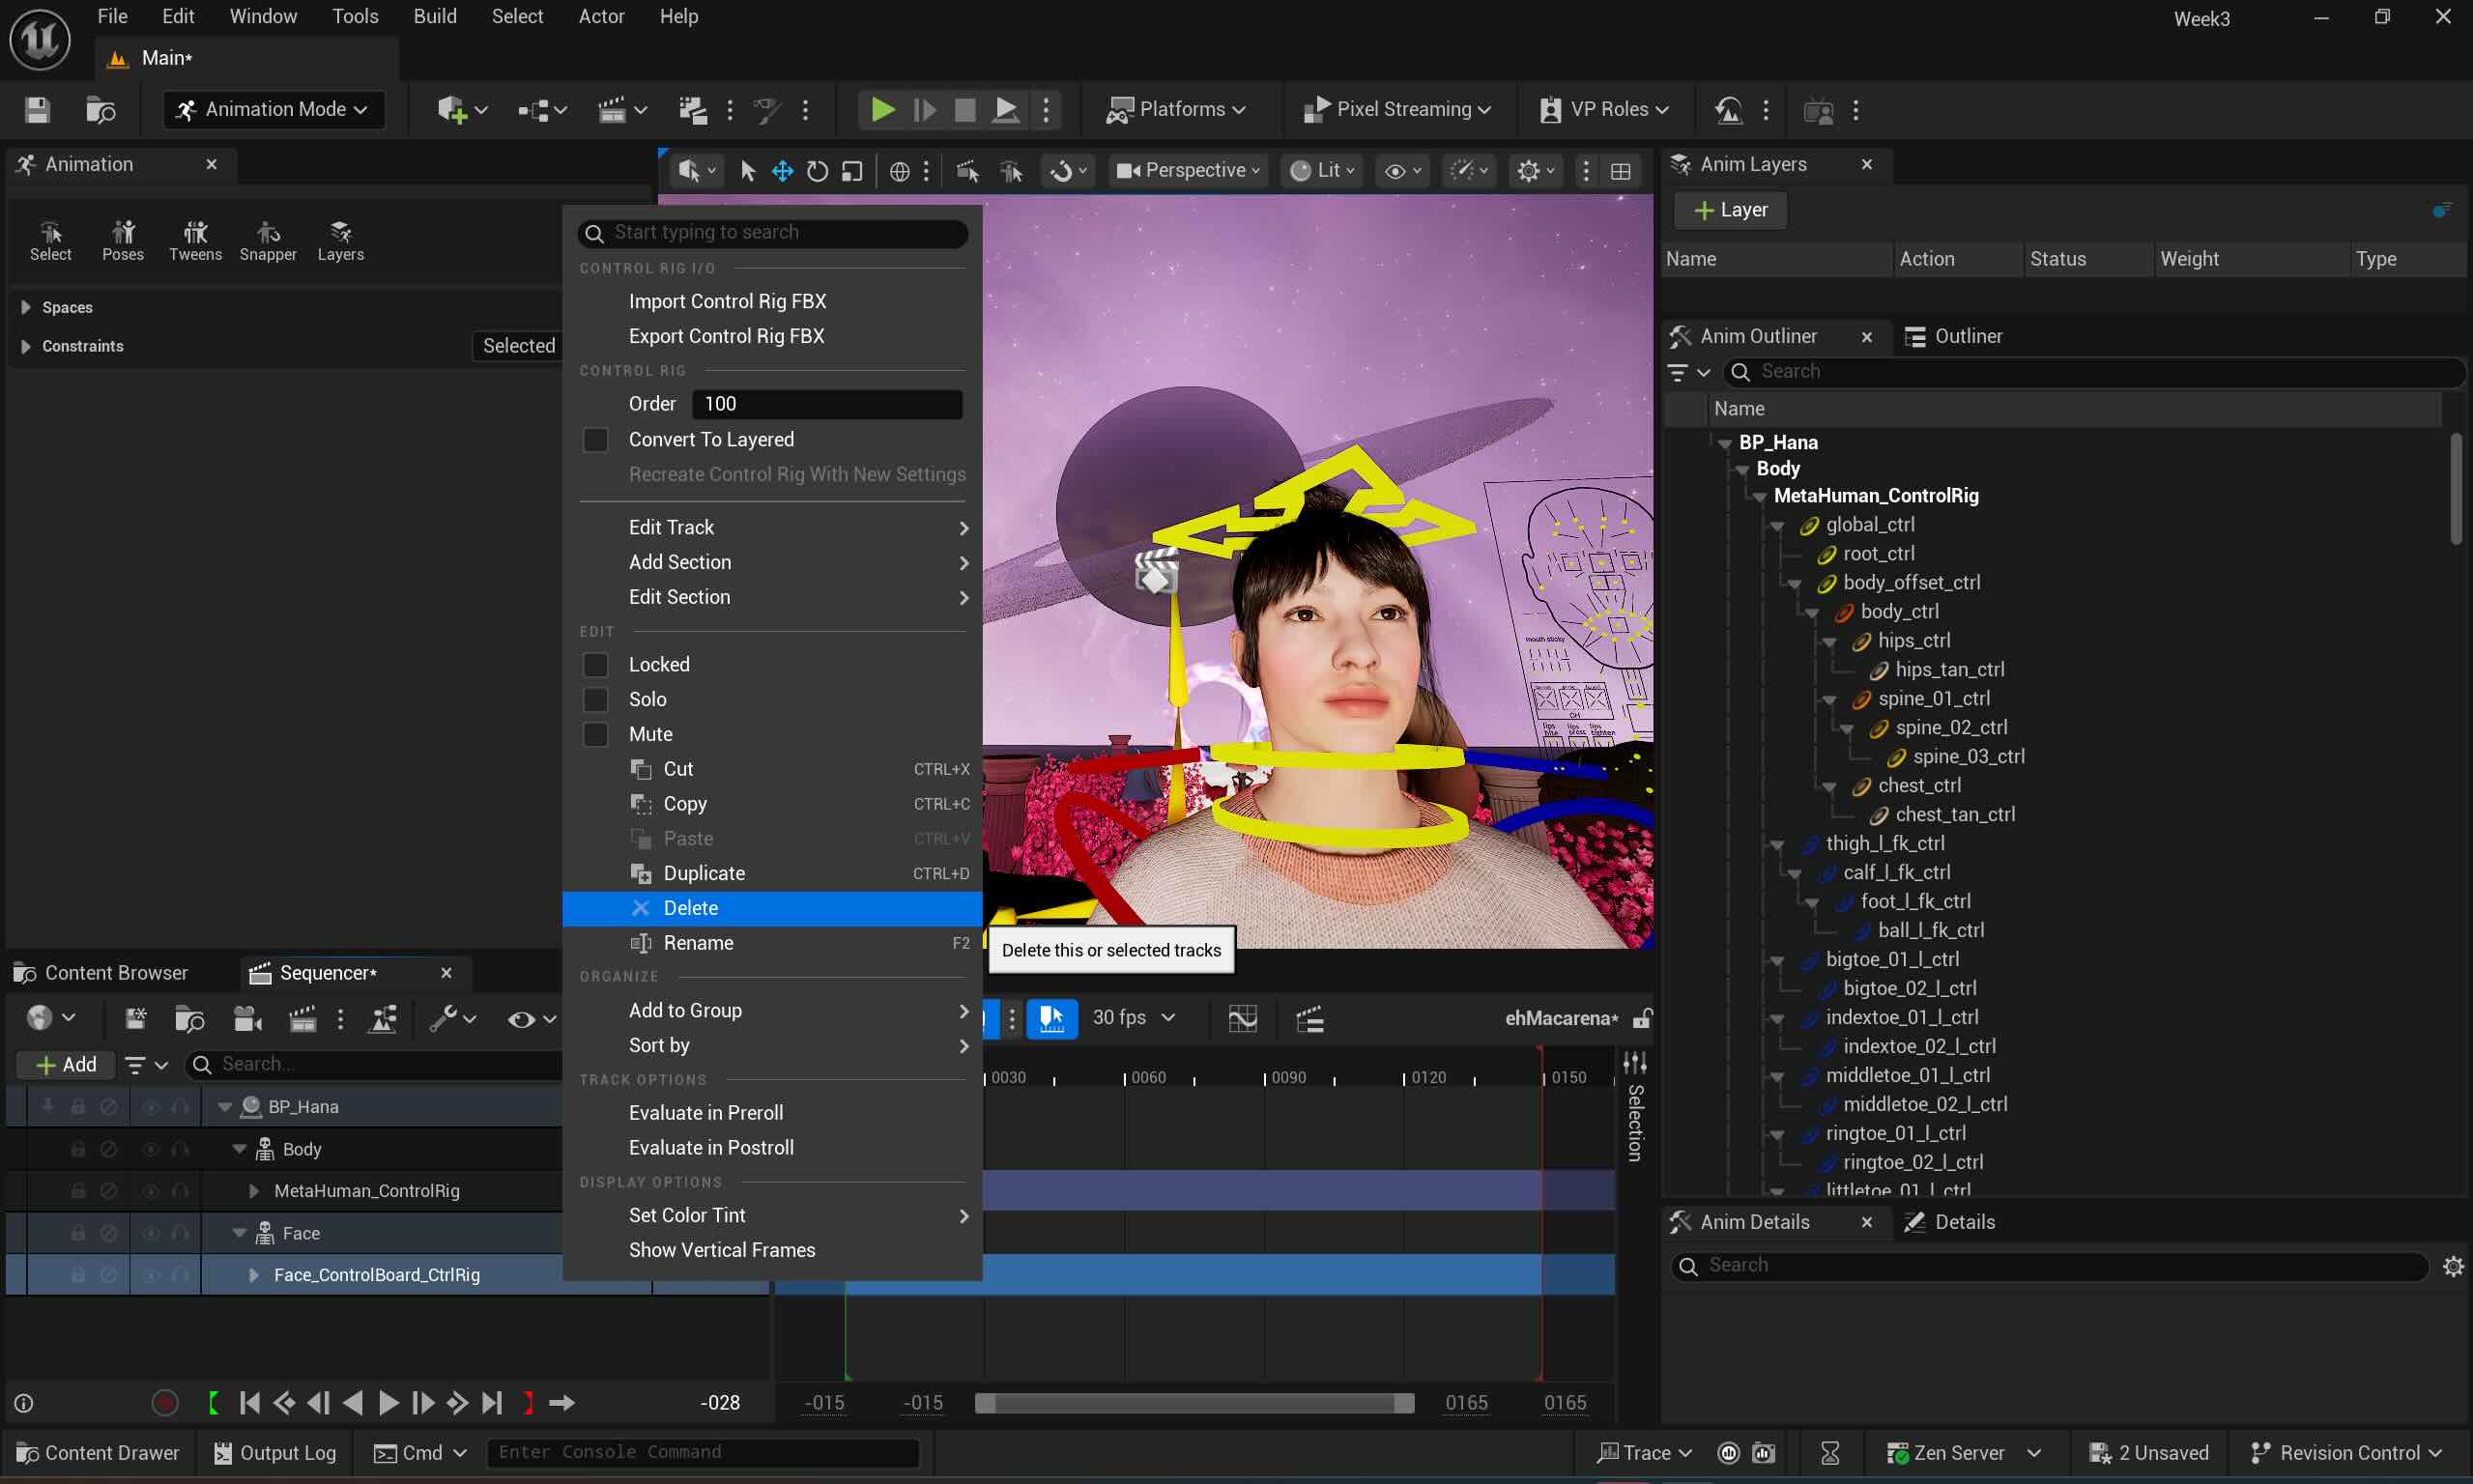
4. Disable Torso, Legs, and feet if we don't need, and delete Face Control from the sequence. Click the red dot to record and repeat till we get the right take. Mine was Take 5.
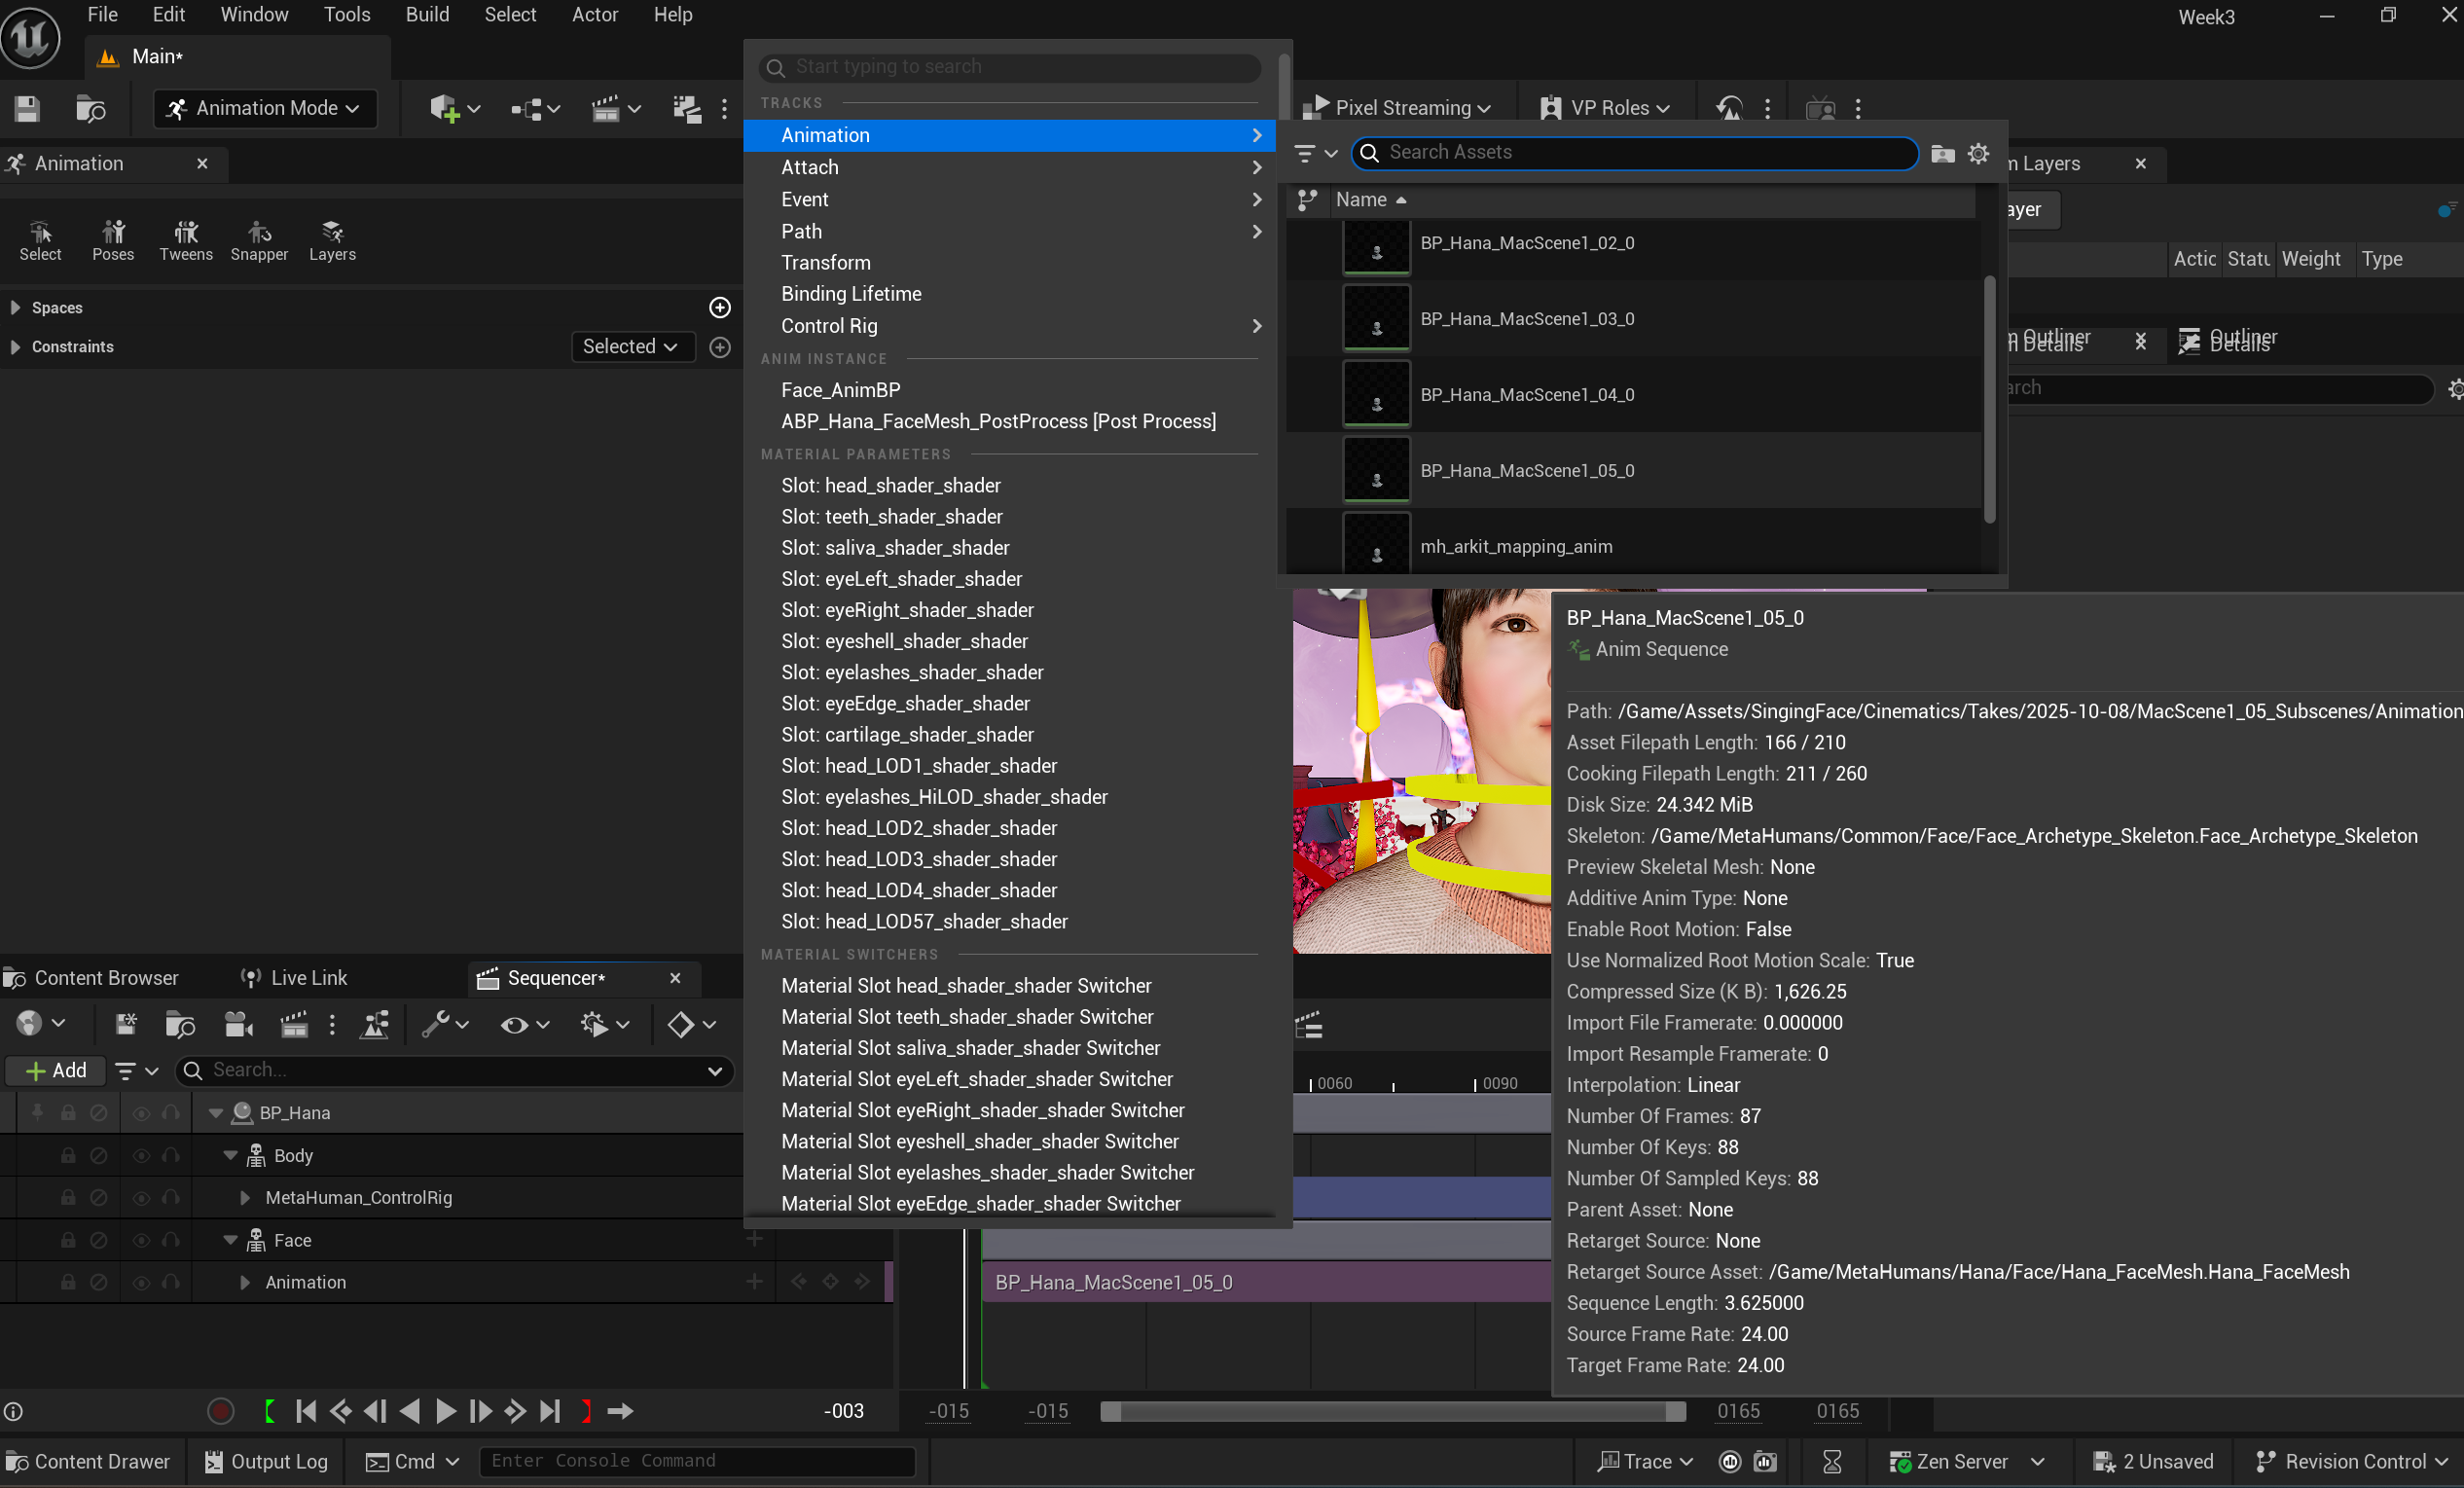
5. Click + button on the "Face" section on the sequence to browse the animation takes and click the take we wish to apply.

6. Click Play to see the animation. The screen captured video is below:
Week 5
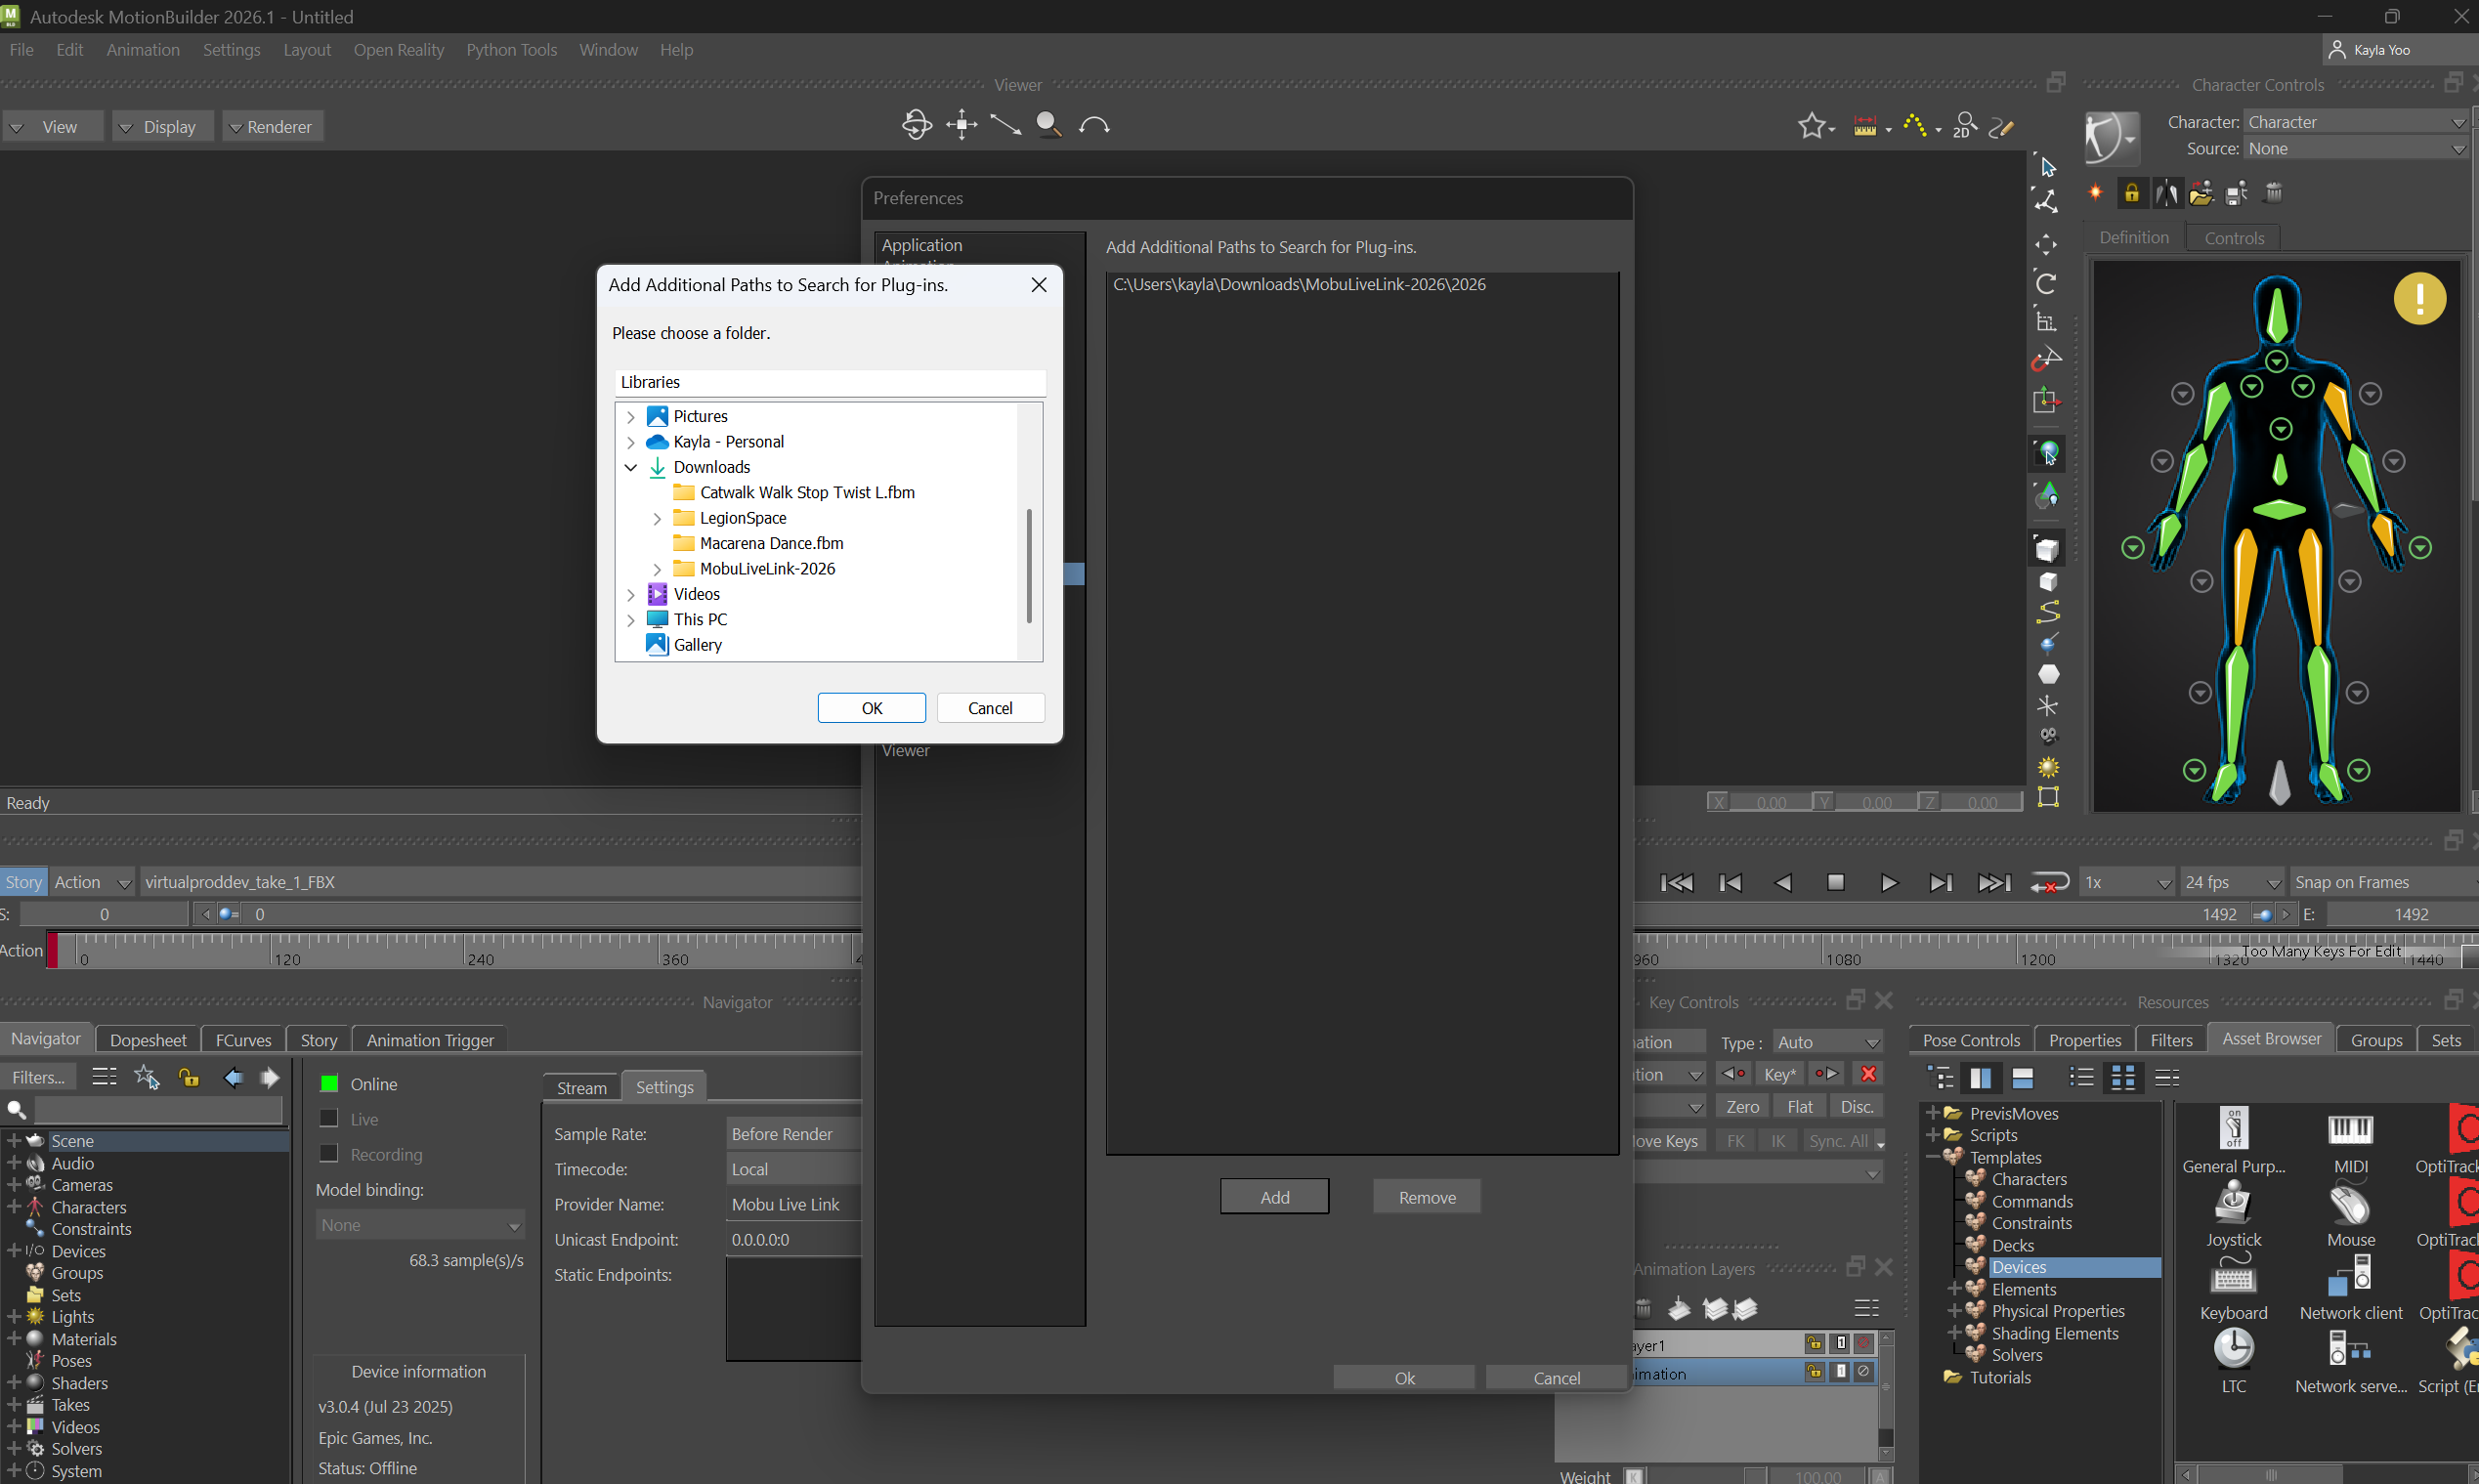
This week, I tested connecting Optitrack and MotionBuilder, with Unreal Engine, and worked on IK Retargeting characters. I followed the GitHub tutorial video till the connection part, as I worked on my computer system at home without the Motive system.
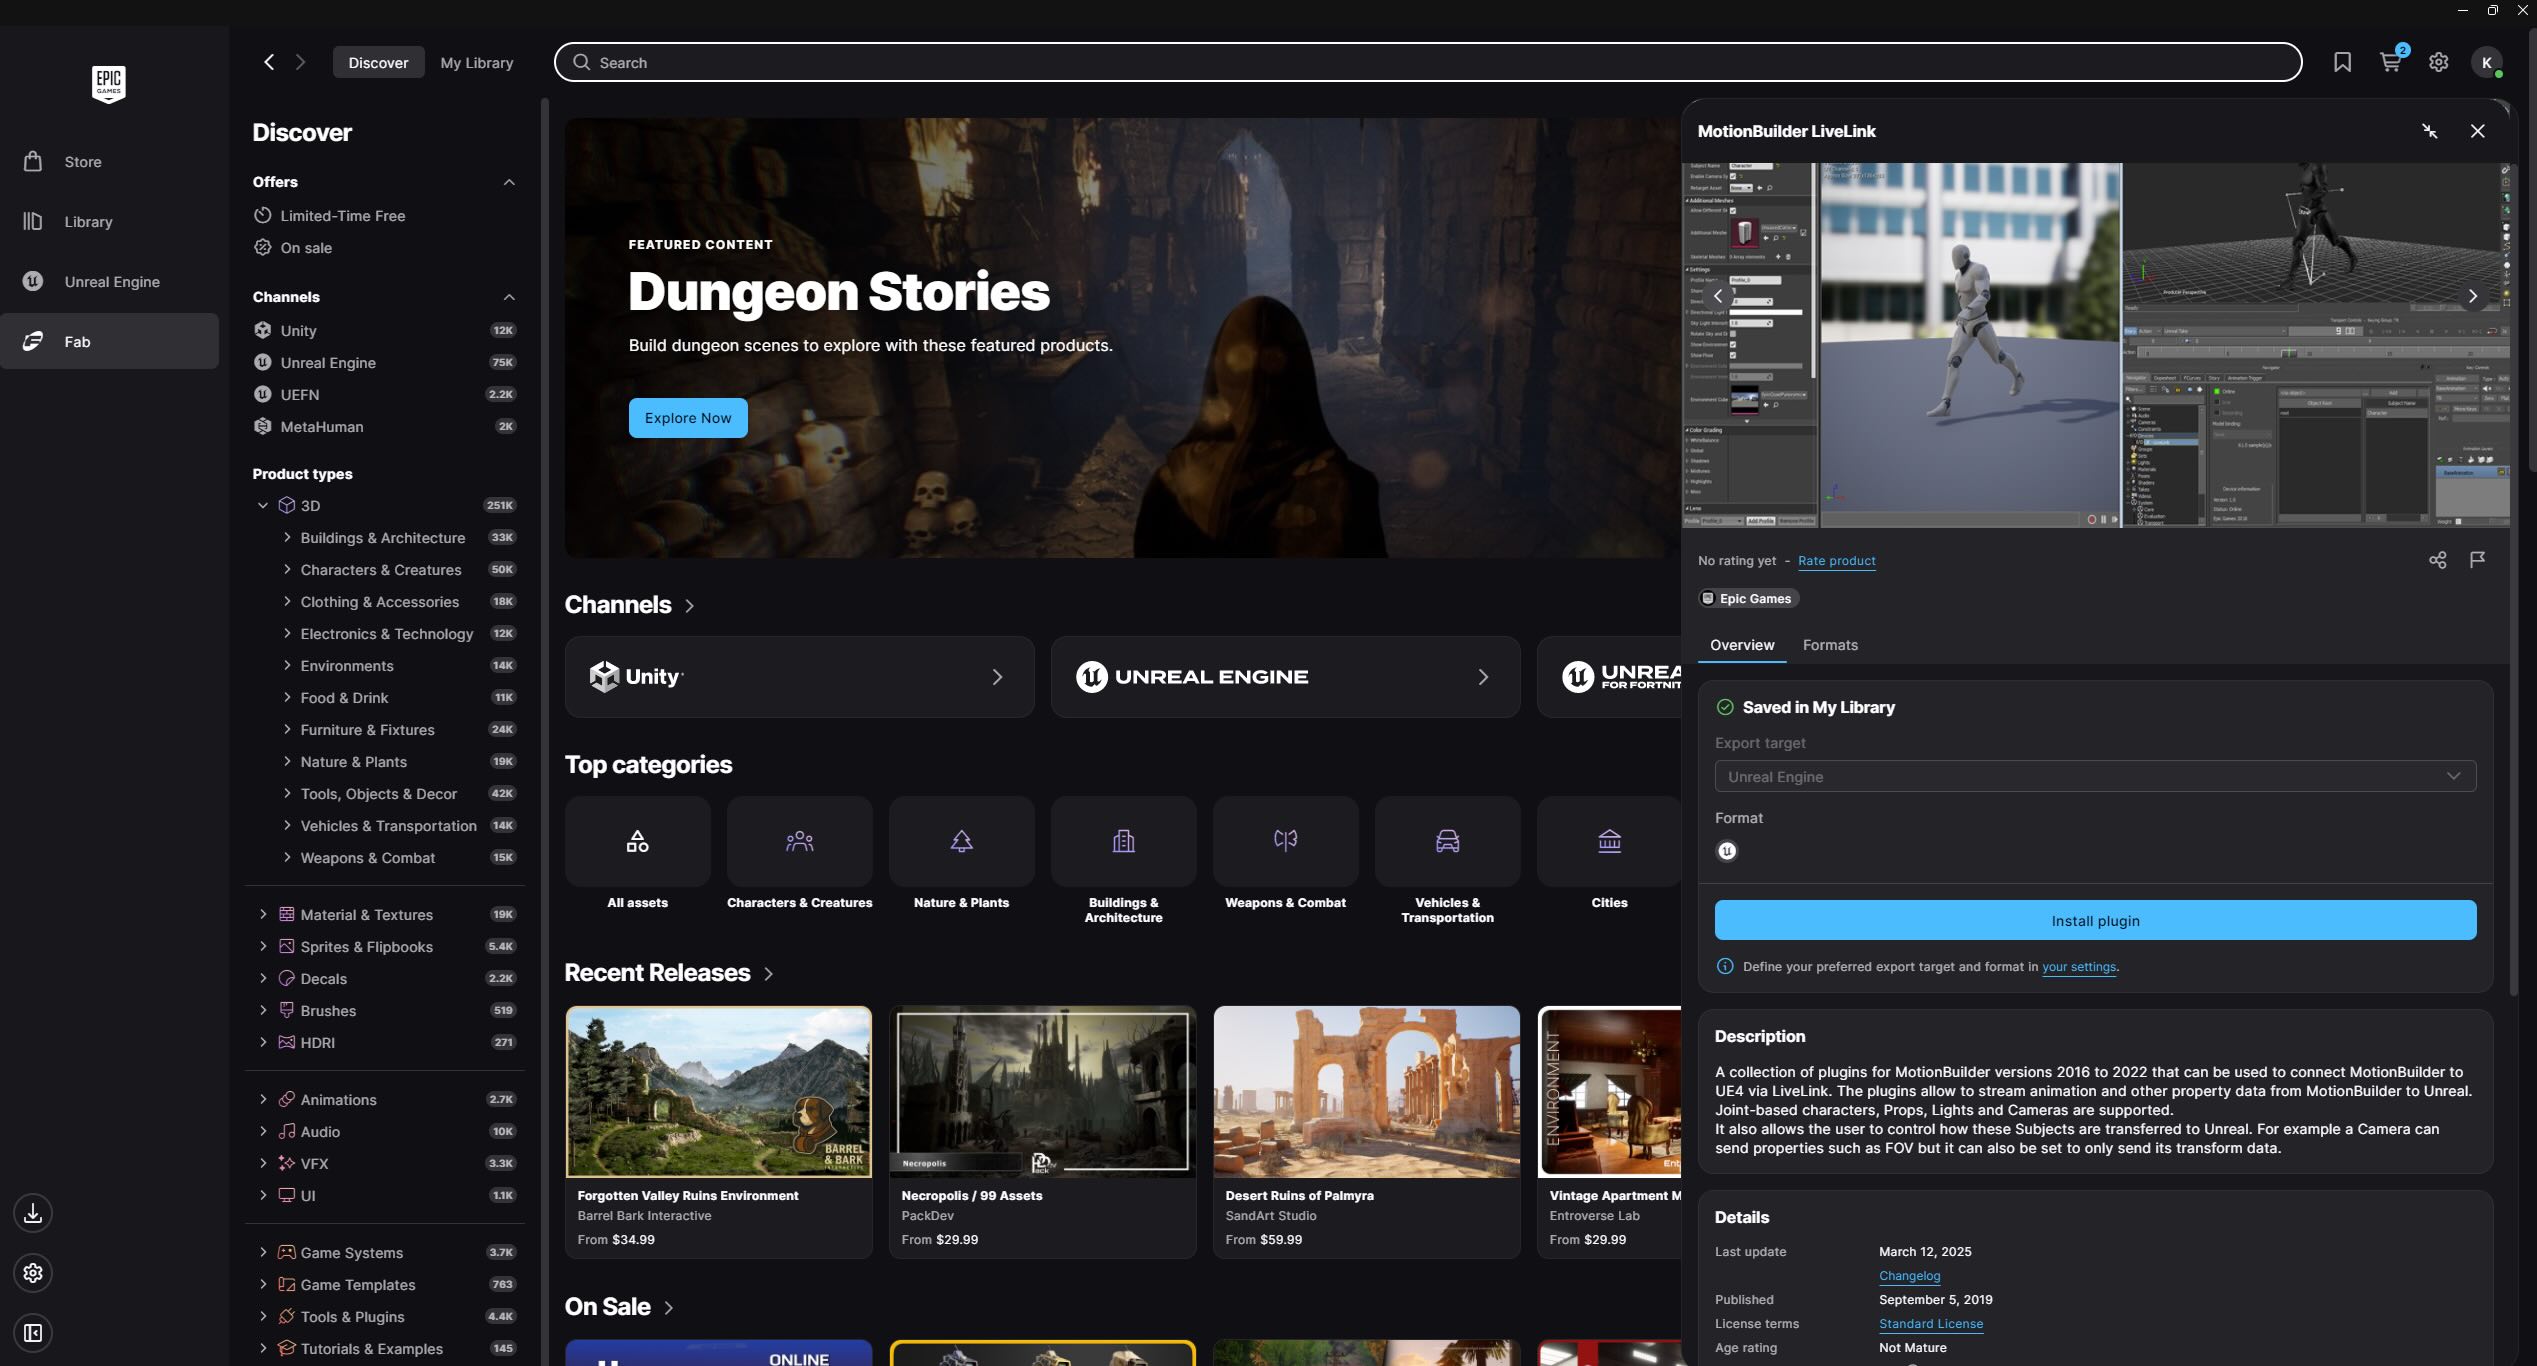
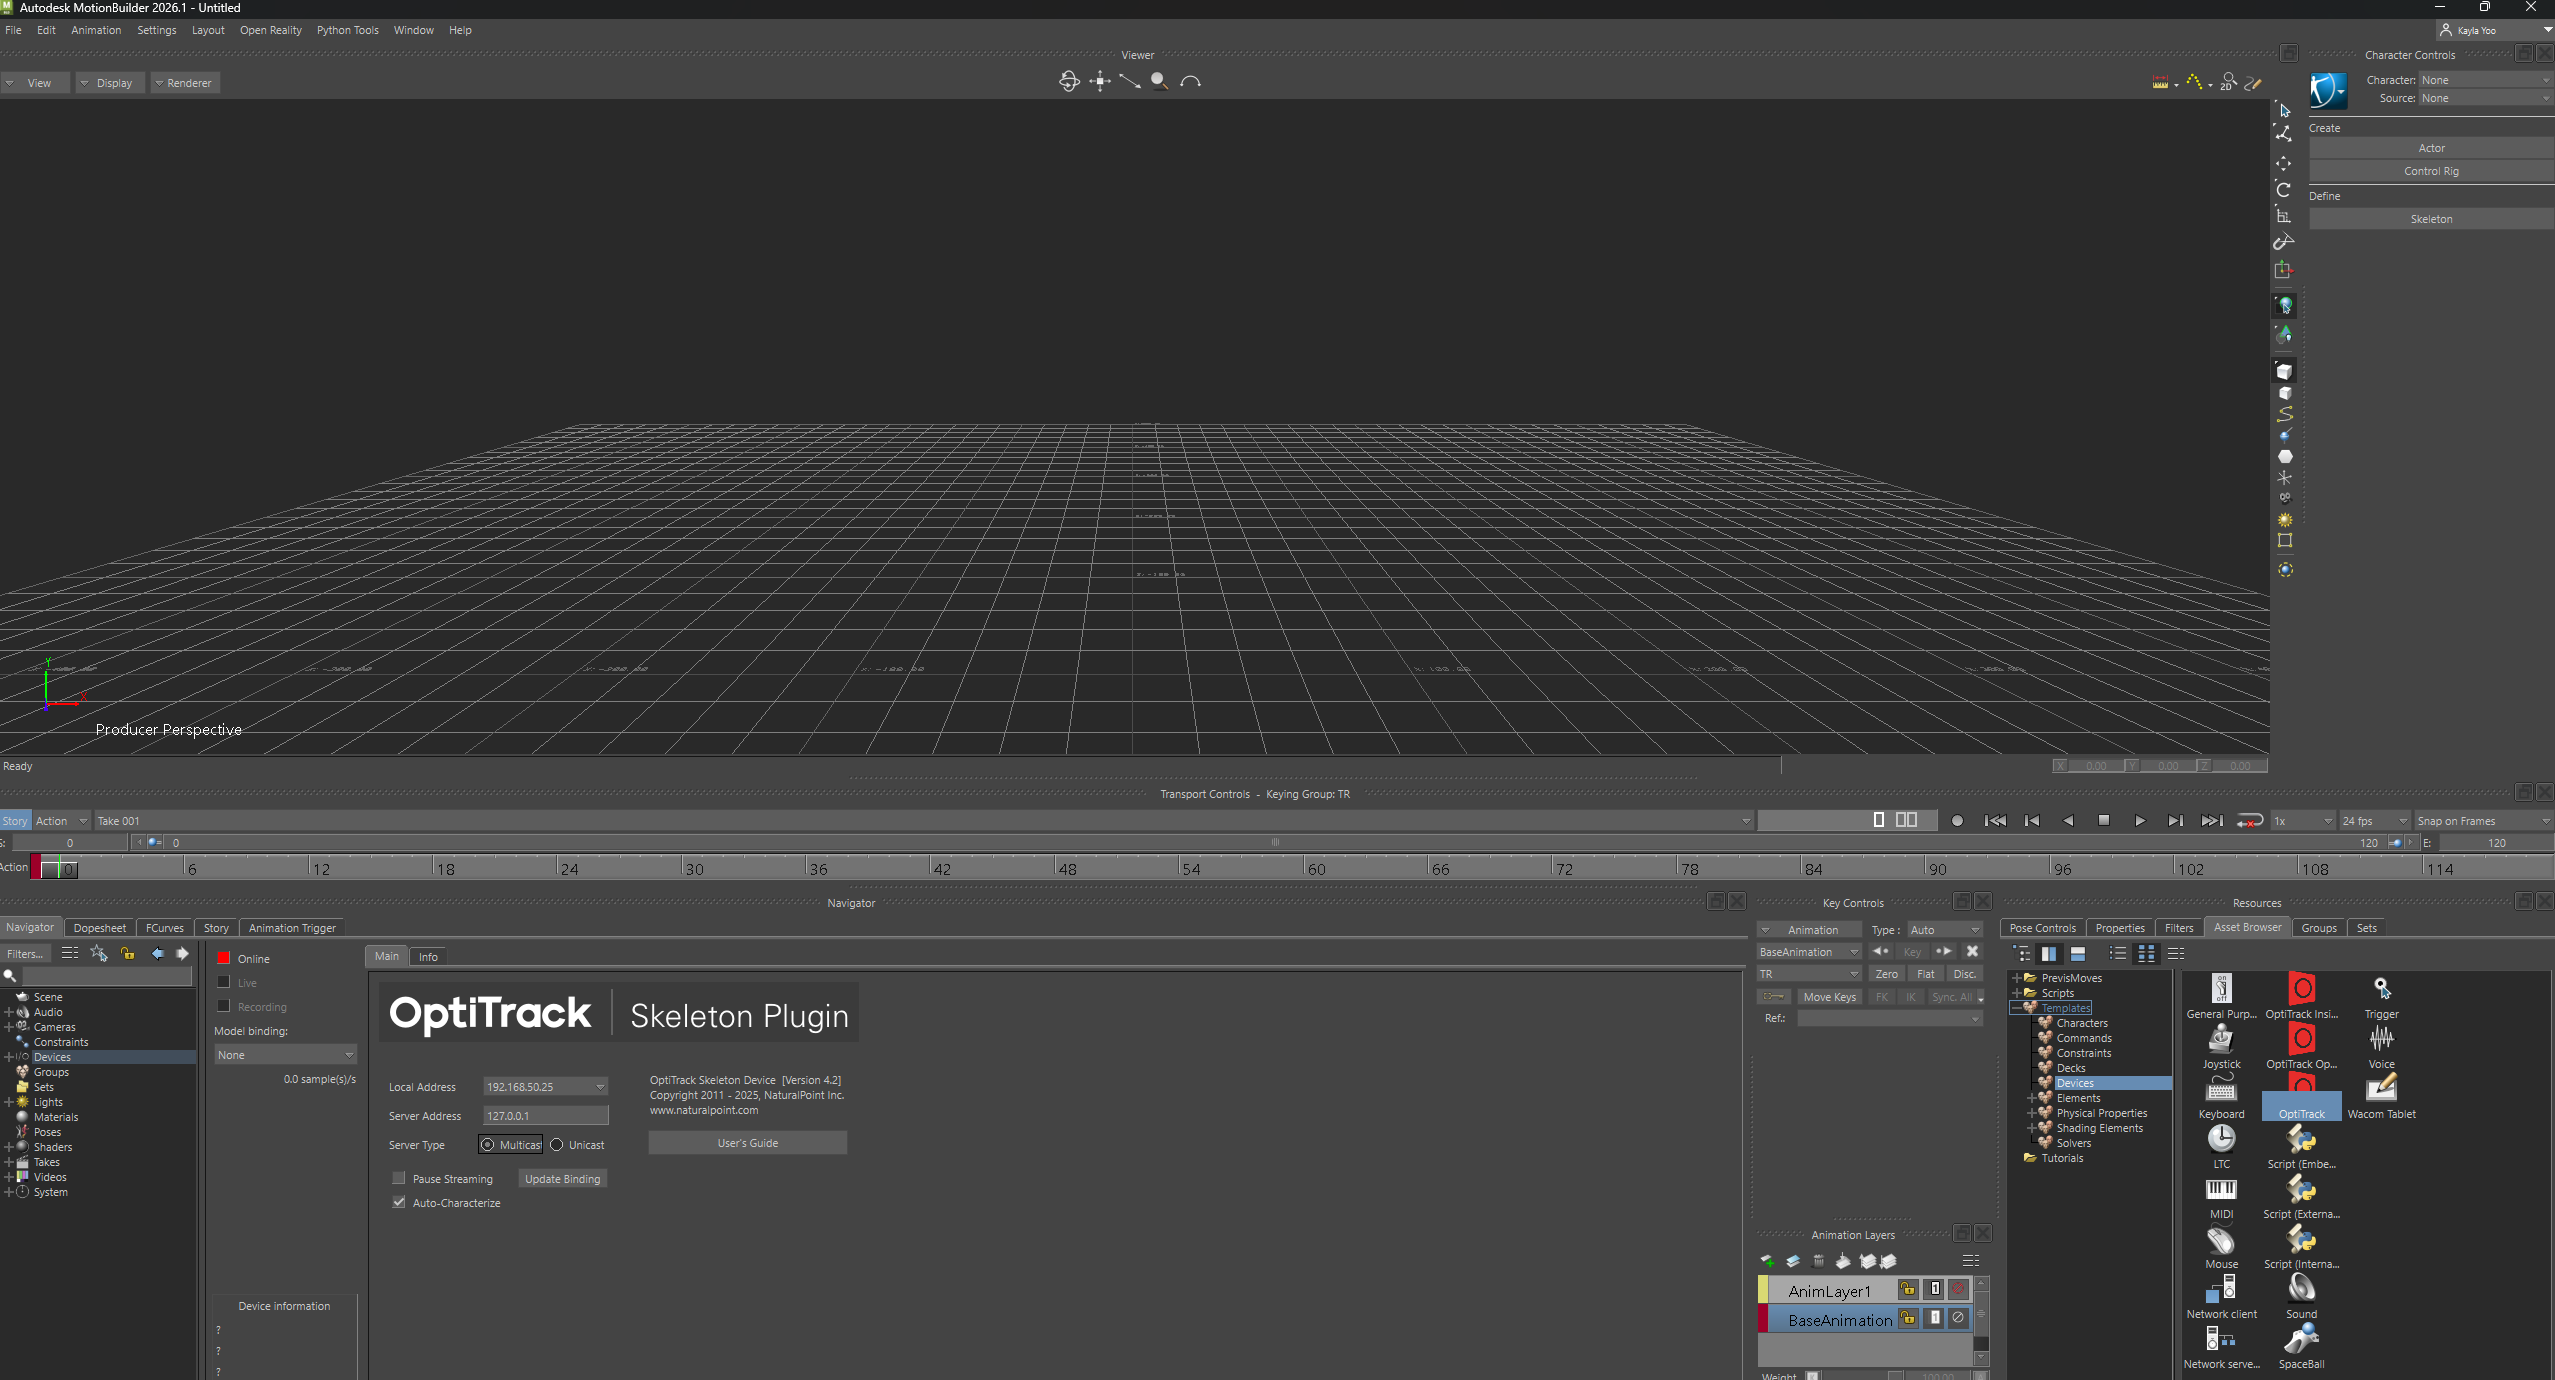
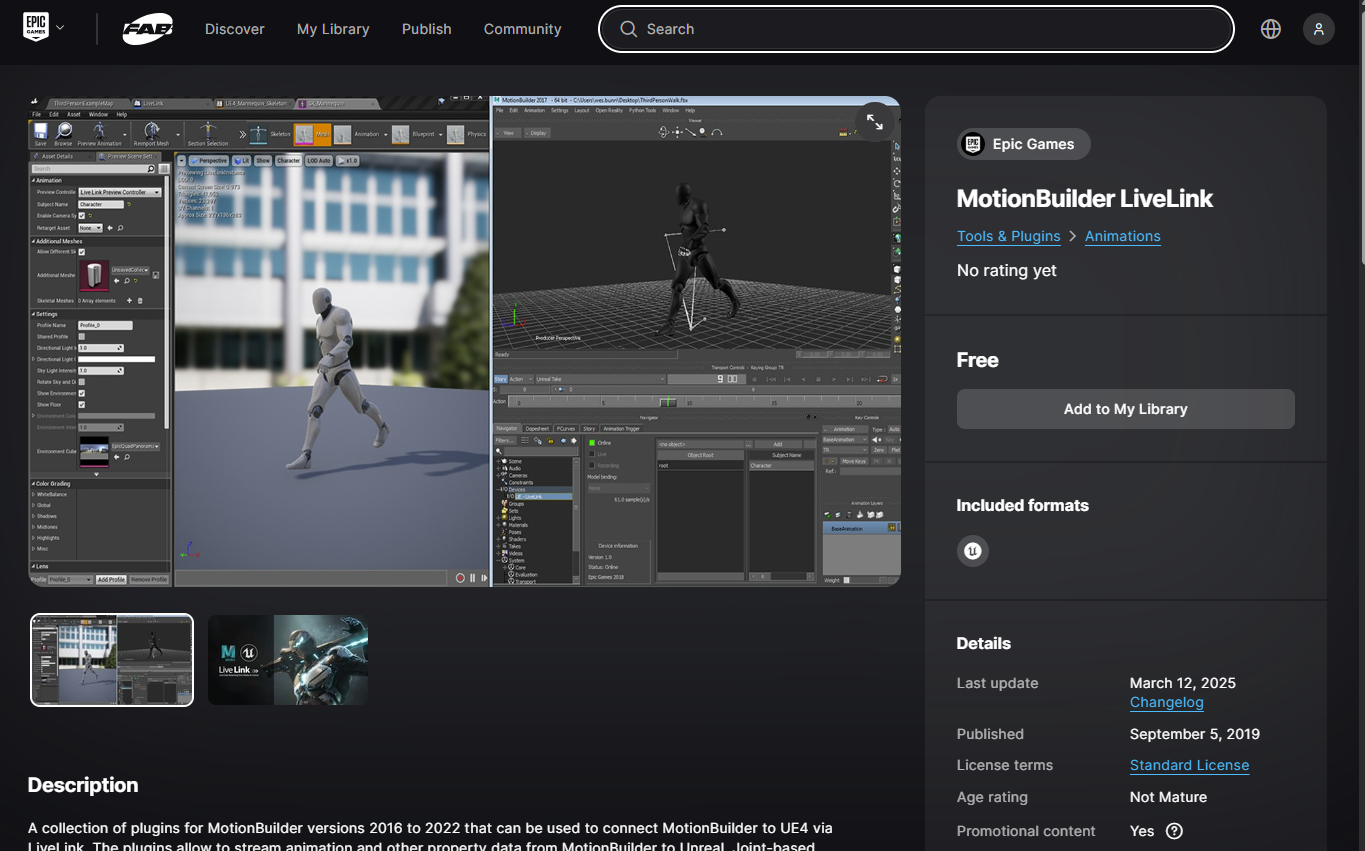
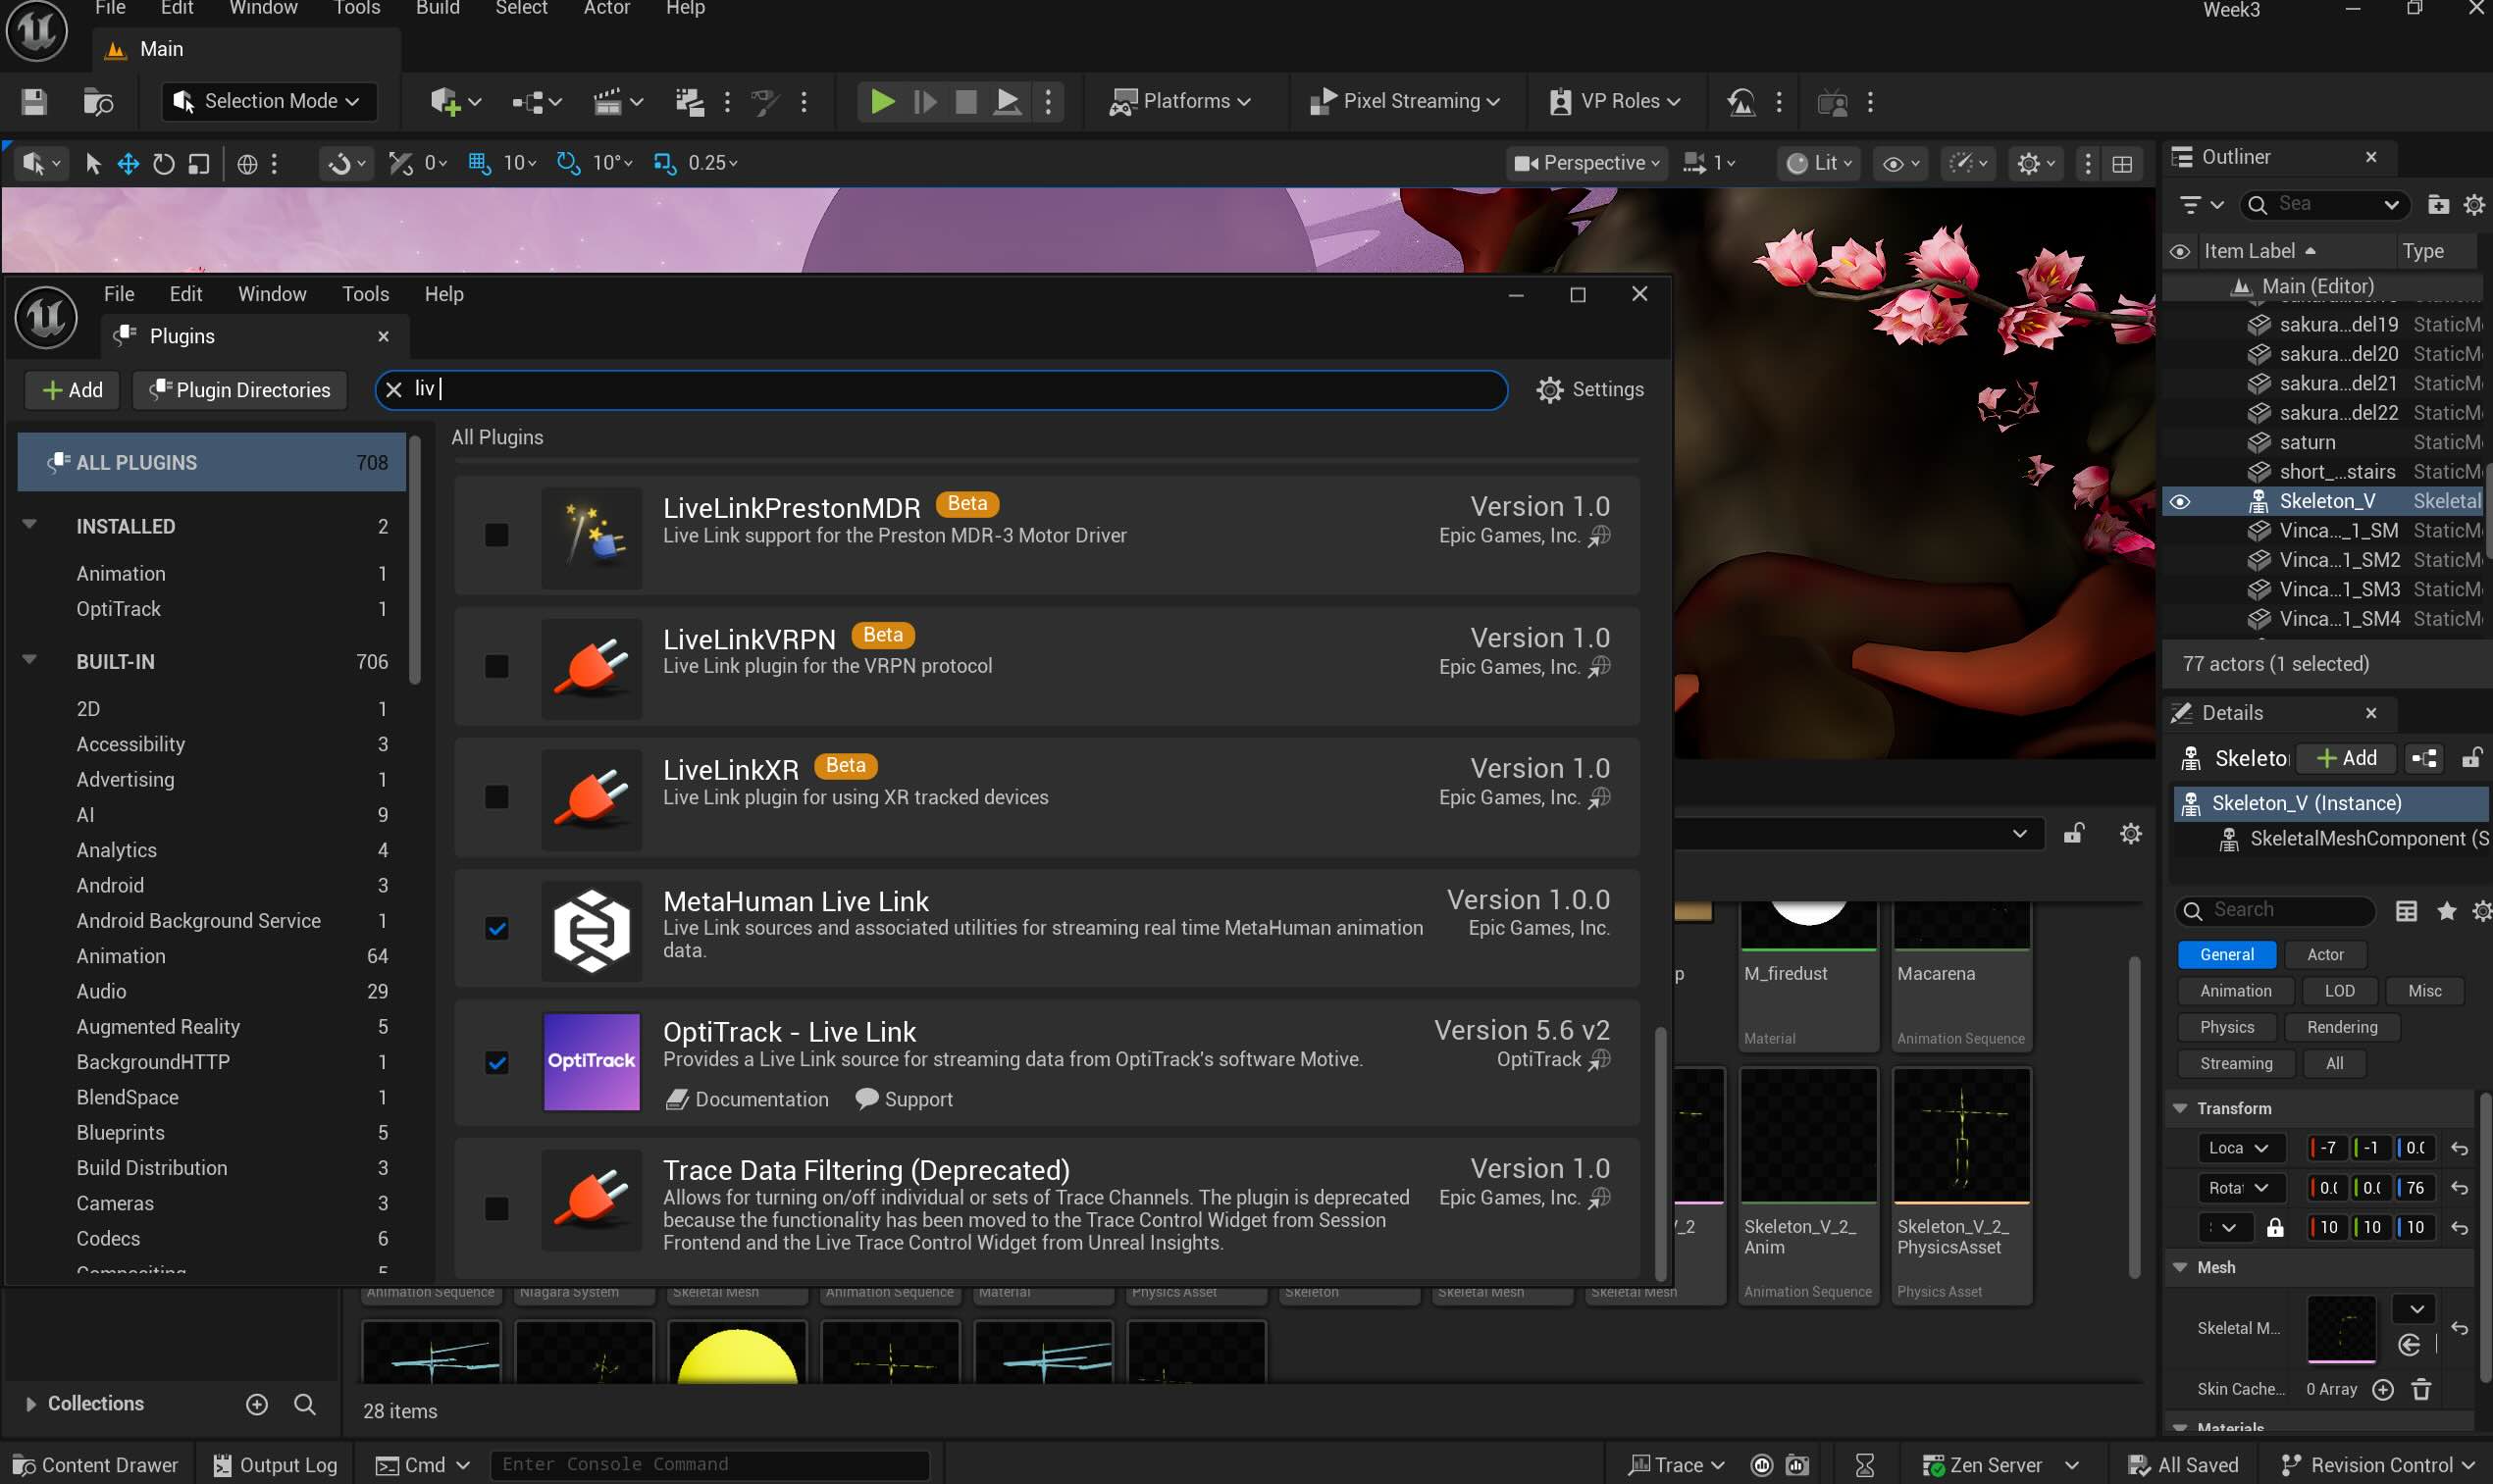
1. Unreal Engine Live Link download for Motion Builder
2. Optitrack Live Link Plugin for Motion Building setup testing
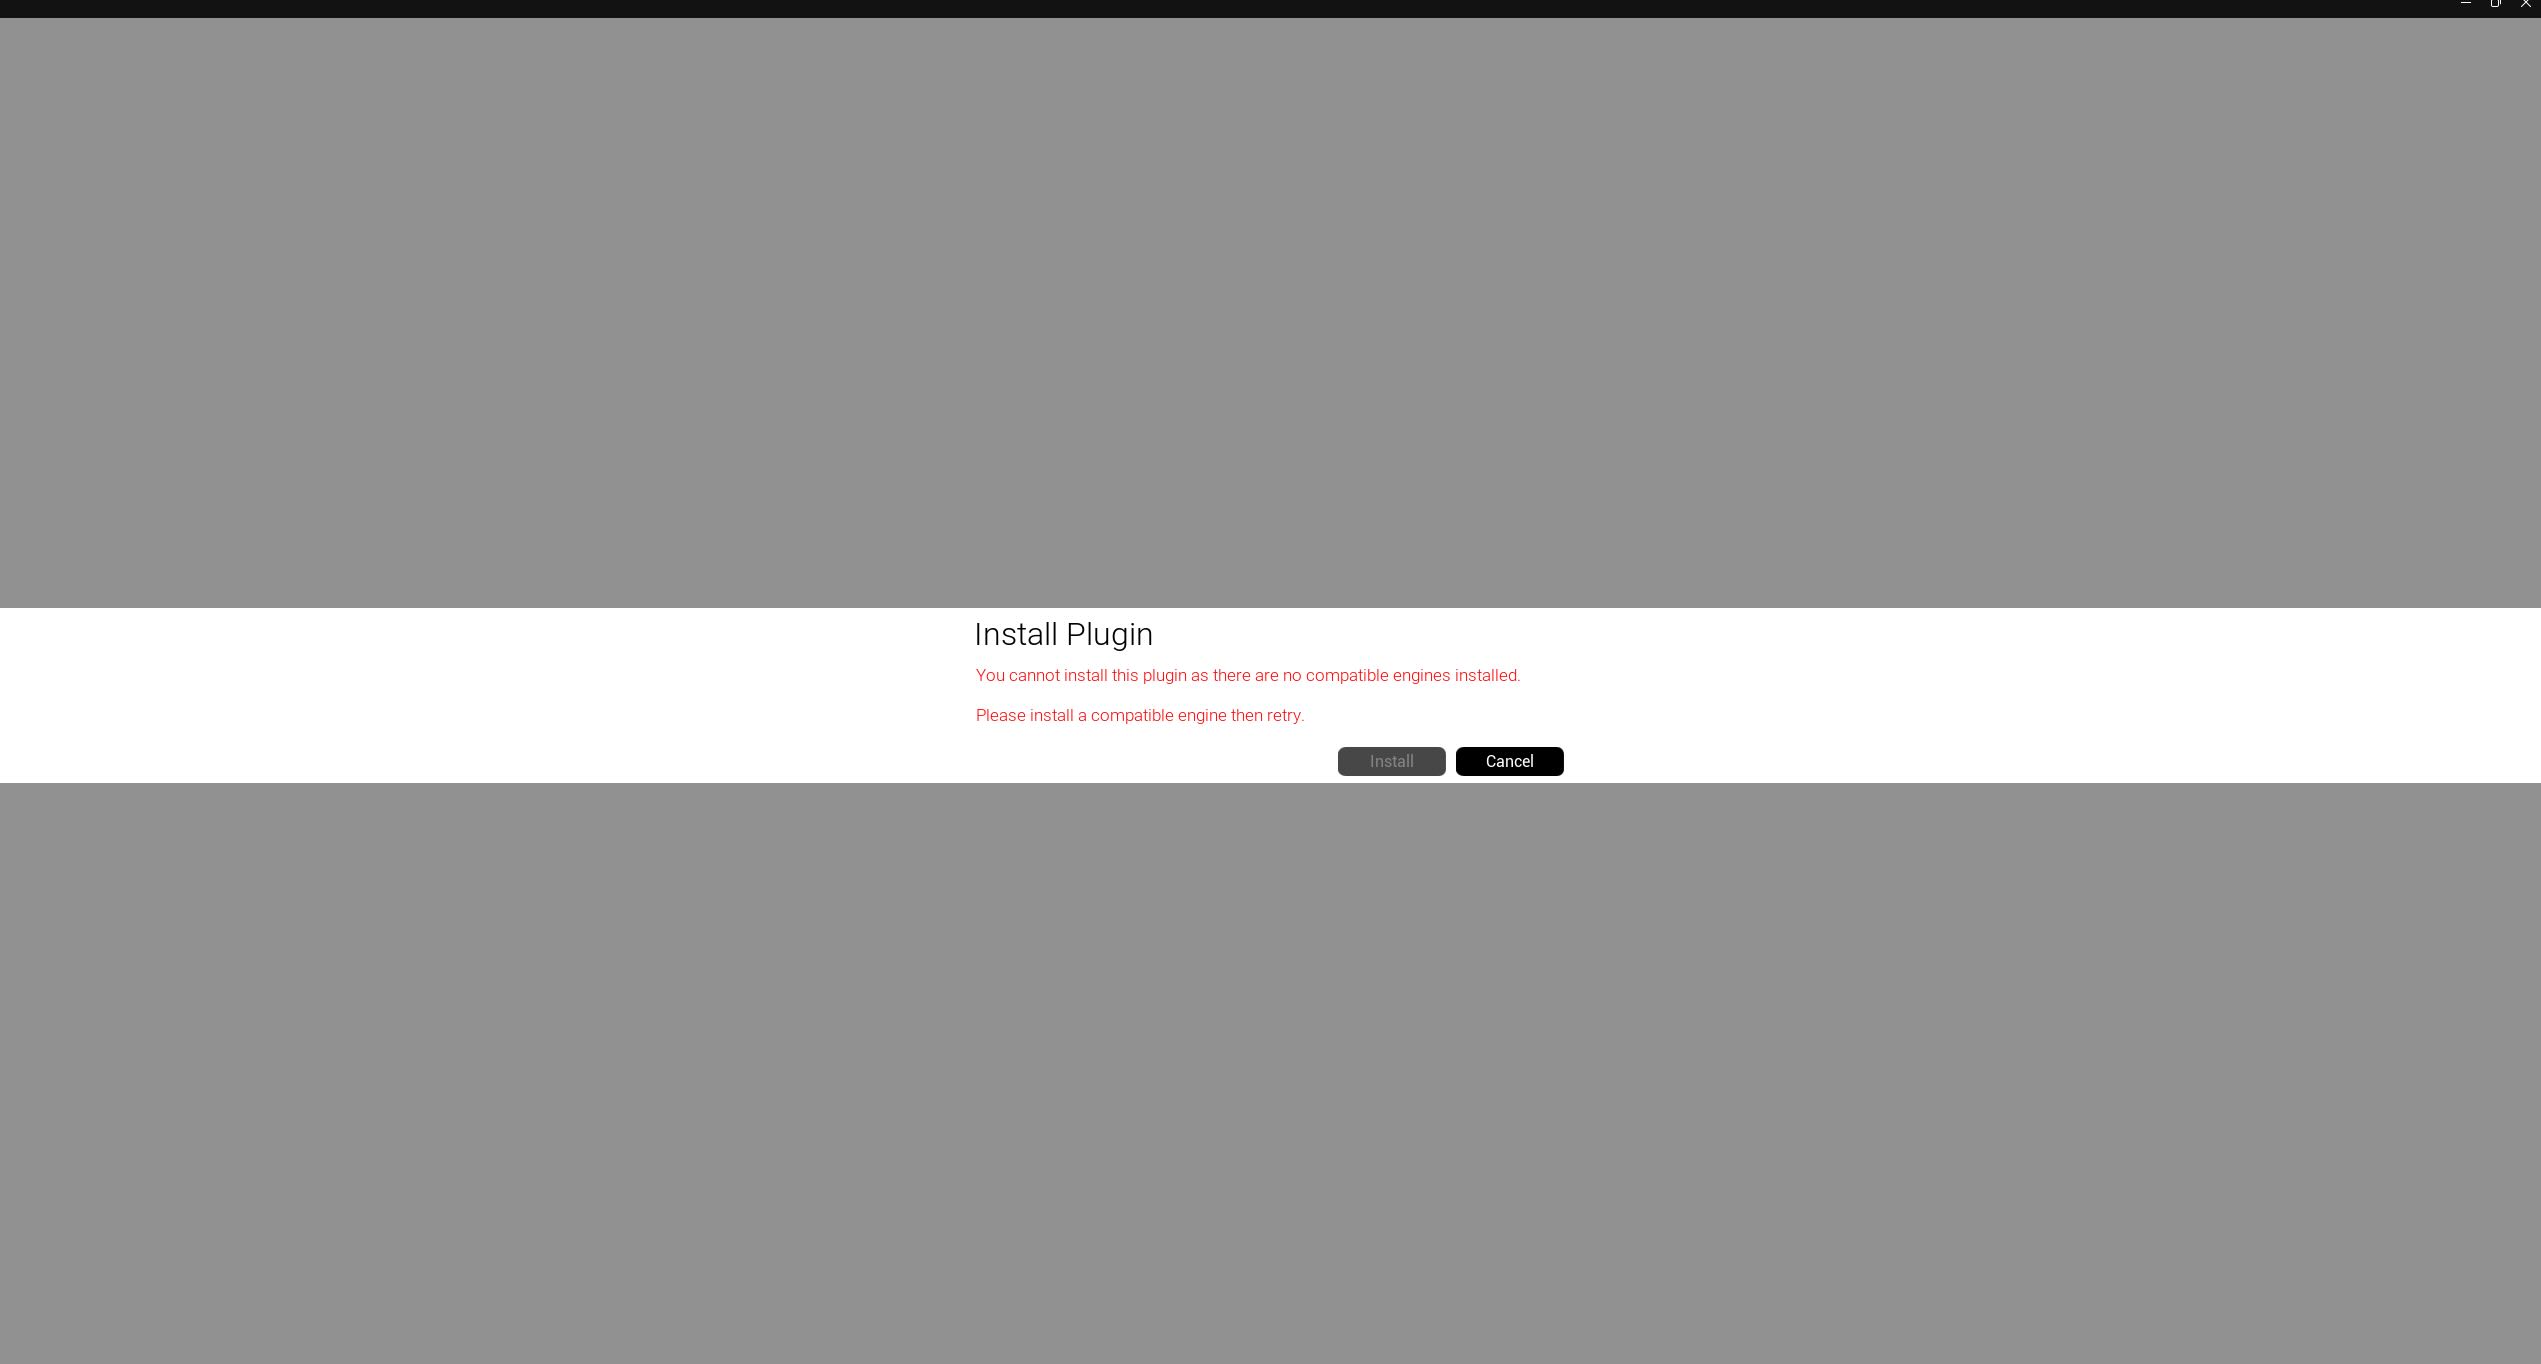
3. Unreal Engine Live Link for Motion Builder (not compatible with UE 5), enabling the OptiTrack Live Link on UE 5.
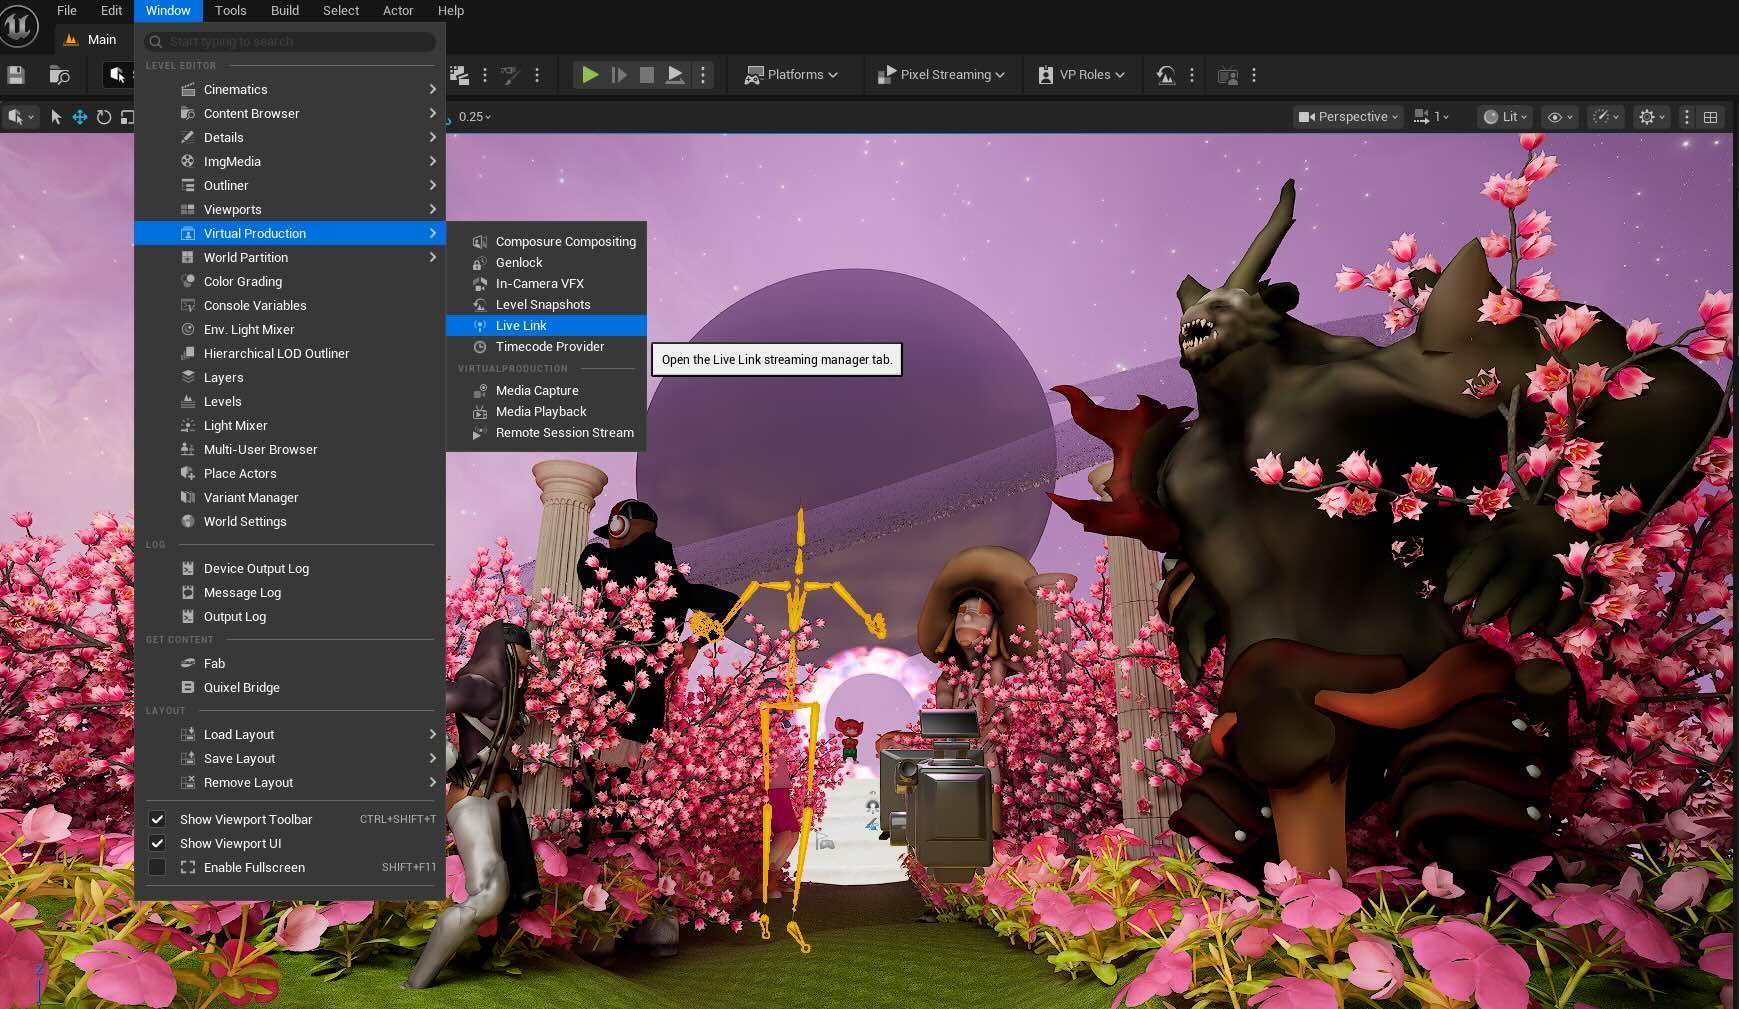
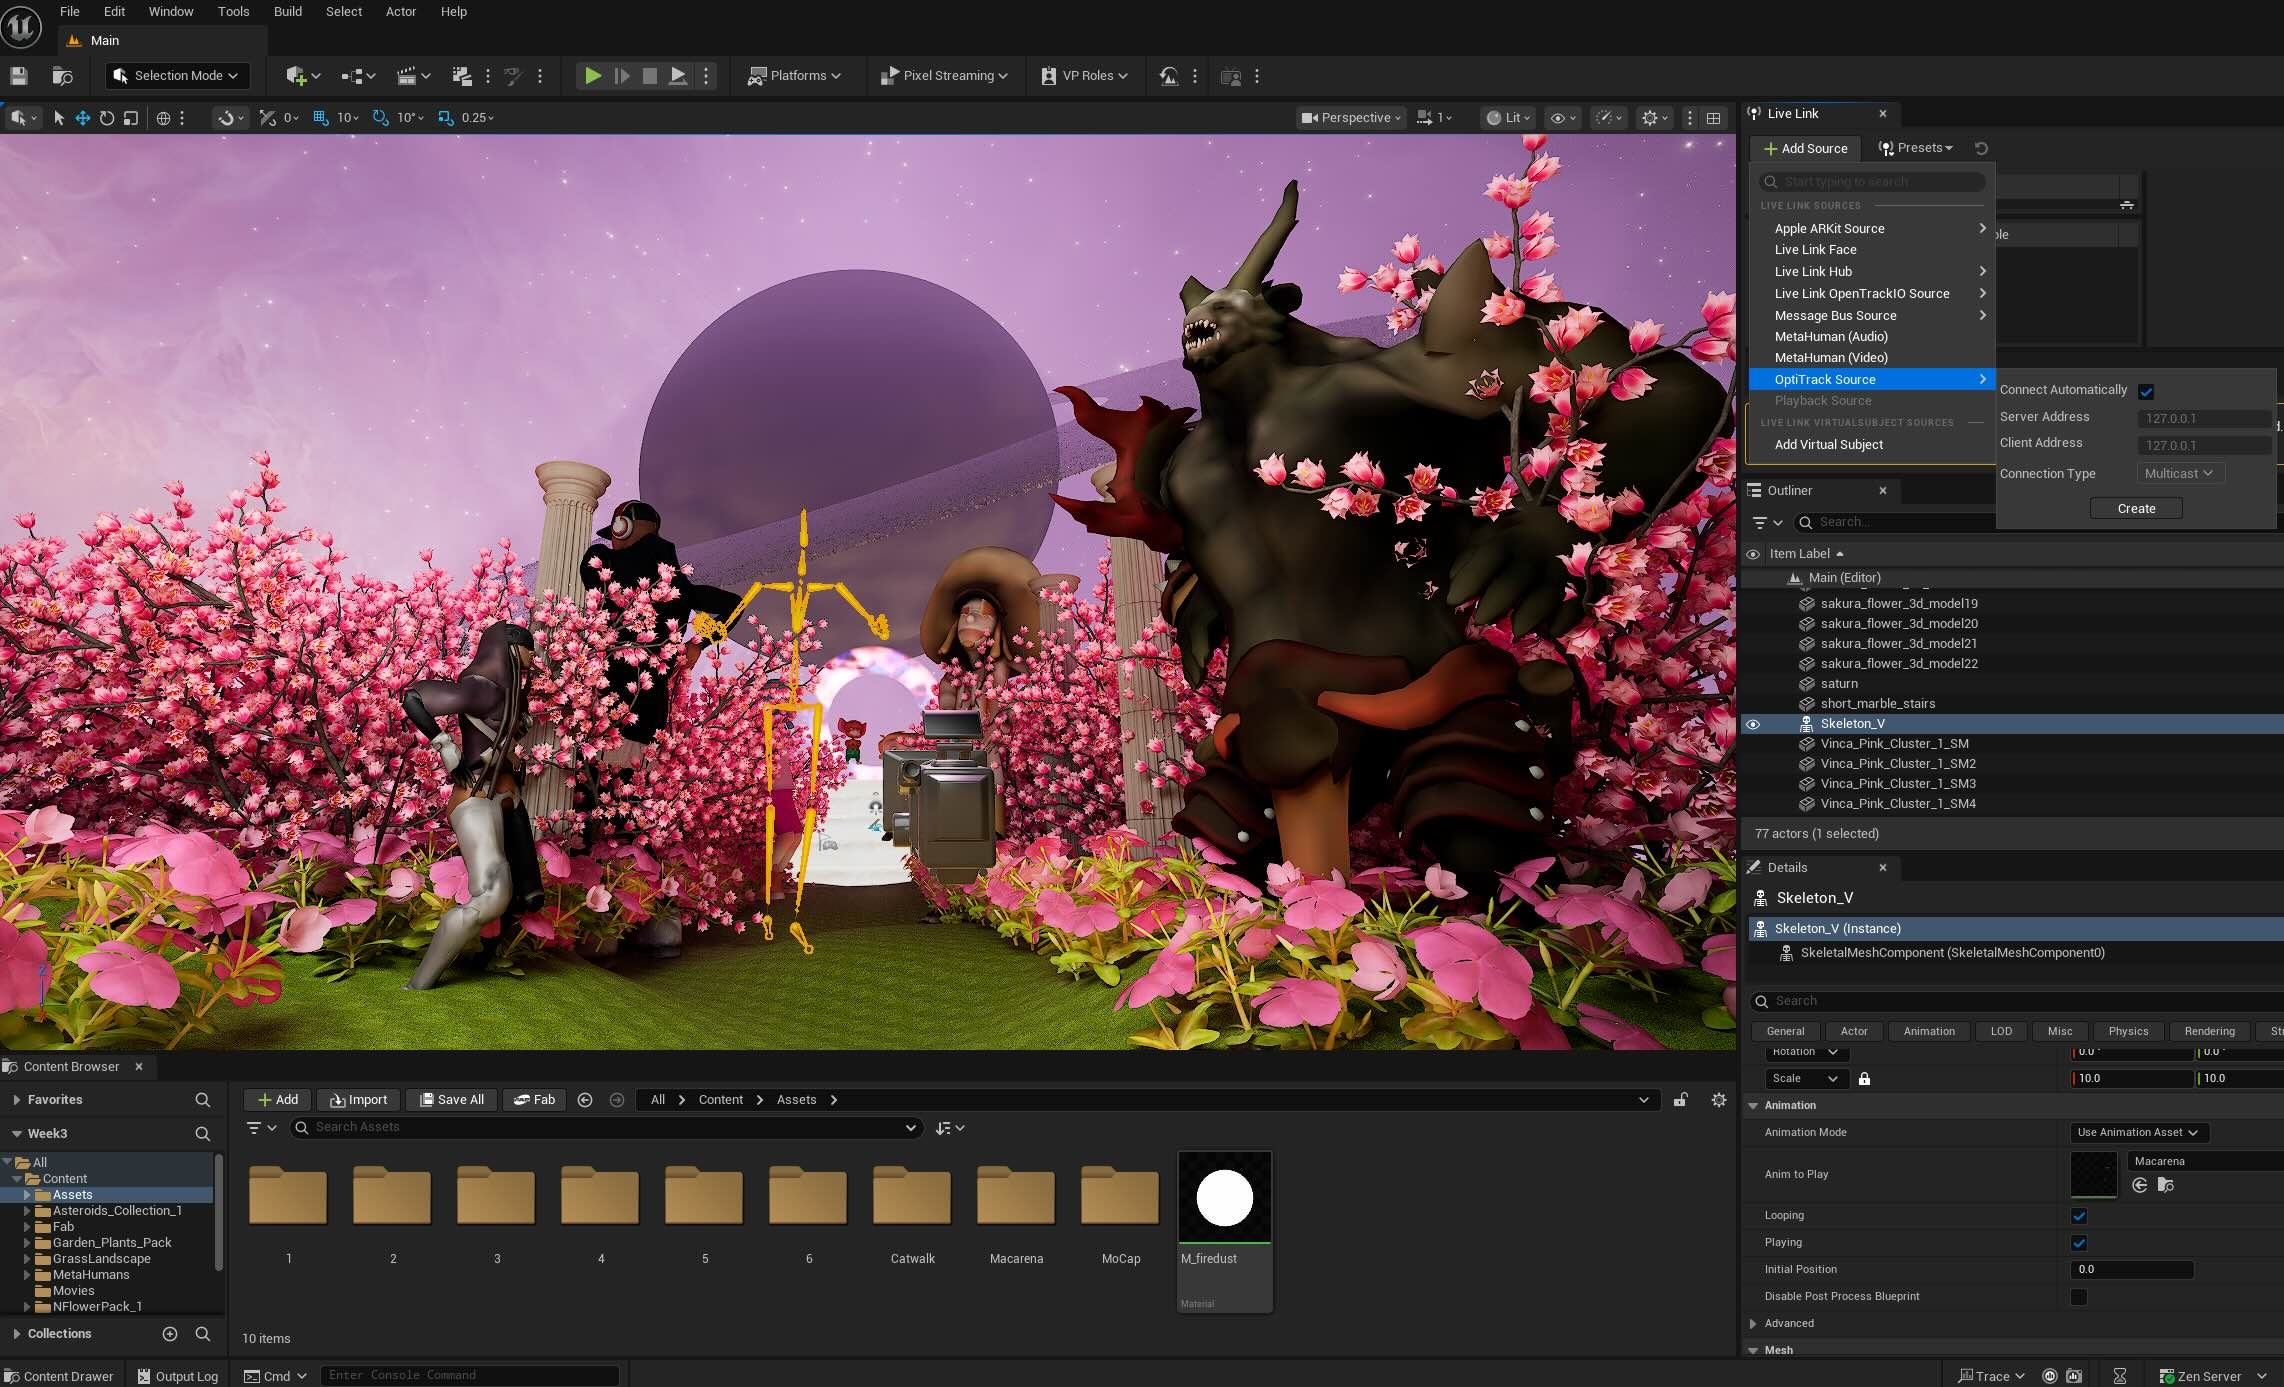
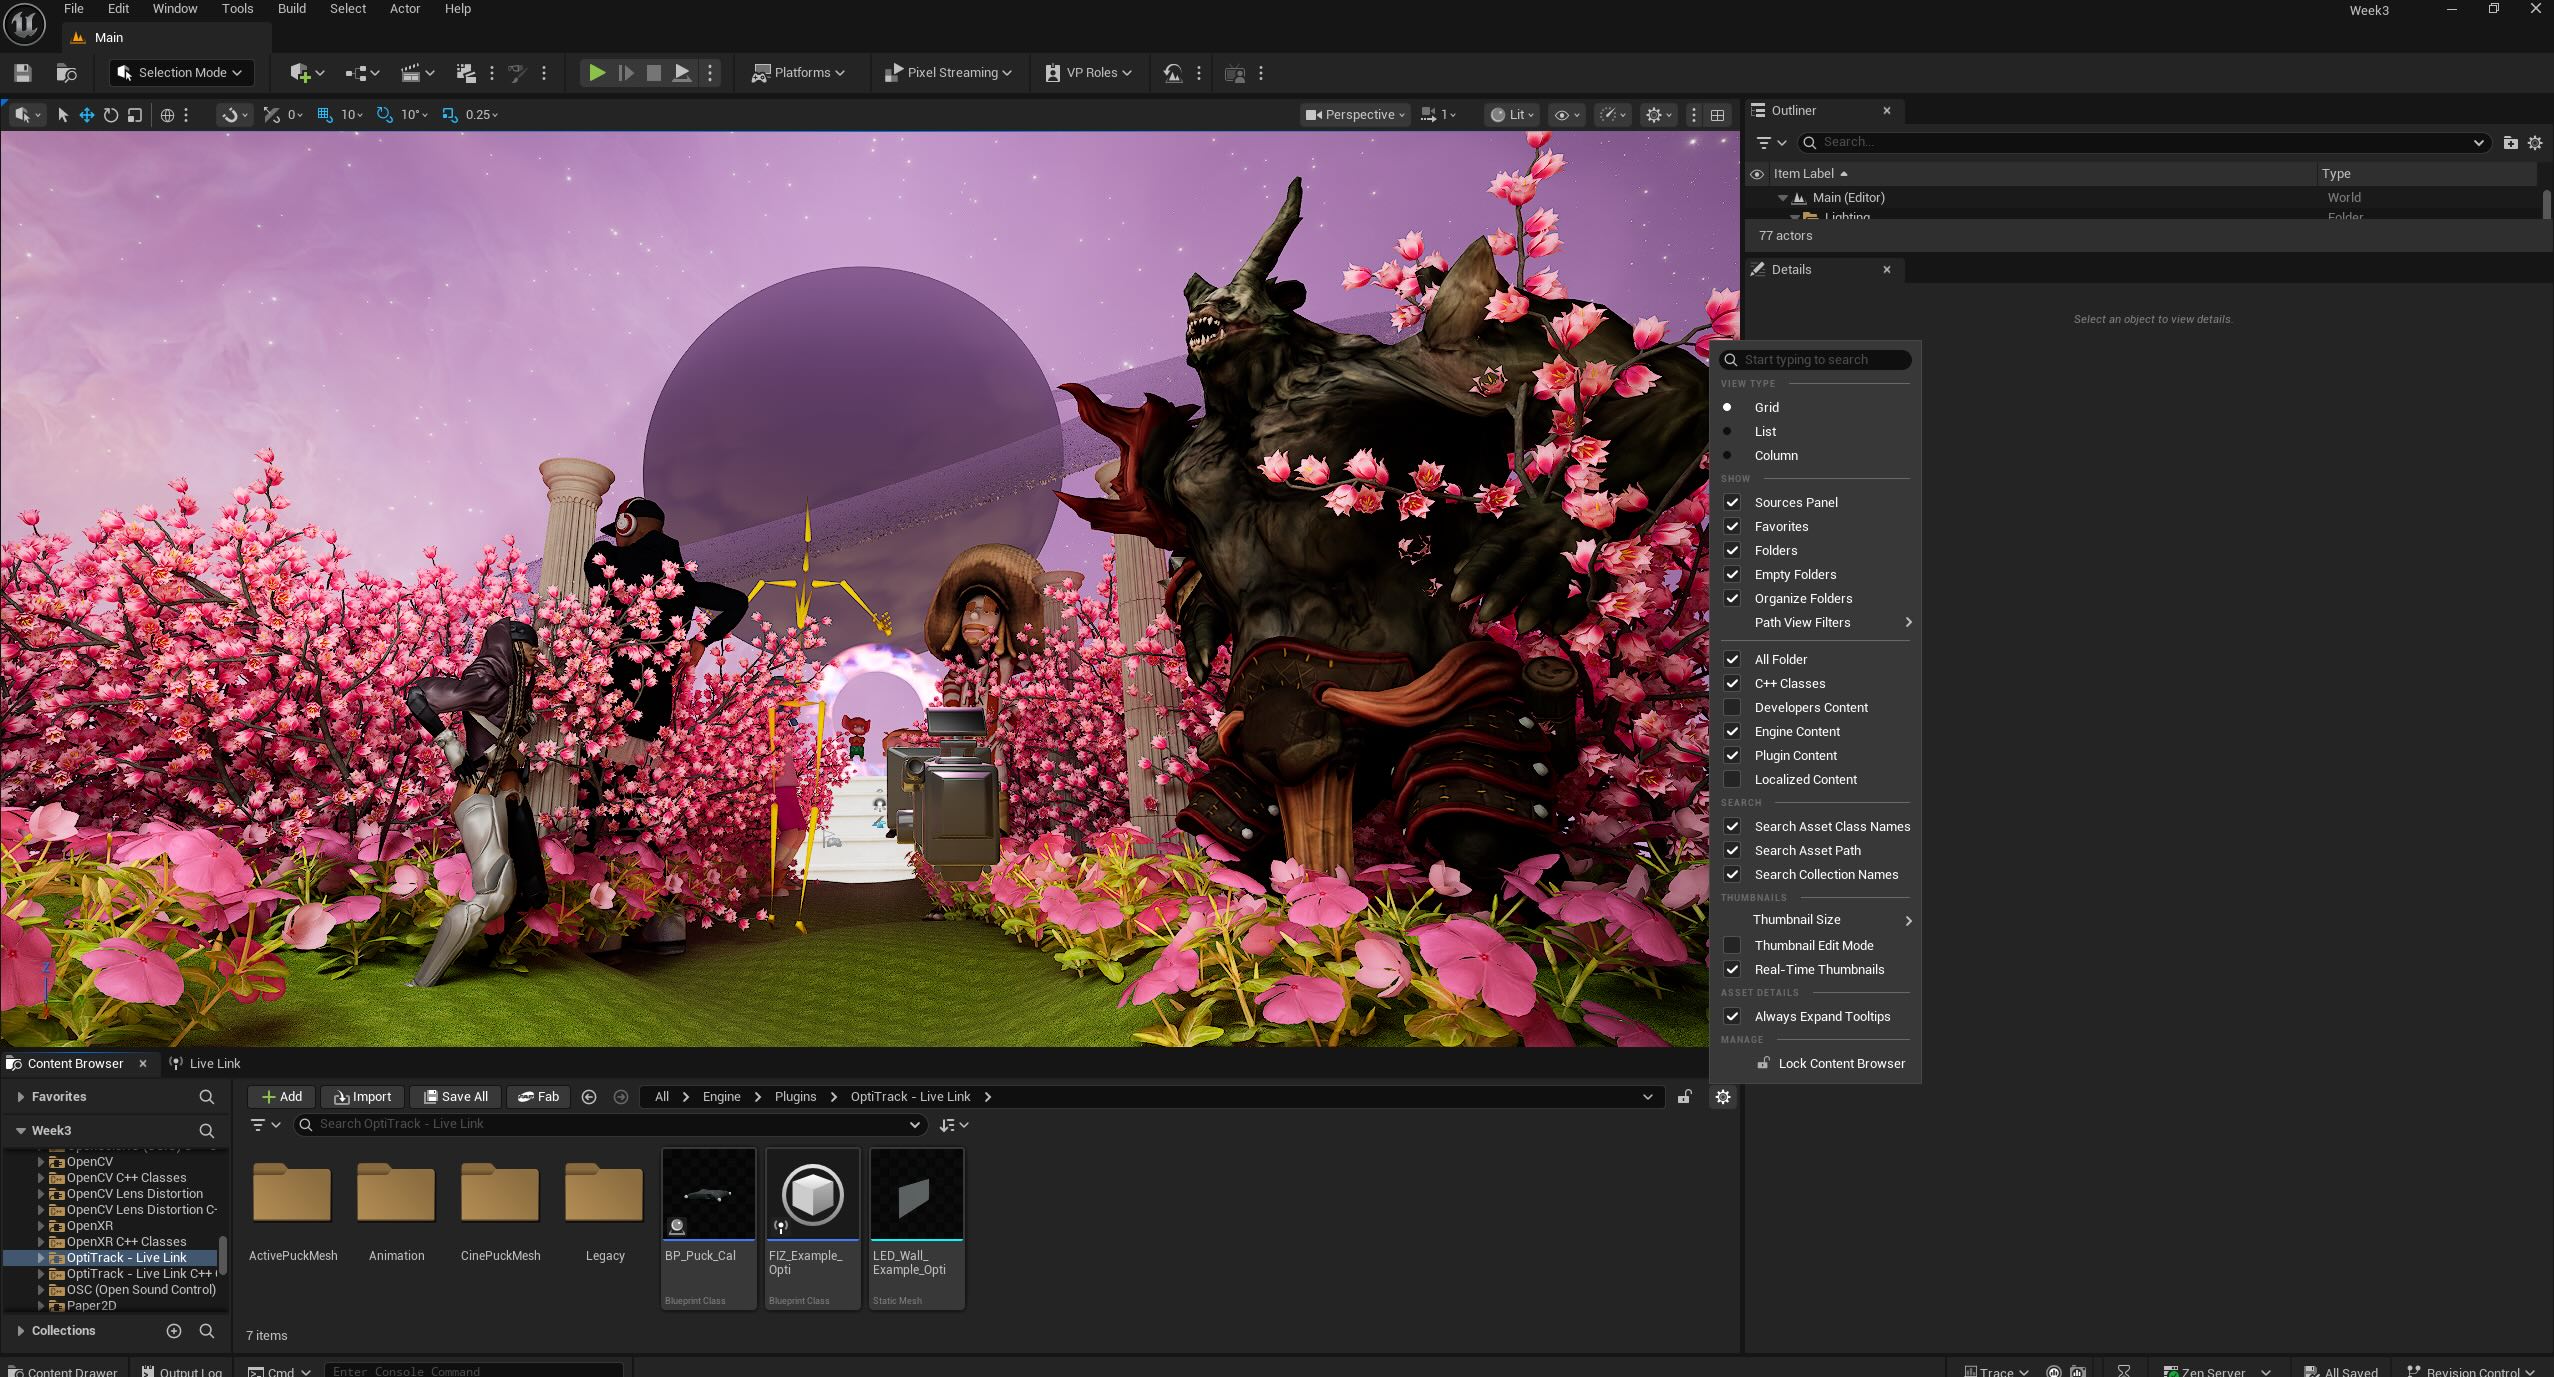
Opening the Live Link and activating the Optitrack Plugin on the Unreal Engine system.

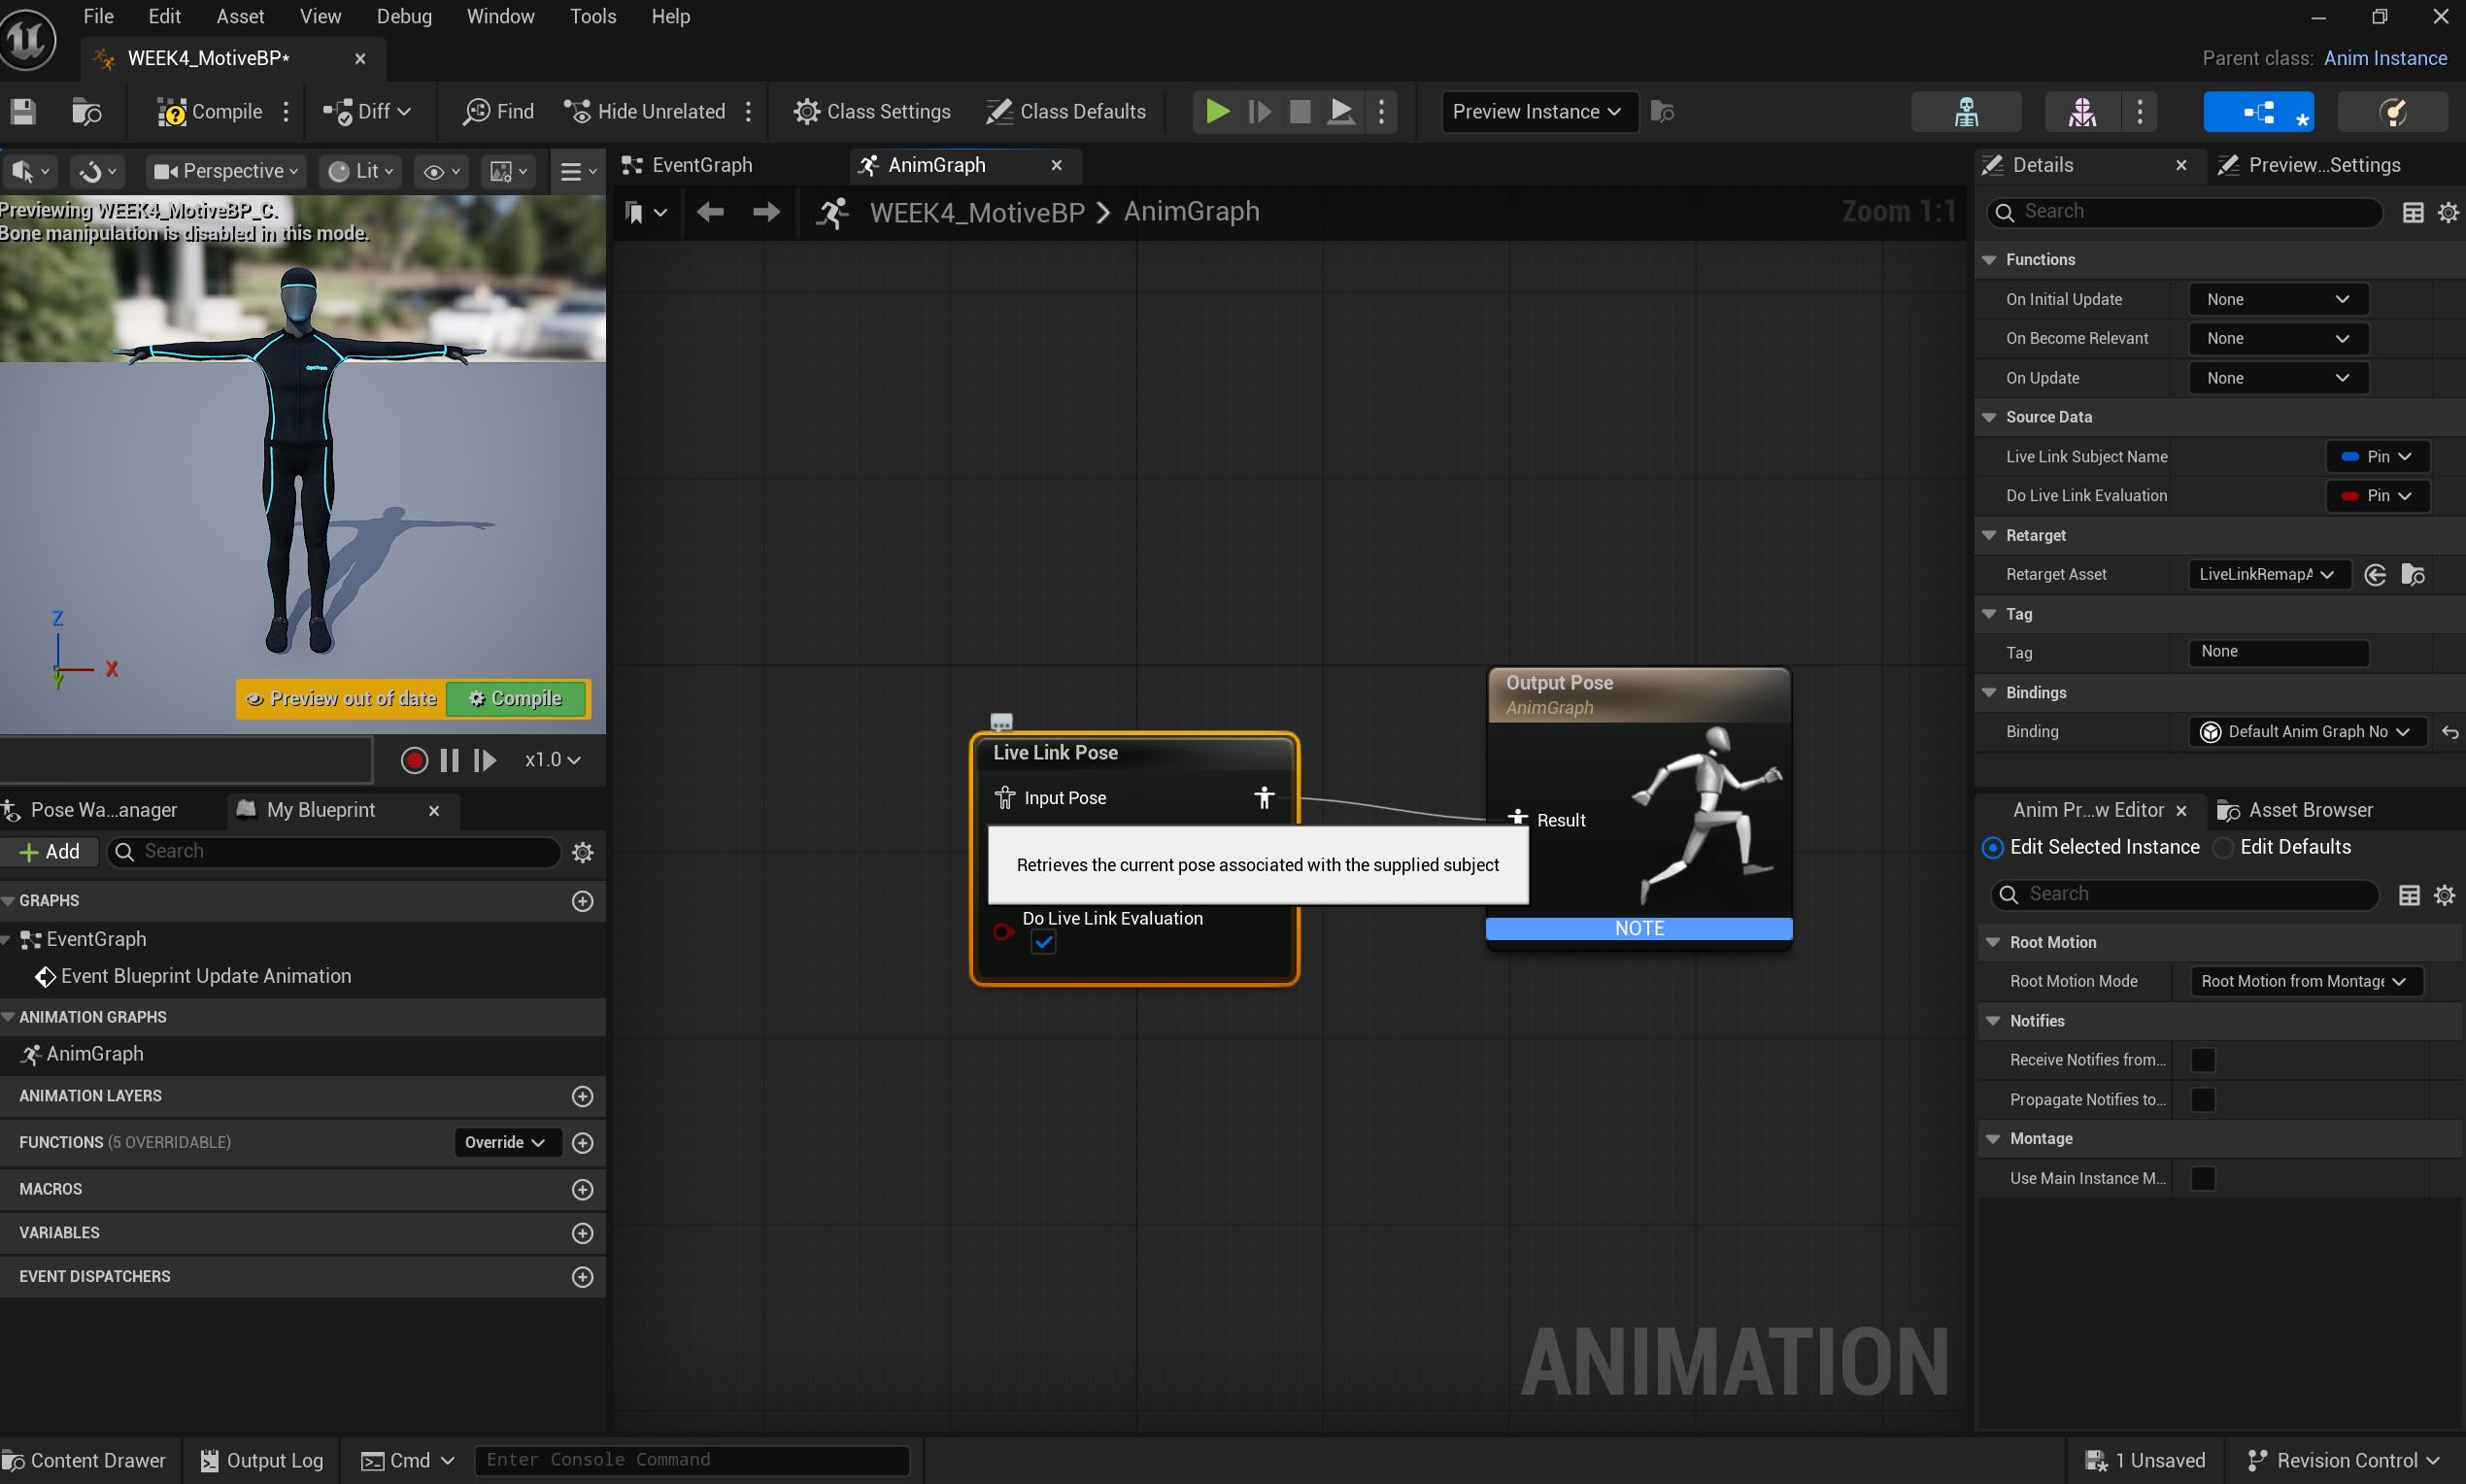
Walking through creating the animation blueprint and connecting Live Link Pose nodes.
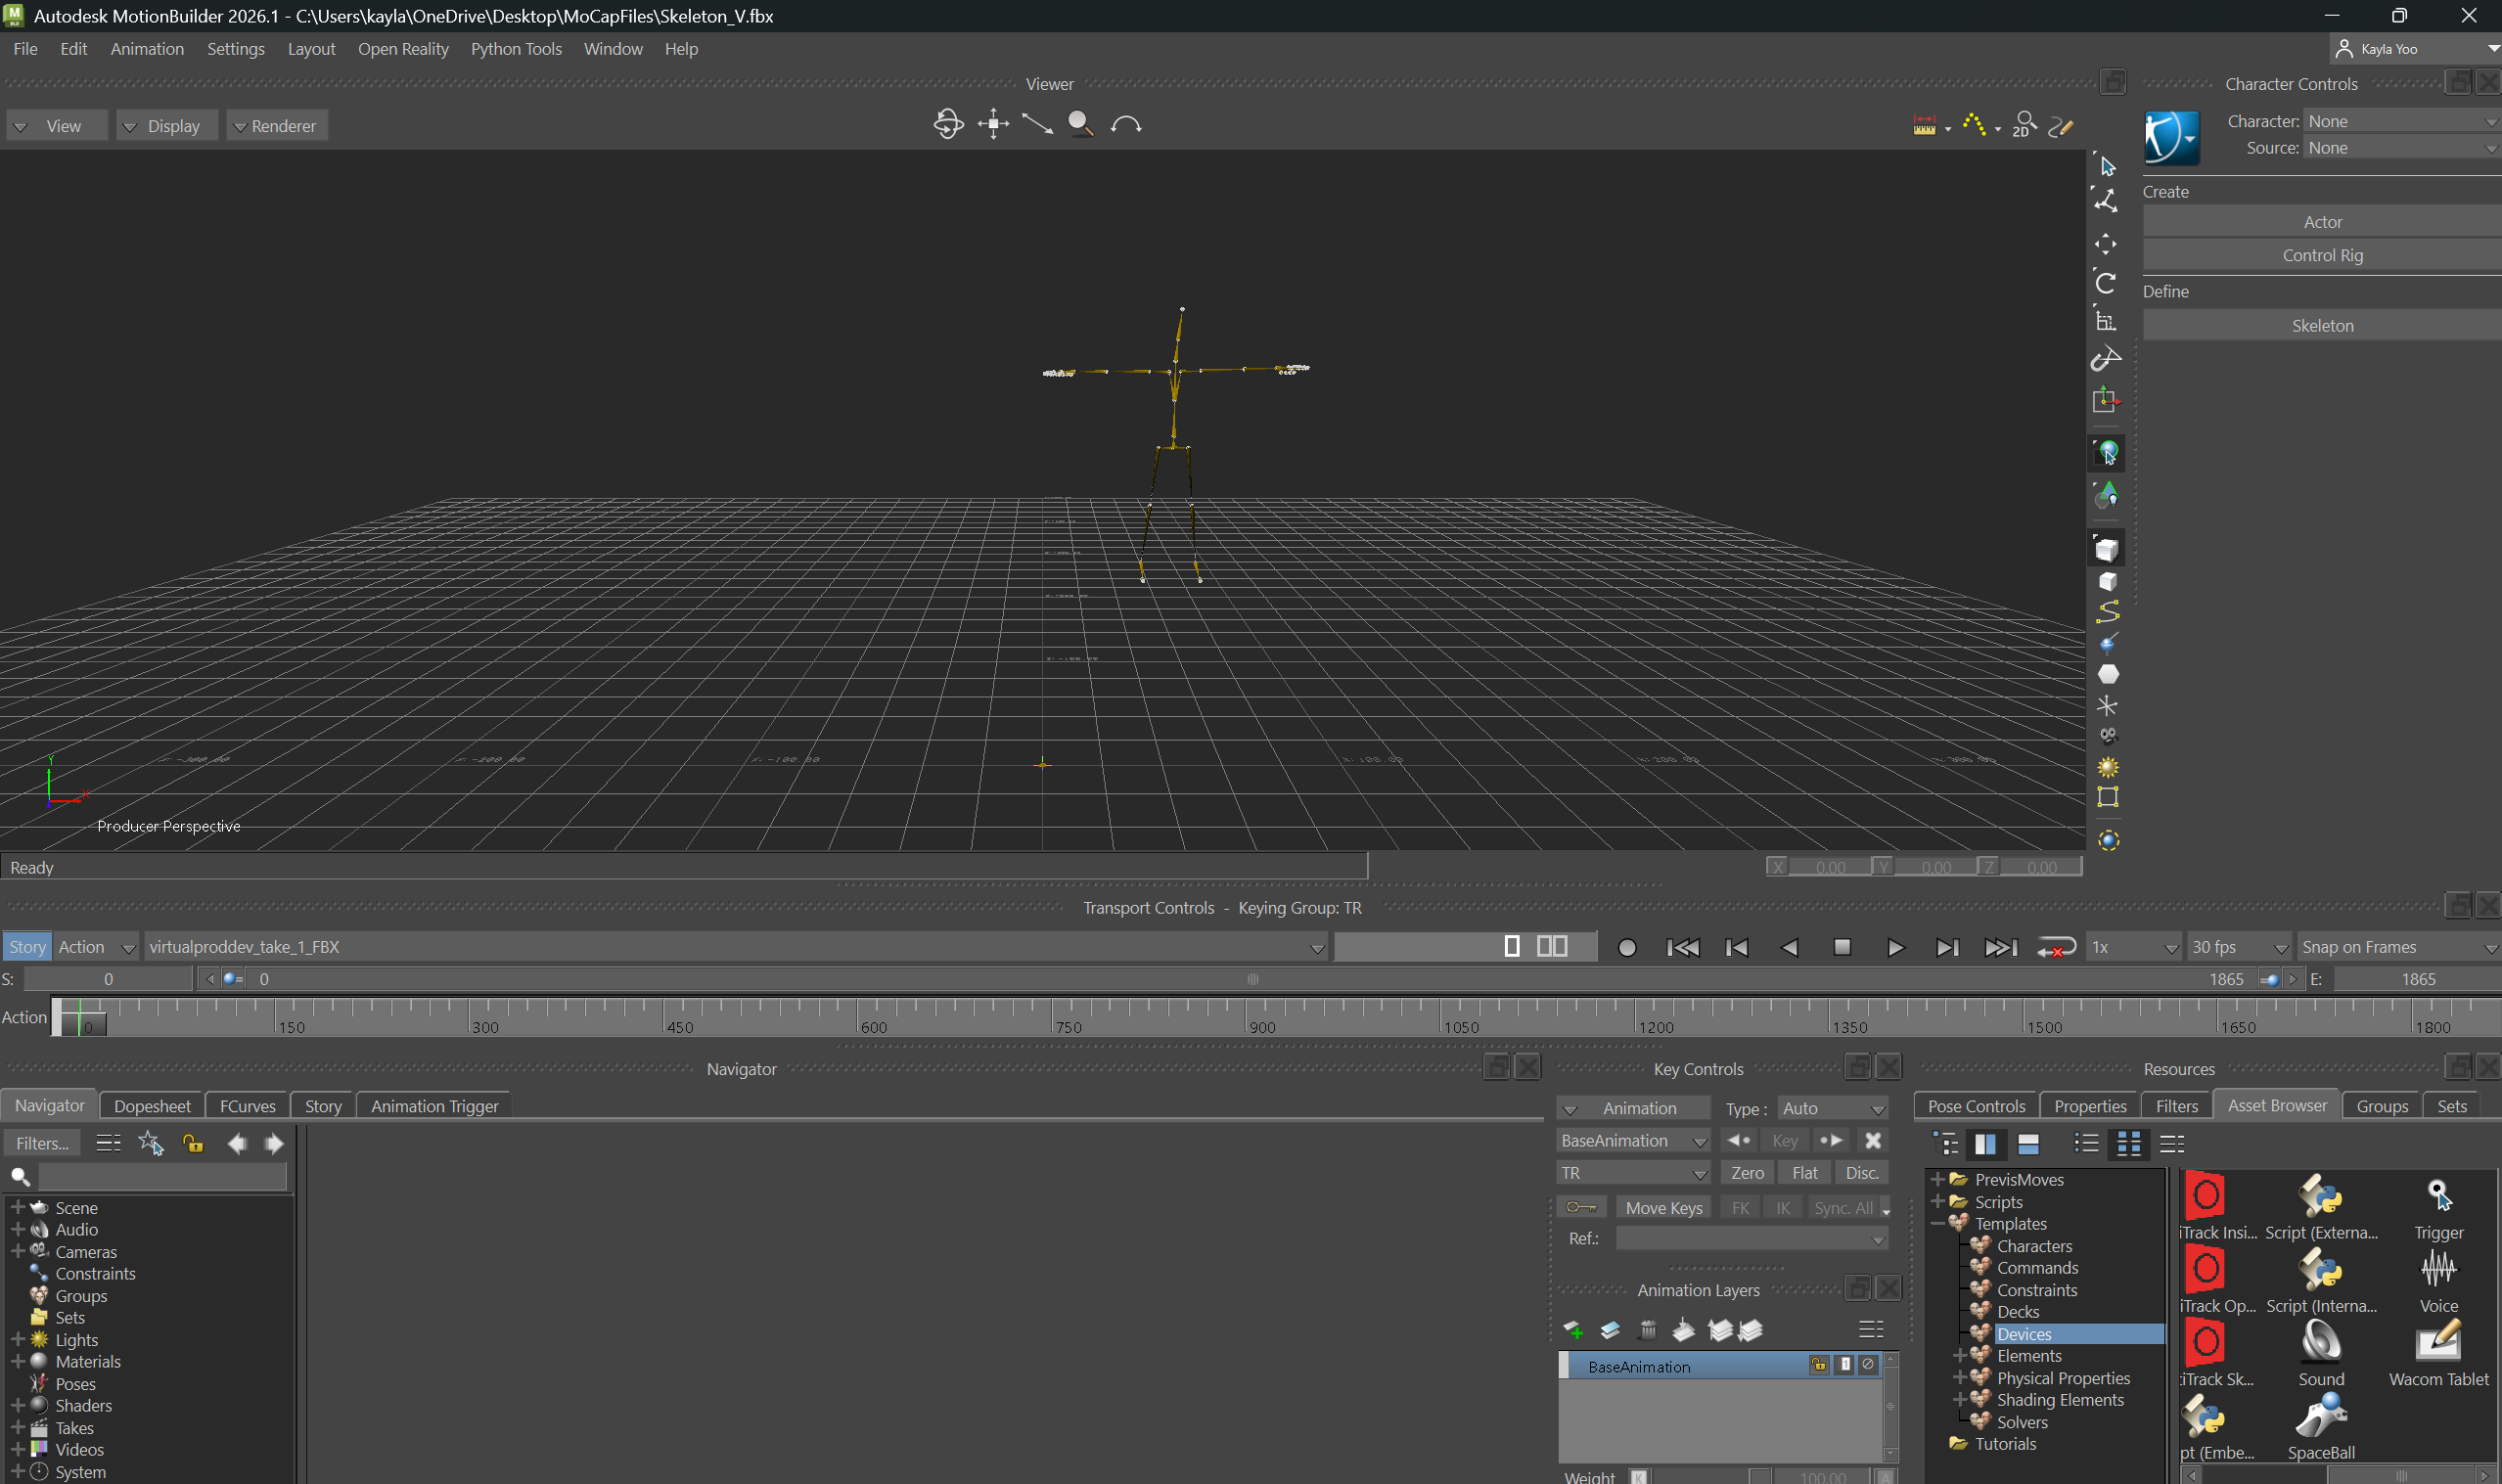
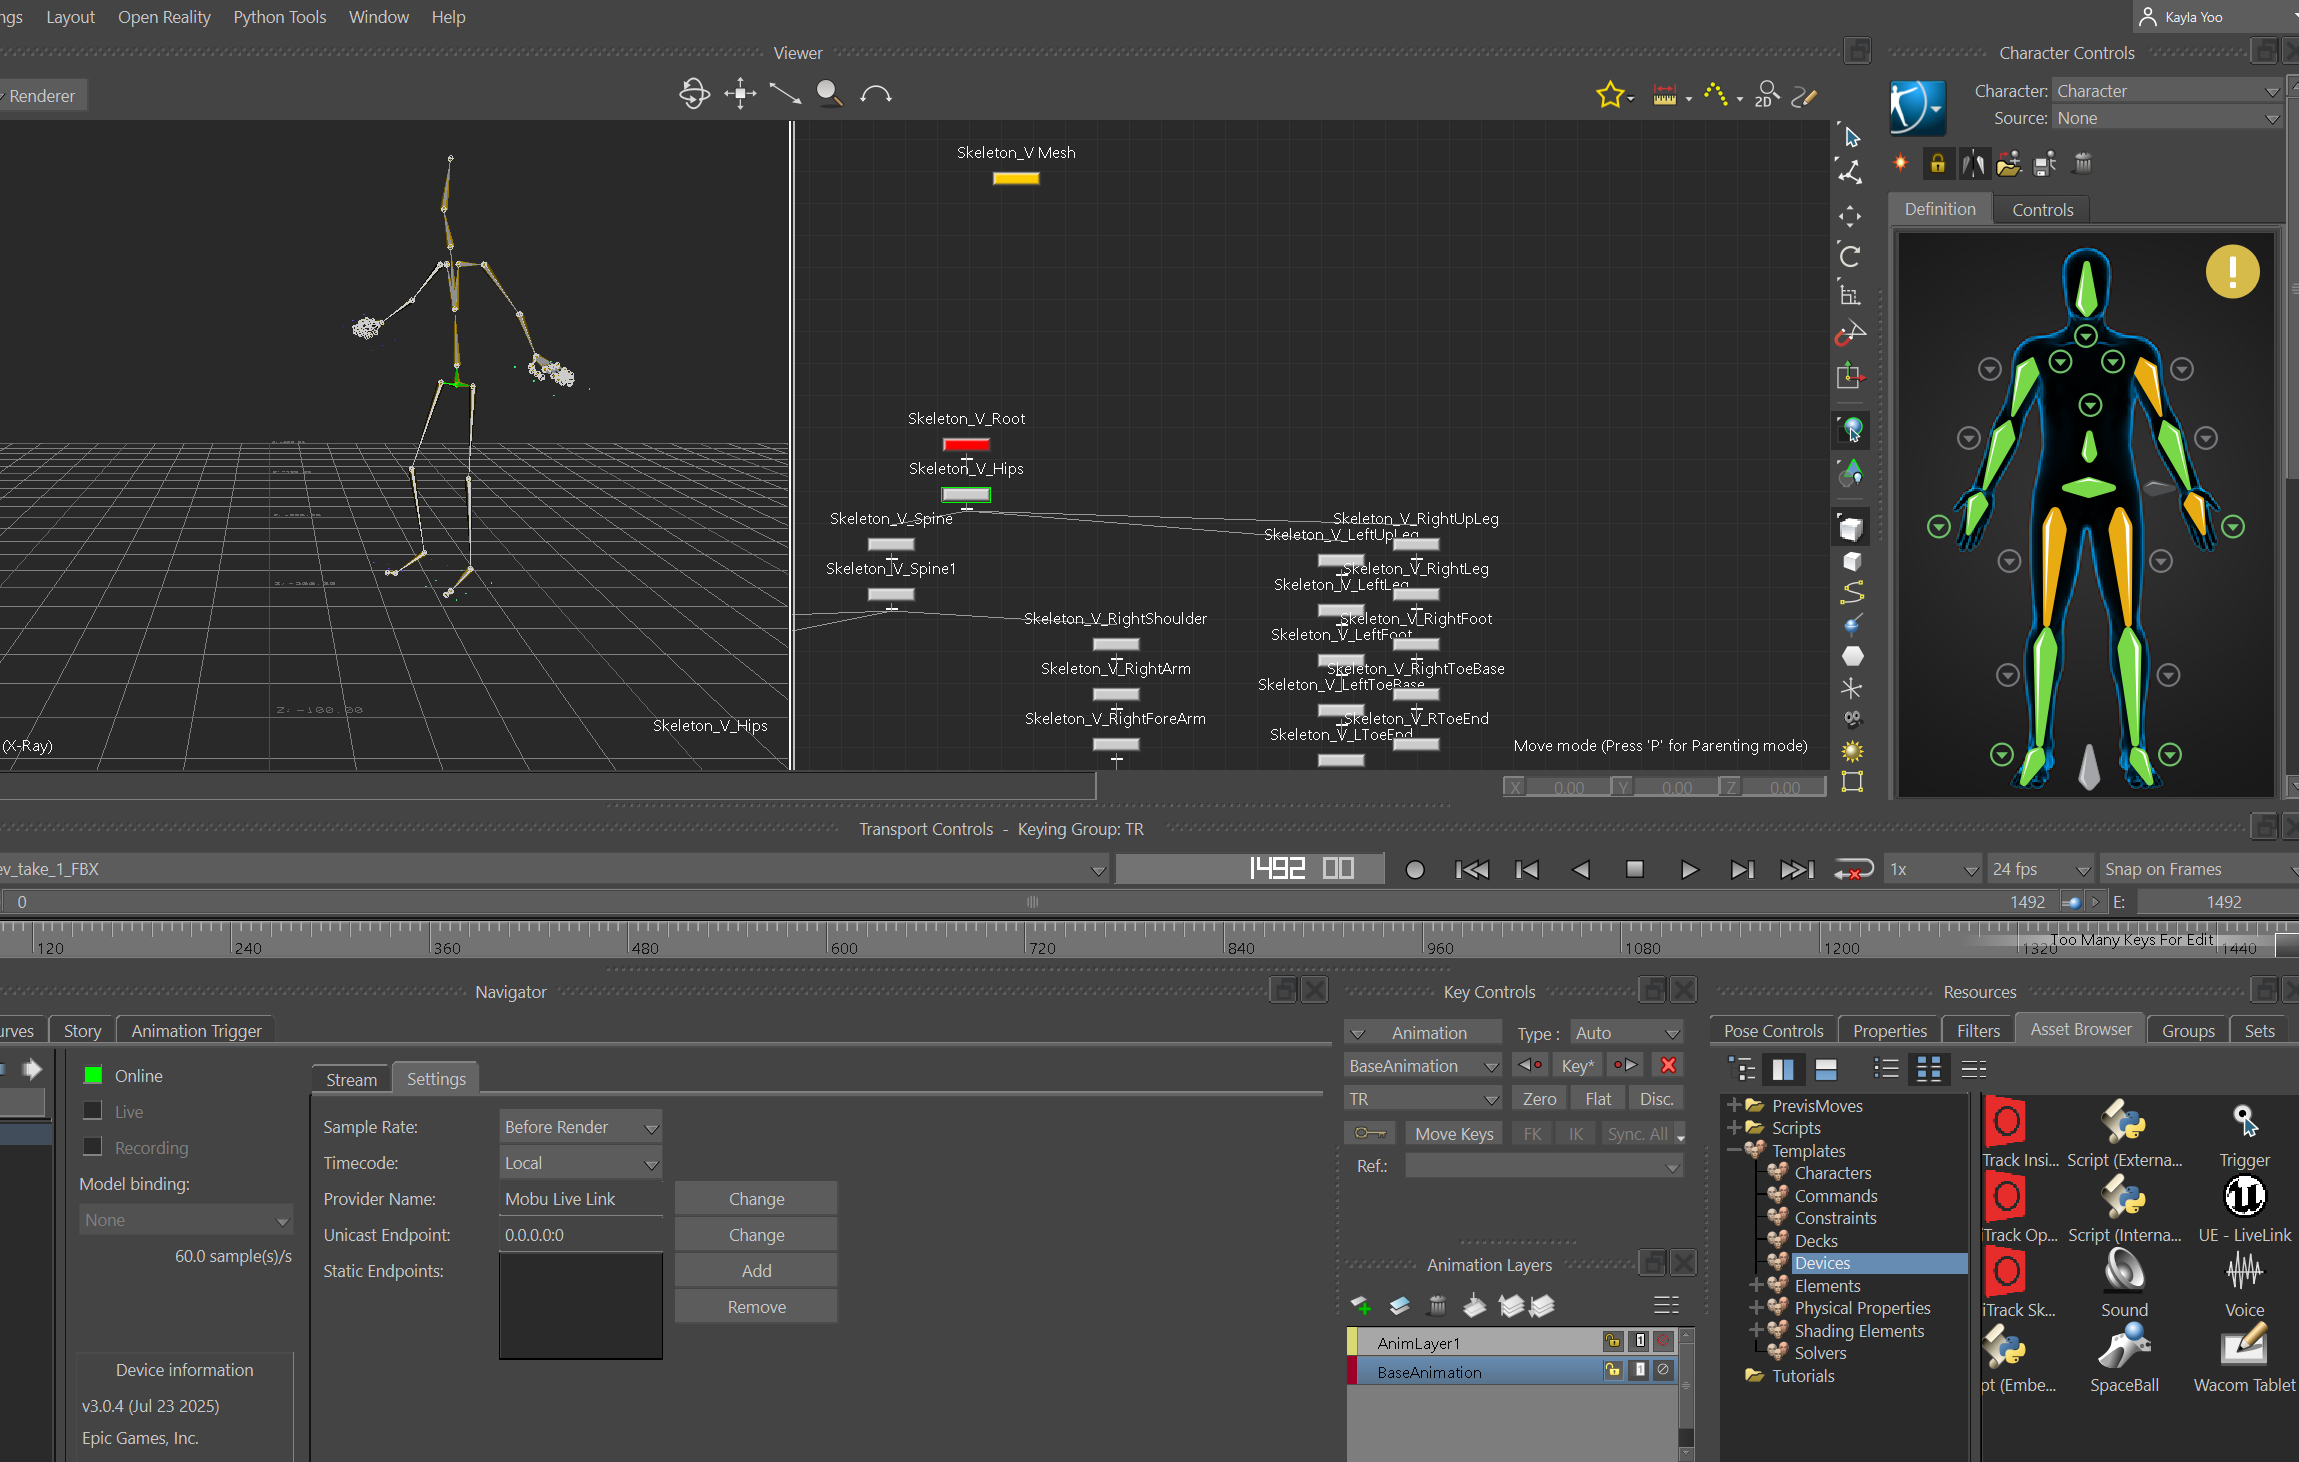
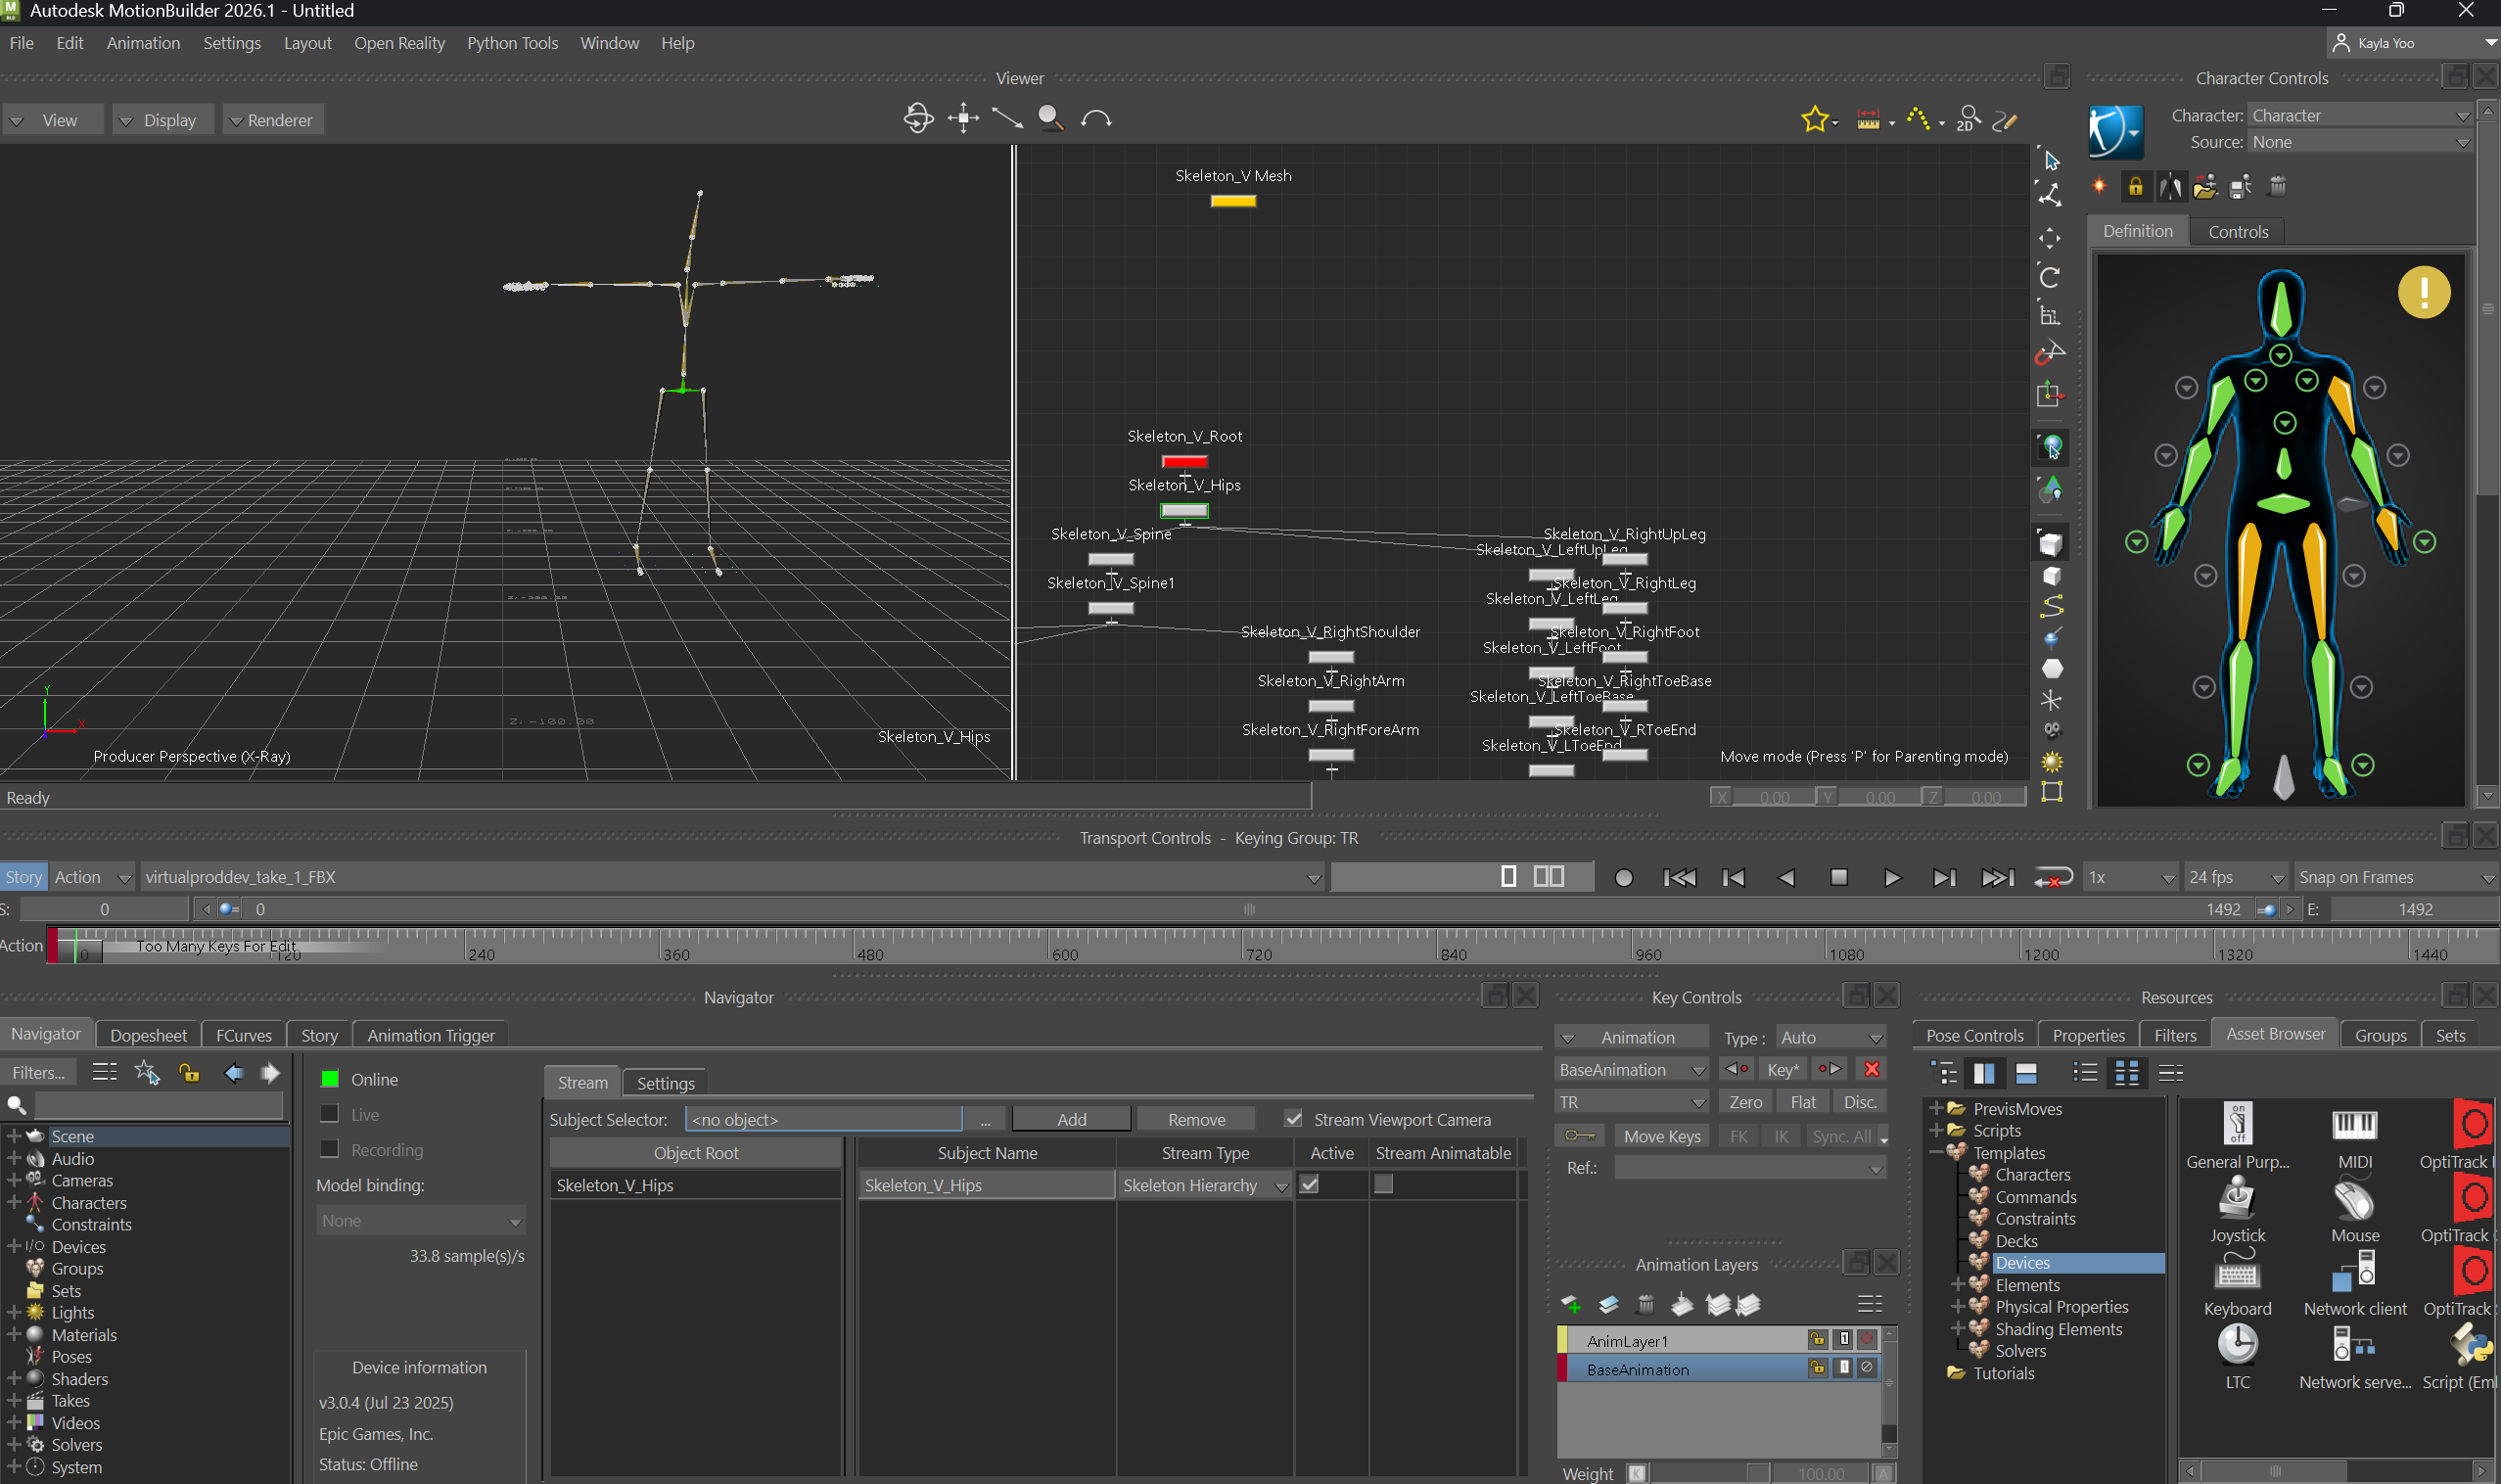
IK Rig Targeting
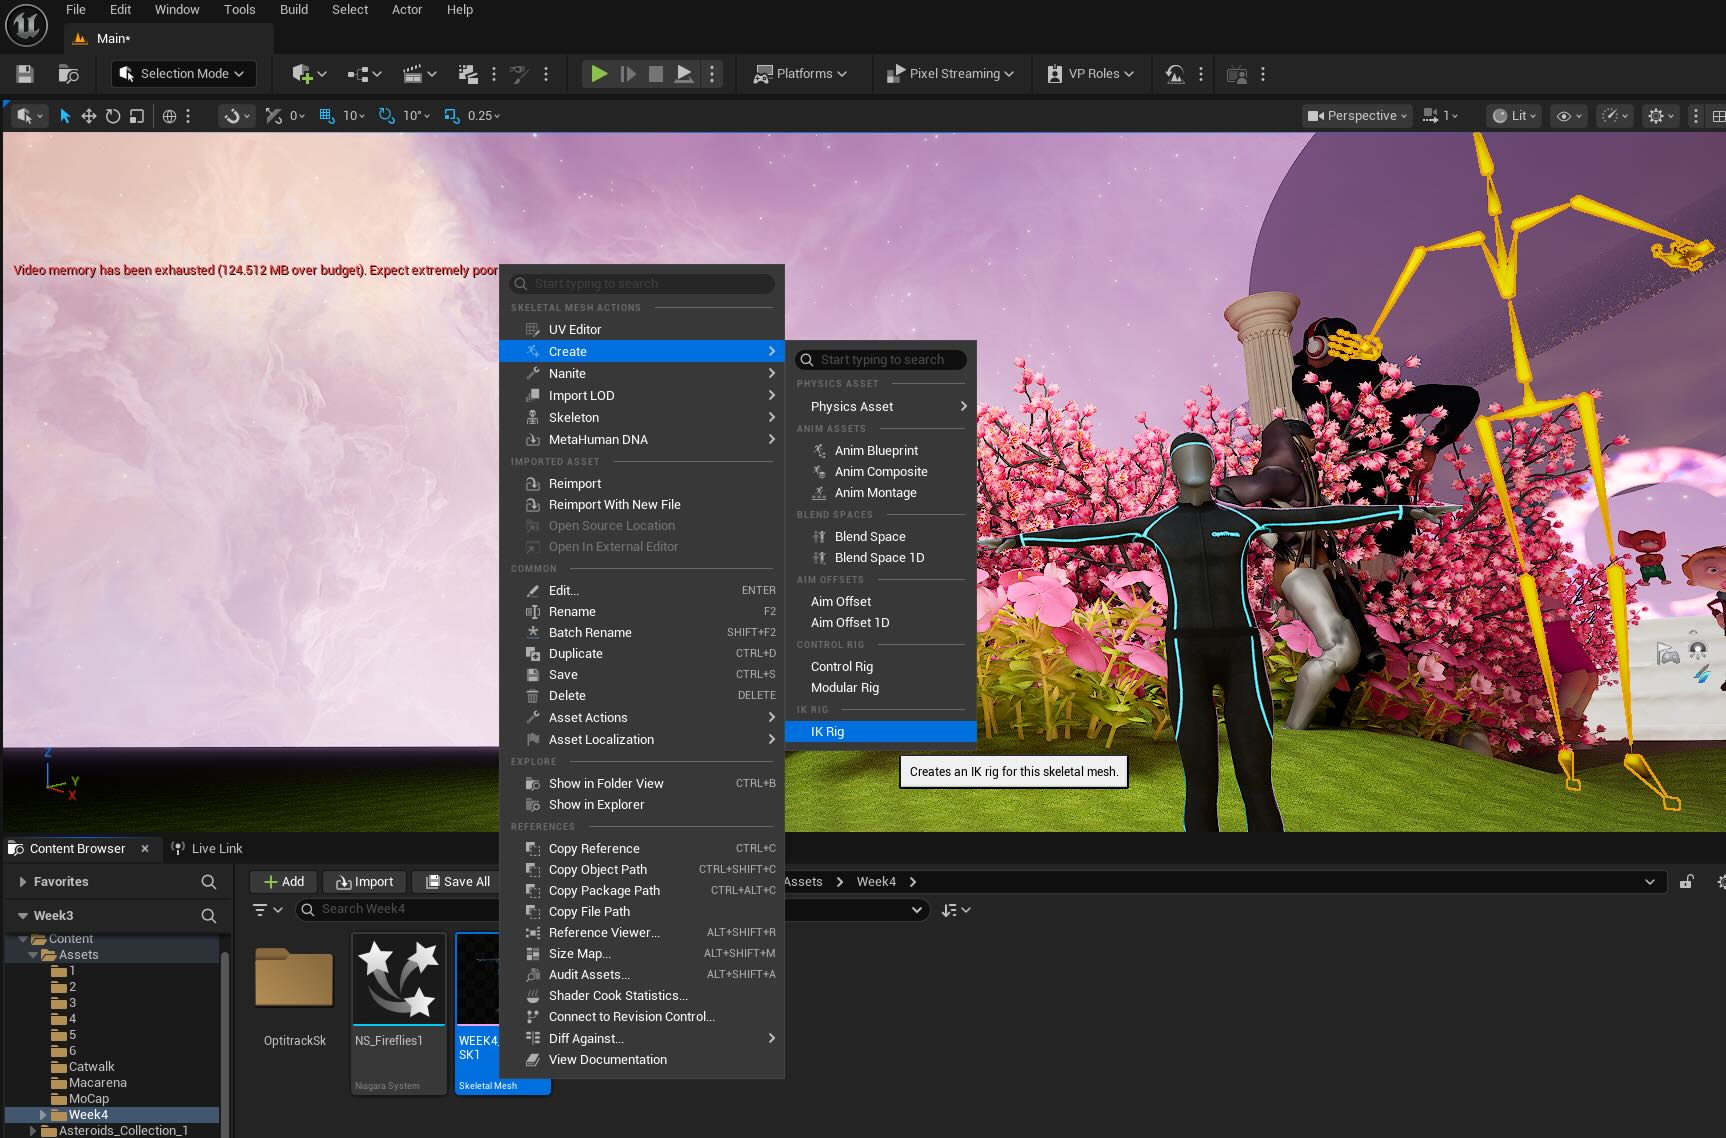

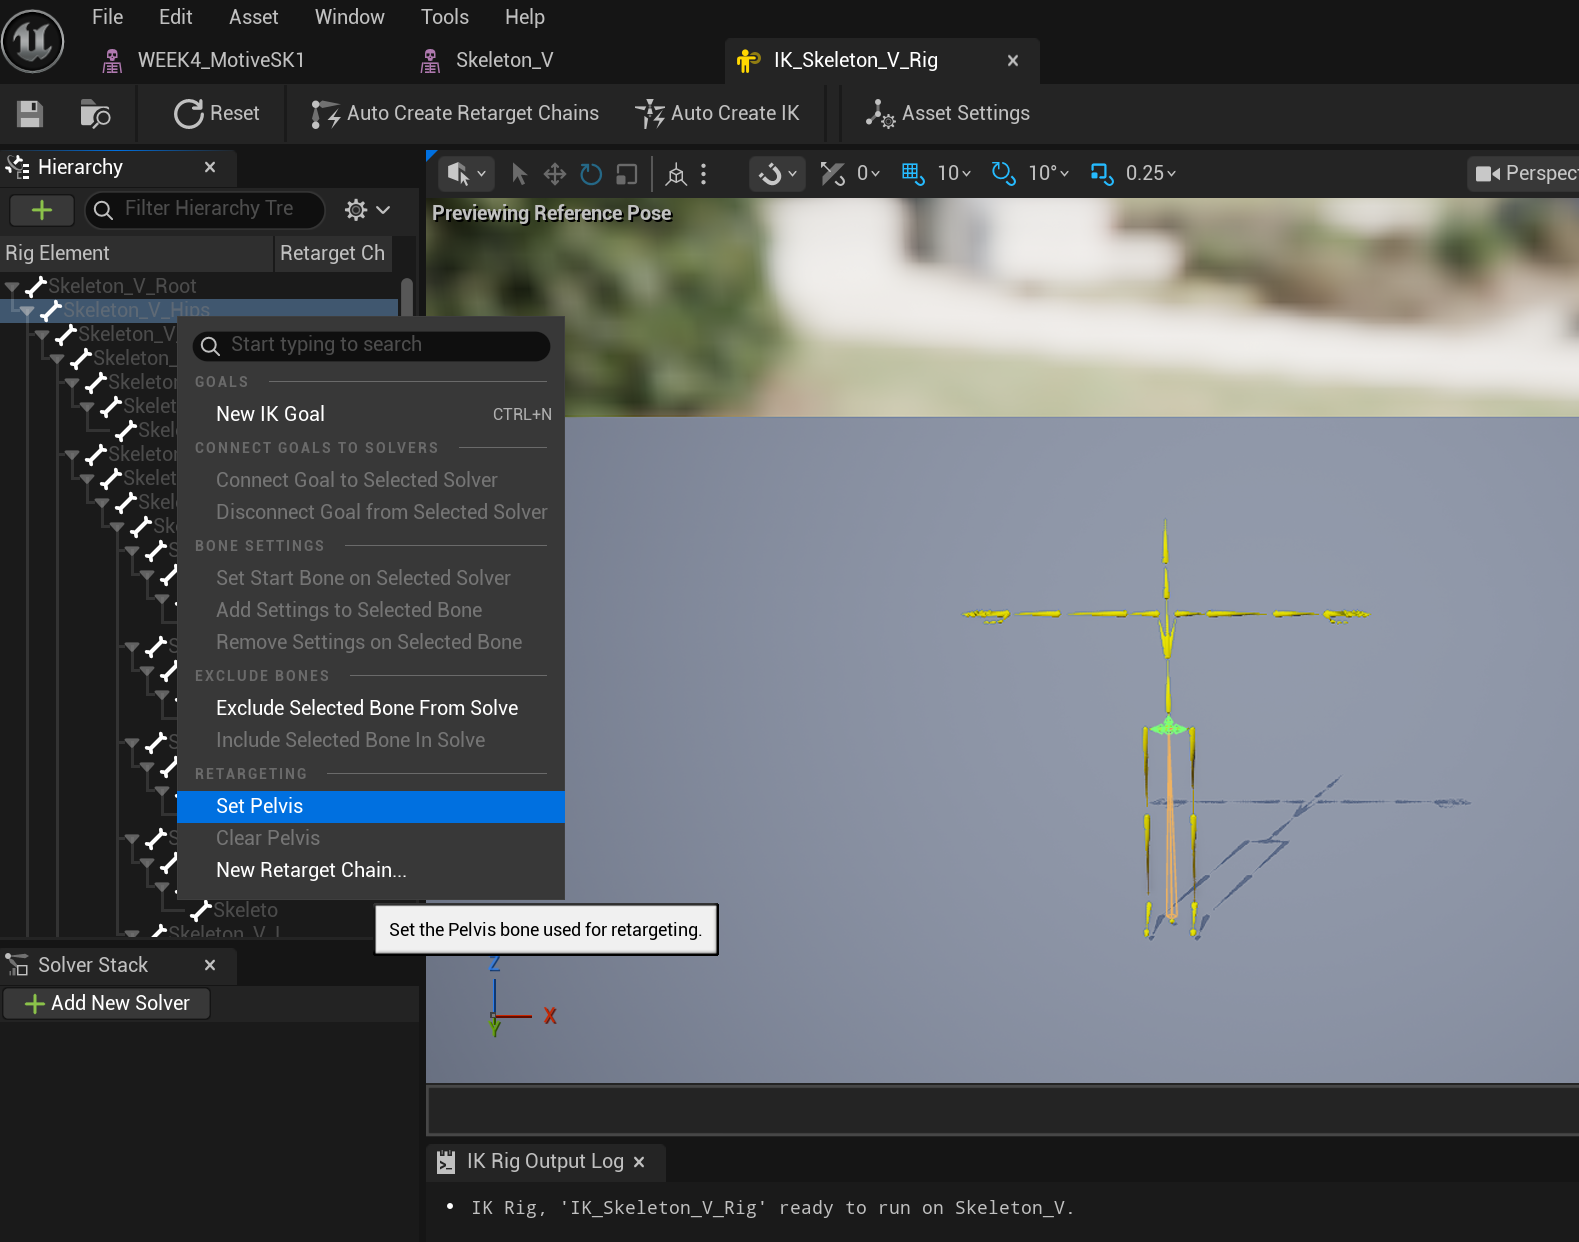
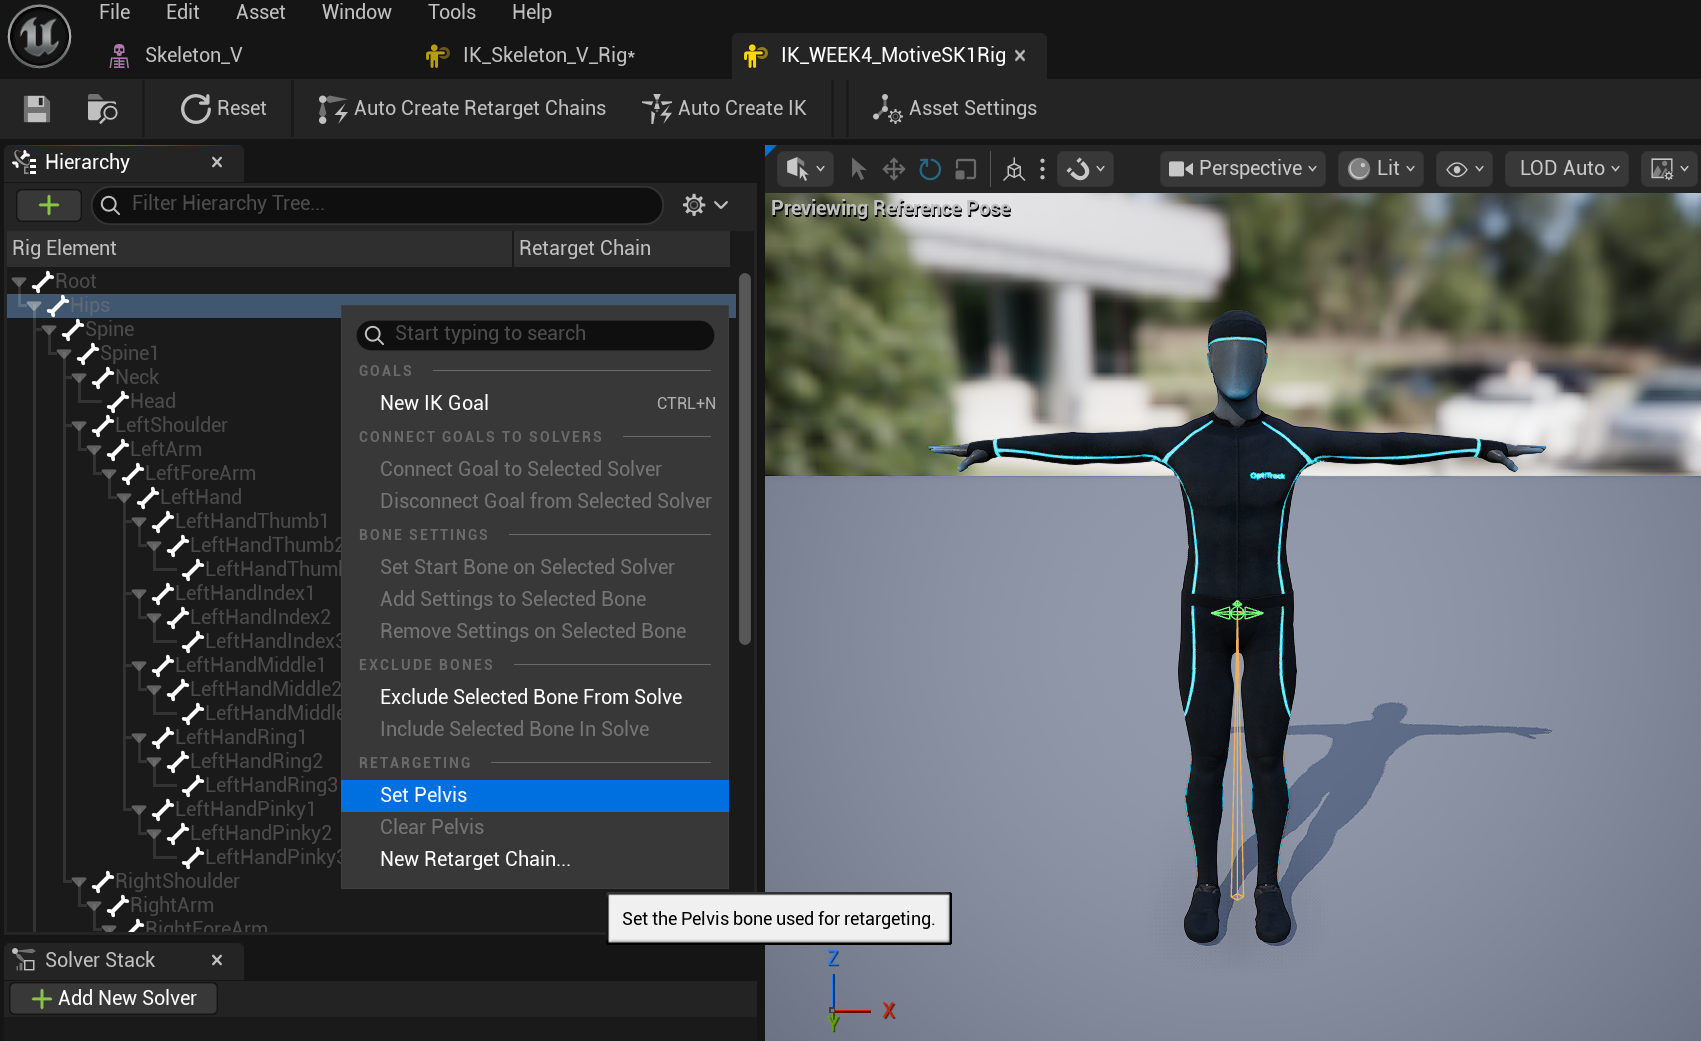
IK Rigging the yellow skeleton and the OptiTrack Mocap Man skeleton - not sure why the yellow skeleton had extra Mocap marks...
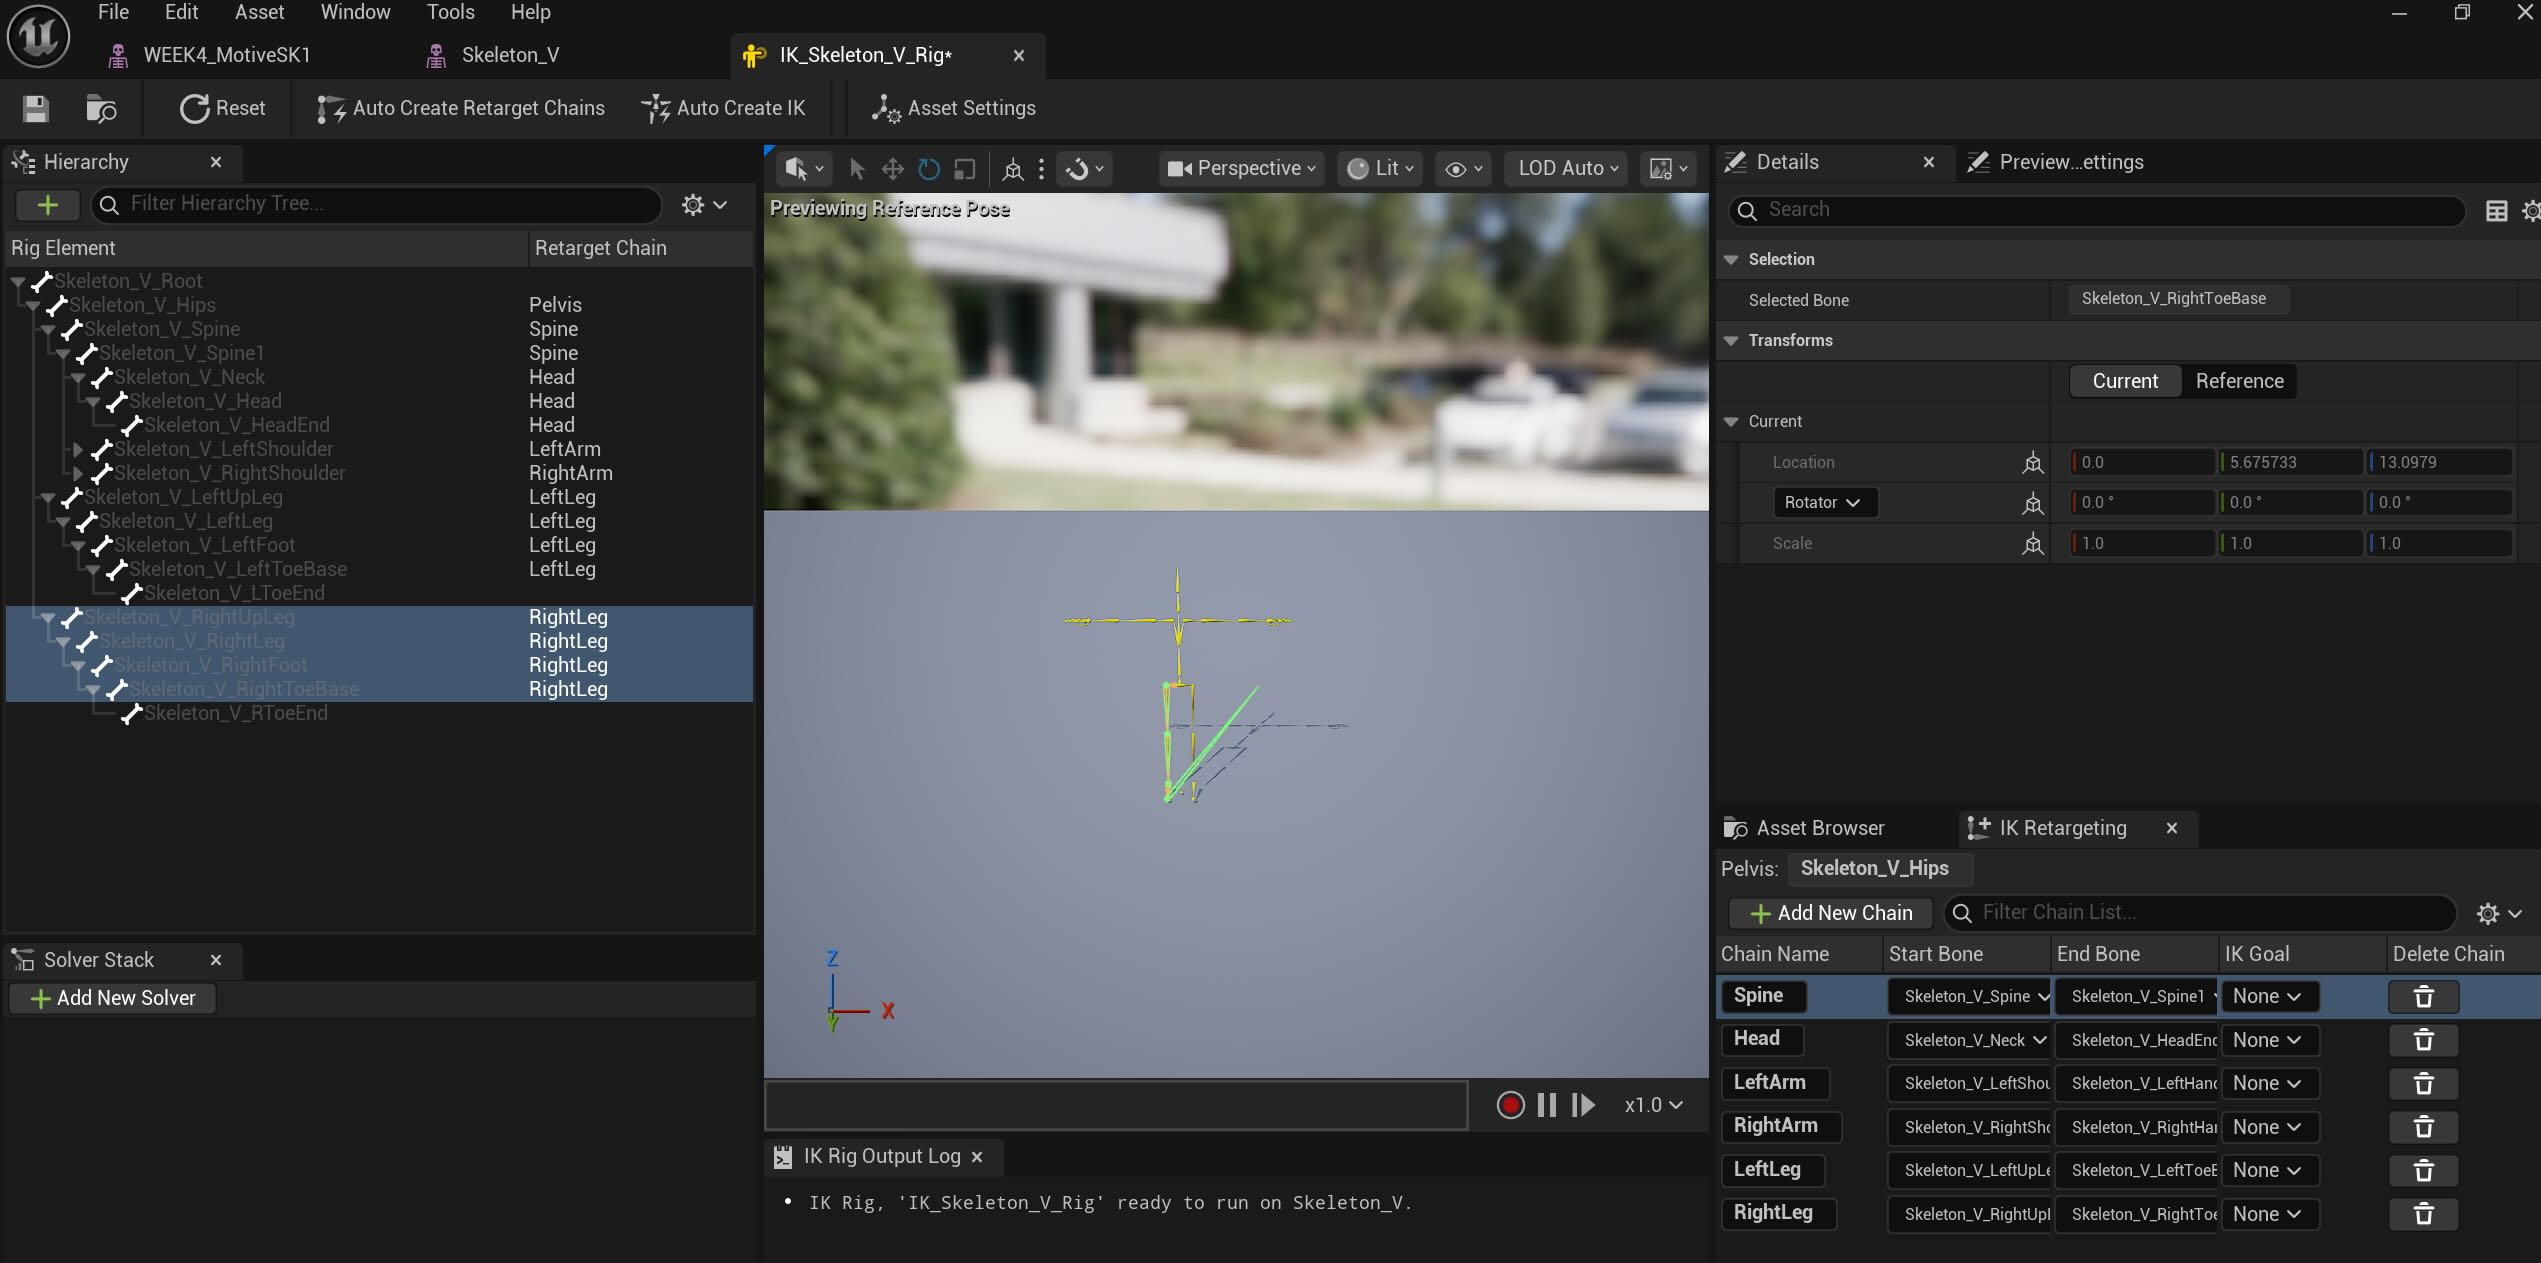
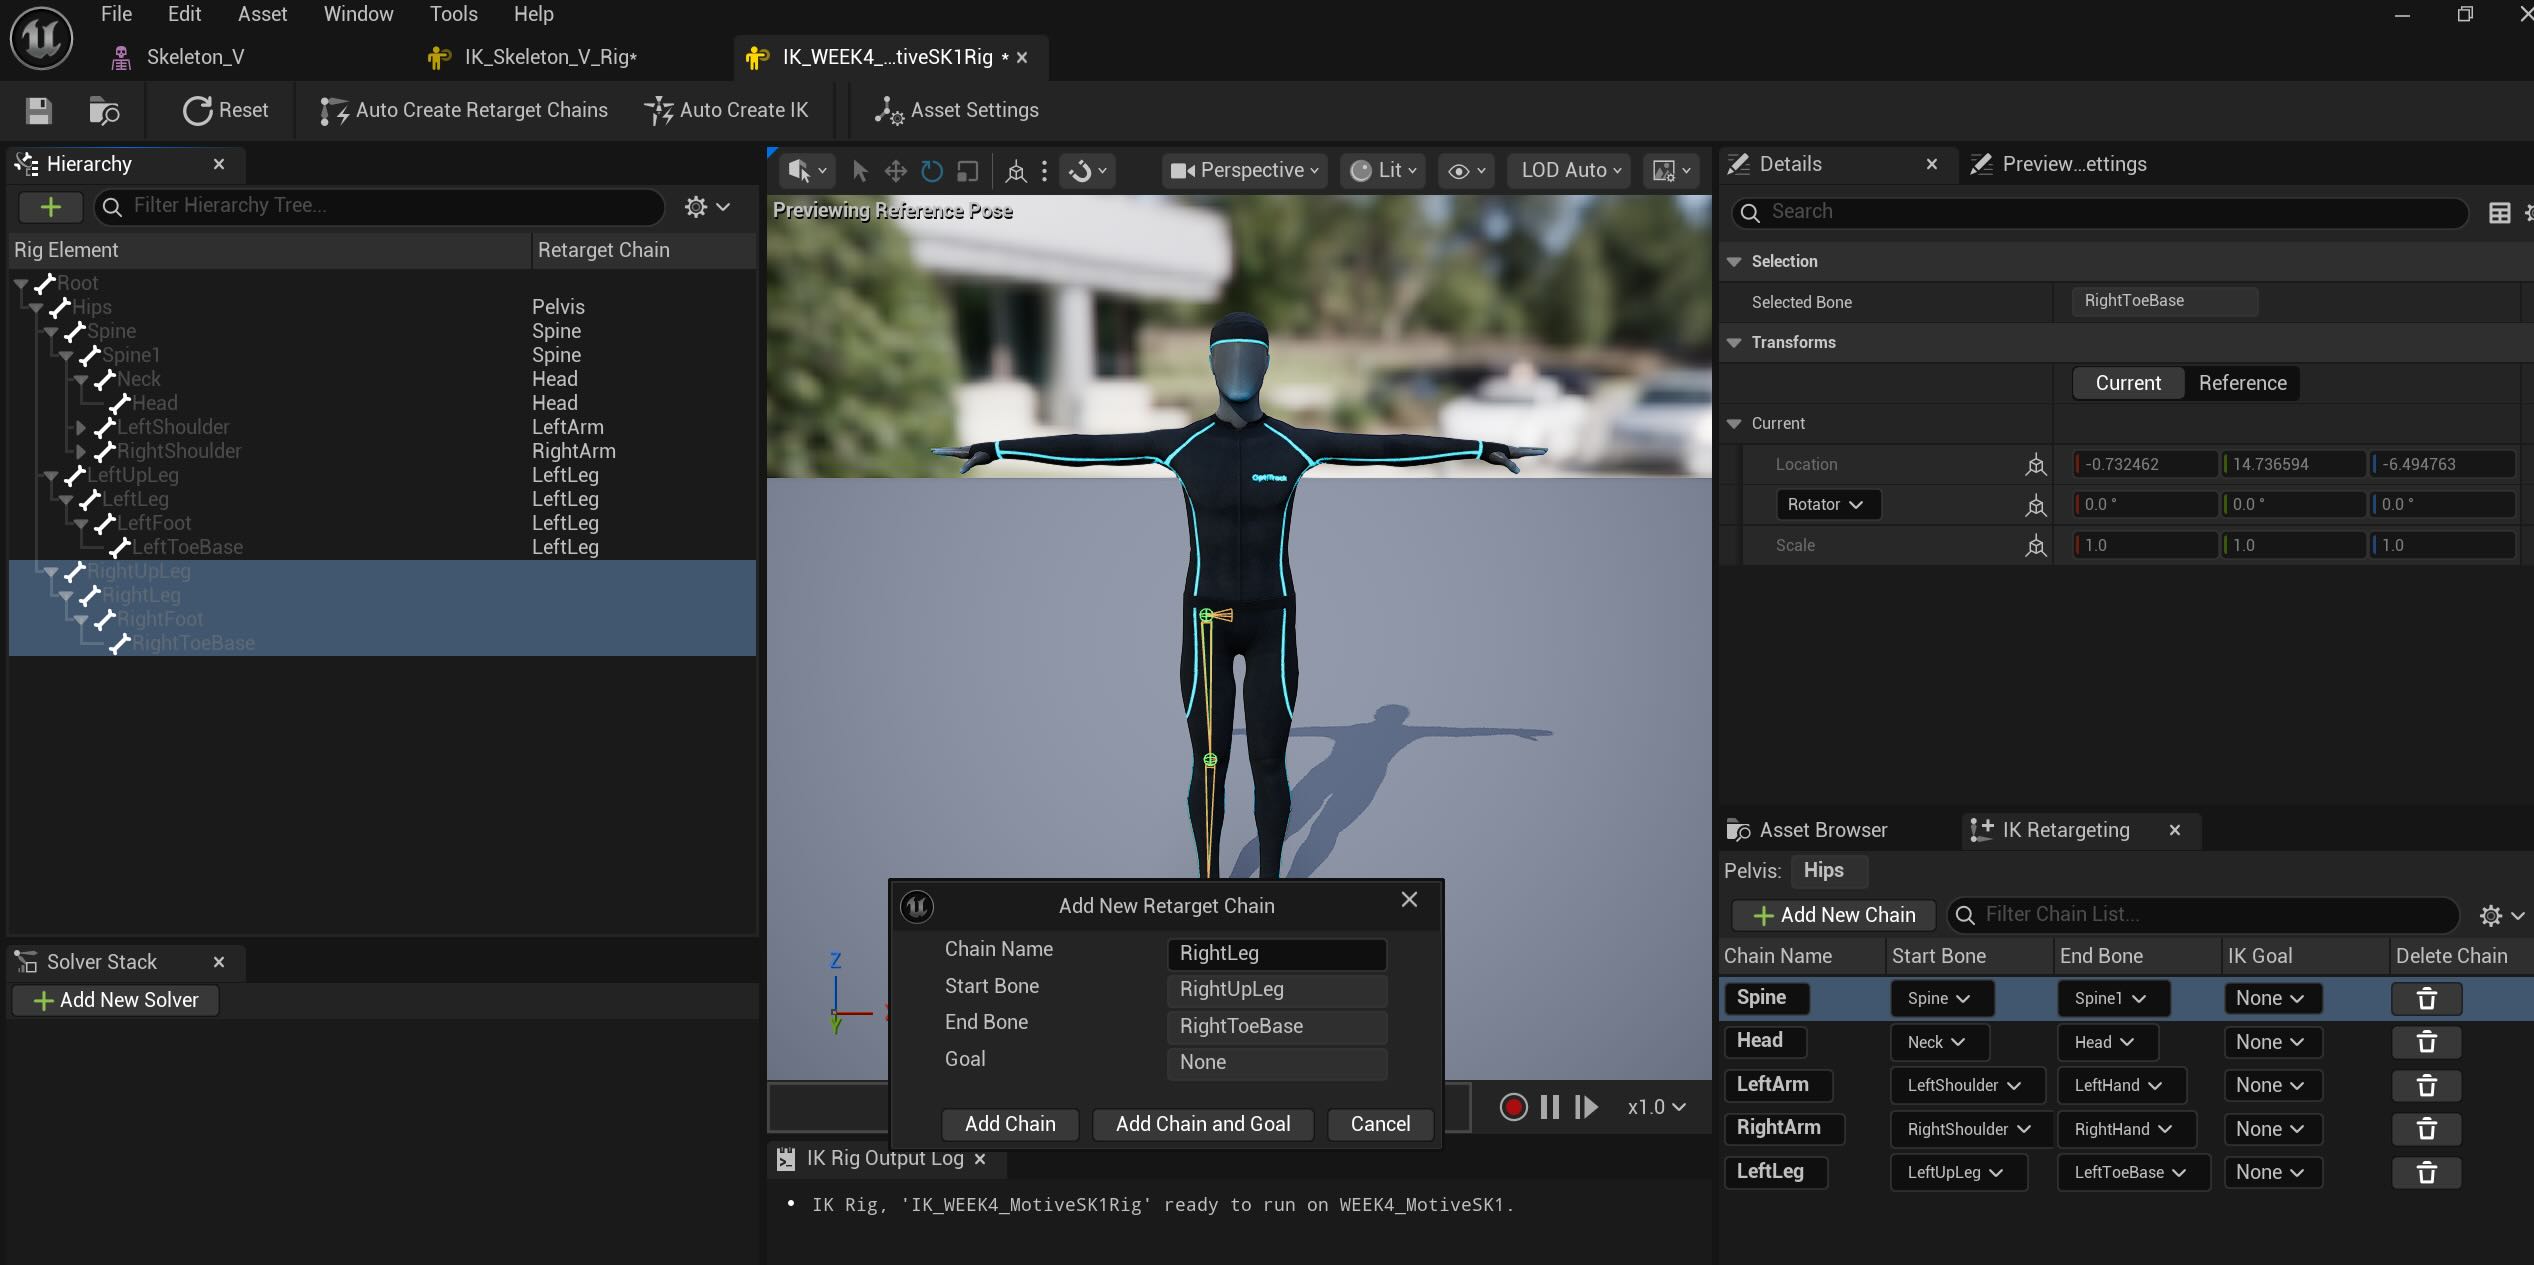
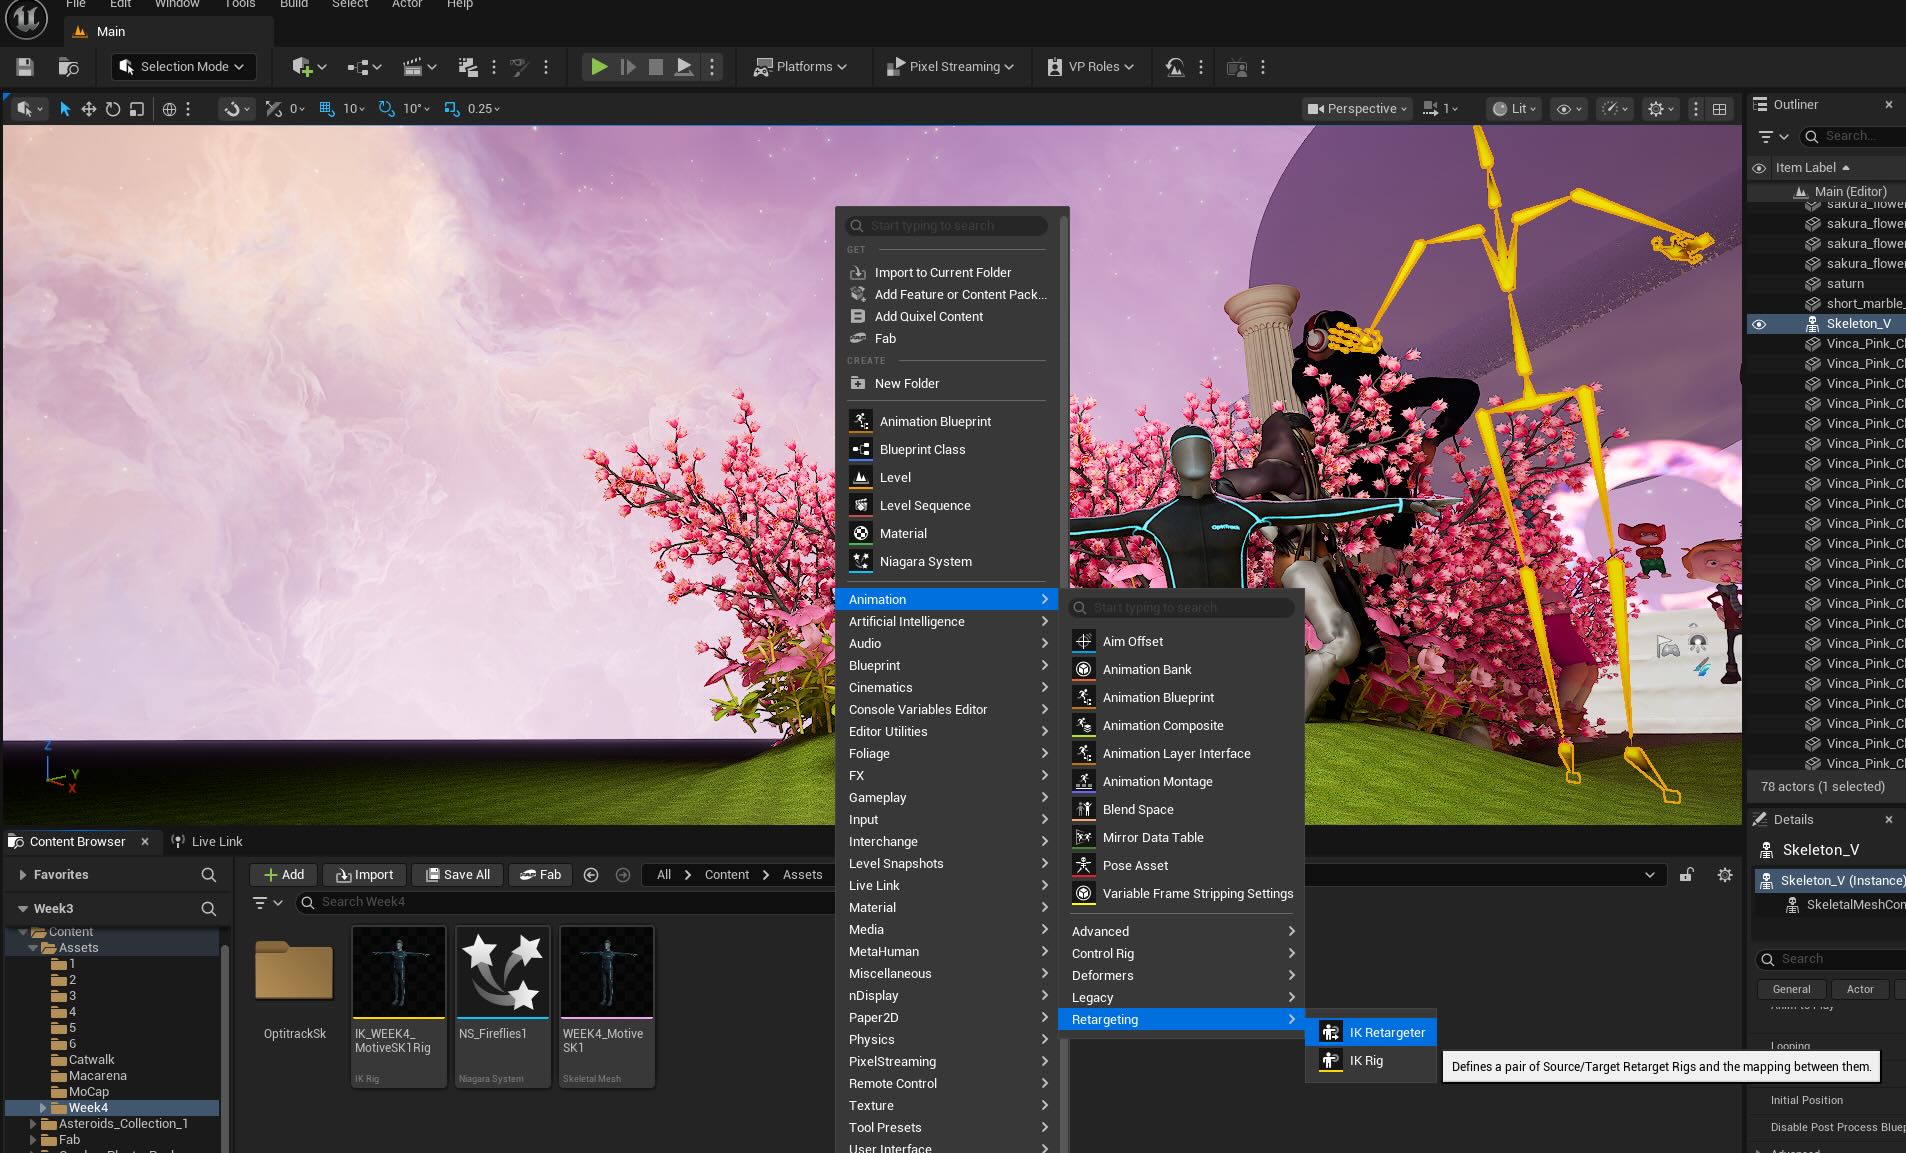
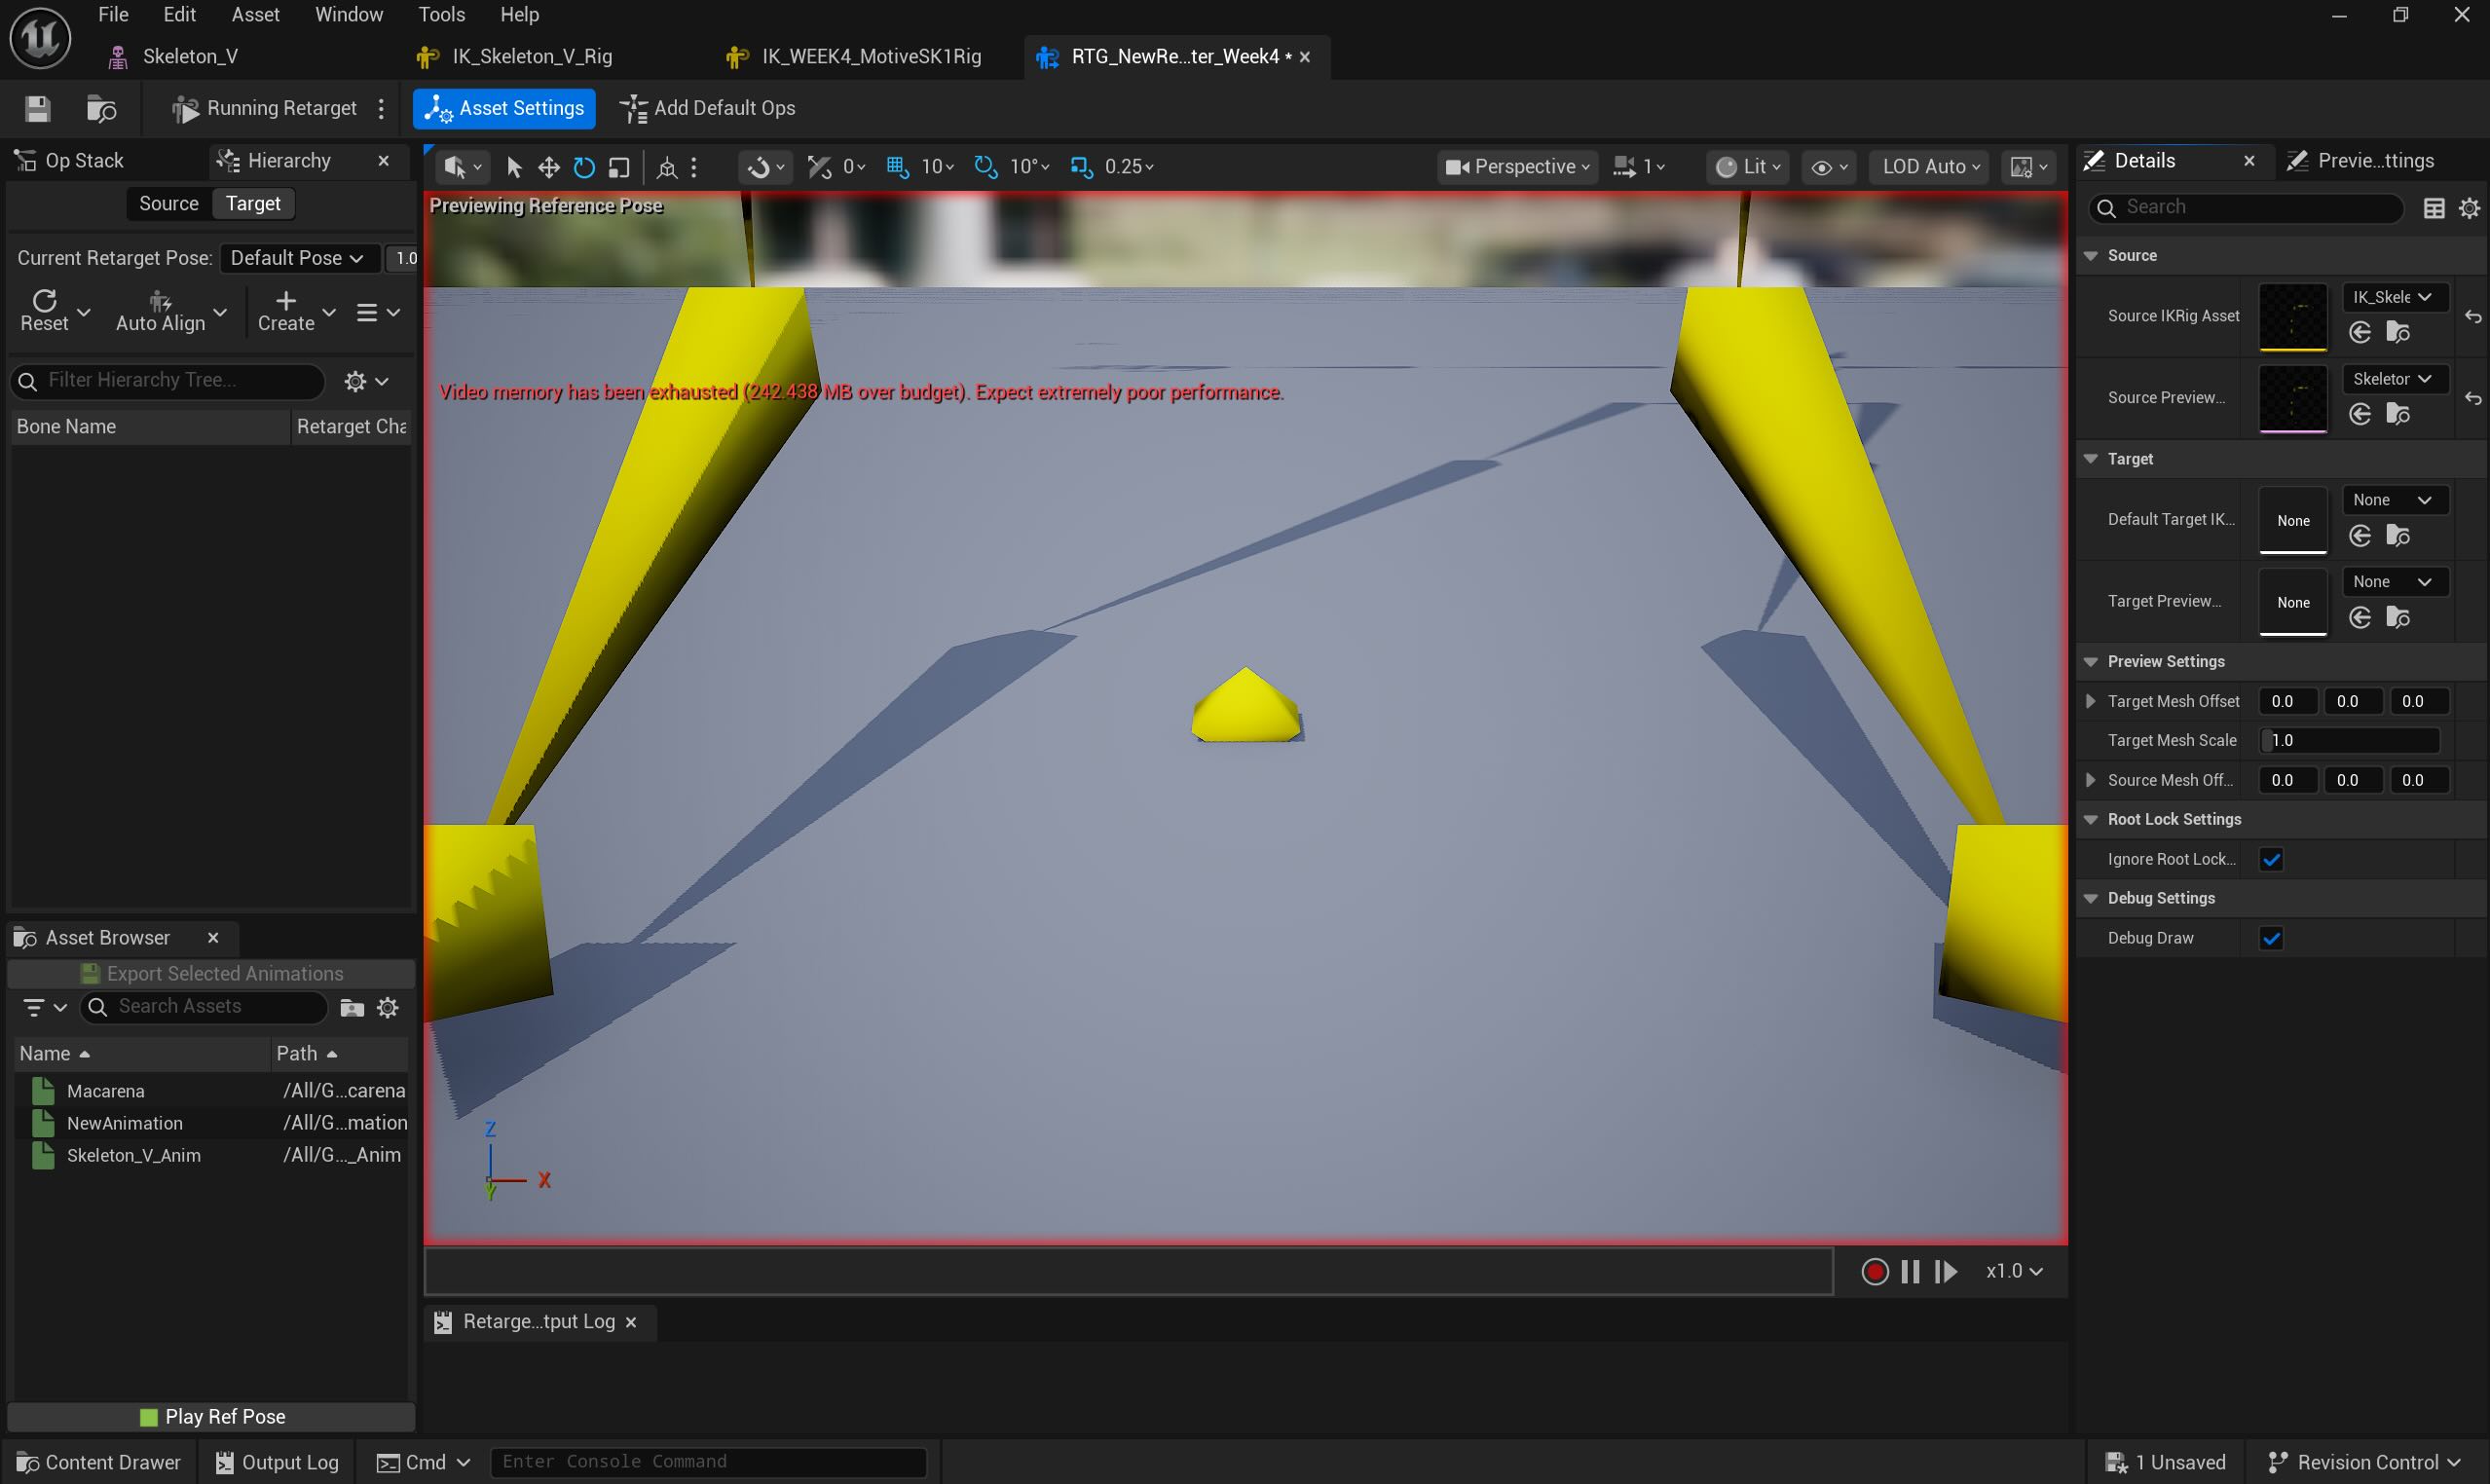
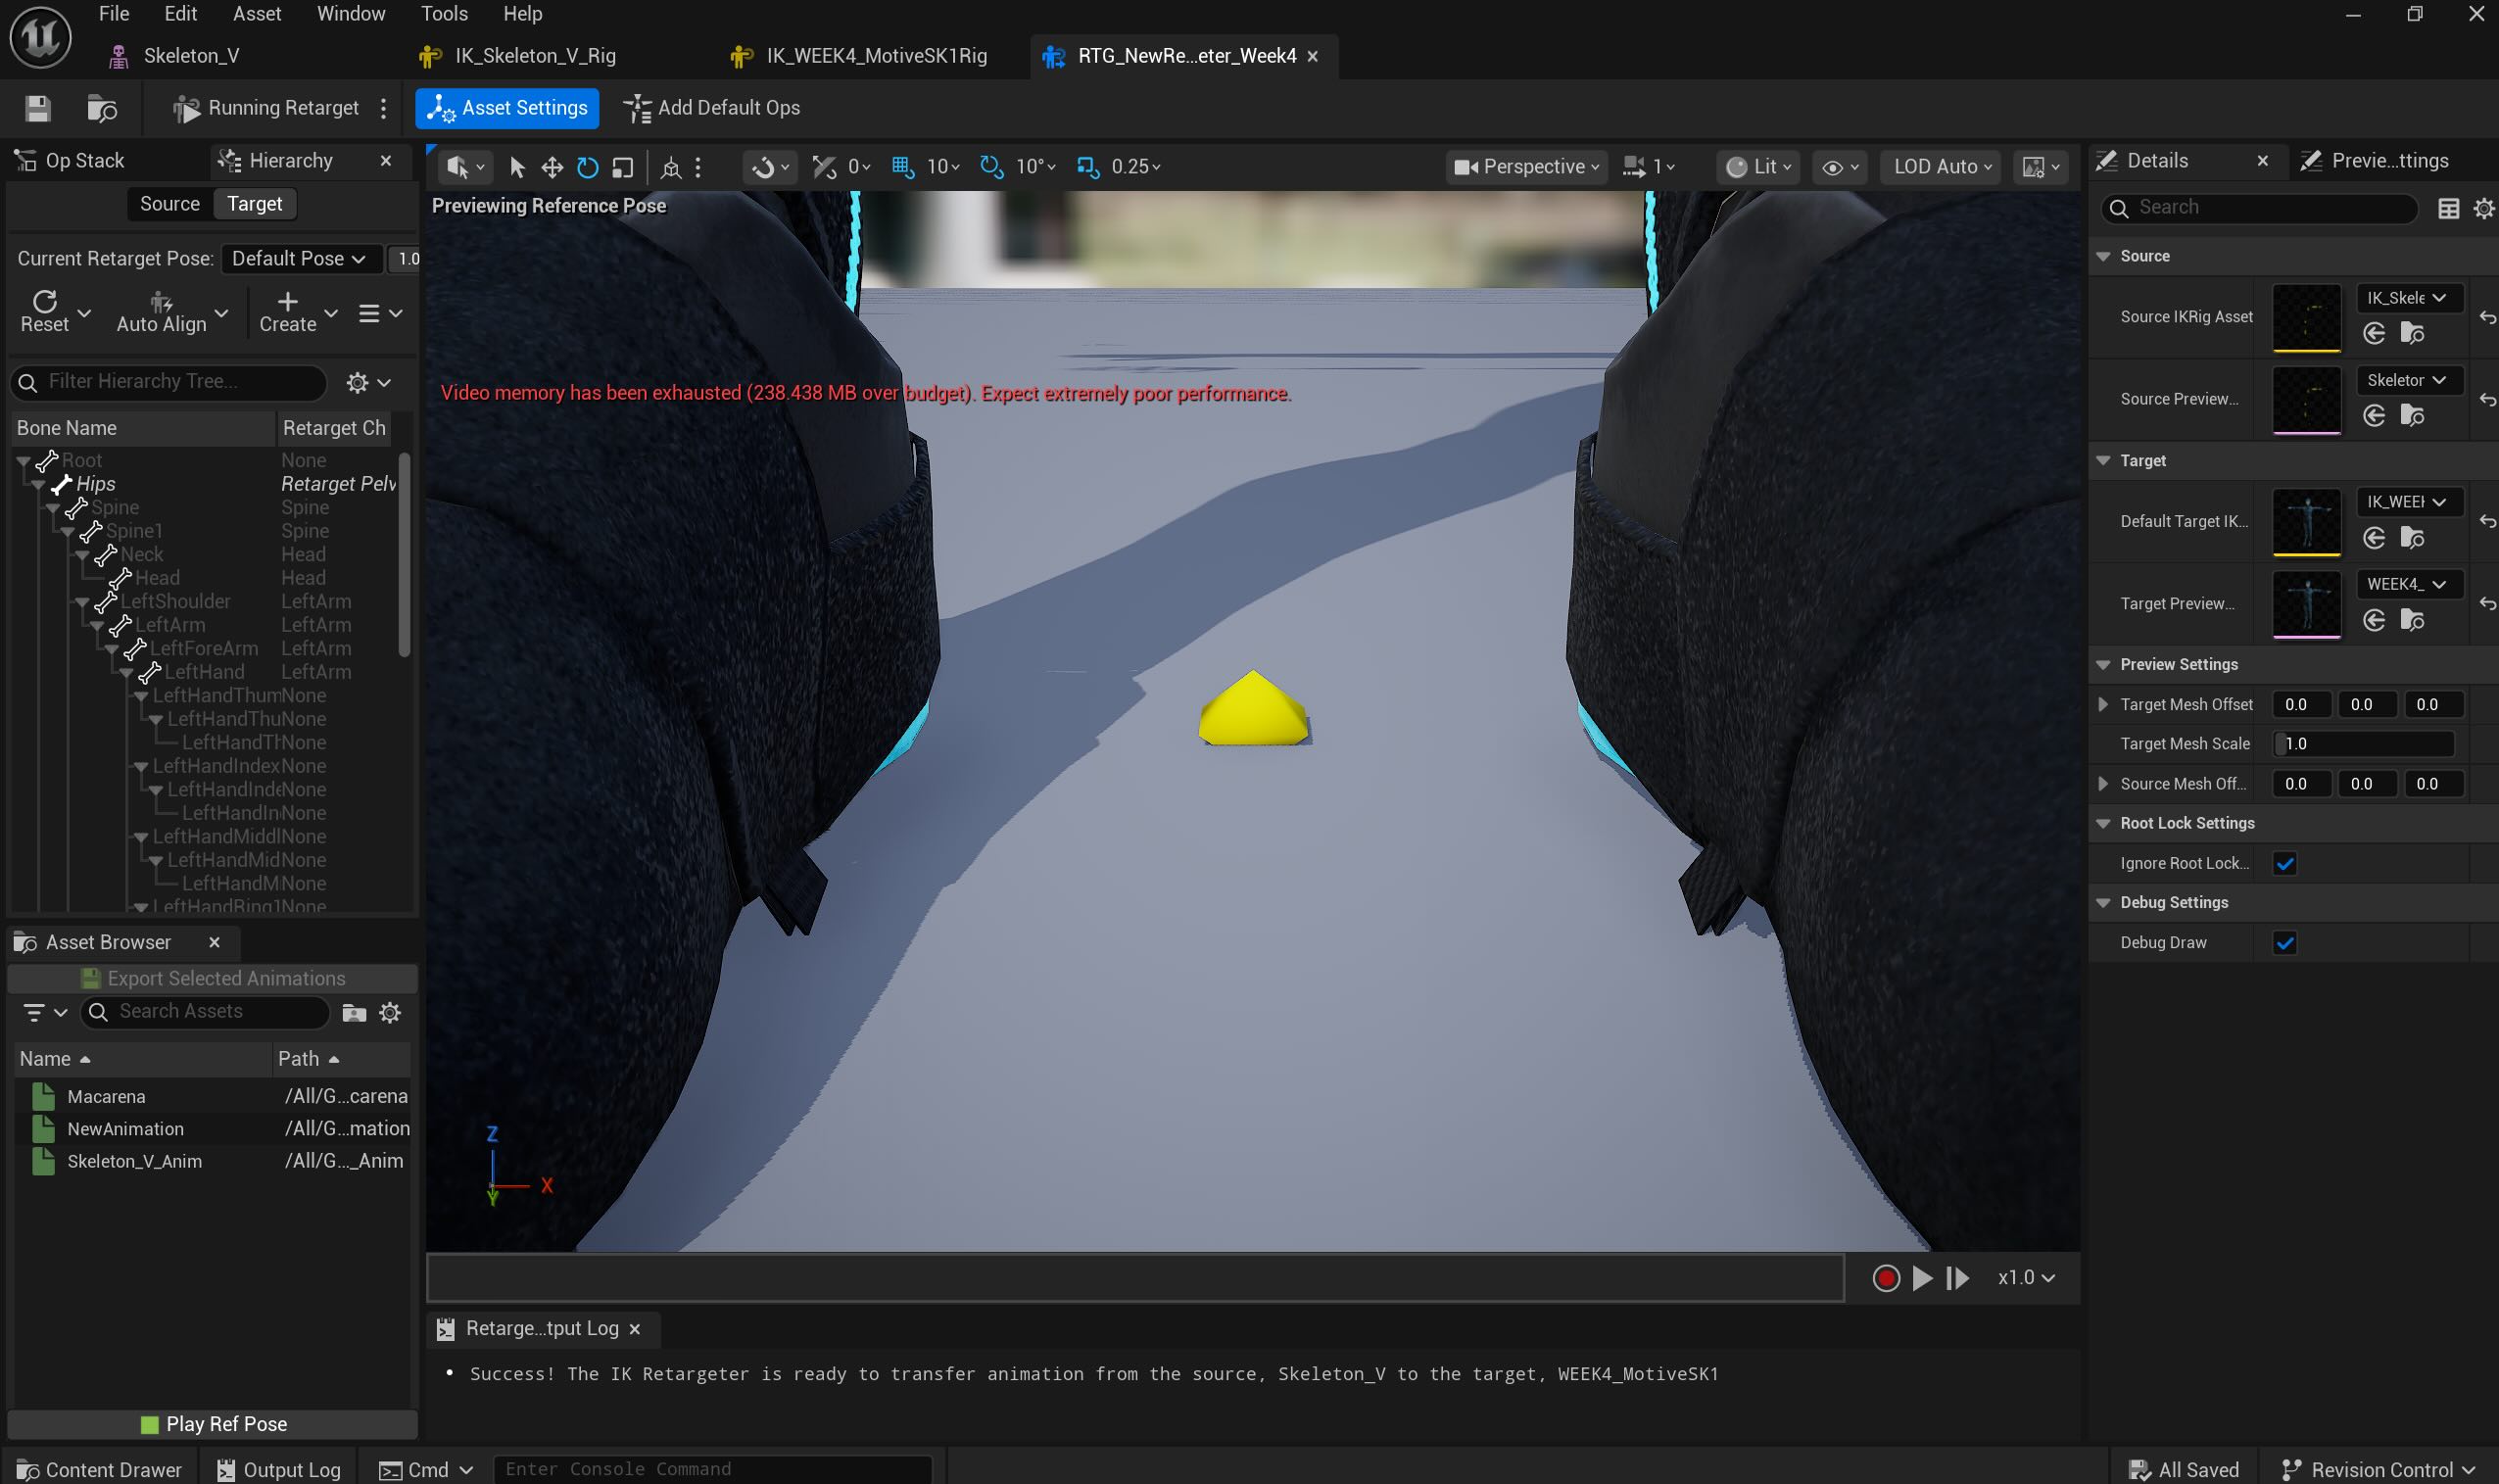
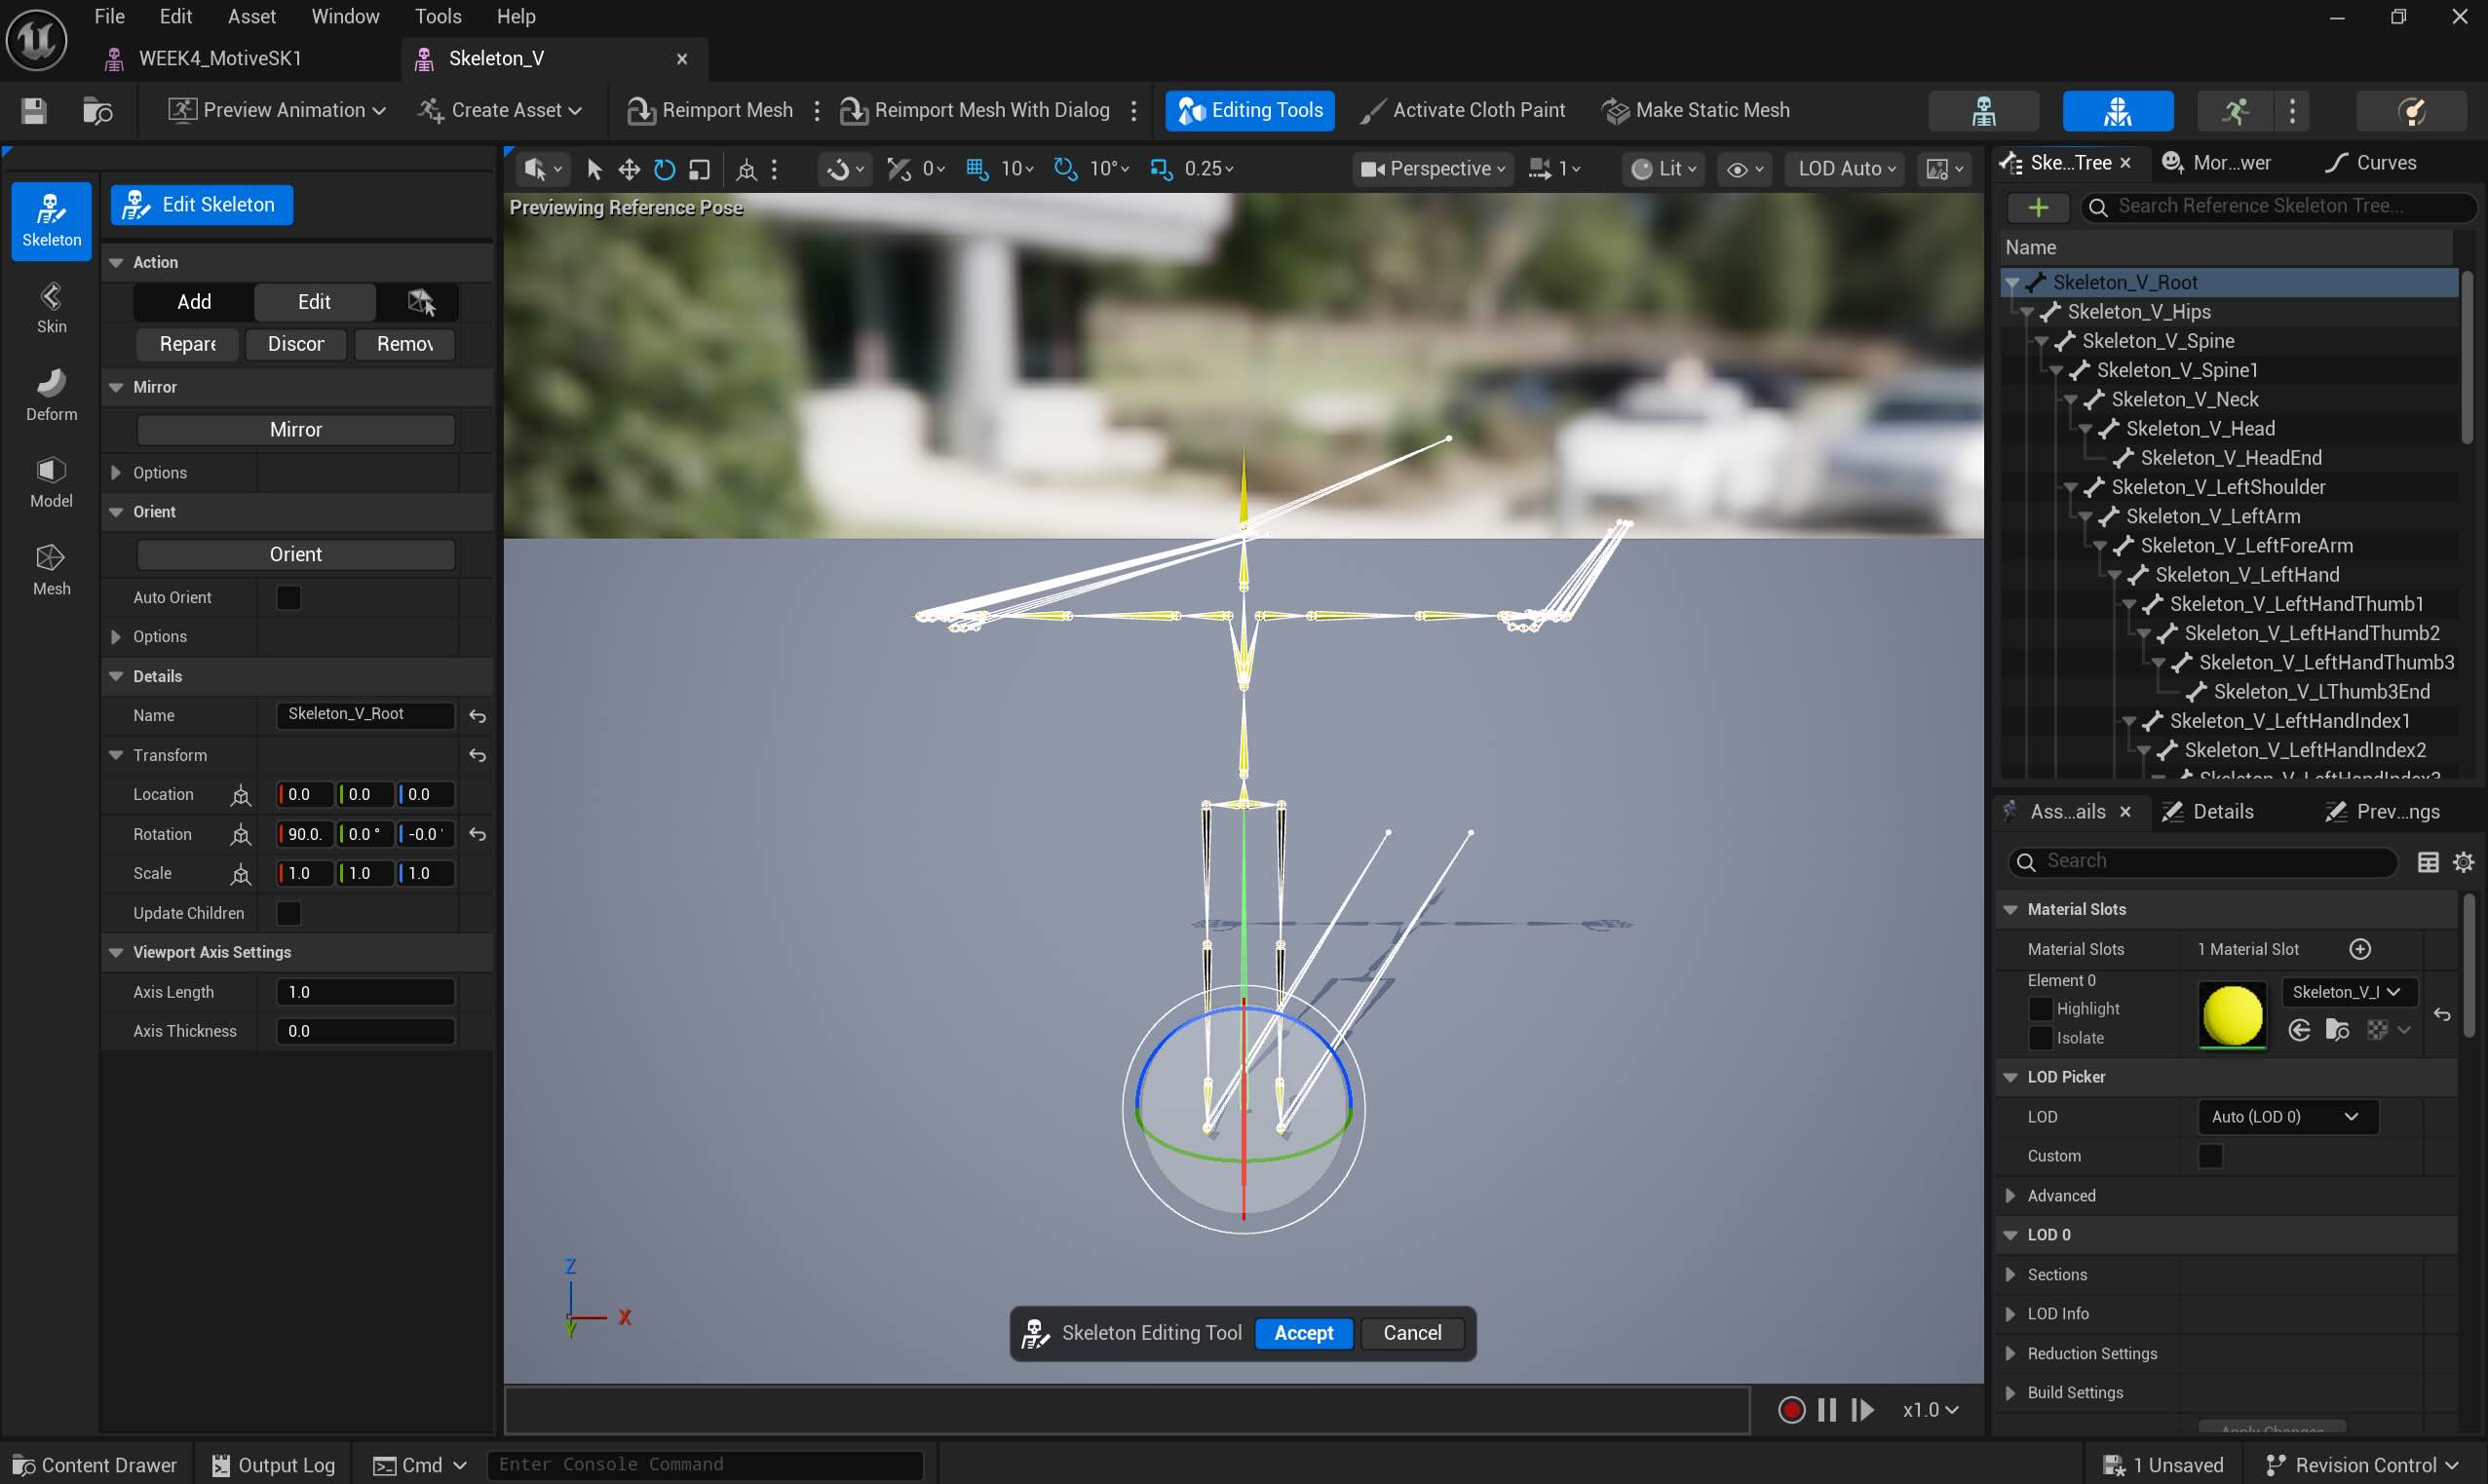
IK Targeting :
Source - Yellow Skeleton with Macarena Dance
Target - Mocap Man Skeleton Mesh
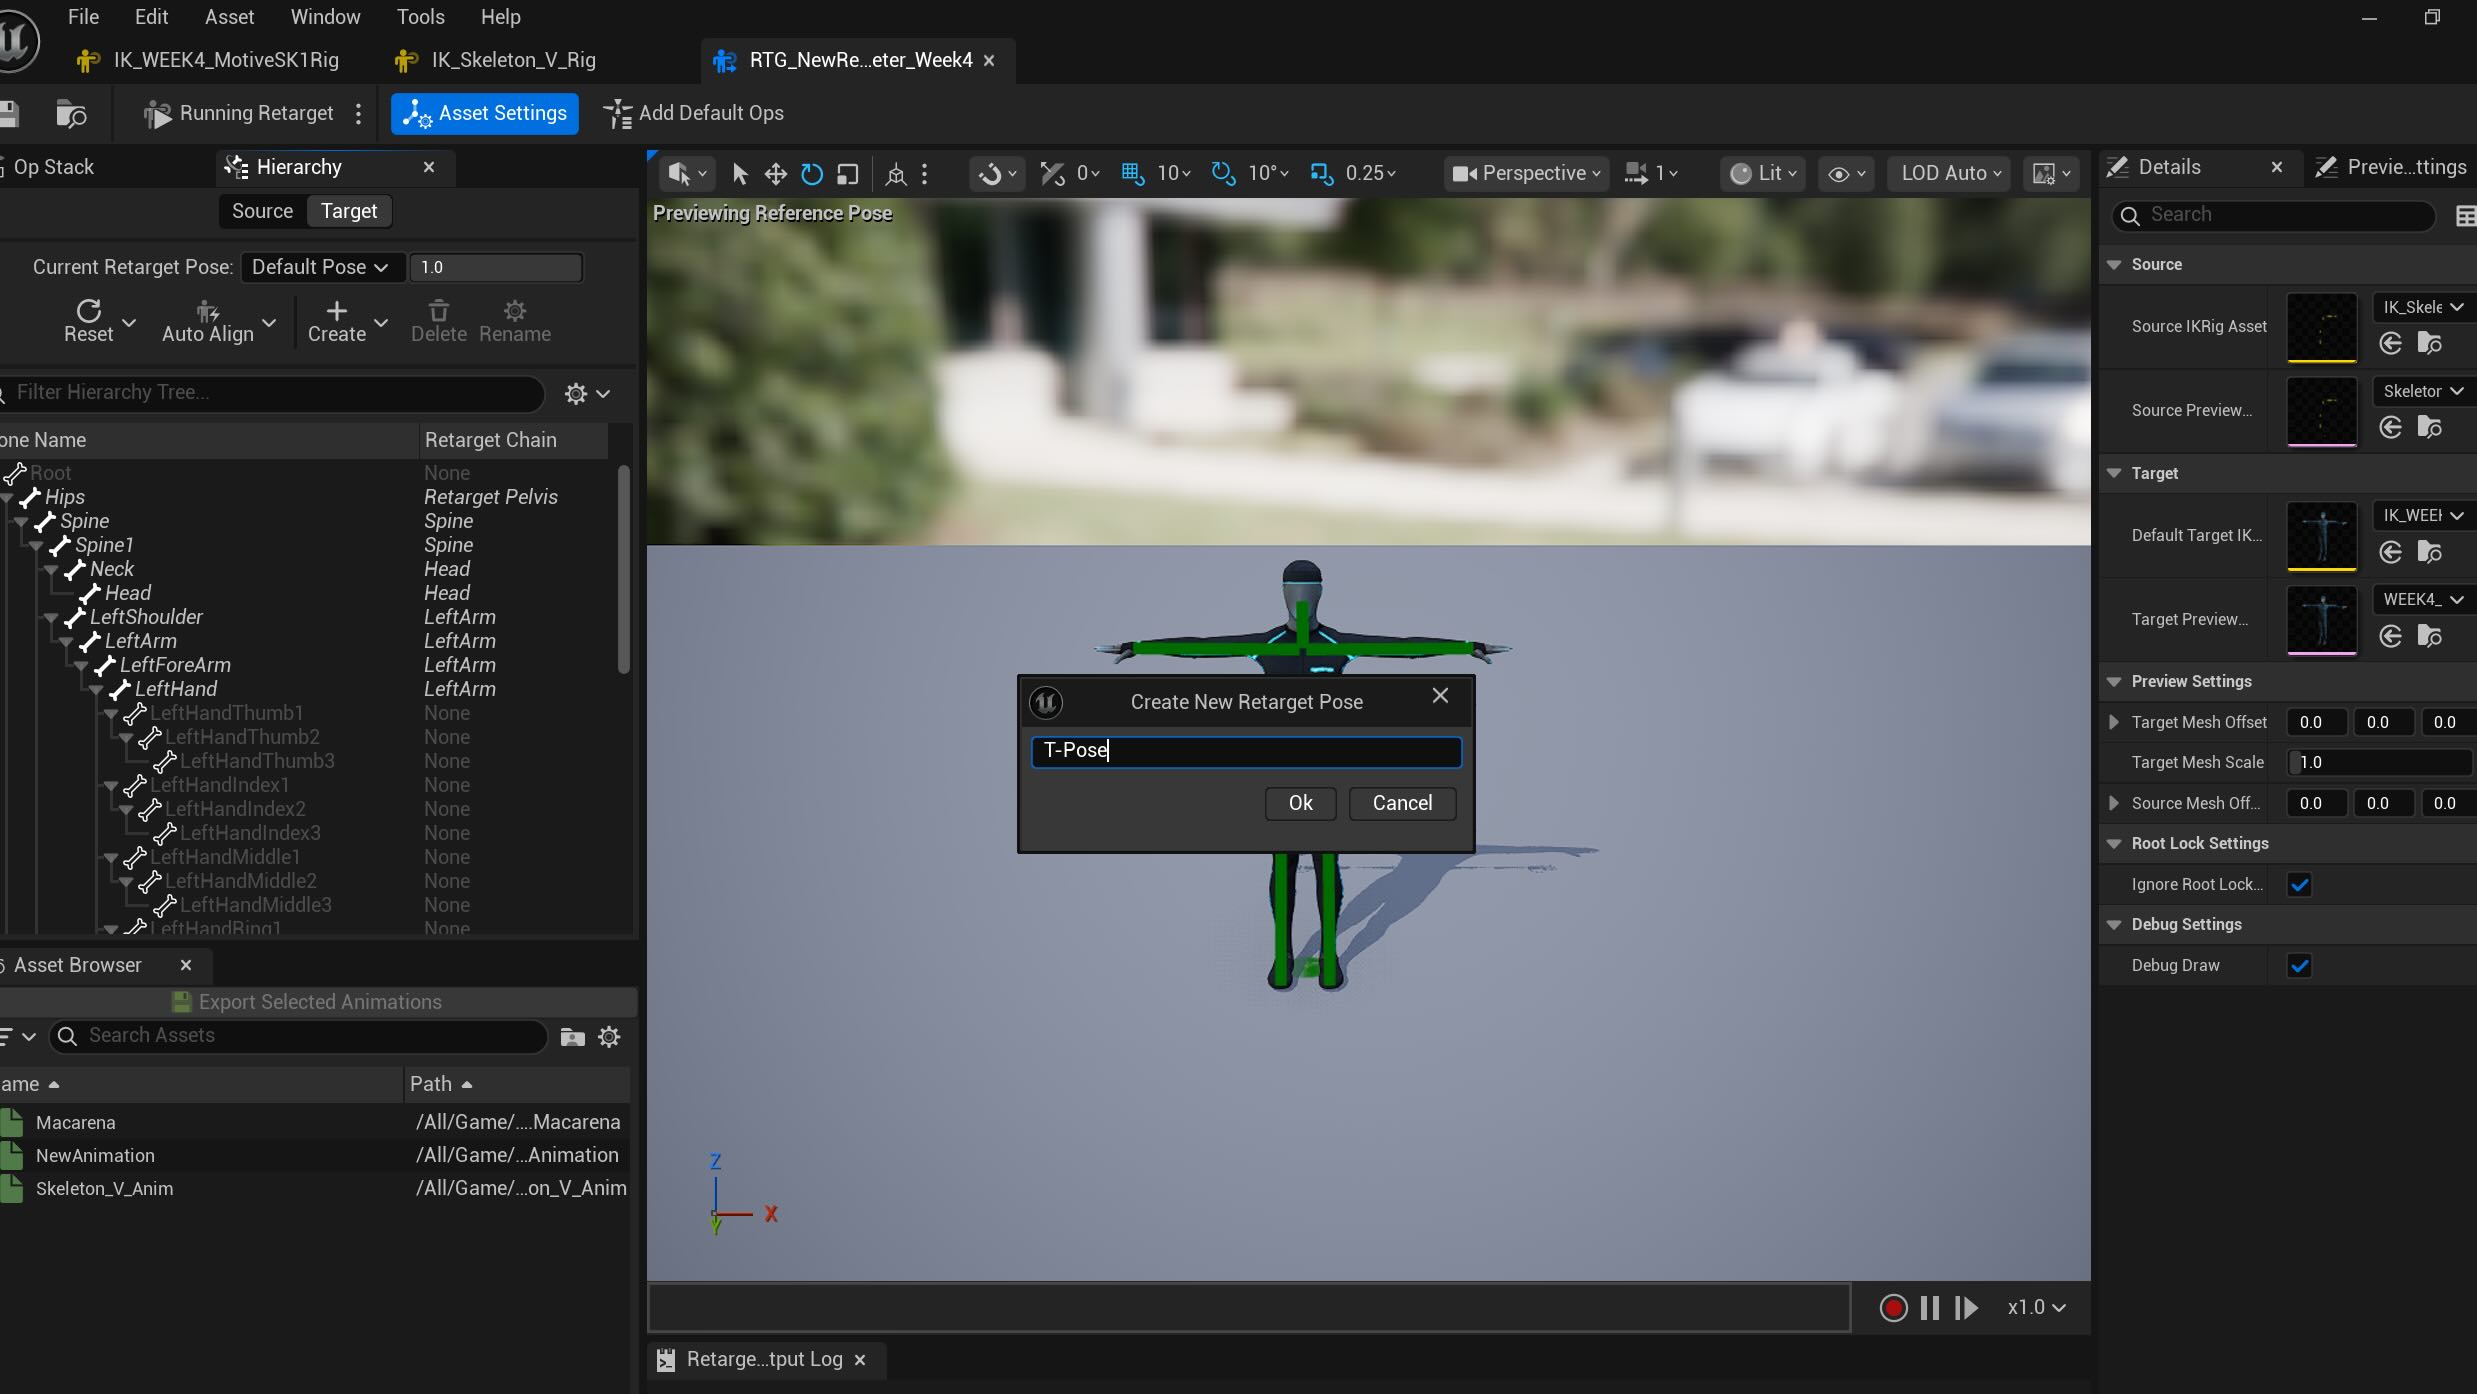

Saved as T-Pose
Motion Builder with UE 5- Grant's Note at class:
Week 4

Last week, we learned the Mocap process in the Navy Yard Studio, I created the list by following the video tutorial that was sent after the class.
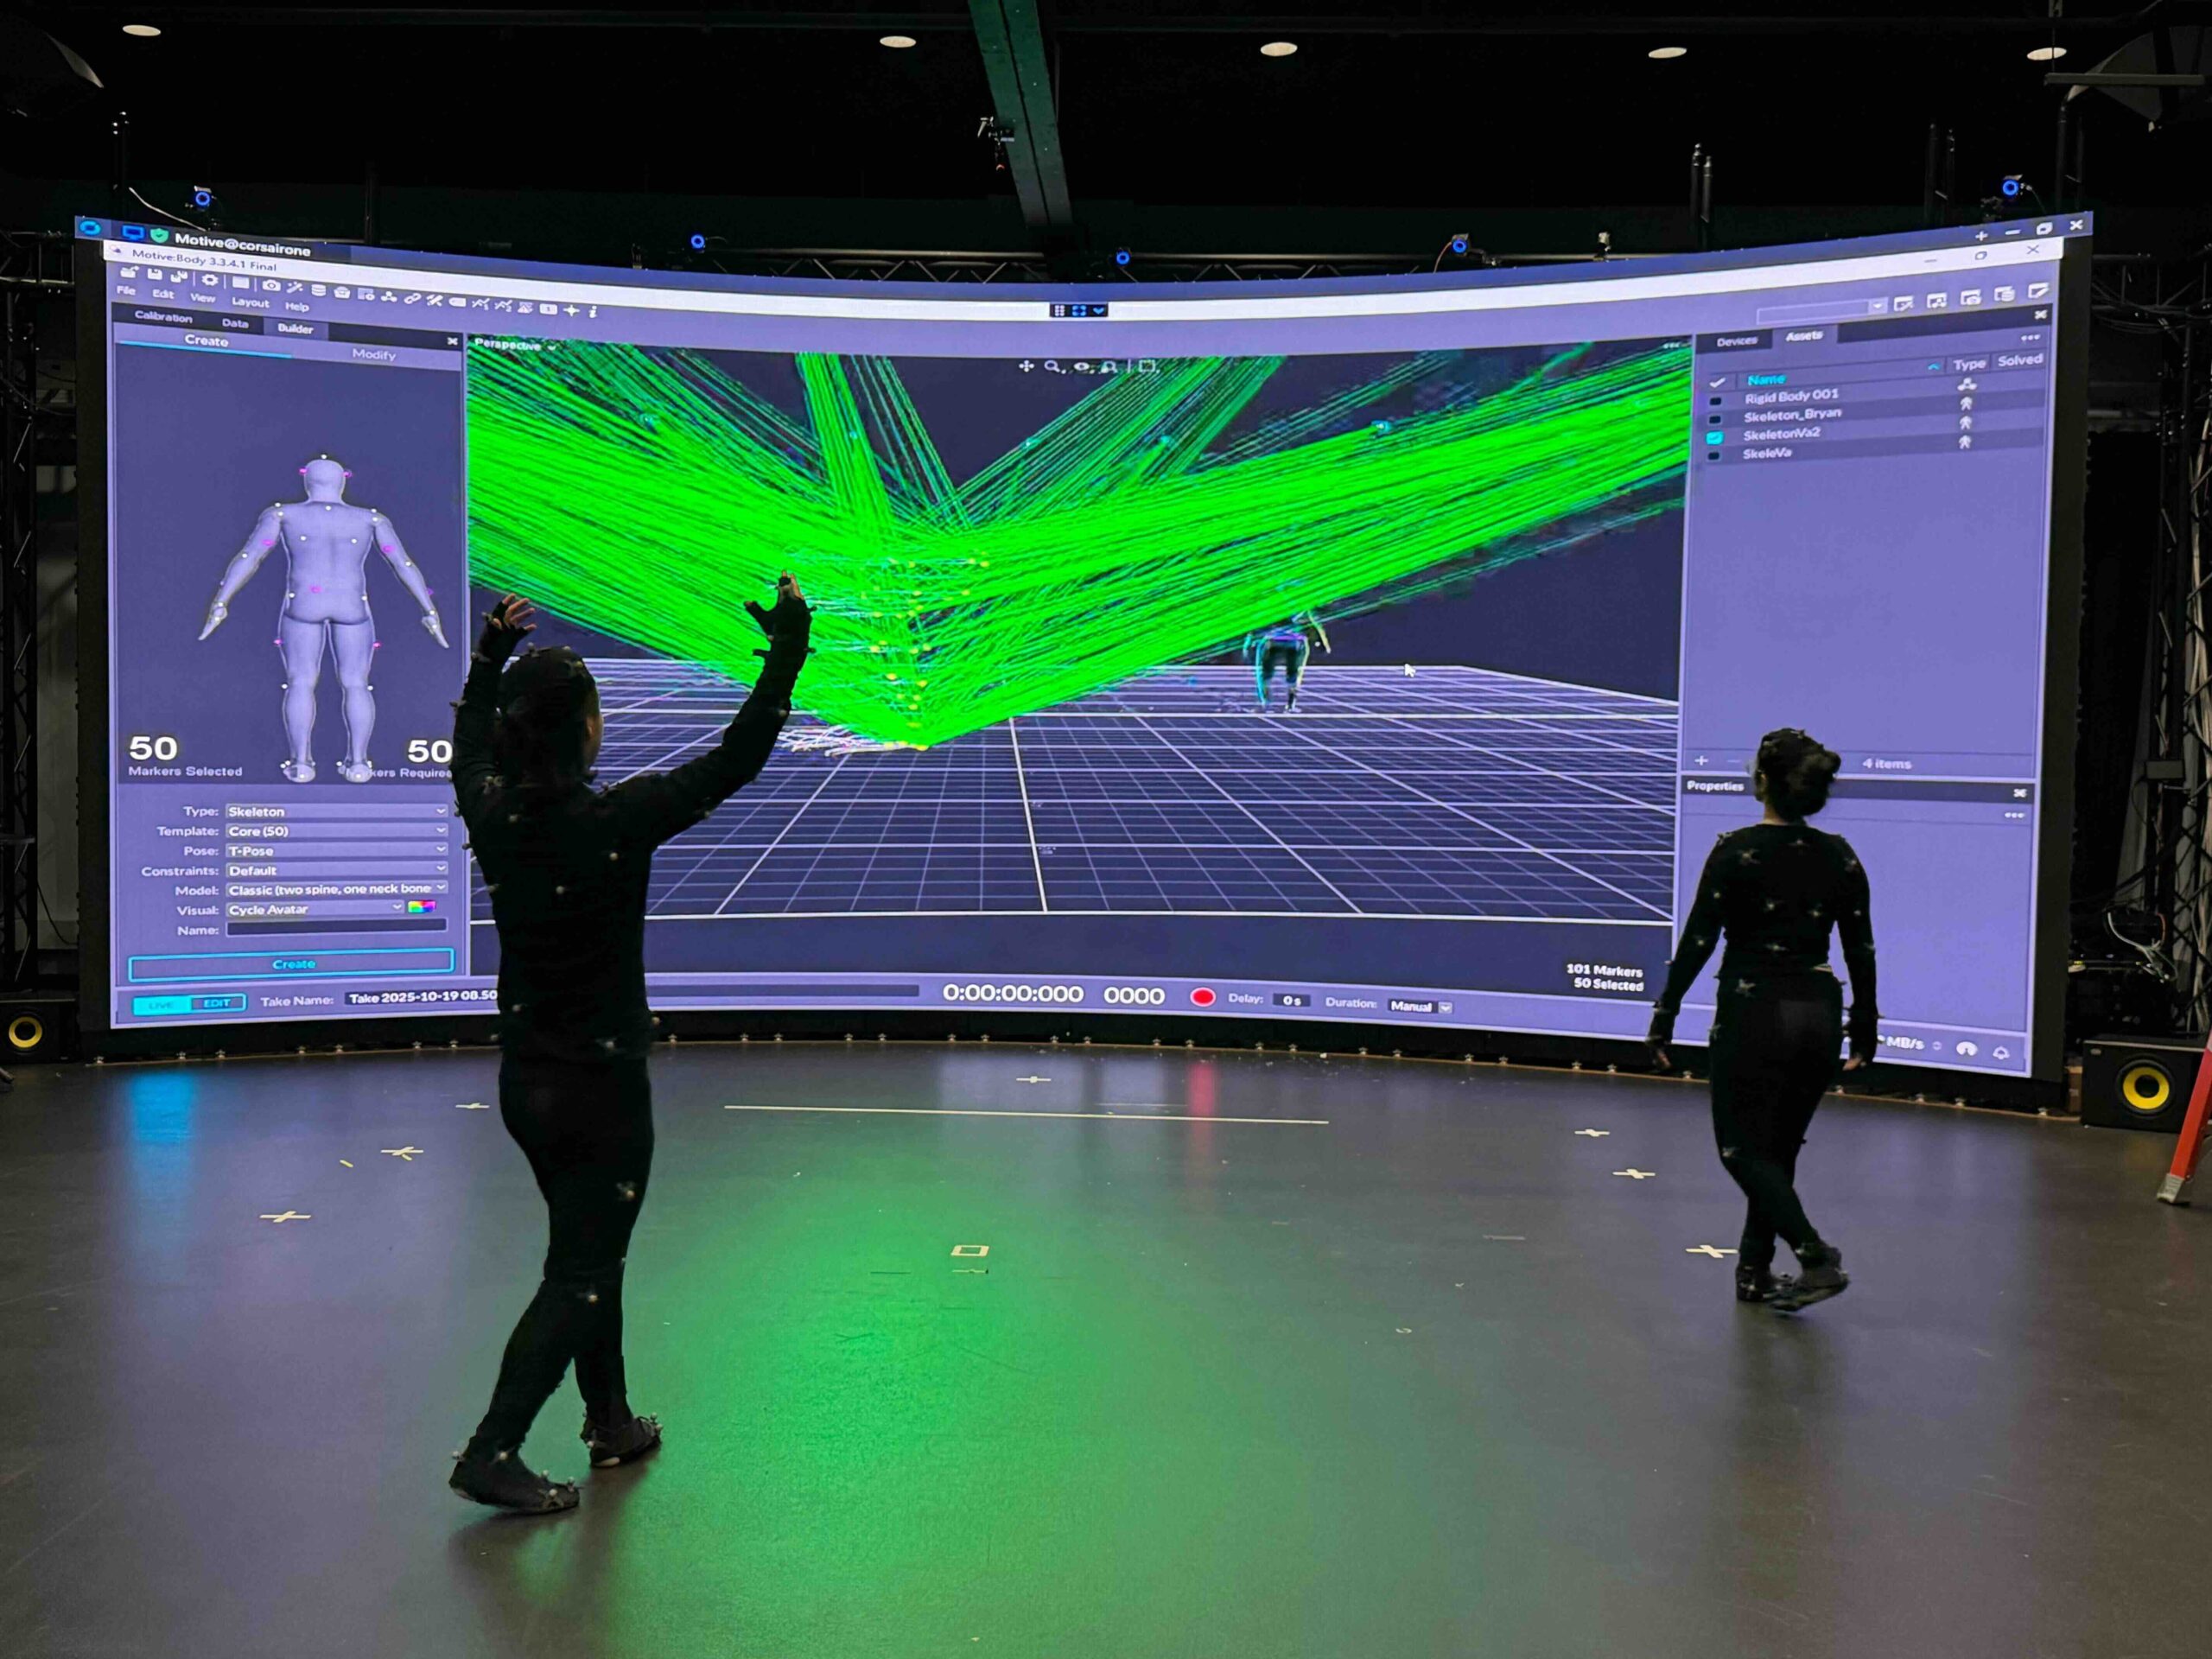
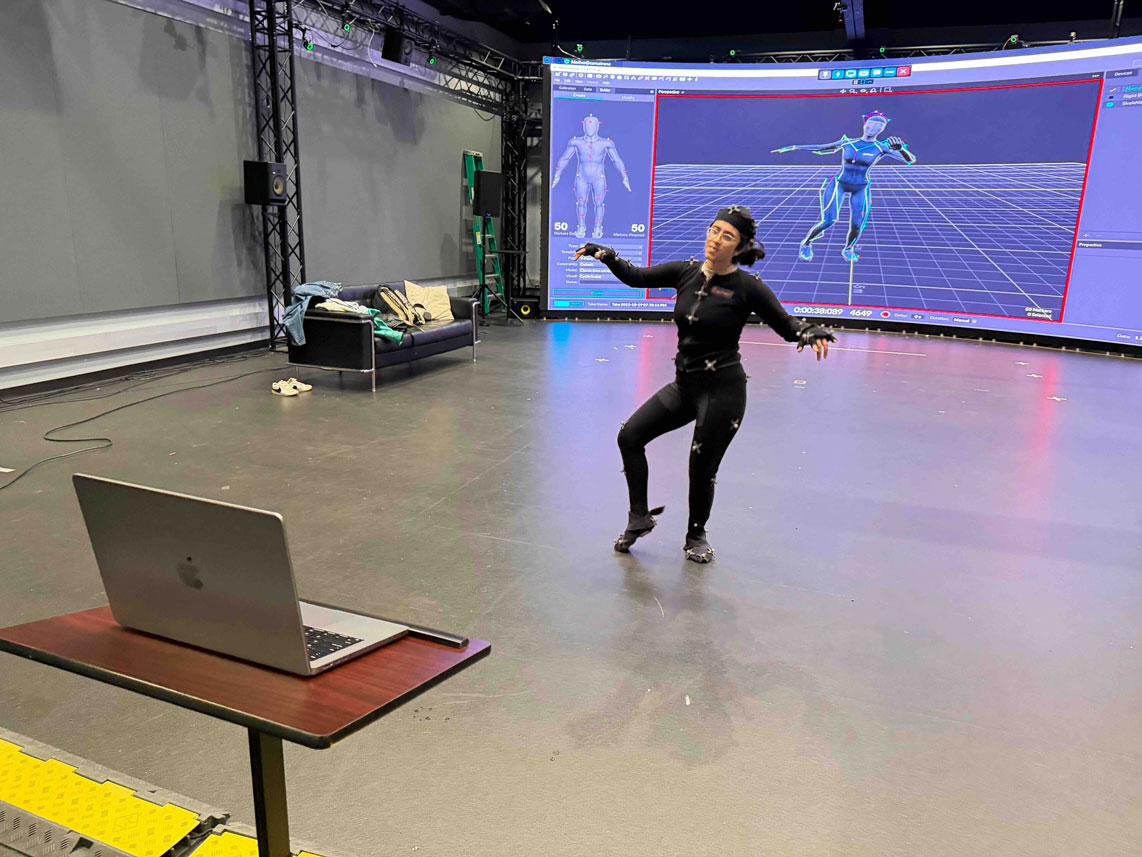
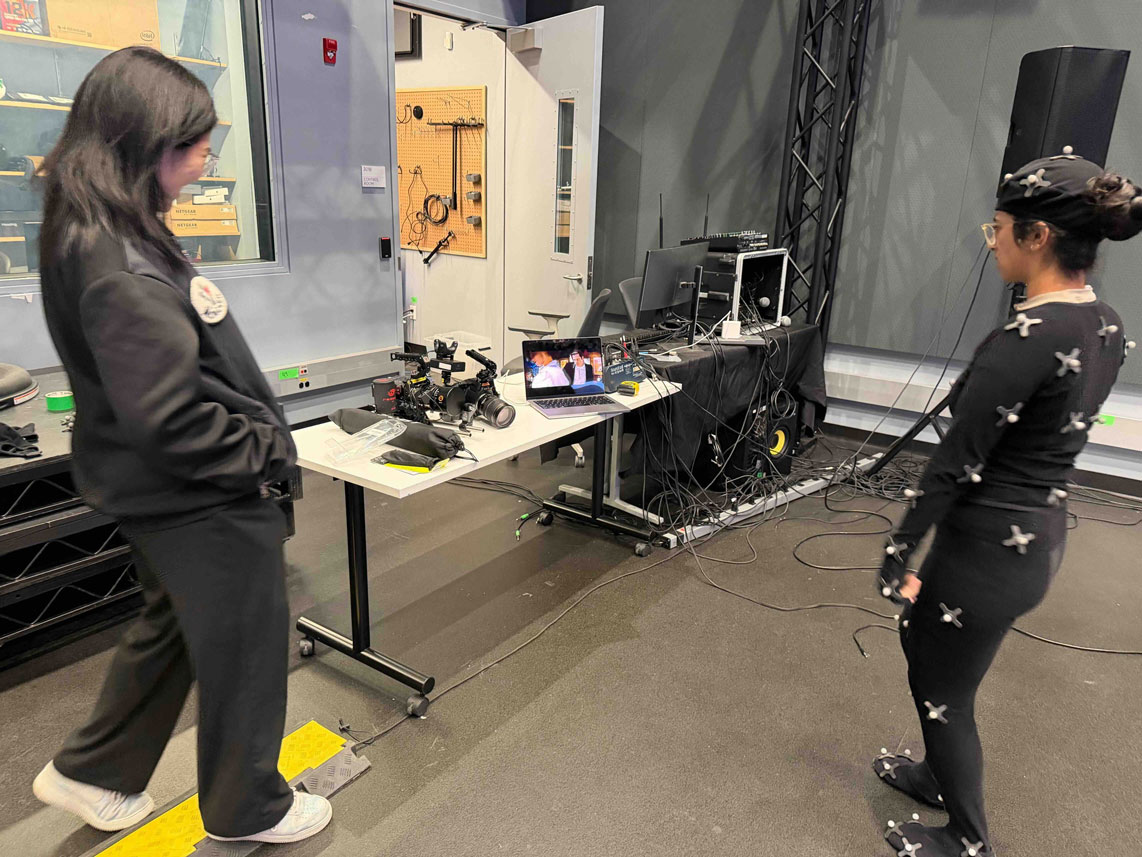
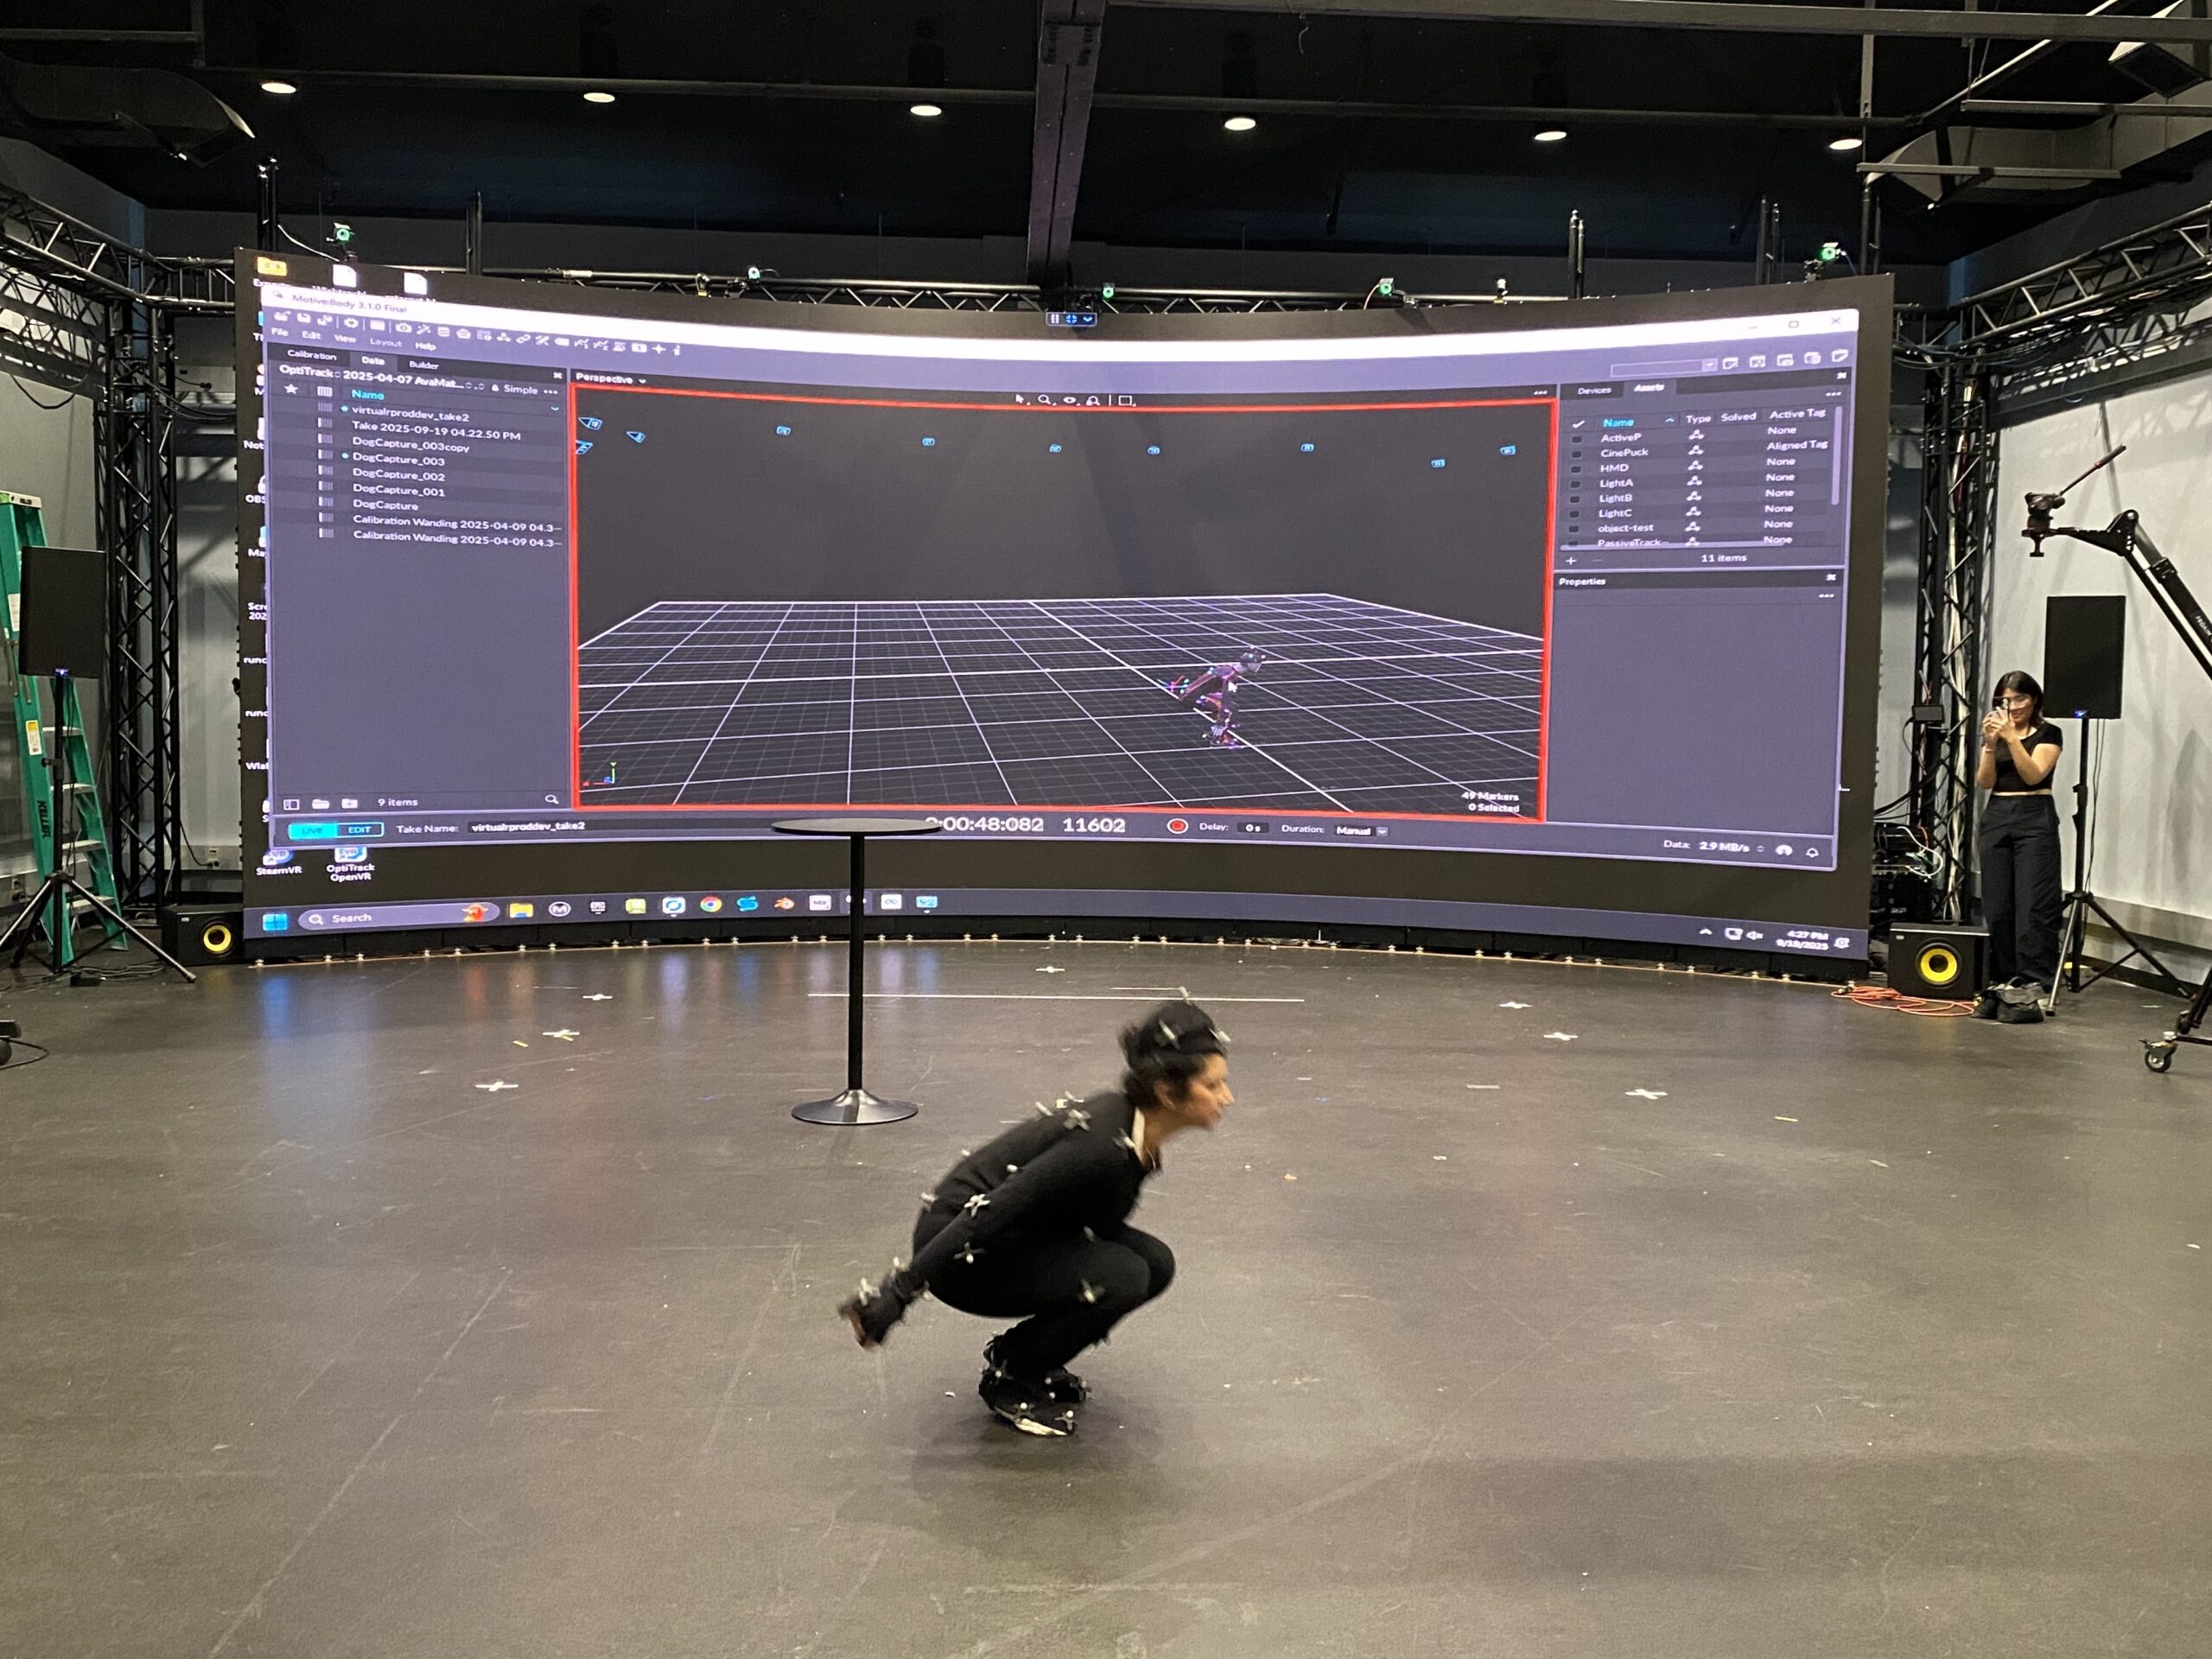
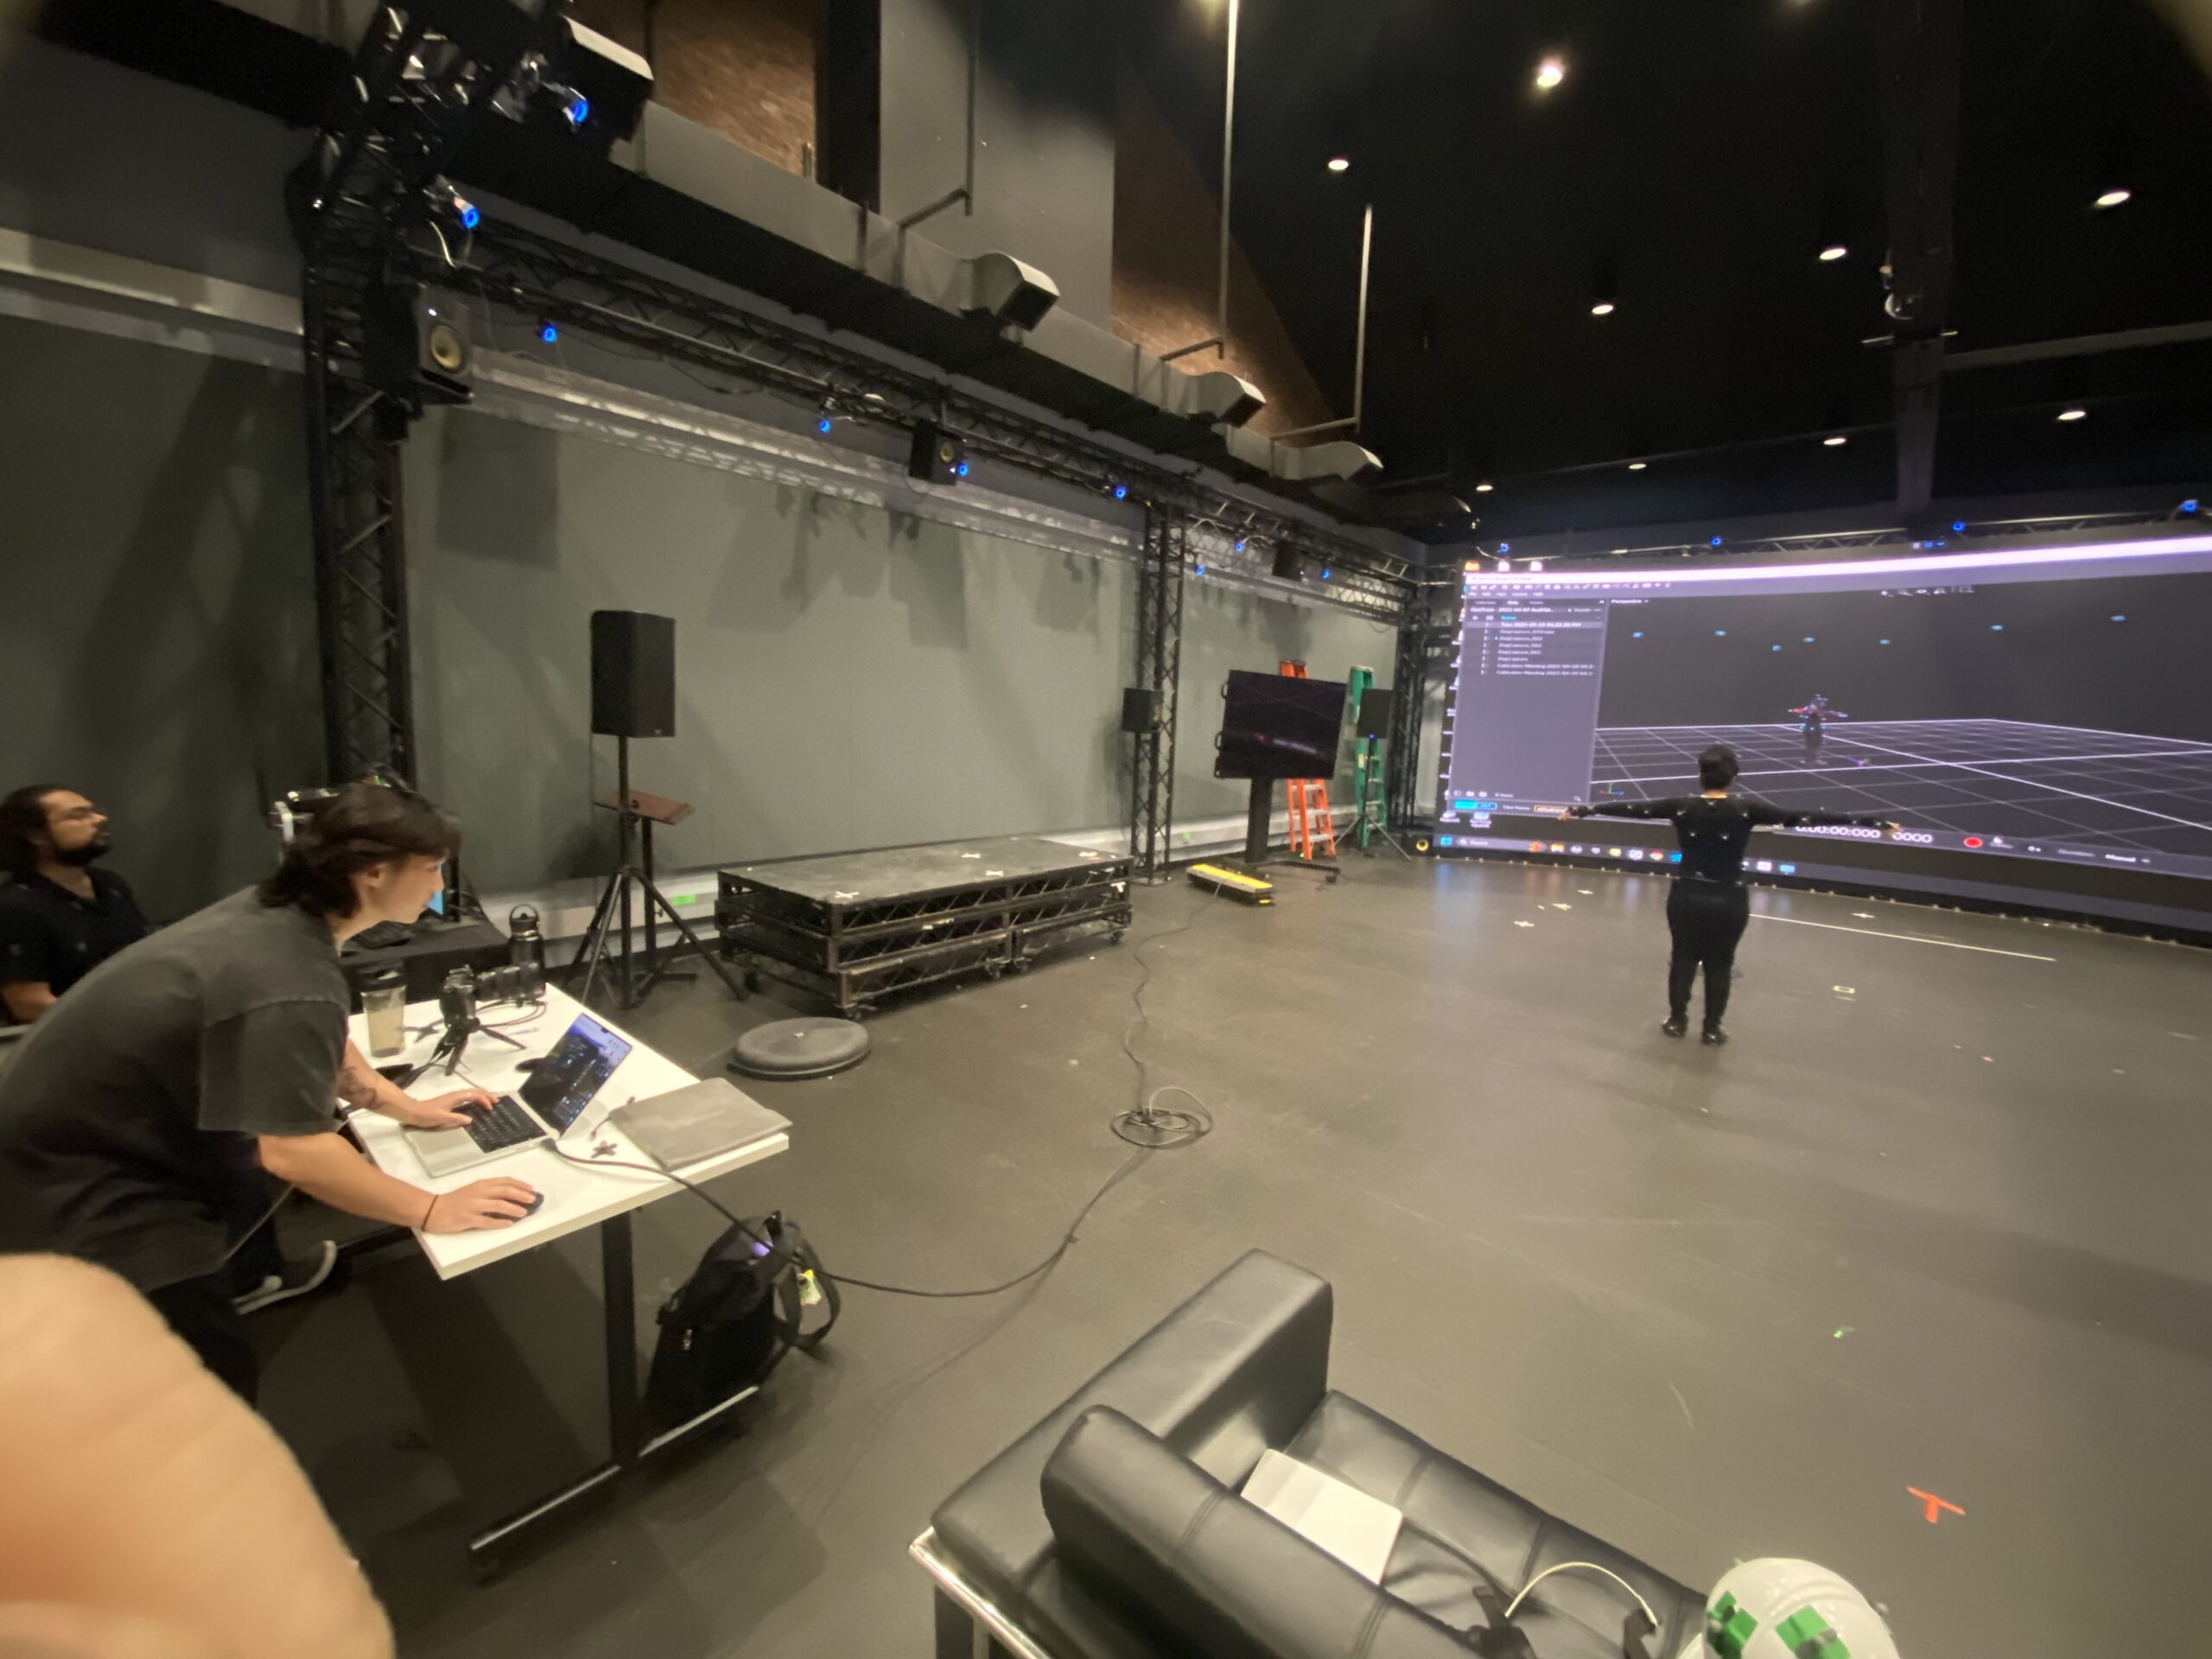
Our team fortunately had the opportunity to test MoCap process in the Navy Yard last Friday (Thanks to Bryan), we captured a few footages. Rosalyn and Vasudha wore the MoCap suit, I assisted them with attaching MoCap sensors on the suits, documented the process and requested some of the movements I wanted to take for my project. (Macarena to be exact)
Here are the photos of us at the studio:
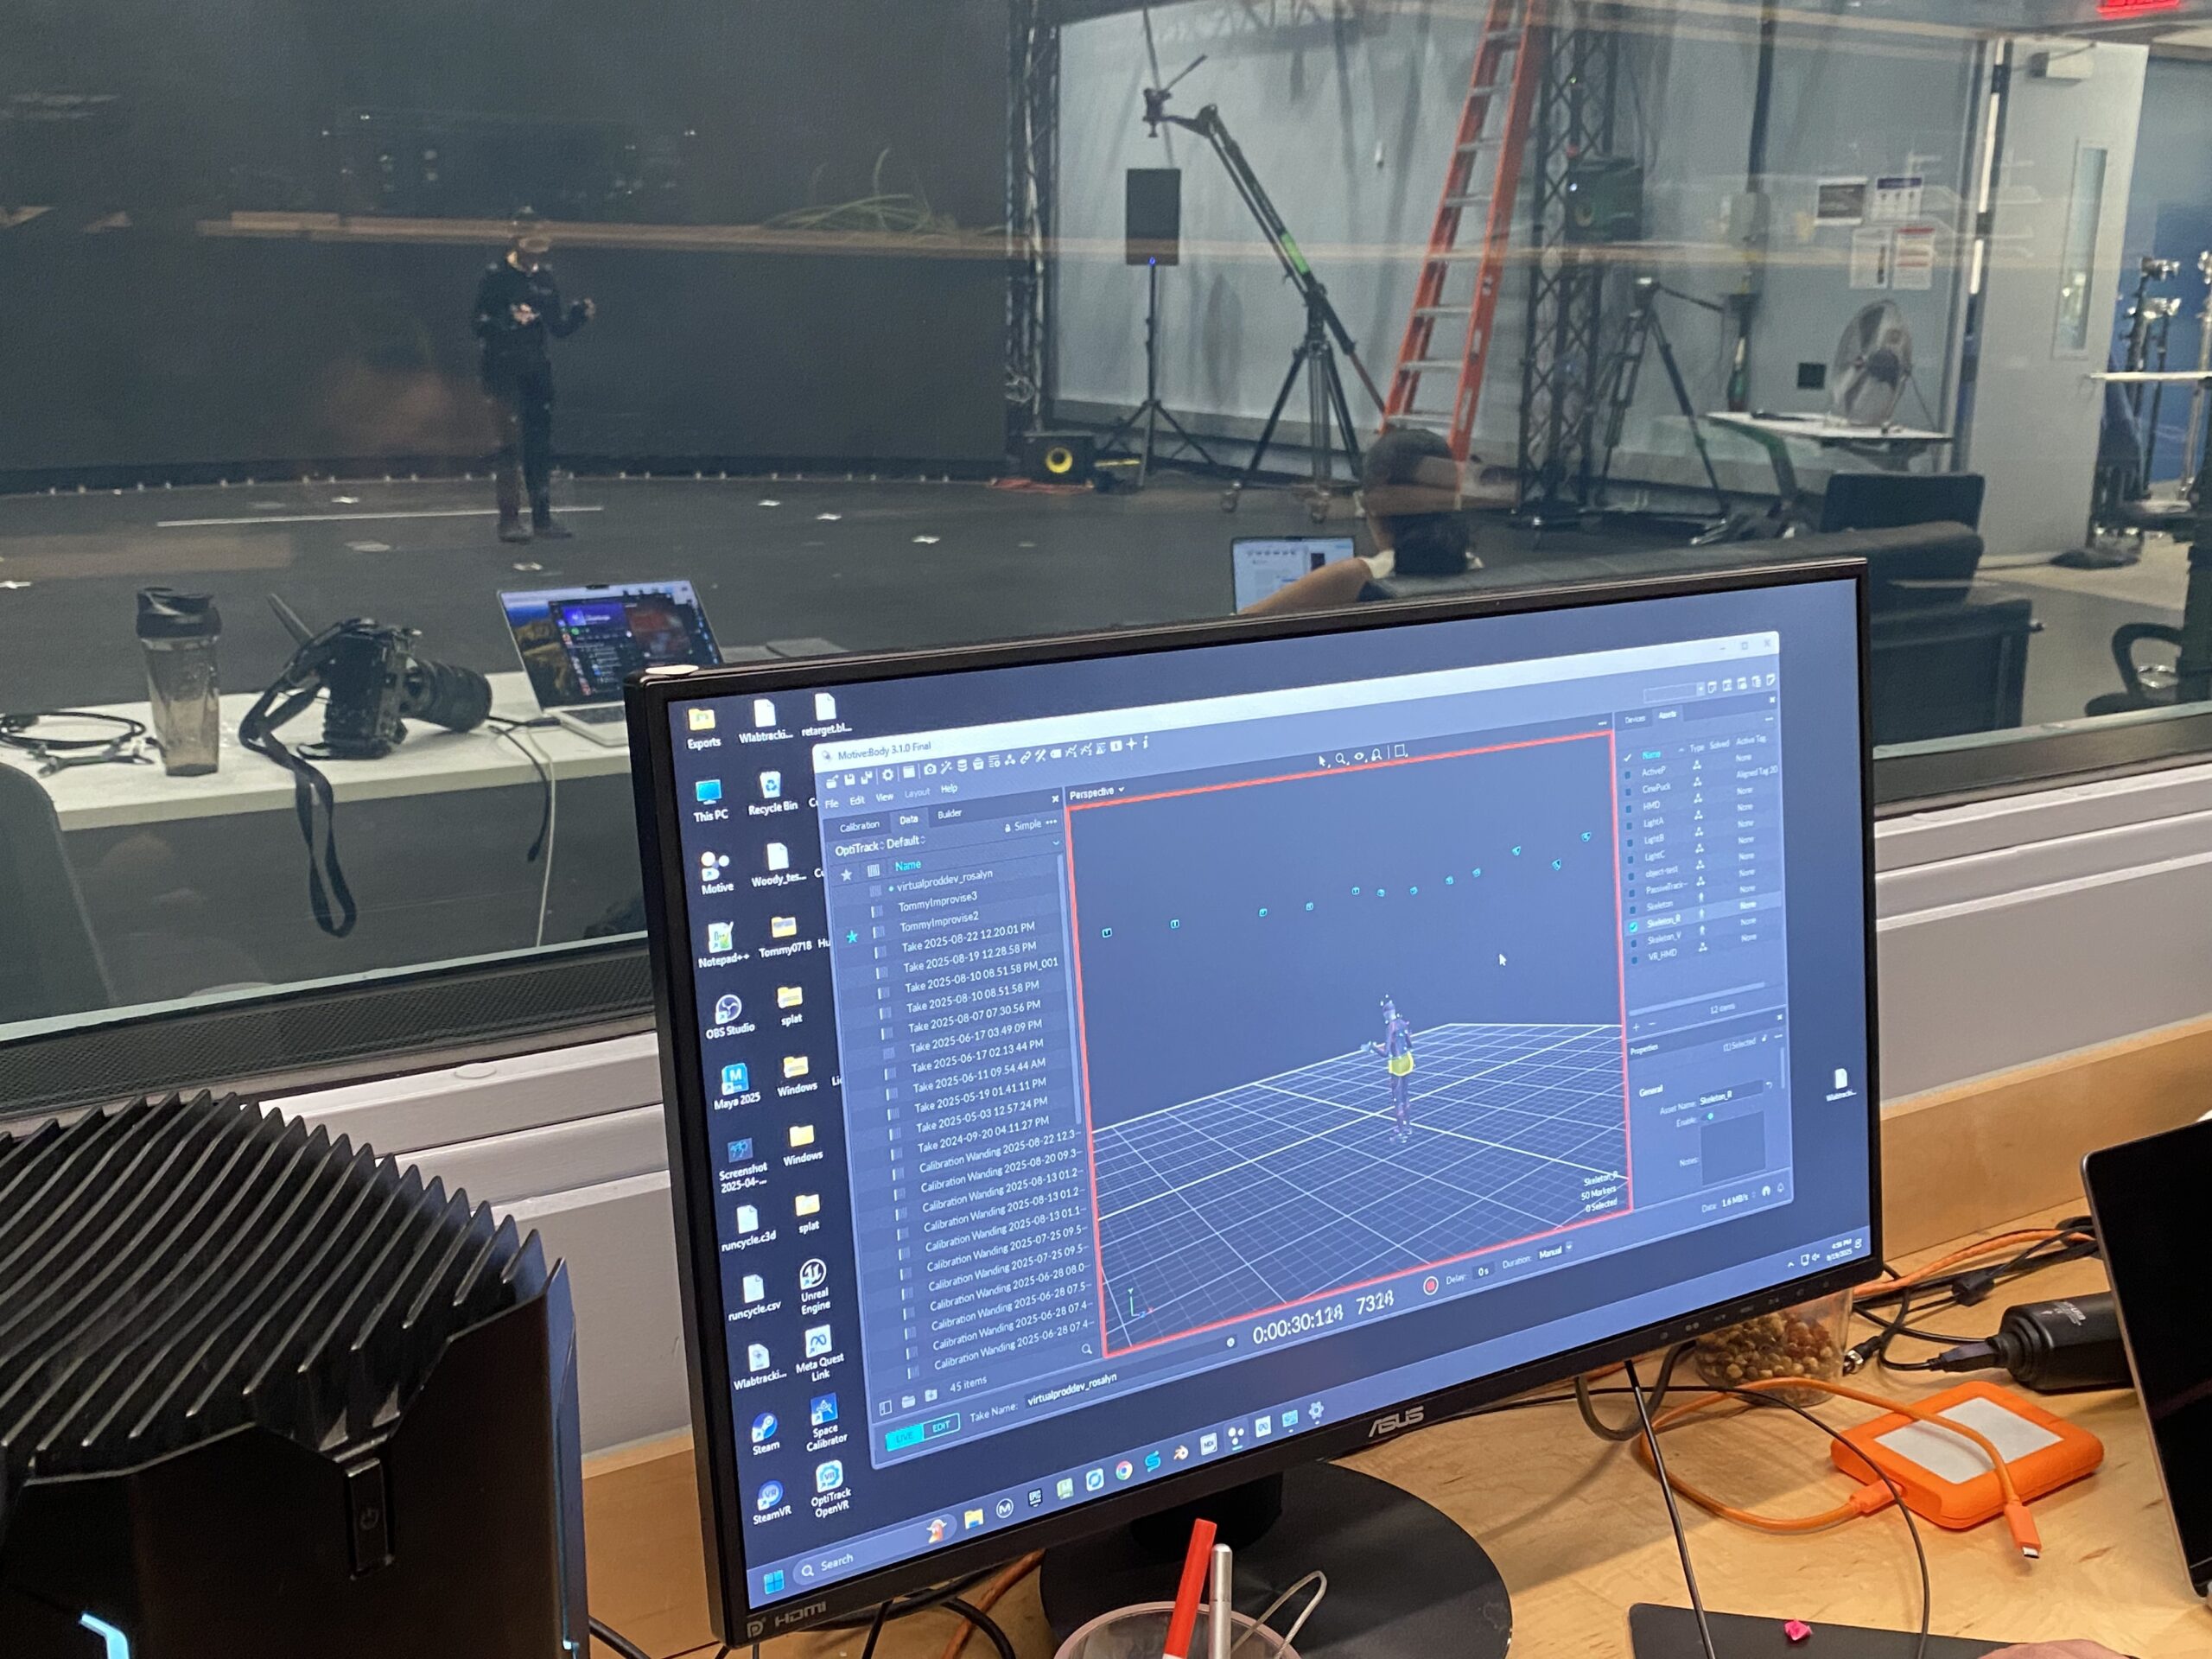
Unreal Engine
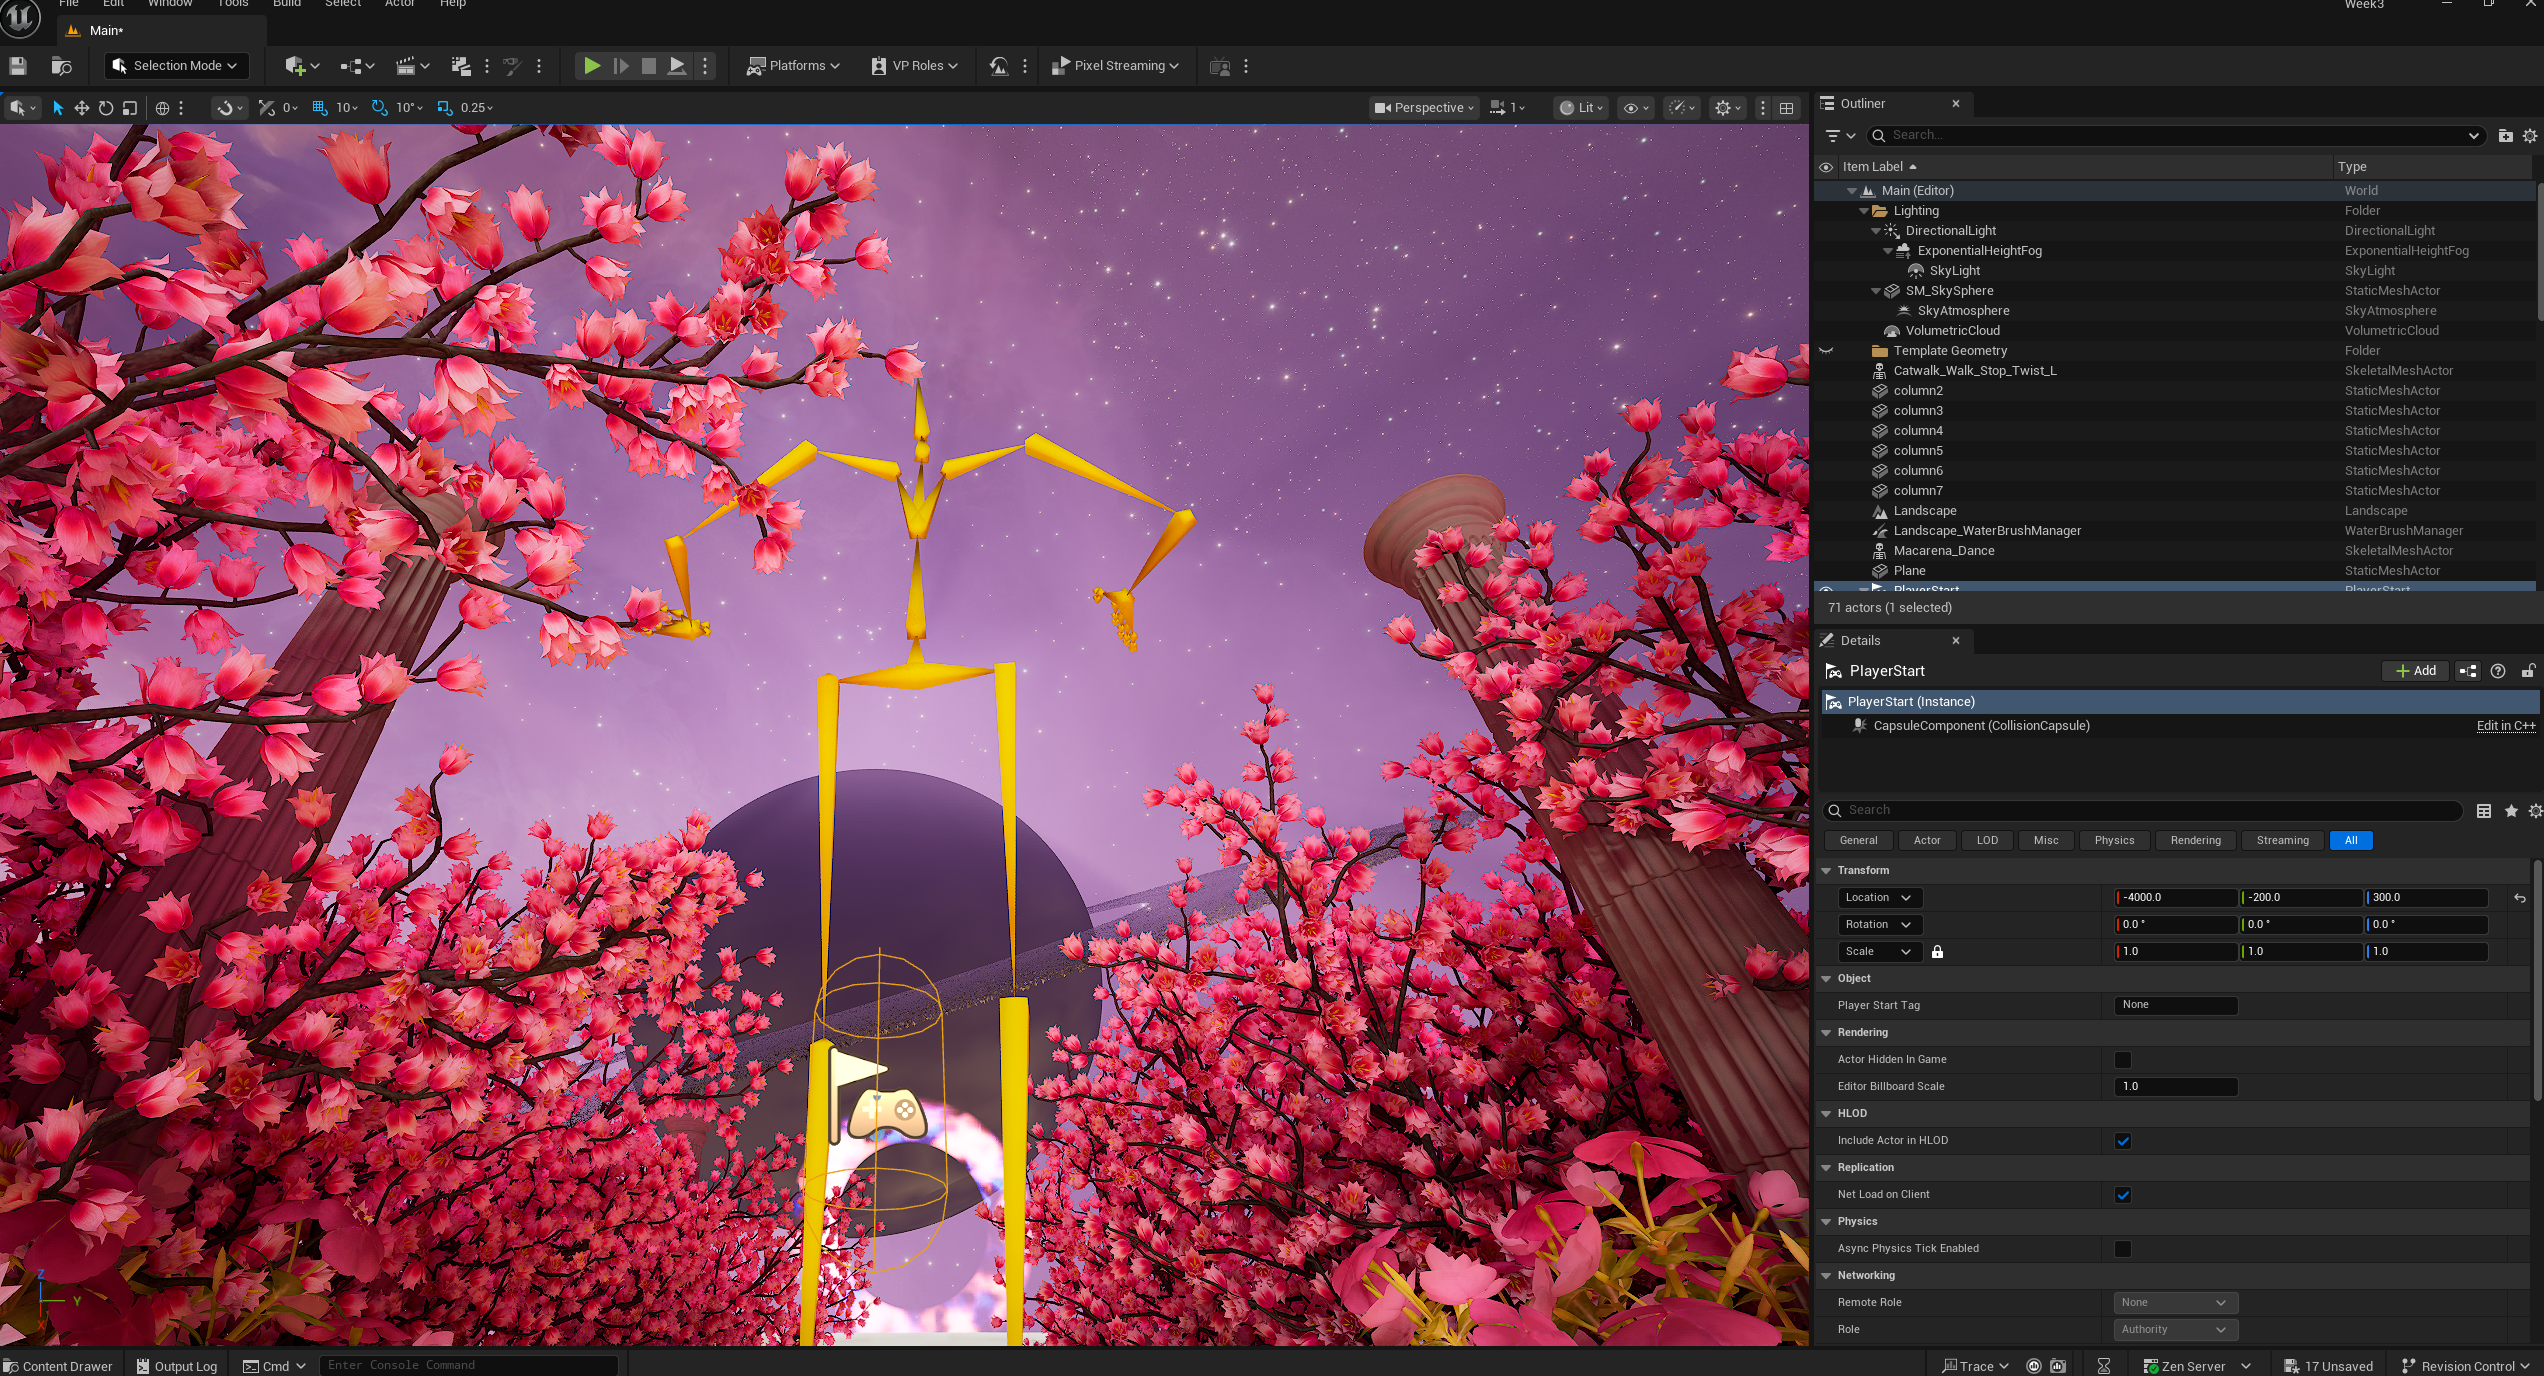
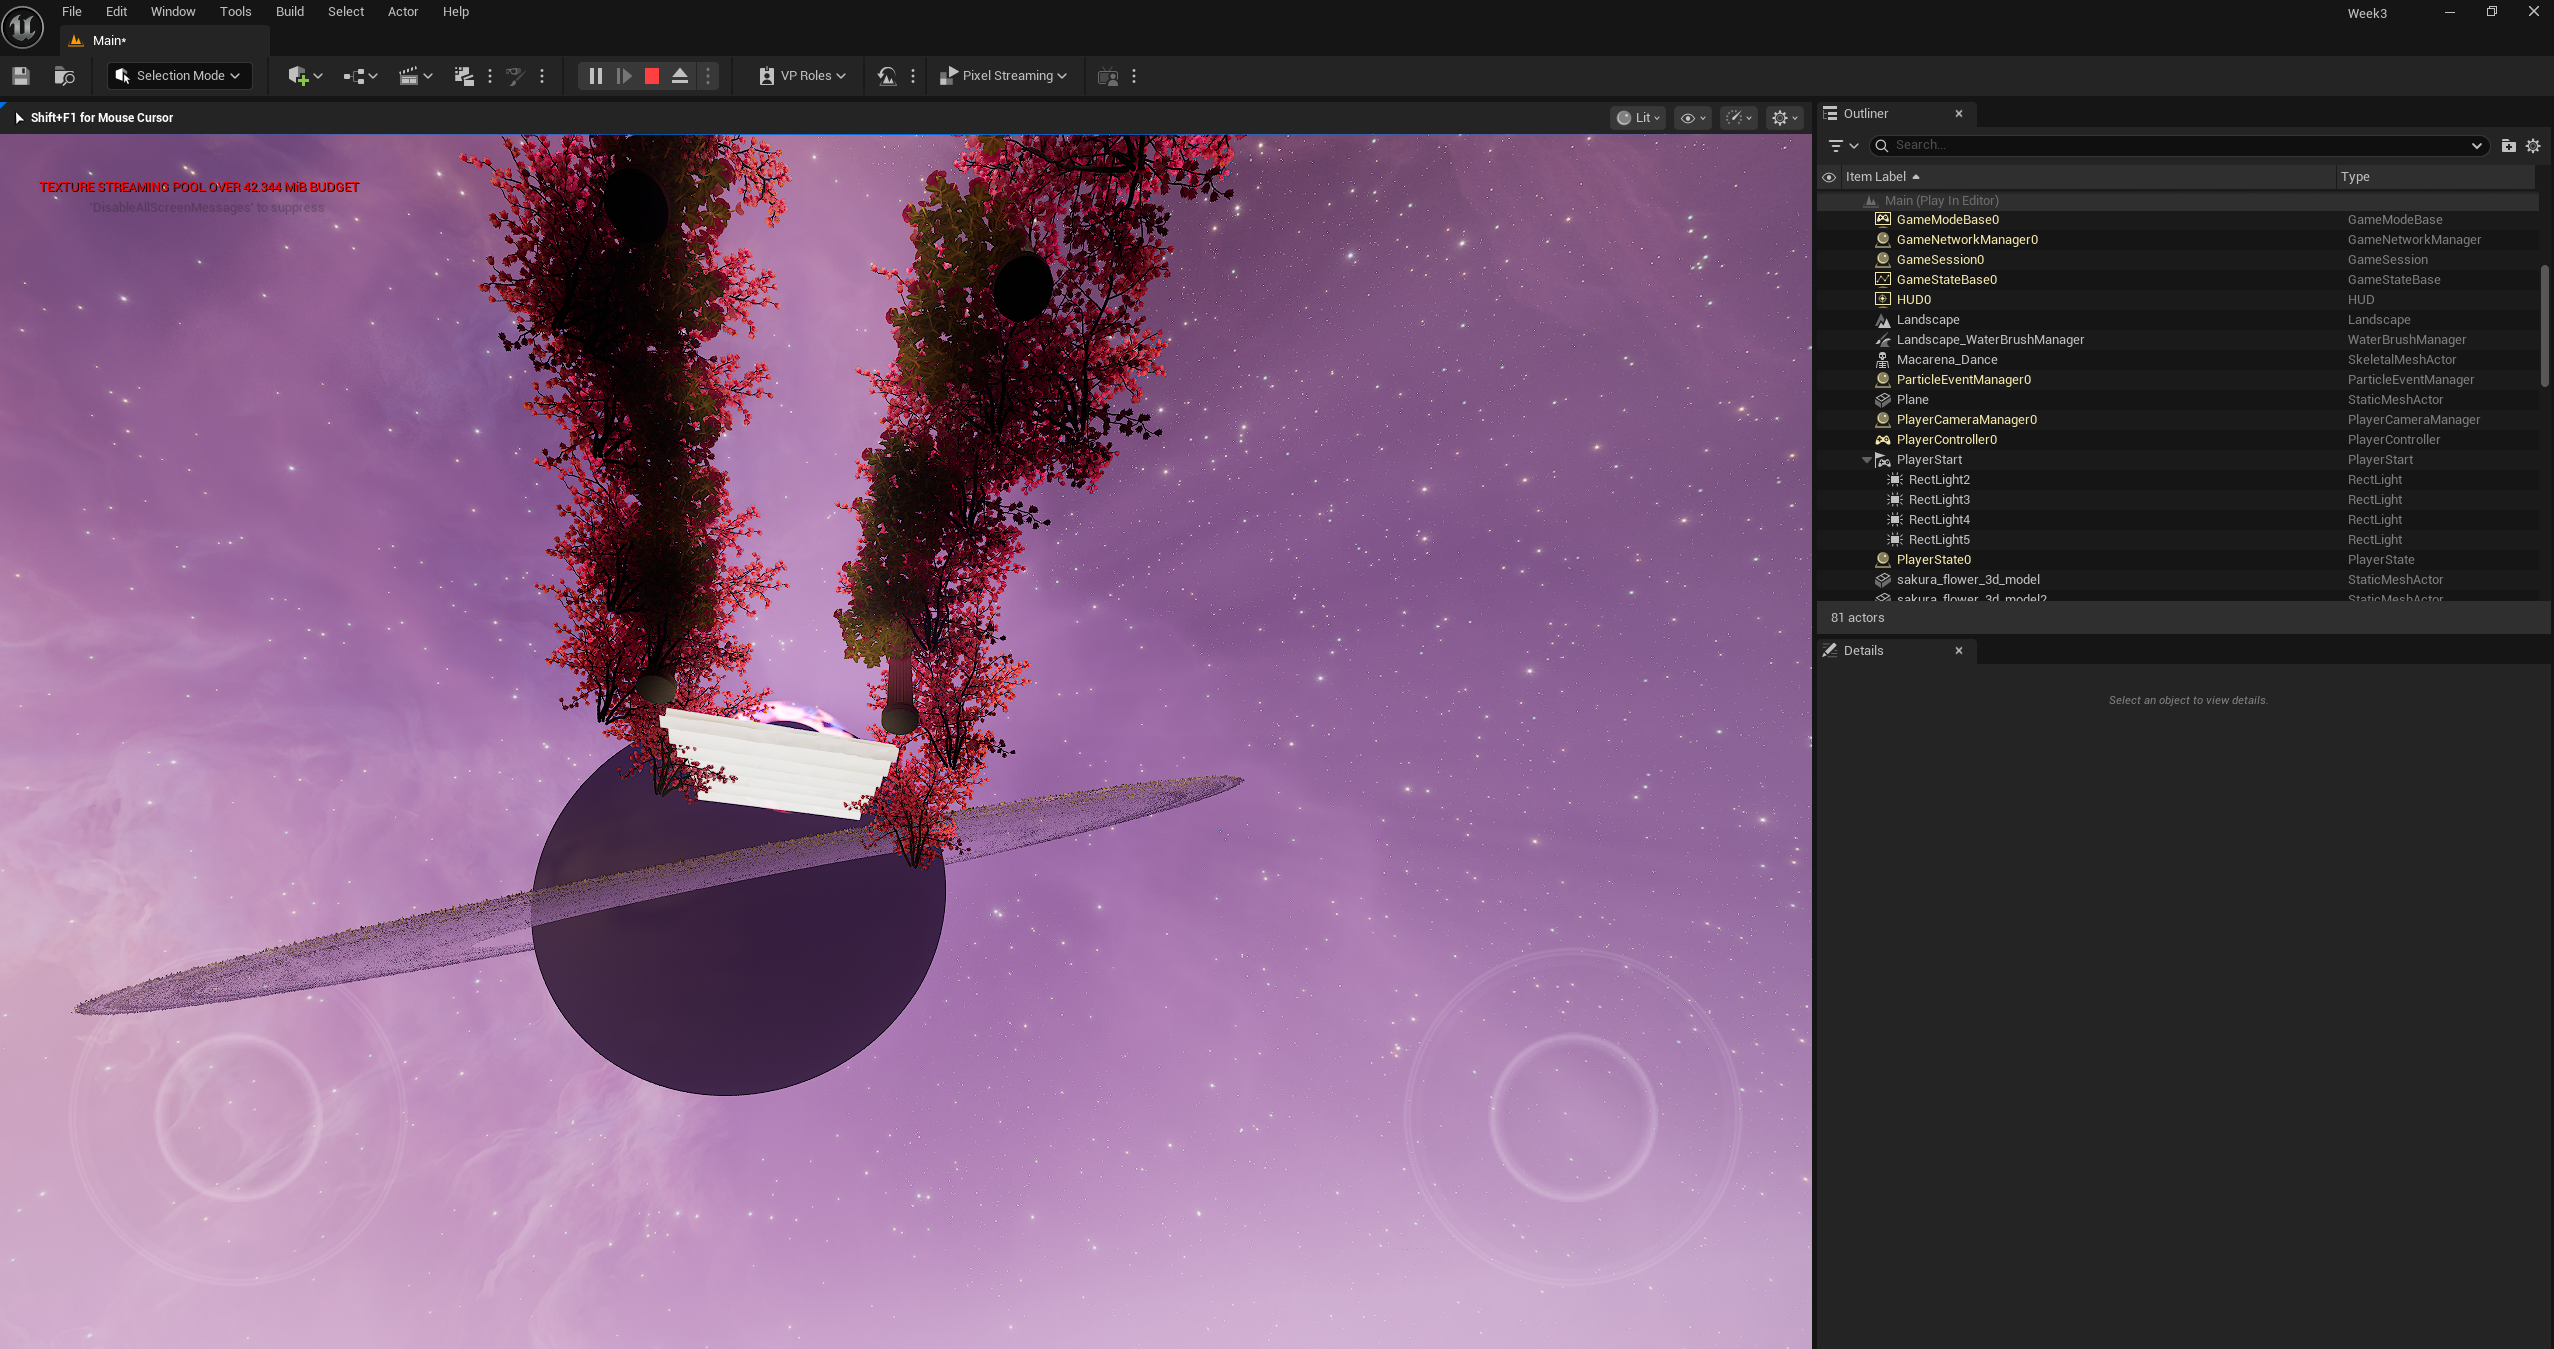
Preview before assigning camera
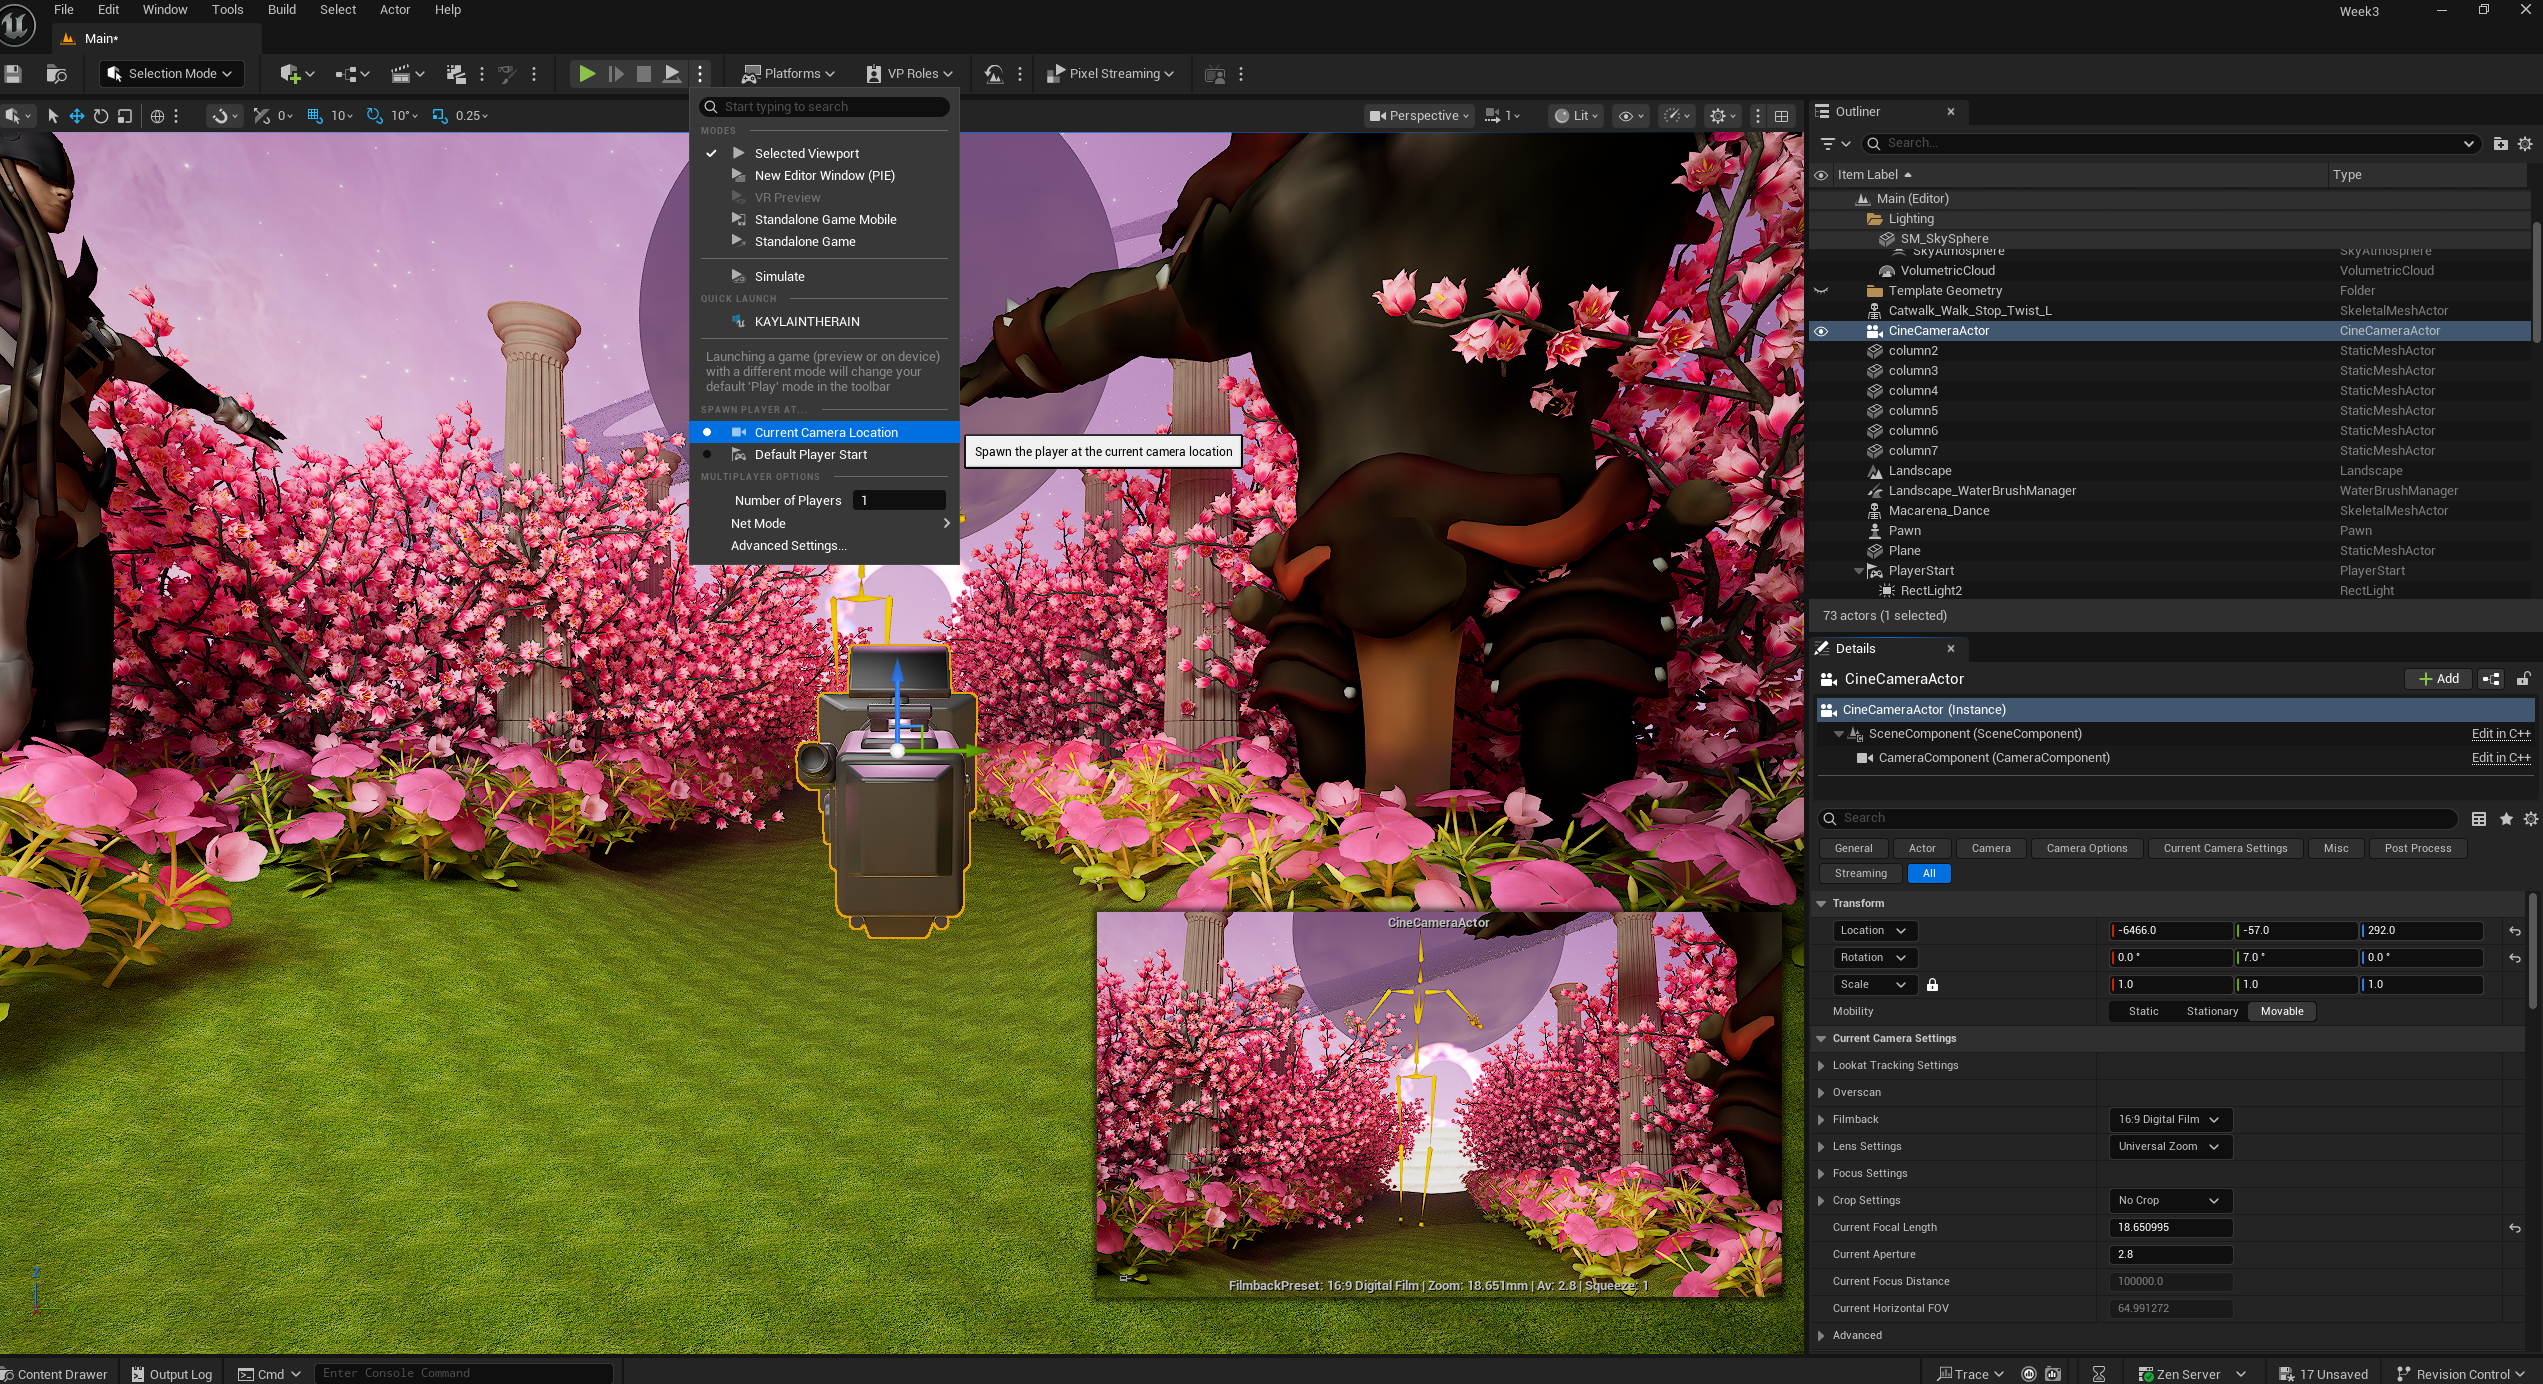
Preview after assigning the camera
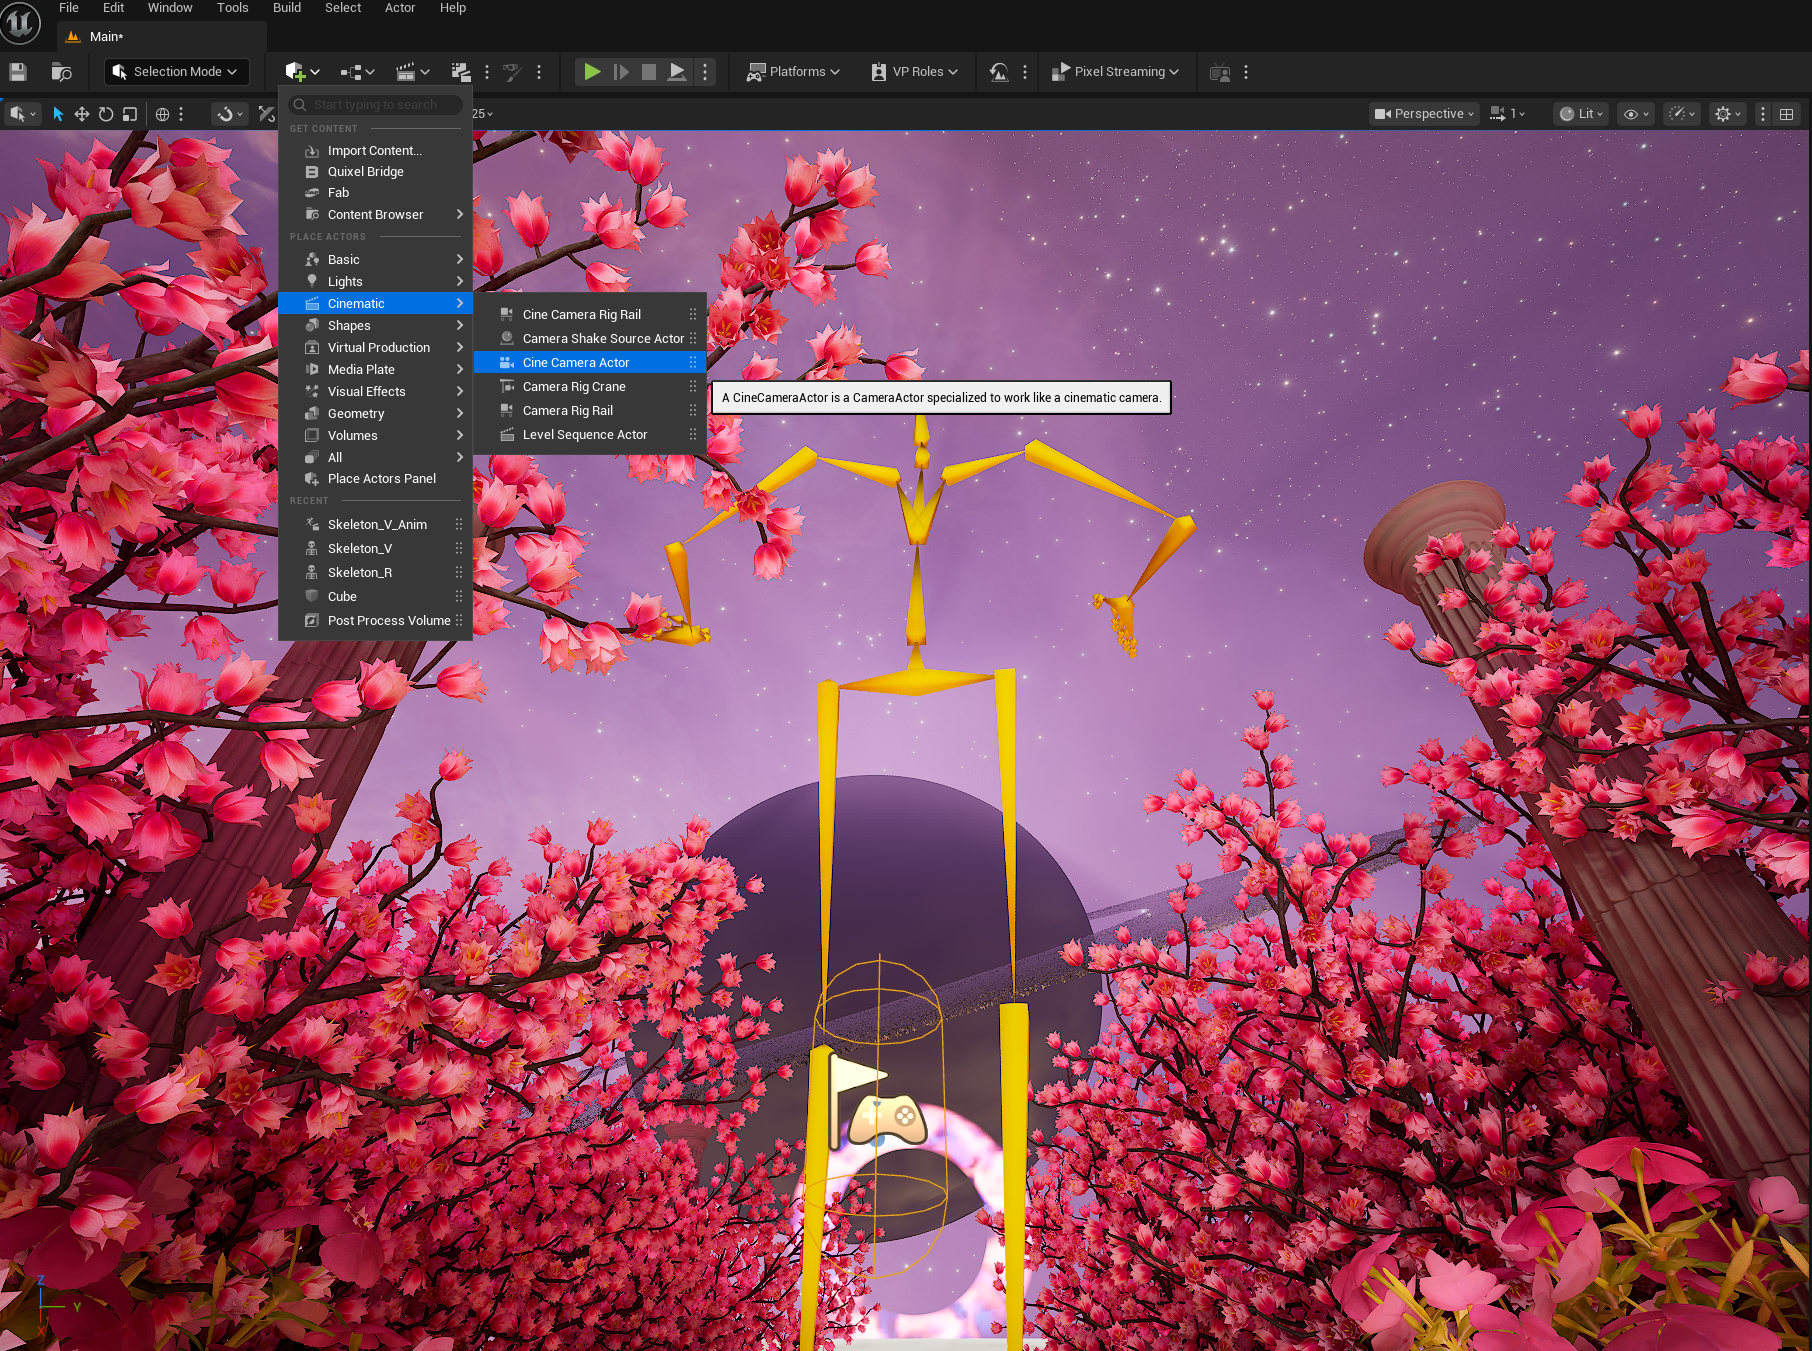
When I added the Macarena footage that was performed by Vasudha in Unreal Engine (the yellow skeleton in the middle), the footage was a bit too long, I learned the process of cutting it via Animation Sequence file. Then I realized that the camera wasn't assigned in the proper place to preview (the picture with the Saturn and the flower road in the middle of empty space). I added the camera via "Cinematic> Cine Camera Actor" so it previews from the location I wanted in the Virtual Production world.
After adding the skeleton, it looked a bit empty and the other two characters are not moving. I assigned the animation sequence separately, nixed the character that walks since I can't assign the animation from one character to another. I started adding more characters from Maximo to the world with the same movement- dancing Macarena.
(The image below is GIF of the skelton dancing Macarena alone, feel free to refresh the page if it doesn't play)
Here are the characters I got from Maximo:


Finished adding all the characters, played via Preview window after finalizing the camera location setting.
THE FINAL OUTCOME
Challenges:
Learning the Optitrack process was helpful, I wish we could have individual time to work on the app. As a part-time student and a full-time worker, it is not easy to book the time at the Media Commons. I wish they open during the weekend so the students have more time to learn and practice.
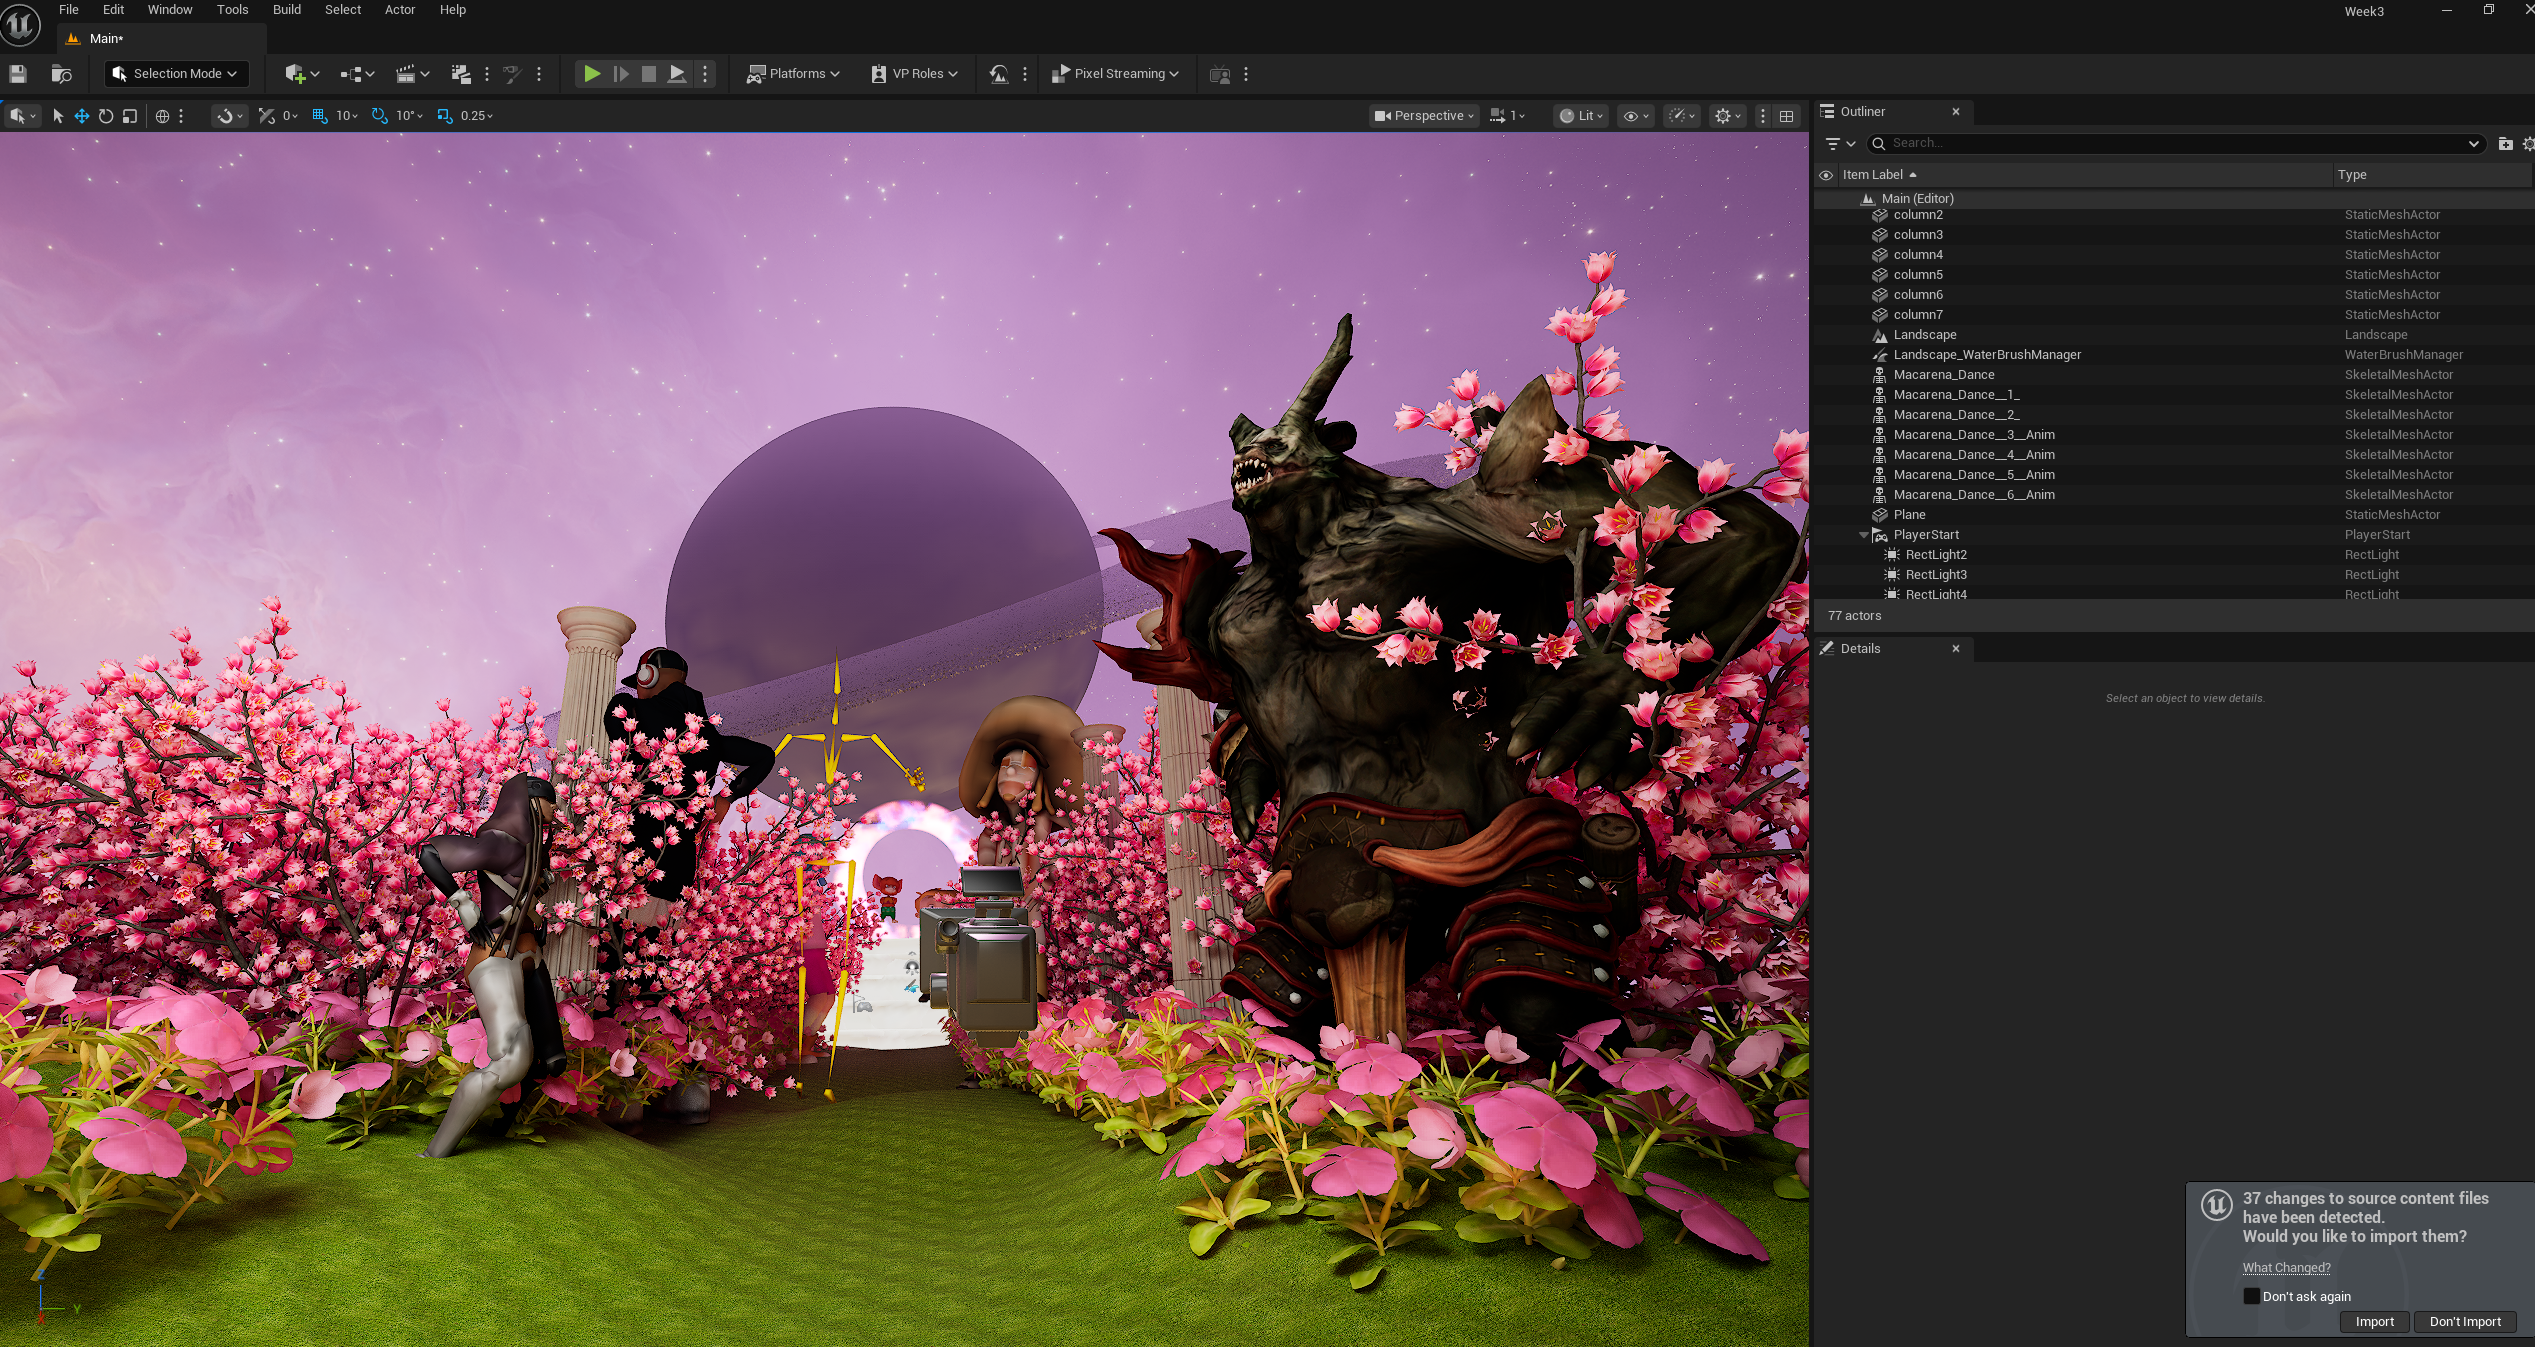
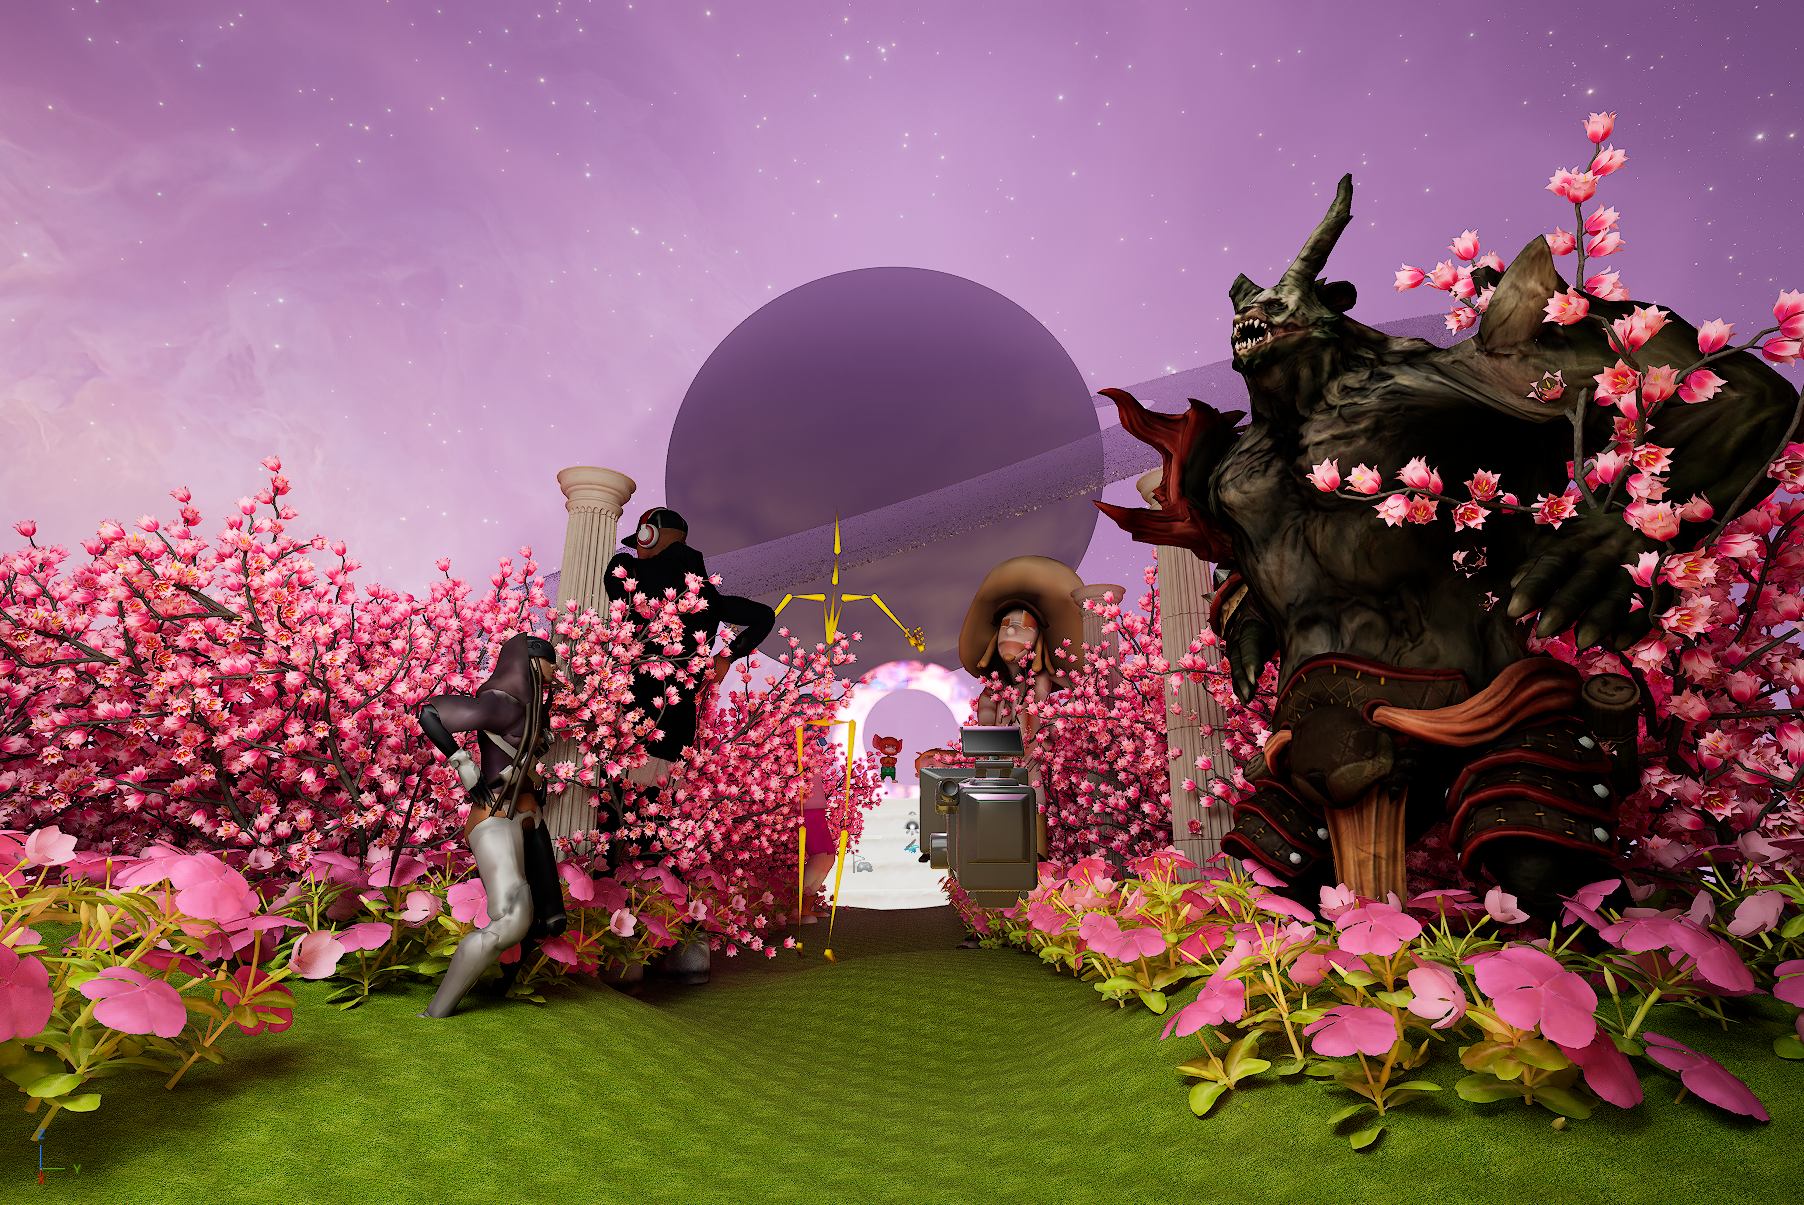
Week 3
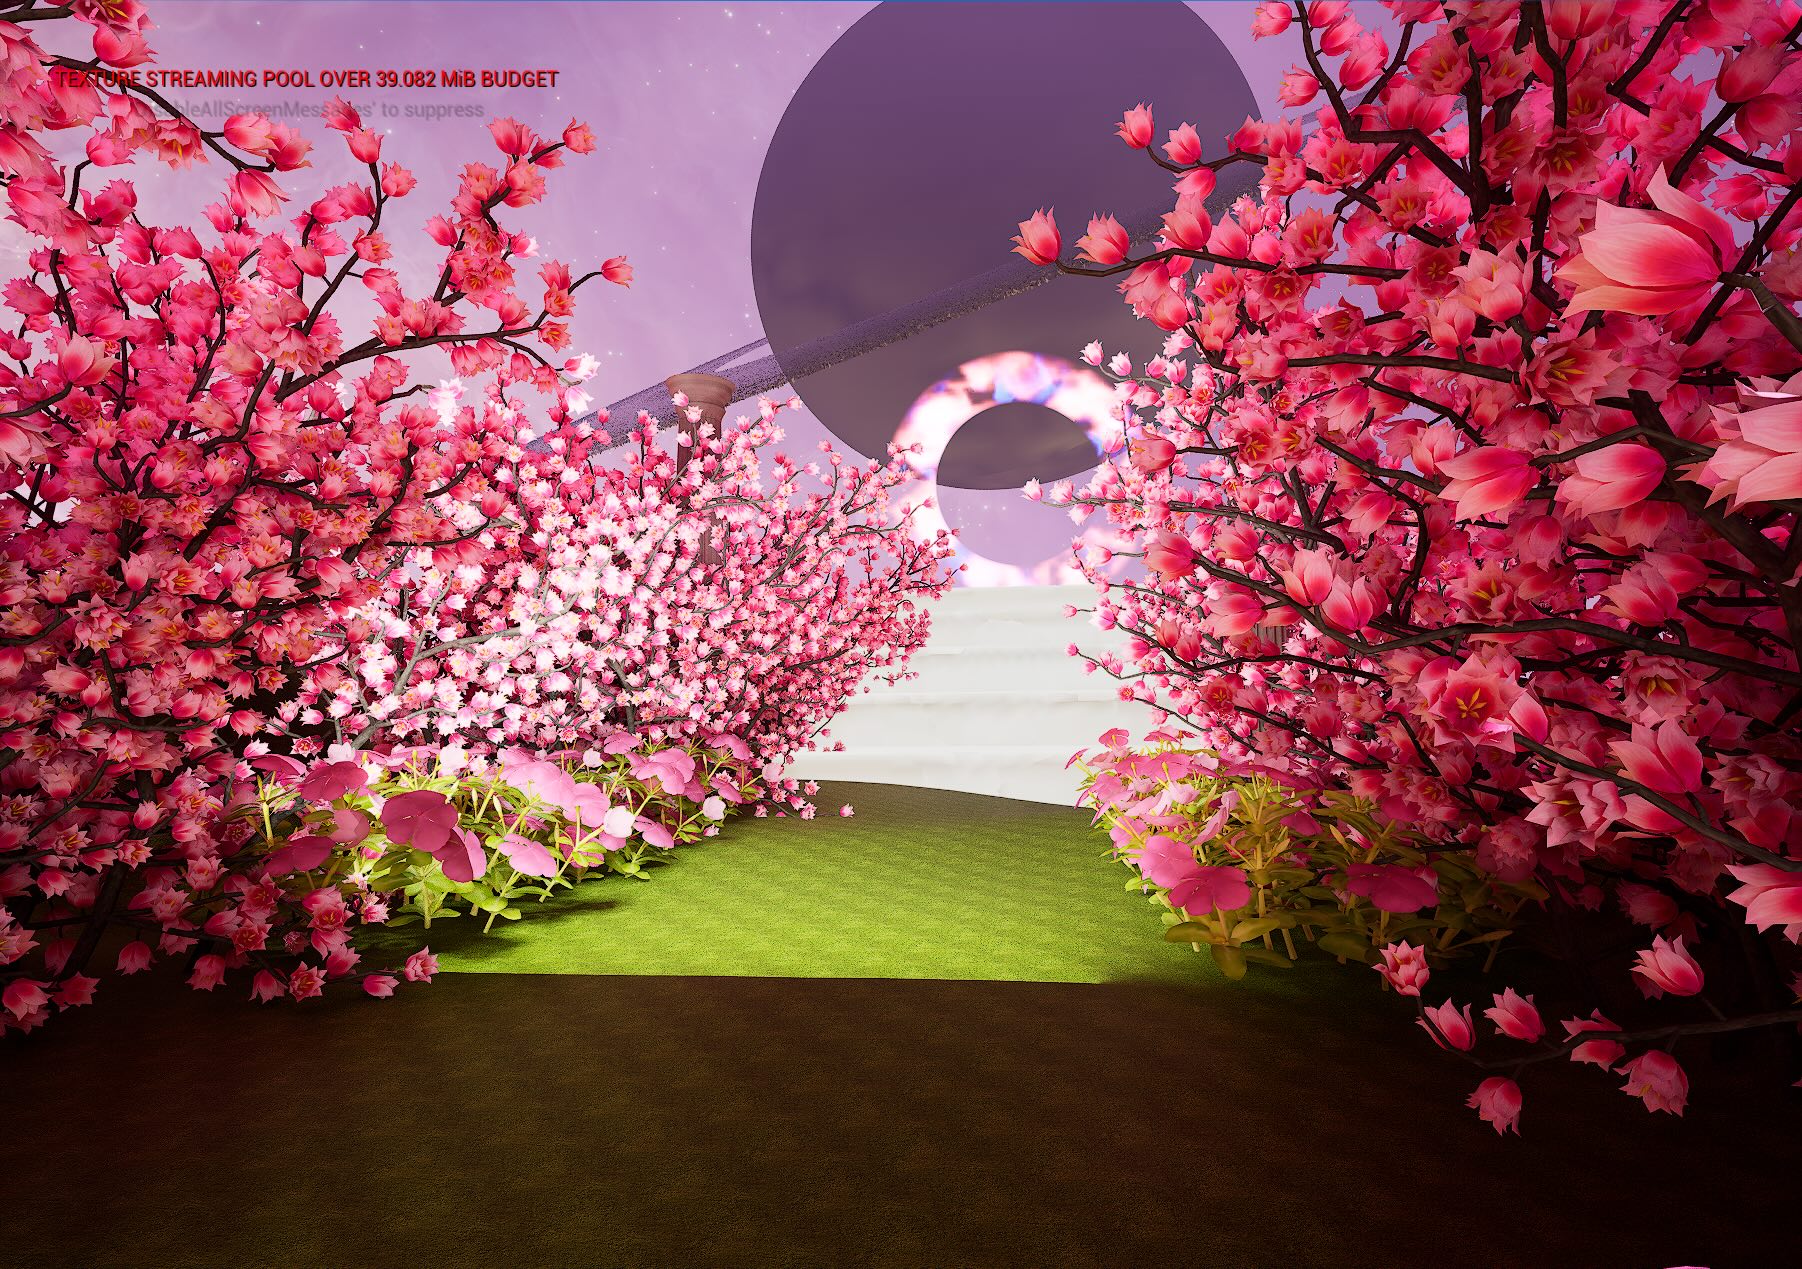
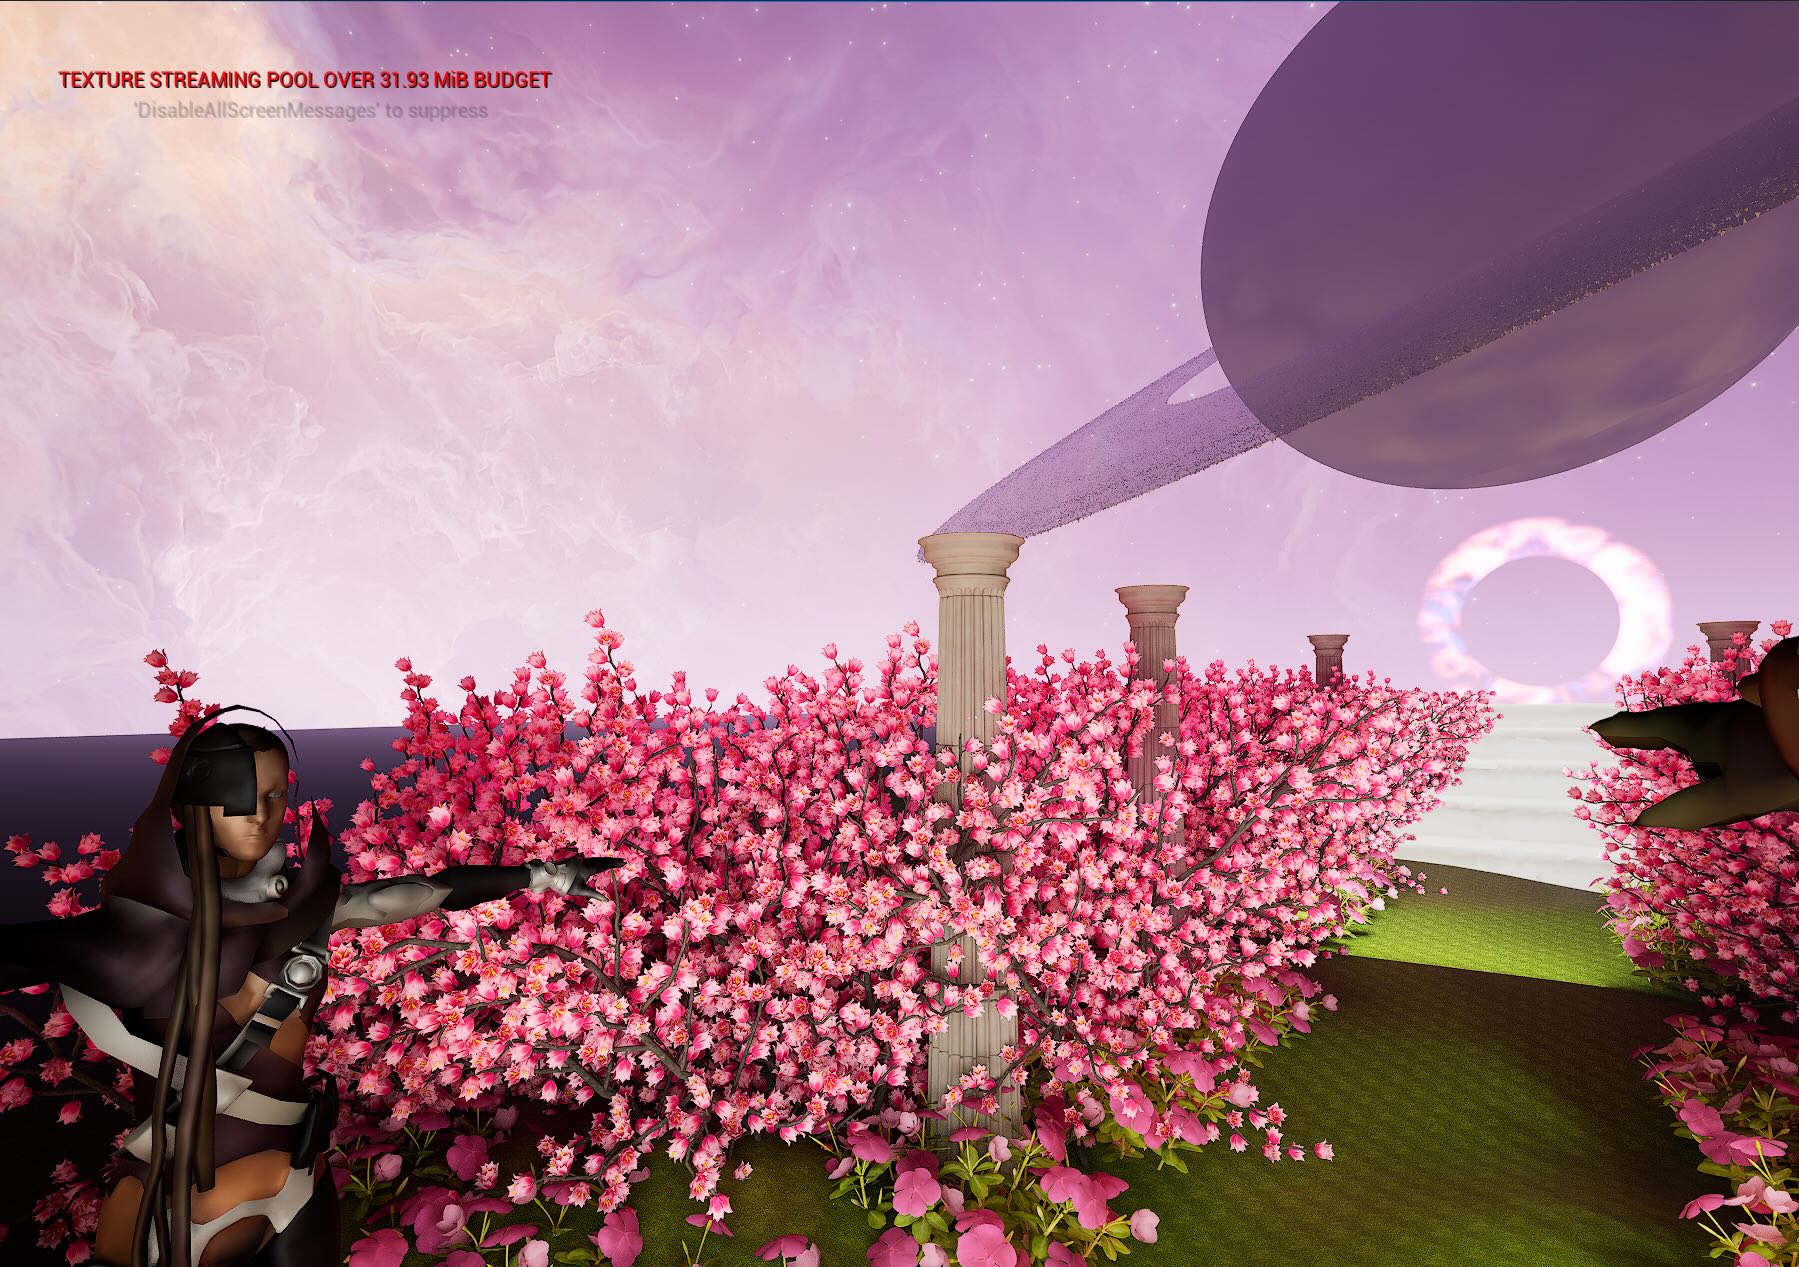
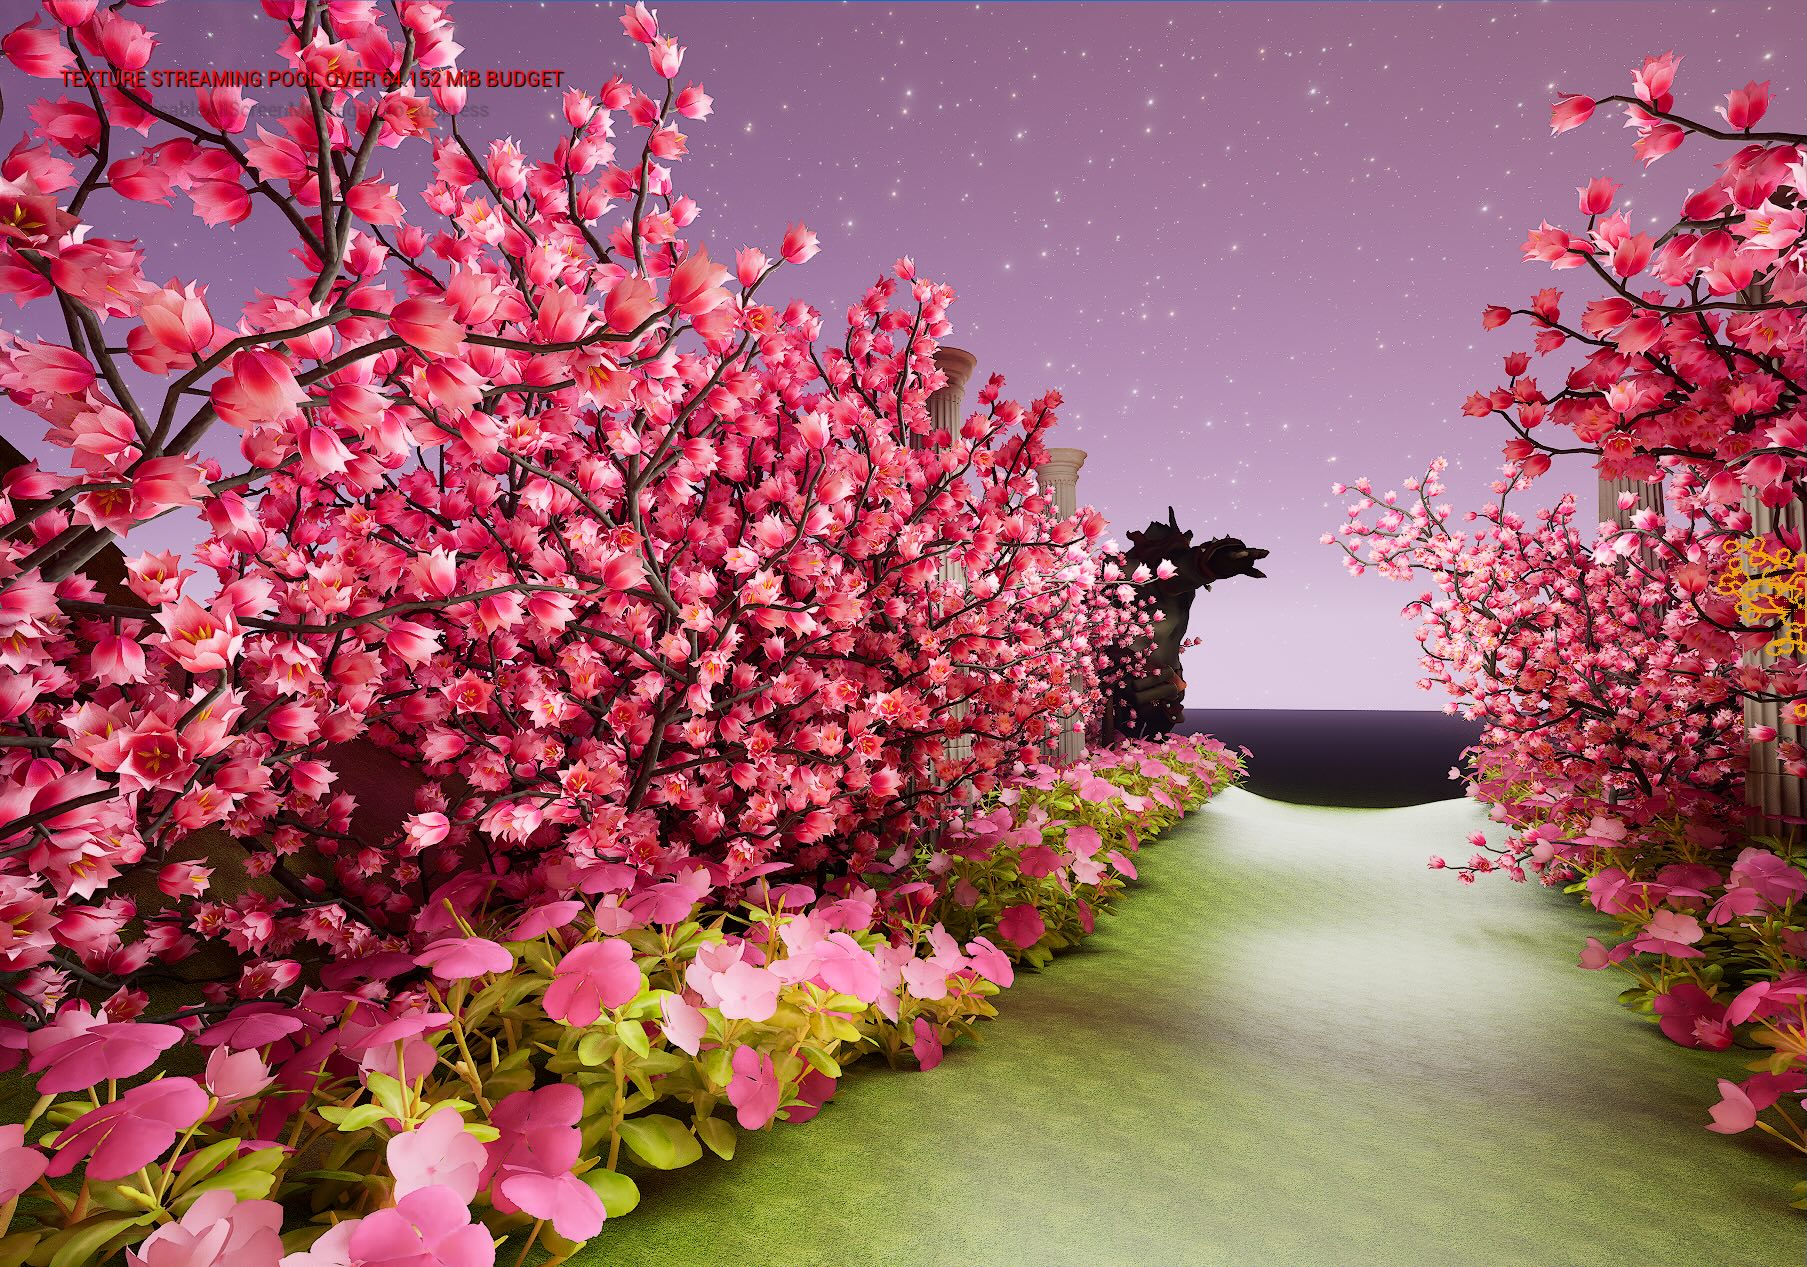
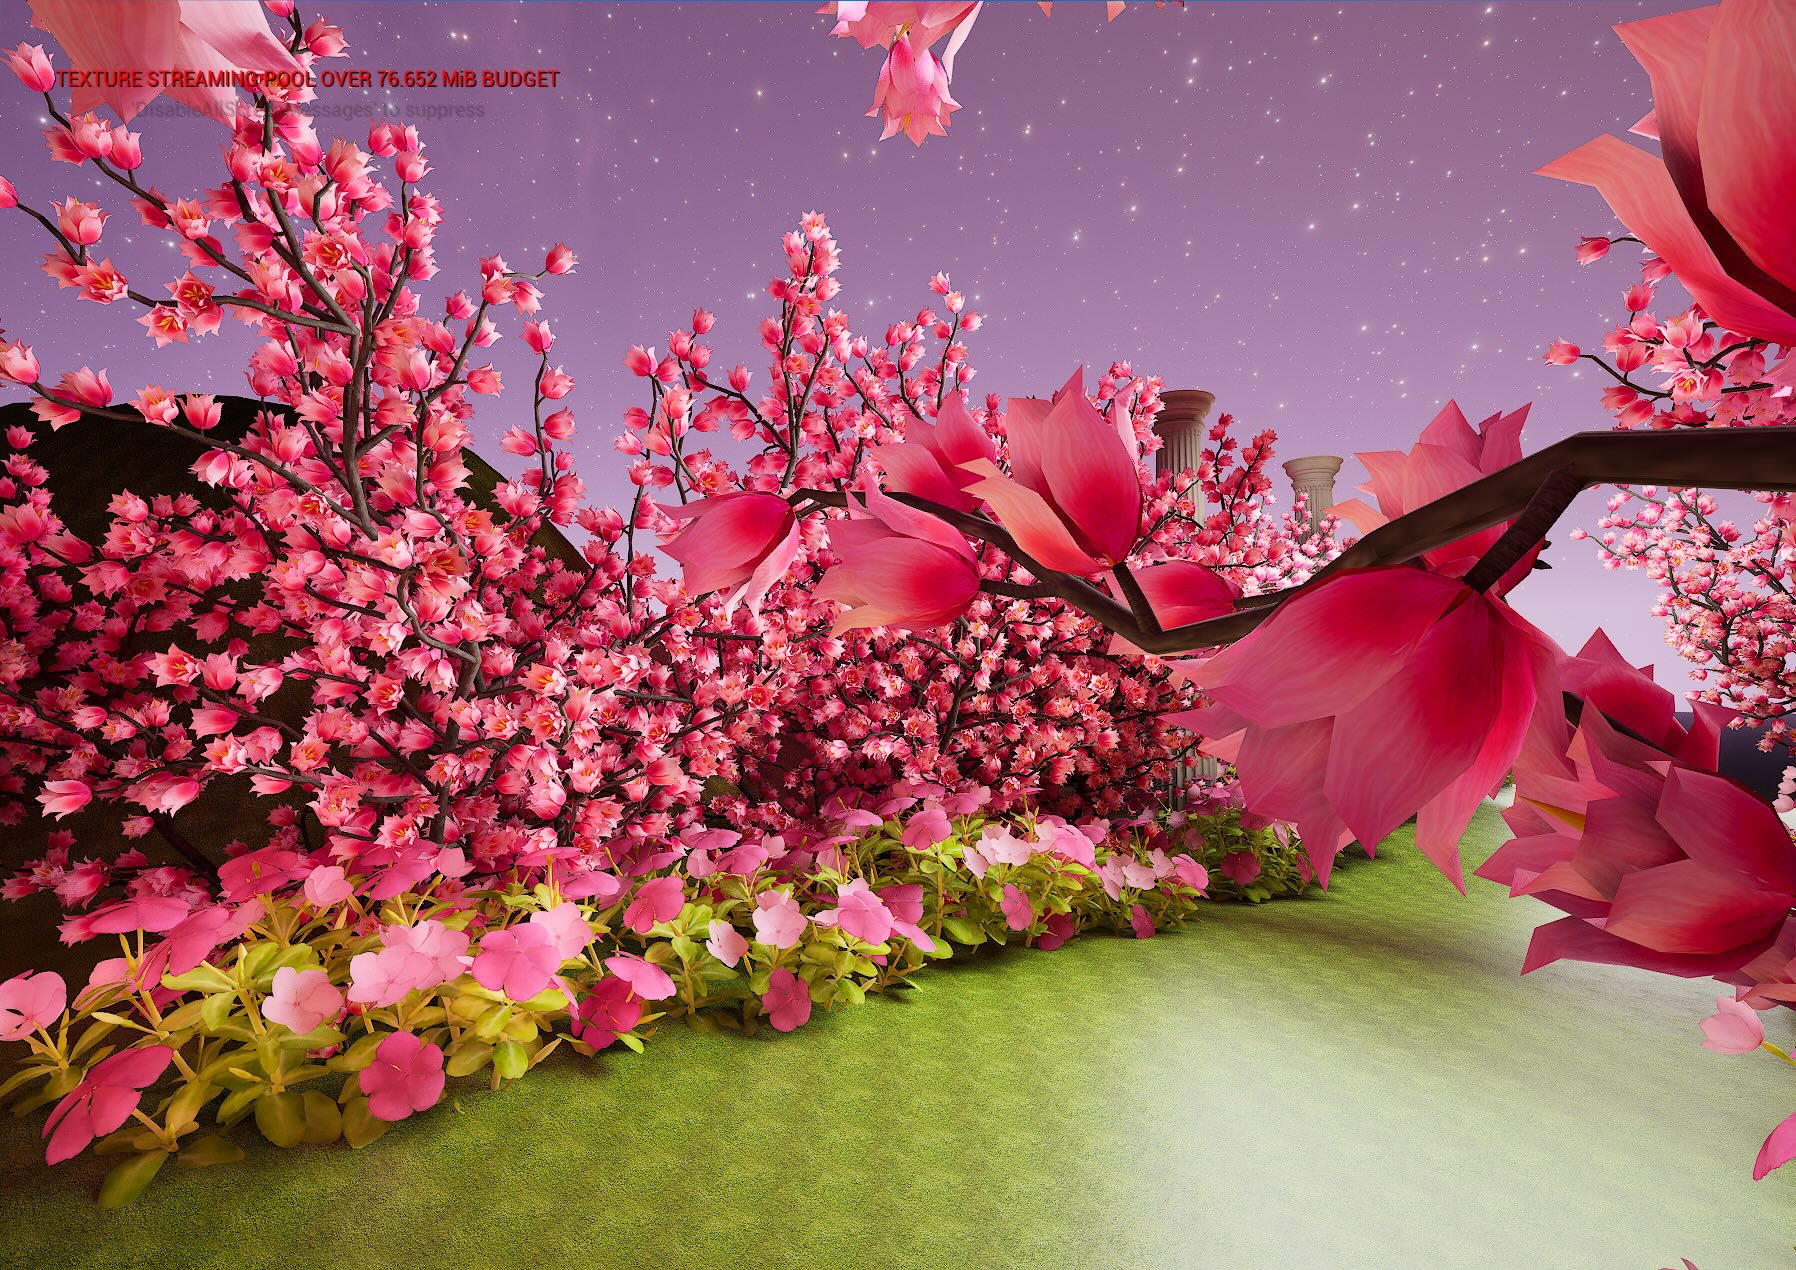
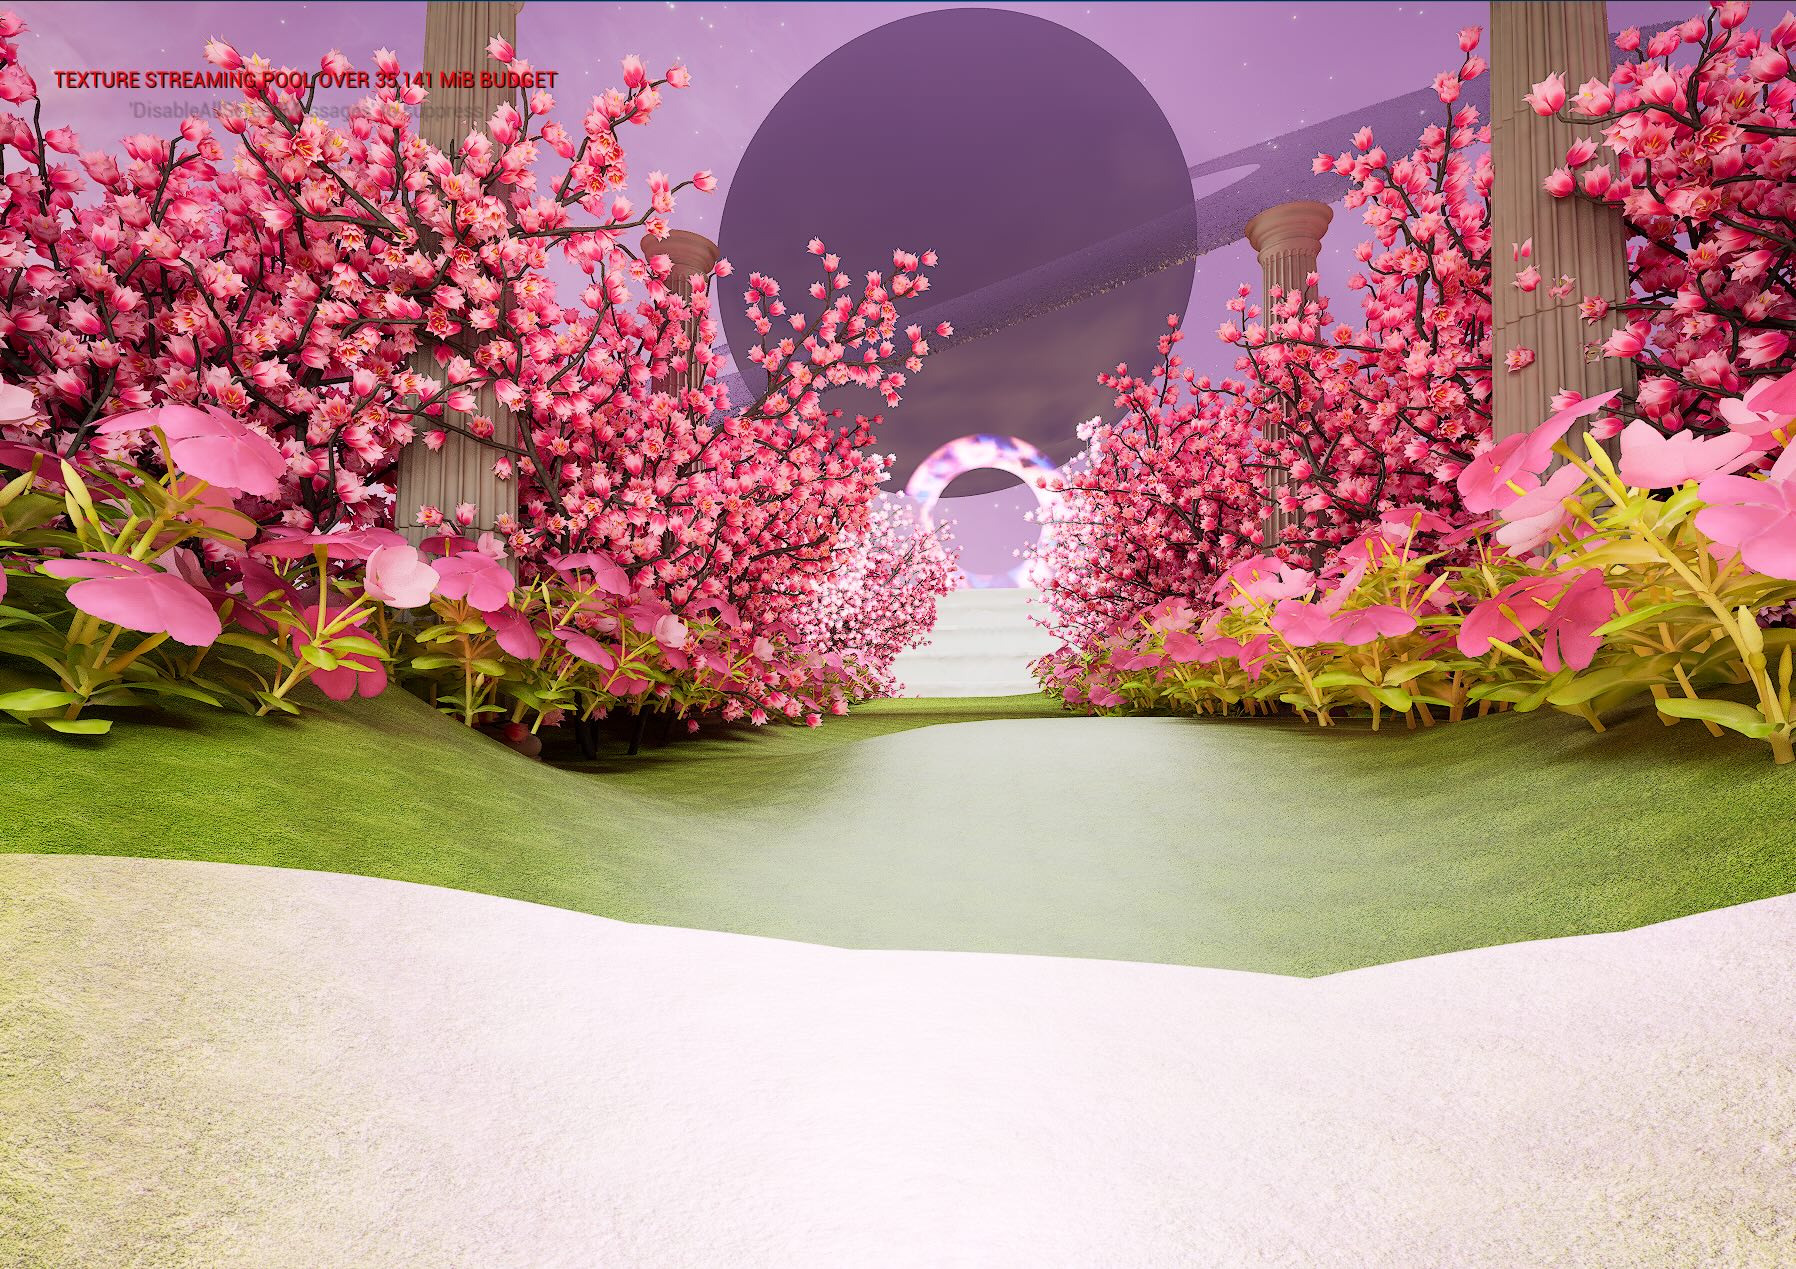
In this project, I designed a surrealistic virtual environment that merges a galaxy sky with a cherry blossom garden, two of my favorite themes that I previously explored in a VR class. Revisiting the FAB library I had built, I incorporated selected elements while reflecting on past lessons and experimenting with how VR background techniques could be adapted for Virtual Production environments.
Key assets such as Saturn, portals, staircases, columns, and cherry blossoms were relatively straightforward to implement. However, Saturn posed some challenges due to light reflection. To address this, I increased the fog intensity and adjusted its color to evoke a more mystical atmosphere. Additionally, I applied a skybox texture to the sky and fine-tuned both the directional light and fog colors to create a balanced harmony with the overall landscape.
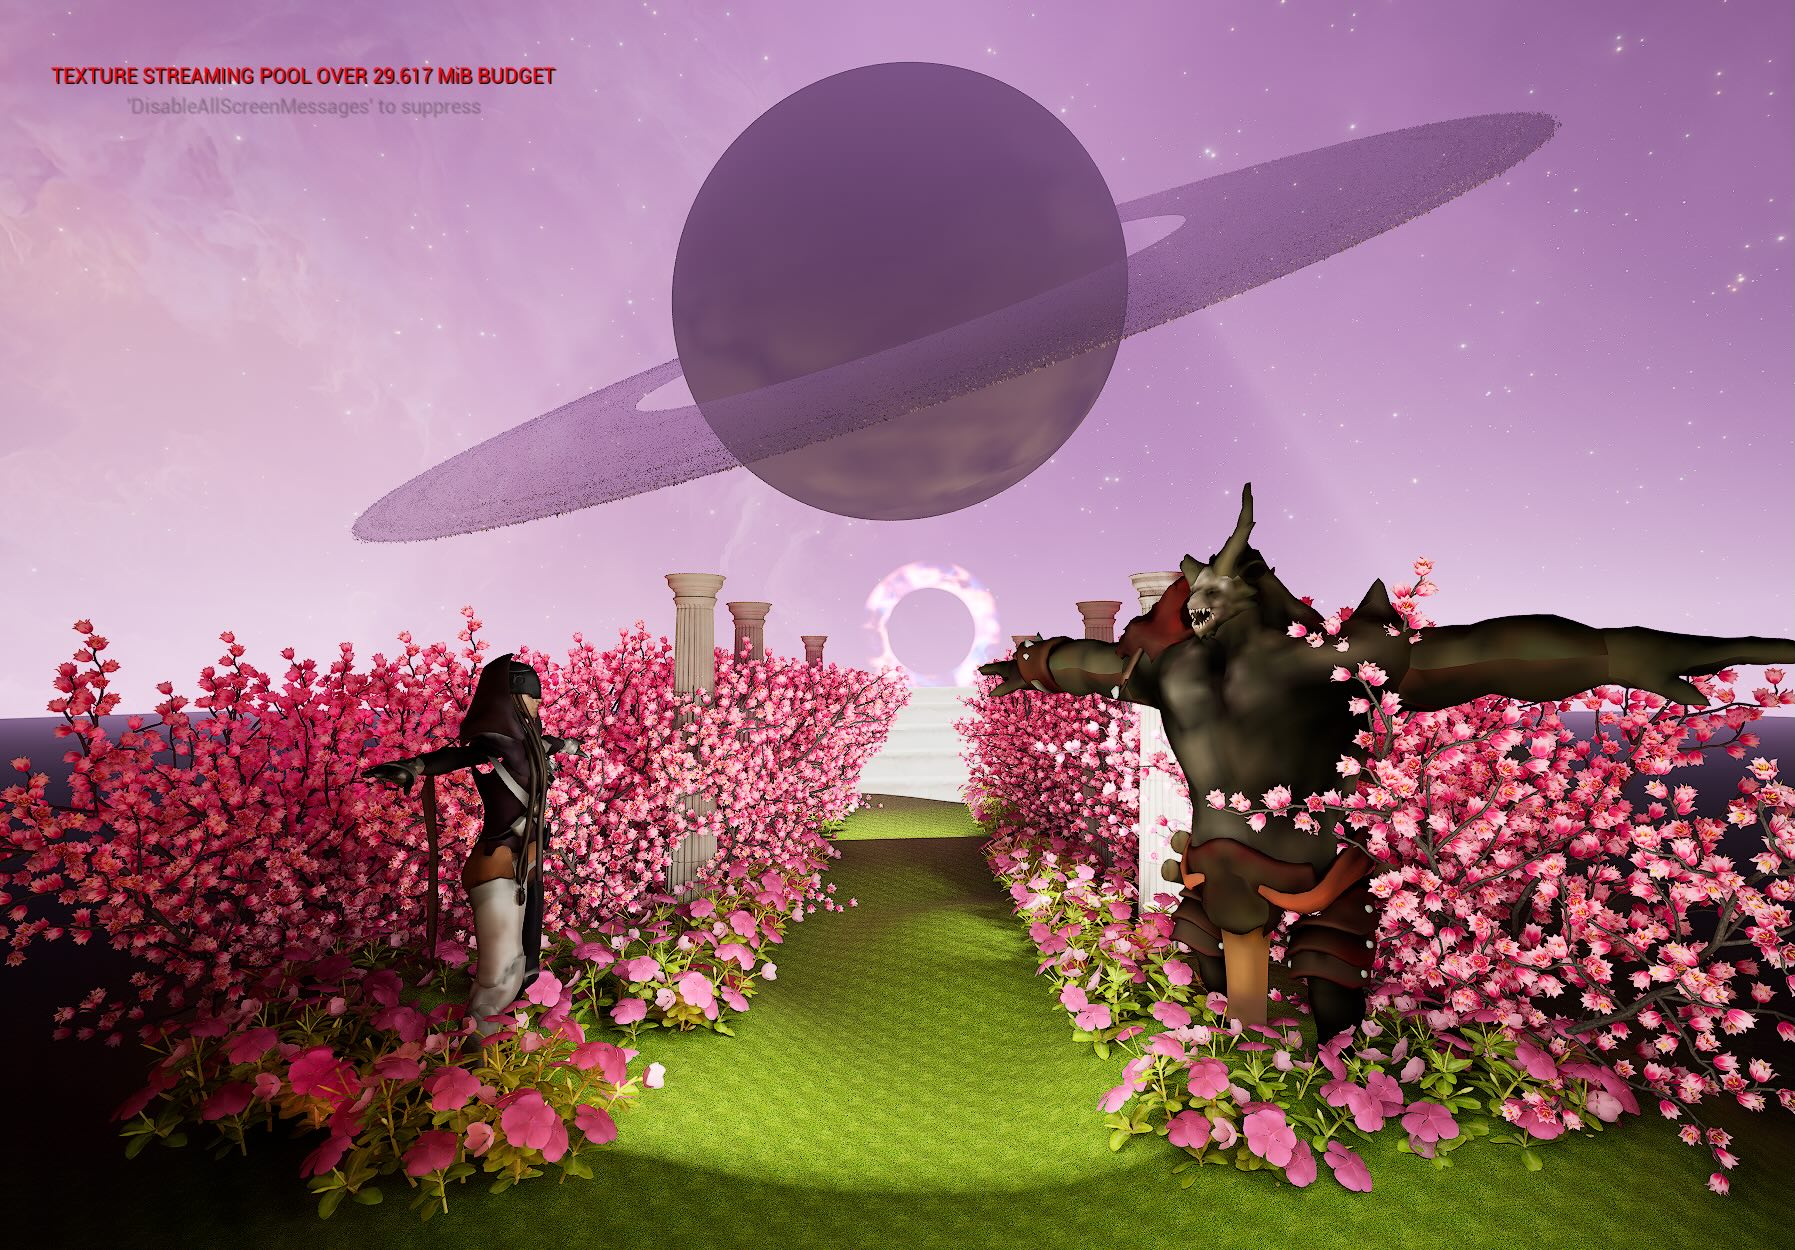
3D Characters from Mixamo. (I found out that my laptop handles Mixamo better than Metahuman).

Challenge
1. Rotating Skybox
Blueprint of rotating skybox makes the galaxy rotating by adding a rotator node and the reflection vector node on the texture so the sky is moving and showing the stardusts and nebula.

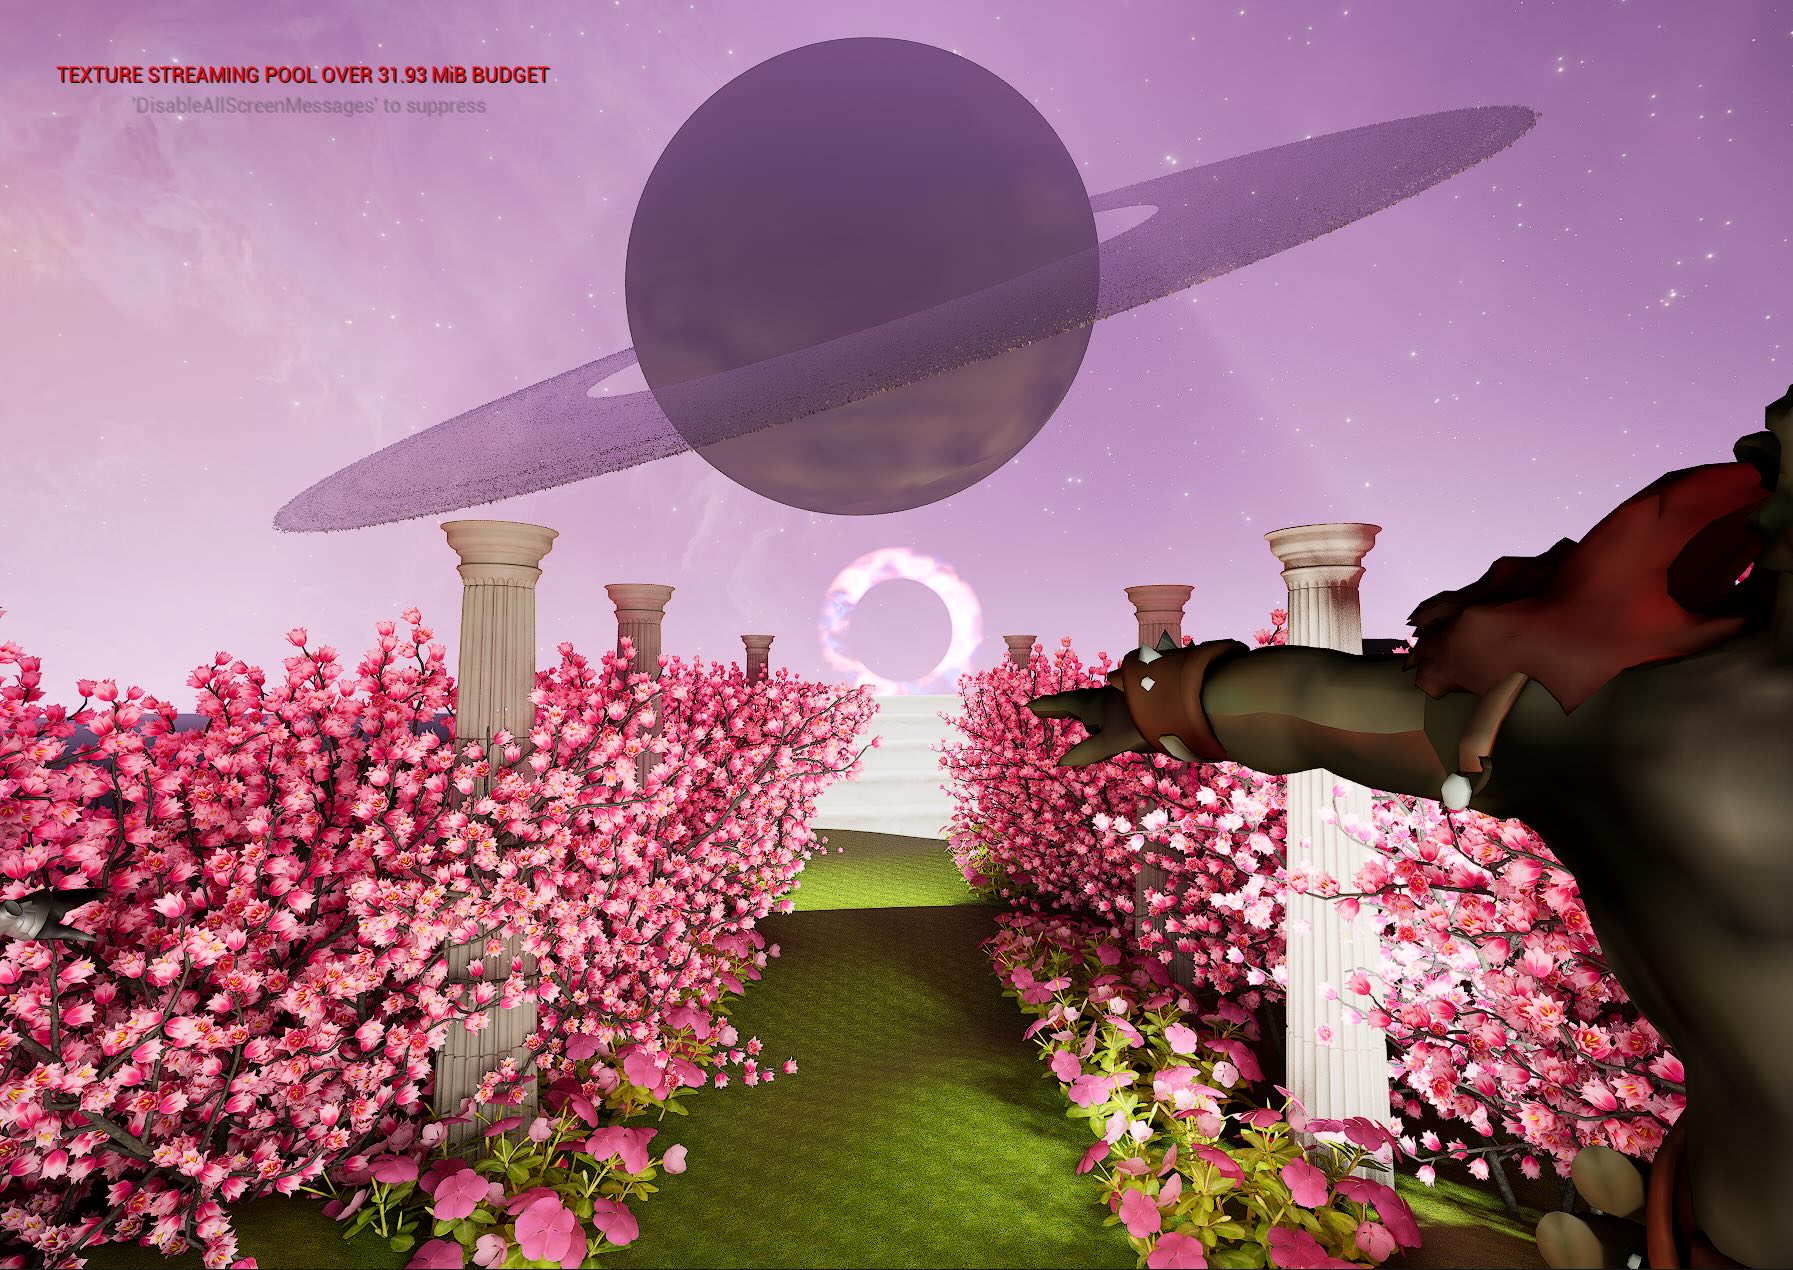
2. Niagara FX
The Niagara FX was for creating the fireflies (this is my favorite tutorial: https://www.youtube.com/watch?v=xJK-QO9YH68) but the multiply node and adding value on the B section didn't blur out the outline of the hanging particles.

Week 2
Reading Summary
1. Eminem - Live AI Event VMA Metaphysic, advanced version of hologram, AI avatar model trained via deep learning, markless facial tracking, automatic face detecting techniques, realtime tracking, AI rendering speed is optimize to process the information
2. SXSW - Disguise with UK house (Motorbike XR, LA SoFi Stadium in virtual ocean, VP accelerator course https://www.disguise.one/en
3. Music Video - Song “Follow the toad” Live action + LED wall (30x12)
Week 1
Choose 3 Articles from https://virtualproducer.io/category/virtual-roduction/
https://virtualproducer.io/ai-for-live-performance-metaphysic-and-eminem-at-the-vmas/
https://virtualproducer.io/uk-advertising-and-disguise-unleash-innovation-at-sxsw/
https://virtualproducer.io/impossible-objects-leverages-major-virtual-production-for-pia-music-video/